Showing posts with label Scrap the Boys. Show all posts

Hip Kit Club: June 2021 Main Kit Only


 Hi Crafters!

Welcome back for more Hip Kit Club inspiration & awesomeness!

Today I'm sharing how I've incorporated punches and metal dies from my stash into a 

June 2021 Main Kit Only layout. 

Yay, such a fun challenge!  

Oh, and if you're a mom of boys (or simply just wondering how such a pretty kit can work for boy pages), read on!

Here's my darling son's newest page with the June 2021 Main Kit Only...

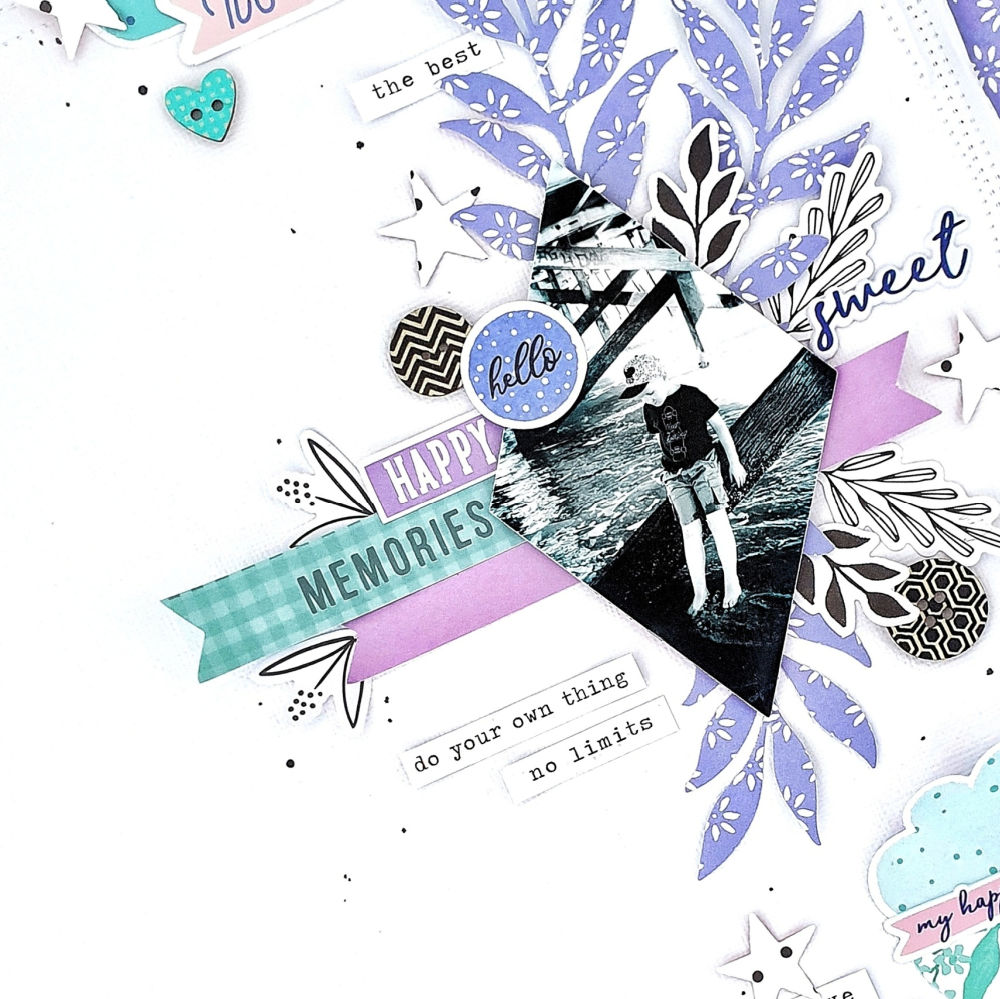
"Happy Memories"


Whoa! How awesome is this?! Super cool &  perfect for documenting my sweet boy!

You'll spy punched stars and semi circles, as well as die cut foliage pieces too! 

And my favorite die cut? Well, that would definitely be the diamond die that I used to shape my photograph with! 

Here's a closer look at it...


So super awesome! That diamond photo is really somethin'! To be honest, it dictated the vertical page arrangement and overall design of the layout. I even aligned my border papers (B sides of Hip Kit Club's Delightful: Lemon Parfait and Pinkfresh Studio's Happy Blooms: Garden) with the diamond photo before I zig zagged them into place.


The blue, teal and purple tones of this layout are so cool and refreshing that they simply add to the chilled out, Summer vibes theme. This contemporary color scheme is then balanced out with pops of striking black & white embellishments. The black and white details really cut through the 'softness' of the colors,  giving a stronger & more masculine feel. You'll notice that I've featured lots of textural elements such as messy machine stitching, distressed cardstock, those amazing Hip Kit Exclusive Wood Veneer Buttons, lots of foam tape and even curled, folded and raised embellishments for the same effect.


The Hip Kit Club Delightful Ephemera  leaves inspired me to create more foliage die cuts to anchor my photo with. I cut these leaves from the B side of Pinkfresh Studio's Happy Blooms: Garden paper, and arranged them with the Delightful leaves, as well as the banners from the Pinkfresh Studio Happy Blooms: Journaling Bits.  The Delightful Wood Veneer Buttons were perfect for added dimension and interest, but I felt like my page needed more black and white details. The solution? I used an old star punch with the B side of Hip Kit's Delightful: Strawberry Crush Paper (white paper with black dot pattern) and sprinkled them throughout the vertical design (because he's my lil super star, of course!).


My semi circle punch was used to support the two die cut clouds. A simple mirroring technique, but so effective!


All the Hip Kit Club Main Kit awesomeness!!! Love it!

I hope my layout has inspired you to get creating with the June 2021 Hip Kits today!

til next time,

Happy Arty Days, 

Amanda xo

Cocoa Vanilla Studio: Boys Rule Inspiration!


Hi Friends!

Thanks so much for stopping by!
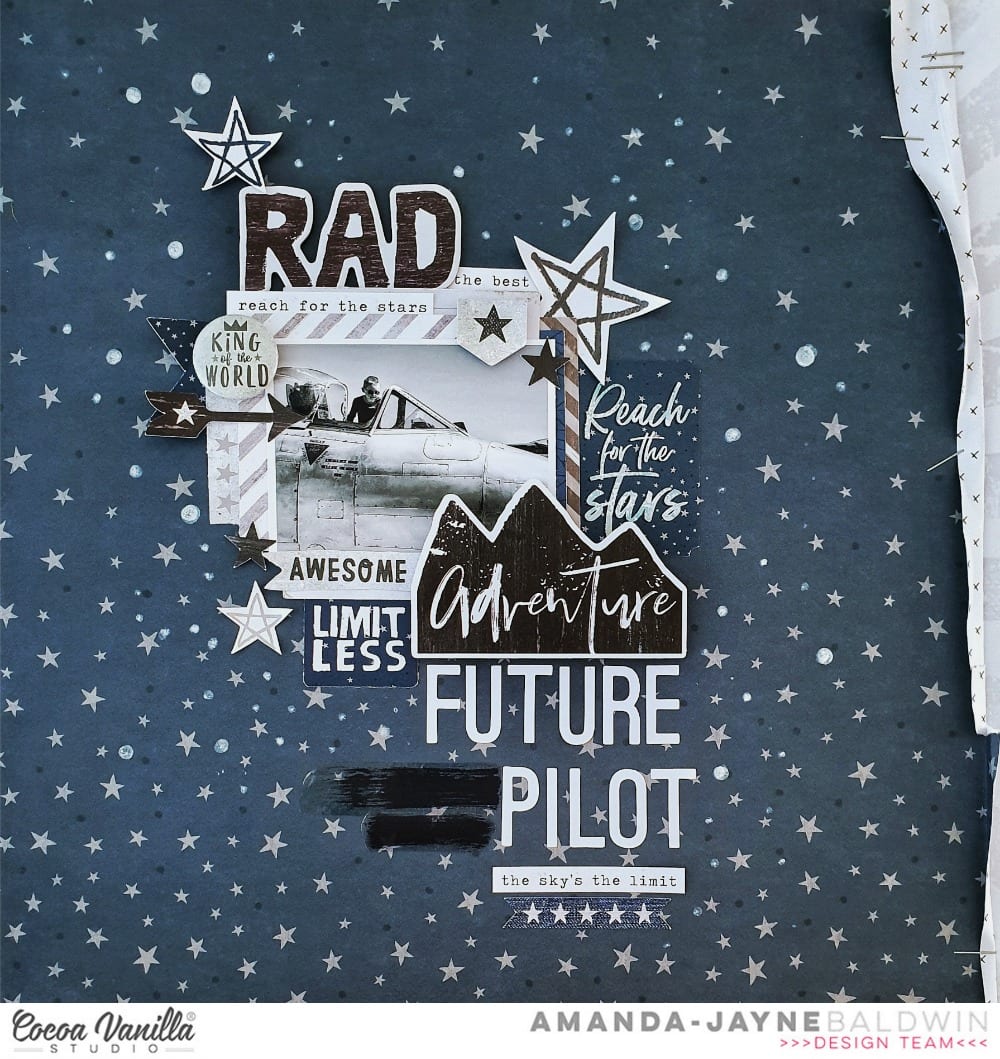
Today I am sharing a super cool  Cocoa Vanilla Studio scrapbook page with their super awesome BOYS RULE line! 
This collection is seriously cool & just rocks when it comes to scrapping the boys!  
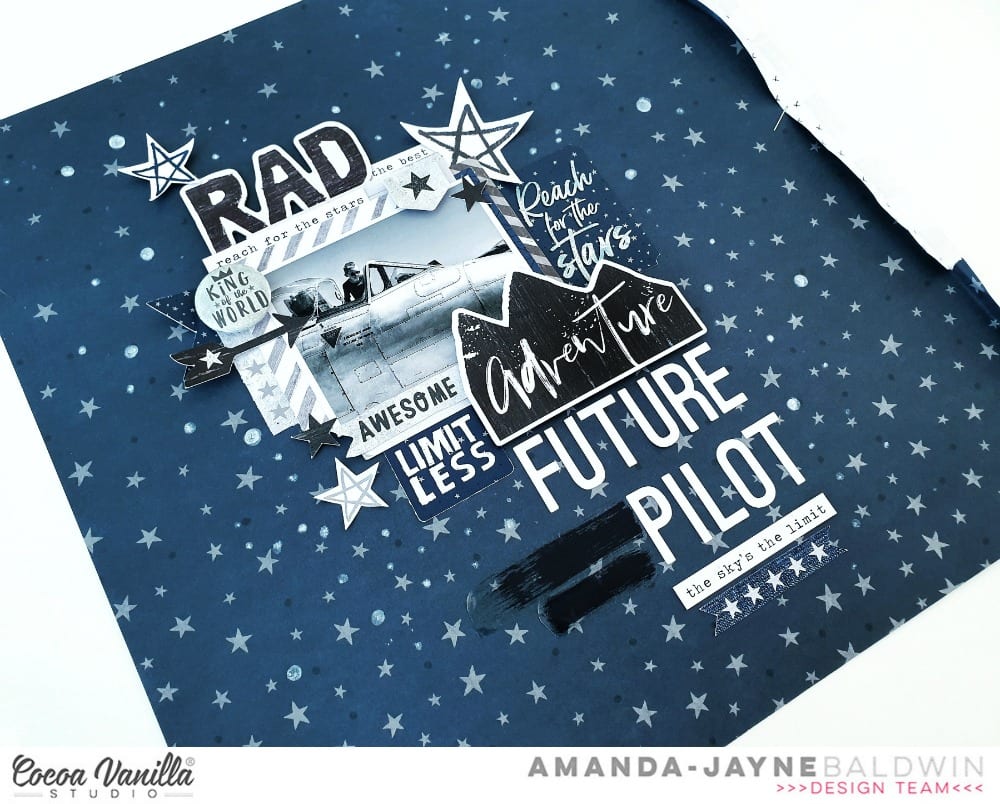
But enough chatter, here's my scrapbook layout,

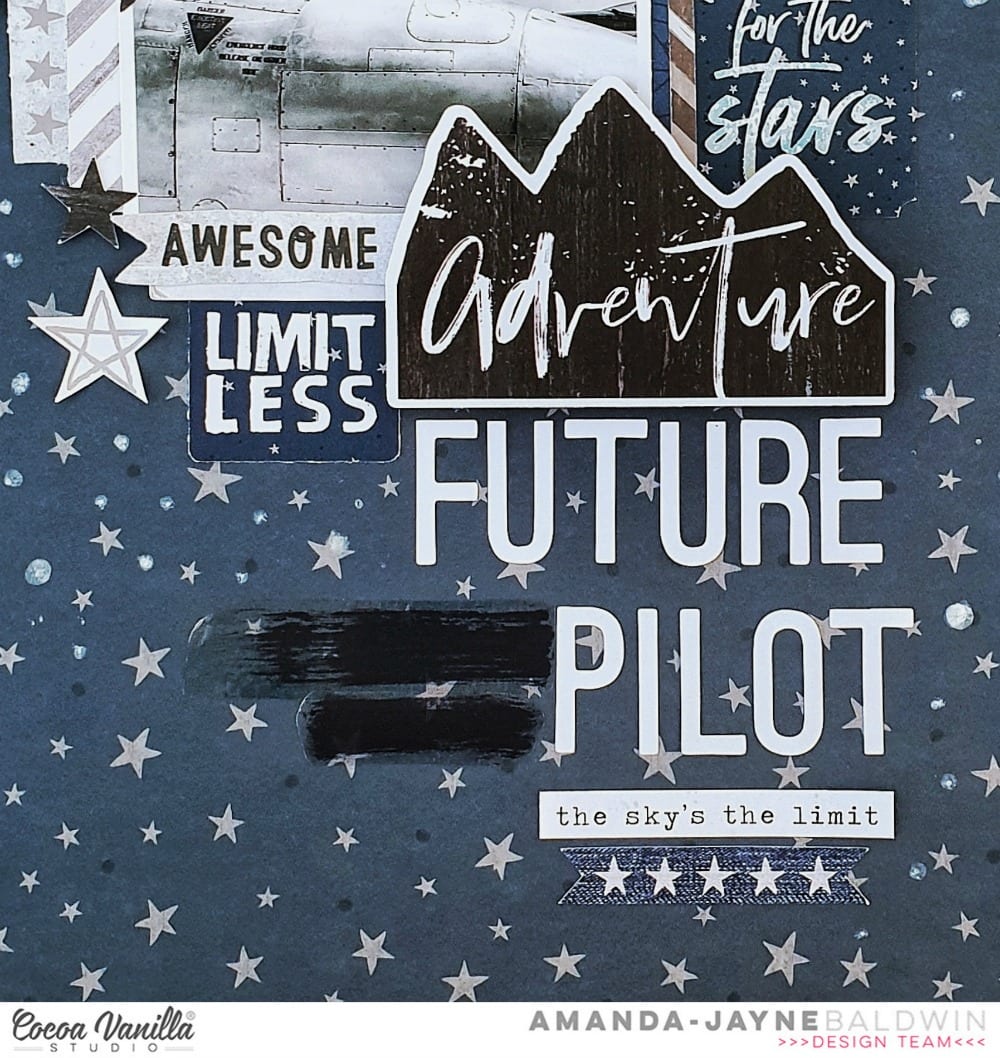
"Future Pilot"


Whoa!!! How awesome is this?! 
RAD, indeed!
I have featured the stunning CV-BR007 STAR FALL paper as my layout background, distressed & folded the right edge of this paper and stapled a trim of CV-BR009 GOOD TIMES behind it. This created a really raw, and edgy look which enhanced the masculinity of the overall design. The use of metal hardware (staples) not only attached the two papers, but also emphasized the rawness. 
Simple, but so effective!


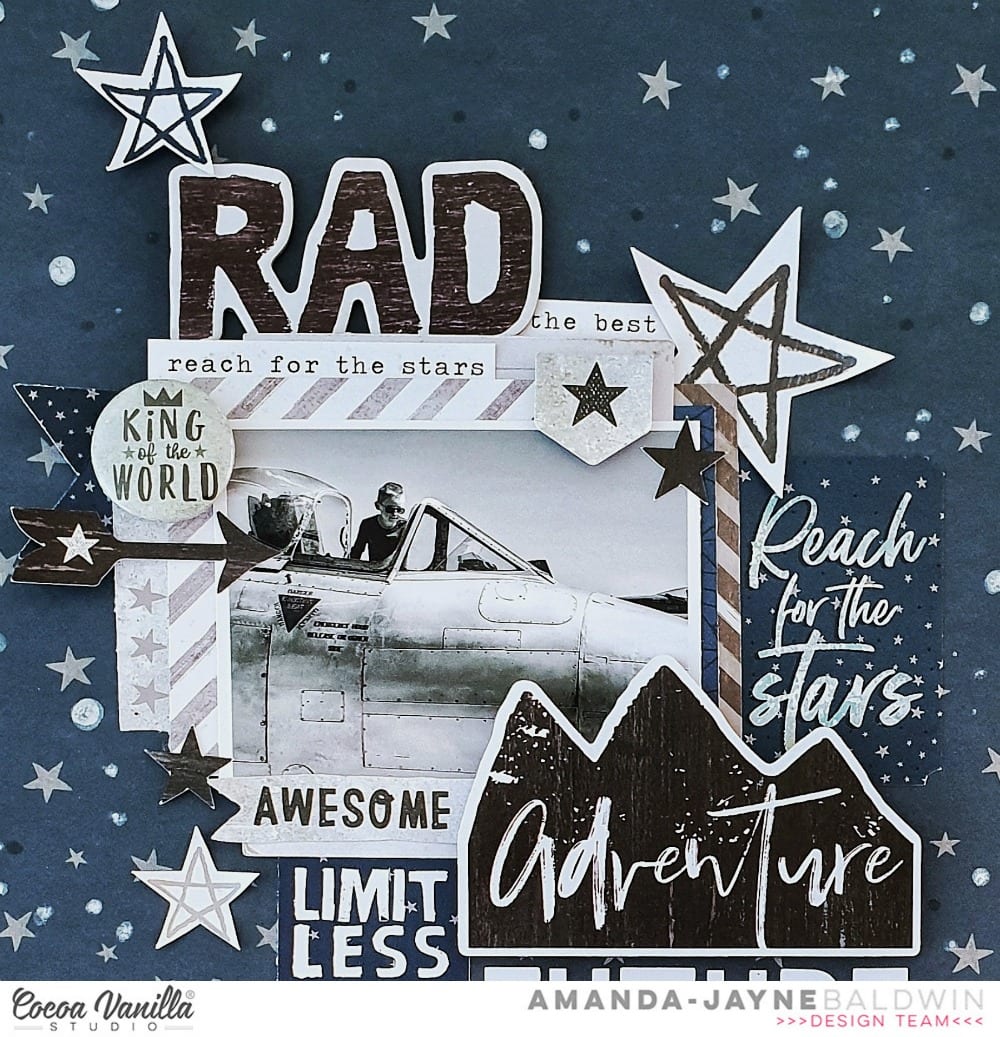
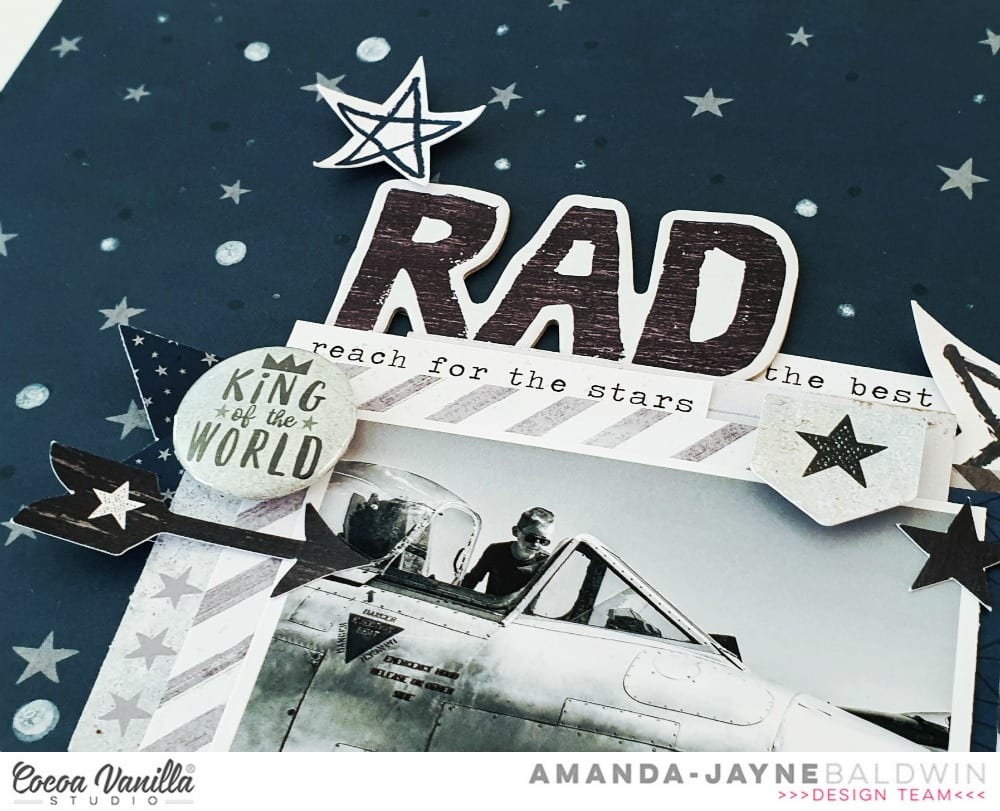
I backed my sweet boy's photograph with a few cool layers of the MISCELLANY frames and die cuts, as well as some fussy cut labels from CV-BR006 BOY STUFF paper. To these layers, I inserted in a few ACCESSORY STICKER stars and words/phrases, and then attached this photo cluster to my page. With my focal point in place, I then tucked my CHIPBOARD PIECES title 'RAD' into the top of the photo layers.


Over my treasured photograph, I foam mounted a couple more ACCESSORY STICKERS that featured stars, plus added I that awesome 'king of the world' FLAIR BUTTON. So cool!!!


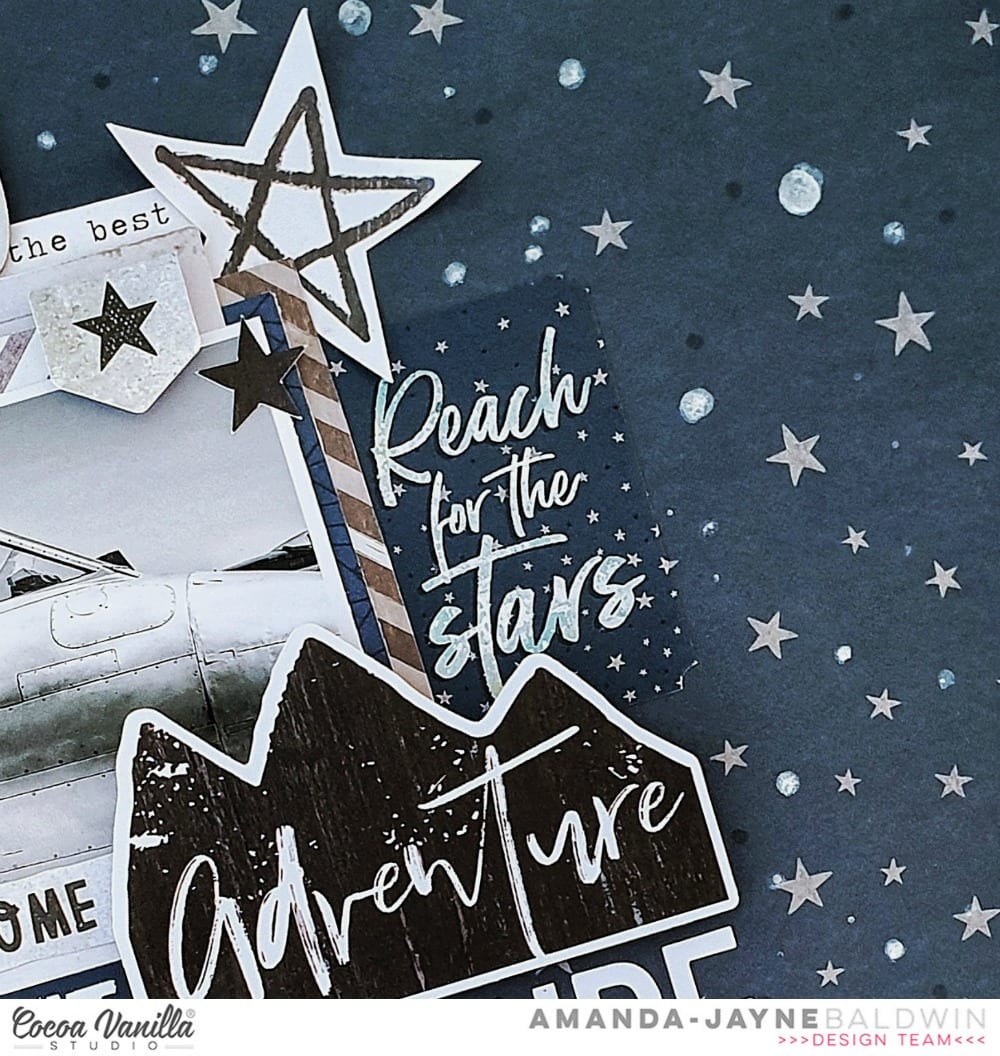
To the right side of the photo cluster, I tucked in the 'reach for the stars' ACCESSORY STICKER - both the print and the sentiment coordinated perfectly with my page design.


More ACCESSORY STICKERS are used to adorn the bottom left of my photo cluster, as well as a few die cuts. To complete the photo cluster I foam mounted & overlapped that fabulous 'adventure' CHIPBOARD PIECE. Awesome!
For my title to be noticed on such a dark paper, I dove into my COCOA VANILLA STUDIO: COLOUR ME HAPPY stash and used the plain white ALPHABET STICKERS. I embellished around my title with more of the ACCESSORY STICKERS as well as two of the brush stroke CLEAR STICKERS. A few dots of white paint completed the page.


Simple, and yet so epic!!!
Scrapping the boys is made super easy (& totally awesome) with the fabulous 
BOYS RULE collection!
Thanks so much for visiting - I hope I have inspired you to get creating today!
til next time,

Cocoa Vanilla Studio: Throwback Thursday with More Than Words!


Hi Creative Friends!

Welcome back for another installment of the Cocoa Vanilla Studio: Throw Back Thursday feature!
Today I am taking you back to 2018 with 
the gorgeous More Than Words collection and a very sweet 'mom & son' page,

"Wonderful Moments"


Talk about sweet, this melts my heart! Such a happy moment documented! And maybe another twist on my love for the monochromatic designs ;)
Lots of lovely layers here, starting with the reverse side of CV-MT003 GOSSAMER as my layout base. I layer over this pretty black floral paper with a sheet of pale blue cardstock. I distress, peel back, and staple this cardstock into place to reveal the CV-MT003 GOSSAMER base. This is such an effective technique, as it creates both texture & interest, as well as a masculine touch to these pretty papers!
To these two background bases, I layer a cut file (Geometric Art courtesy of The Cut Shoppe) which I semi back with the 6 x 6 PAPER PAD version of the GOSSAMER paper. To the cut file, I add embellishments galore, and of course, my photo cluster! So many pretty layers! Let's take a closer look......


Absolutely LOVE this photo of me & my boy! 
I embellish the cut file with a mix of DIE CUT EPHEMERA, CHIPBOARD ACCENT STICKERS, ENAMEL SHAPES, & even ACCESSORY STICKERS. I start my design from the top of the cut file, & travel down the page focusing on my photo cluster in the center. The 'wonderful' CHIPBOARD ACCENT STICKER was the perfect title choice for my darling photo! But my title doesn't end there! As your eye moves down my layout, you'll find the remainder of my title beneath my photograph....


Unforgettable, & Wonderful are fussy cut labels from pattern paper CV-MT006 TREASURE, and Moments is from the CHIPBOARD ACCENT STICKERS. Such a fun mixed title & I just adore all the tucked in pieces surrounding my photo! Layered perfection!
Here's a better look at my title and central photo....


That layering beneath my photo is just stunning! 
You'll spy more cuts from pattern paper, CV-MT006 TREASURE, as well as ACCESSORY STICKERS, more CHIPBOARD ACCENT STICKERS, DIE CUT EPHEMERA & that divine VELLUM ACCENTS feather!  I love that bold pop of blue, it really brings attention to my photo!

Here's another view for you....

Just gorgeous!
I tuck a few white cotton floss threads into the photo cluster too!  For more interest & a finishing touch, I also add a few watercolor splatters as well! LOVE it!


More Than Words might be a girly, feminine collection but it is still perfect for scrapping the boys too! 
I hope you enjoyed my edition of Throw Back Thursday, 
& feel inspired to get creating with your older Cocoa Vanilla Studio stash too!

Thanks so much for visiting today!
til next time, 

Cocoa Vanilla Studio: Cool Kid!


Hi Creatives!

Welcome back for more Cocoa Vanilla Studio inspiration!
For today's DT assignment I am scraplifting the incredibly talented, Anna Komenda
I know, what a task! 
Everything Anna creates is pure awesomenss, and today's layout is no exception!
Here's her original layout, created for last month's Throwback Thursday.....


Told you it was pure awesomenss!!! What a stunning page!
I decided to create a boy version of it using our super cool, Boys Rule collection! 
Here's my take,

"Cool Kid"


How awesome is this?!! He's one cool kid, for sure!
Just like Anna's original I have opted for a pattern paper base, & made a real feature of the frames in this collection. 
Such a clever design!

The background paper is the reverse side of CV-BR009 GOOD TIMES, and I just love its textural appearance! The concrete look is so raw and edgy - perfect for more masculine memory keeping! I have used a lime and sky blue color scheme to compliment the coolness of the GOOD TIMES paper. I opt for wood grain embellishments and frames as my accent color; to add warmth and balance to my page. Awesome!

Here's a closer look......


While Anna features flowers as her core embellishment, I have used stars for mine. 
You'll spot stars from the CLEAR STICKERS, ACCESSORY STICKERS, CHIPBOARD PIECES, & even the DIE CUT EPHEMERA pack! All.the.stars for the win!!! T
o add dimension and interest to the stars, I foam mount a few of them & even layer one or two together.


But it's the layered frames that really make this layout! I have combined frames from both the DIE CUT EPHEMERA & MISCELLANY packs to create this fun look! For my photo cluster, I dress the frames with that awesome #BOYSRULE FLAIR BUTTON, a CHIPBOARD PIECES star and arrow, and my DIE CUT EPHEMERA COOL KID title.


Tucked between the layered frames are a few more EPHEMERA stars, an ACCESSORY STICKERS tab,  as well as a flag & label from the MISCELLANY pack. The #EPIC subtitle is fussy cut from pattern paper, CV-BR006 BOY STUFF & just adds that little something extra! 
Here's another view for you....


Awesome! Loving all the details here!


That FLAIR BUTTON is the best! I use it not only for cool factor, but to balance my black & white photo and camera embellishment (rule of three and all that jazz  ;)  ) To add more dimension & interest I foam mount the DIE CUT camera too!
Travelling down the page, I add a  few more stars (you can never have too many, right?), as well more layered frames......


I opt for smaller frames to avoid distraction from my focal point and photo, and embellish with the CHIPBOARD PIECES wood grain face, ACCESSORY STICKER flag, and that Super Hero EPHEMERA. Very cool!


And there you have it!
My scraplift of our amazing Anna Komenda using our Boys Rule collection! 
I hope I have inspired you to scraplift this layout too! 
You can see more of Anna's awesome creations HERE

Thanks so much for visiting,
til next time, 

Happy Arty Days,
Amanda xo

Cocoa Vanilla Studio: RAD Boys Rule!


Hey Friends!

Welcome back for more Cocoa Vanilla Studio Design Team inspiration!
Today I am sharing a super fun, mixed media, grungy, boy page for geometric theme week!
I just had to use the awesome new BOYS RULE collection for this cool kid layout!
"RAD"
 

Whoa! Super RAD indeed!
I've opted for big impact with striking pops of colour, bold use of texture and all our AWESOME embellishments!
Here's a closer look for you....


There are so many fun details & elements coming to play in this design! & I did warn you it was a grungy, messy, mixed media page! Sometimes it's good for your creativity to go wild - and what could be more appropriate for my Wild Child on the scooter, lol!

I've incorporated this week's geometric theme with the triangle pattern paper CV-BR005 MESSED UP (B side), and then followed through with fussy cut pattern paper triangles, and a triangle mask for all that texture paste! I even flipped the mountains DIE CUT EPHEMERA to mimic the downwards triangles! So cool!

I have used the reverse side of pattern paper, CV-BR001 HAPPY GO LUCKY, as my layout base. Apart from the striking black, I just love how it looks 'grainy' & distressed. Such a cool, textural look, that works so well with our edgy masculine creations.


I layer the pattern paper base with a variety of mediums. I start with aqua & lime pastes which I apply with a palette knife in horizontal strokes (to compliment the grain in the paper). I then build on this paste with the triangles mask & a white dimensional paste. I add white ink splatters, and then a mix of high gloss pastes (lime greens, & blues) using the mask as both a stencil & stamp. To complete the mixed media element, I add more inky splatters in both white & aqua.  
With such a dramatic background, I have opted for lots of black and white embellishments (and even use a black and white photograph) to cut through, and balance all that striking color.


Next, I matte my photo onto a mix of pattern paper rectangles - mostly my leftover cuts from pattern paper CV-BR004 FUN & GAMES, (see my previous creation with this paper HERE) and a torn white paper bag from my stash. I staple the underneath layers together through the center, to keep the edges 'open' to allow the insertion of DIE CUT EPHEMERA and ACCESSORY STICKERS. 
I attach the photo layers to my page, and then adorn my photograph with fun embellishments. I just love that cool CHIPBOARD PIECES label 'Fun & Games' - such a perfect descriptor for my photo!


On closer view, you'll also spy both DIE CUT & MISCELLANY EPHEMERA, as well as more of my fussy cut triangles directing your eye into my photograph.
The CHIPBOARD PIECES 'RAD' title is the final addition to my photograph, before embellishing the remainder of my page.


I know I say this every release, but seriously the FLAIR!!! SO good! Always so perfectly coordinated, and another fun way to add dimension to your layouts! #BoysRule indeed!

 
Loving that skull n cross bones DIE CUT EPHEMERA too! Such a cool accessory for our rough 'n' tumble, dare devil boys! And while we're talking all things EPHEMERA, how fabulous is that ombre blue 'AWESOME' subtitle?!! LOVE the inclusion of bigger words in the DIE CUT EPHEMERA pack! SO good!
For finishing touches, it's a few more ACCESSORY STICKERS, and a smattering of both CHIPBOARD & DIE CUT stars!


So.much.awesome!!!!
When it comes to scrapping the boys, BOYS RULE, really does rule!
I hope my bold page has inspired you to get creating with this super cool collection!
Thanks so much for visiting,
til next time, 

Happy Arty Days,
 Amanda xo 


Cocoa Vanilla Studio: Rad Boy!


Hi Everyone!
Welcome back for more Cocoa Vanilla Studio inspiration!
Today I am sharing a closer look on my take for the second CSI - Color.Stories.Inspiration challenge layout for June!
Yes, they have 2 cases for us to solve! How fun!
If you didn't already know, Cocoa Vanilla Studio is sponsoring CSI this month, so be sure to play along with the challenges to go in the draw to win a VERY cool prize! Yay!
Speaking of challenges, here's what the second one looks like....

Such a fun and playful image to draw inspiration from!
I have been inspired by the colours, the bold pops of black, the sense of adventure and the circles! Here's what I came up with,
"Rad Boy"


OH YEAH!!! Such a cool little mister; Rad Boy indeed! 
And what a fun design too!
When it comes to my boy, it's all about challenging those rules lately - so in true boy spirit, I am breaking some of mine! I am, wait for it, mixing collections & not using a white cardstock base! Eeesh! Talk about outta my comfort zone & yes, I know, totally living on the edge! Ha!

You'll spot that I have actually mixed my two fave Cocoa Vanilla Studio boy collections - You Rock and Boys Rule! I begin with Boys Rule pattern paper CV-BR009 GOOD TIMES (textured concrete print) as my 12 x 12 base. I love how rough, raw, & edgy this paper is! Perfect for masculine pages! I then turn to the You Rock collection, and in particular, pattern paper CV-YR001 STARSHINE. I use this paper for that awesome circular cut file called Geo Globe 
(get it from The Cut Shoppe HERE)  and then fussy cut out all the 'negative' left over stars to embellish this cut file with.


I layer my sweet boy photo onto a mix of DIE CUT EPHEMERA frames, as well as a couple 3 x 4 cards which I cut from paper CV-YR006 RANDOM. Inside these layers, I slide in a couple tabs from the Boys Rule DIE CUT EPHEMERA, as well as one more fussy cut star from STARSHINE. I adorn my photo with CHIPBOARD STICKERS, and that super cool Epic RUBBER CHARM. As my photo is my focal point, I position it in the center of my layout design but maintaining the angle of the cut file design too. I add one of the new Boys Rule CLEAR STICKERS (sentiment One Cool Kid) beneath it all. I just love that pop of black!


While I have the CLEAR STICKERS handy, I use a bunch of the stars, as well as the word Epic to embellish around my cut file. These stickers are so easy to use, and look SO effective! One of my new favourite embellishments for sure!


Looking above my photograph, you'll get a closer look at the embellishments I used on the cut file. I carefully positioned those fussy cut STARSHINE stars in rows, covering the intersecting points of the file. More noticeably though, I added my CHIPBOARD STICKERS title; Rad Boy. The striking black chippies have quite an impact! SO cool! (& the font on them is so rad!)


To the left of my photograph is that very cool camera, which I fussy cut from pattern paper CV-YR006 RANDOM. To make it stand out more, and to be in alignment with my photo, I mounted it on thick foam tape. I also add another pop of black beneath it with another CHIPBOARD STICKER. Boom! Yes, this kid has boom factor, lol!


I embellish a few of the fussy cut stars with RUBBER CHARMS & DIE CUT EPHEMERA, and add just a couple more of those CLEAR STICKERS stars for finishing touches. Love it! Simple, striking and oh-so cool!
I hope you have enjoyed seeing my take on the second challenge for CSI this month, and moreso, will play along with your fave Cocoa Vanilla Studio products too!
Thanks so much for visiting!
til next time, 

Happy Arty Days, 
Amanda xo 

Cocoa Vanilla Studio: Boys Rule!


Hi Eveyone!

Boy-OH-boy am I excited about the newest  Cocoa Vanilla Studio collection, Boys Rule
This collection is just the coolest boy line EVER! Yep, I said it, EVER!!! Infact, it's cool with a capital C! So easy to create with that I made today's layout in only 15 minutes!

** Warning - the new Boys Rule collection is not for the faint hearted, this is 100% Pure Boy awesome! **

There are just SO many reasons why you're gonna love this collection too!
But enough chatter, let's have a look at my first layout......

"Mr. Fantastic"


Yep. Mr Fantastic indeed!
So many awesome elements in this line, but I just couldn't get past creating with that incredible specialty paper first!
This paper is all kinds of amazing! It's called CV-BR018 LARGE DIE CUT & BACKING KIT and as the name suggests this is a pre-made cut file kit! I know, that's madness! So crazy good! 
Not quite understanding me, well here's a visual to what I'm meaning....

And you thought I created something special, didn't you? 
Well, I kinda did but mostly I just let the paper do ALL the work!
Seriously, this paper is just THE BEST! It even has the mixed media added to it already as well!
Now you can see how I made my page in only 15 minutes - perfect for those of us who are time poor. Or, if you want the cut file look but don't have a cutting machine. I said it before, and I'll say it again, this is the coolest boy collection EVER!
Let's take a closer look....


With the background taken care of, this layout was simply a matter of mounting my photo, and embellishing! My photo mounts consist of that fun striped CHIPBOARD PIECES frame, ACCESSORY STICKERS and mixed pieces from the MISCELLANY pack. I'm especially loving the raw woodgrain frame  - so edgy, and perfect for balancing all the black & white in this page.
 A mix of arrows direct you into my sweet photograph, he's Mr Fantastic for sure! 
I adorn my cool kid photograph with CHIPBOARD PIECES, adding both sentiments as well as dimension to the design.


As always, the coordinating FLAIR BUTTONS are super awesome, so I used three for good measure! Love them layered onto the cut file stars - so good!


And while we're speaking of stars, I just had to add more of them to this cool kid page!  
You'll find DIE CUT EPHEMERA, ACCESSORY STICKERS, & CHIPBOARD PIECES stars throughout my layout. As layering is quite the feature on this page, I even doubled up that Yeah Boy flag in keeping with the design aesthetic. I've mounted it on foam dots, and even popped a star in it too! Stars for the win!


Here's another close up of those awesome FLAIR BUTTONS! 
Nothing says Beware, Adventure Boy! more than skull n cross bones! SO cool! 
You'll spot the star one below too.....


It's no secret that I am a huge fan of the typewriter font phrases in our ACCESSORY STICKERS. I couldn't resist adding just a little journaling with them in the bottom corner of my page. I just love how everything works together so perfectly - it really is so easy to create with!


The CHIPBOARD PIECES are another new fave of mine! 
I love that they're not stickers and can be easily rearranged around your page during the planning process. Here's a closer look at that speech bubble adorning the top of my photo....

Pretty RAD indeed!


 BOOM! 
Super cool boy pages in minutes, that's what we love!
I hope my layout has inspired you today!

Thanks so much for visiting!
til next time, 

Happy Arty Days,
 Amanda xo