Showing posts with label Pinkfresh. Show all posts

Hip Kit Club: Rainbows, Rollerskates & a Process Video!


Hi Friends!

Welcome back for more Hip Kit Club inspiration! 
 I am SO super excited to be sharing my latest scrapbook layout (& process video) with the gorgeous 
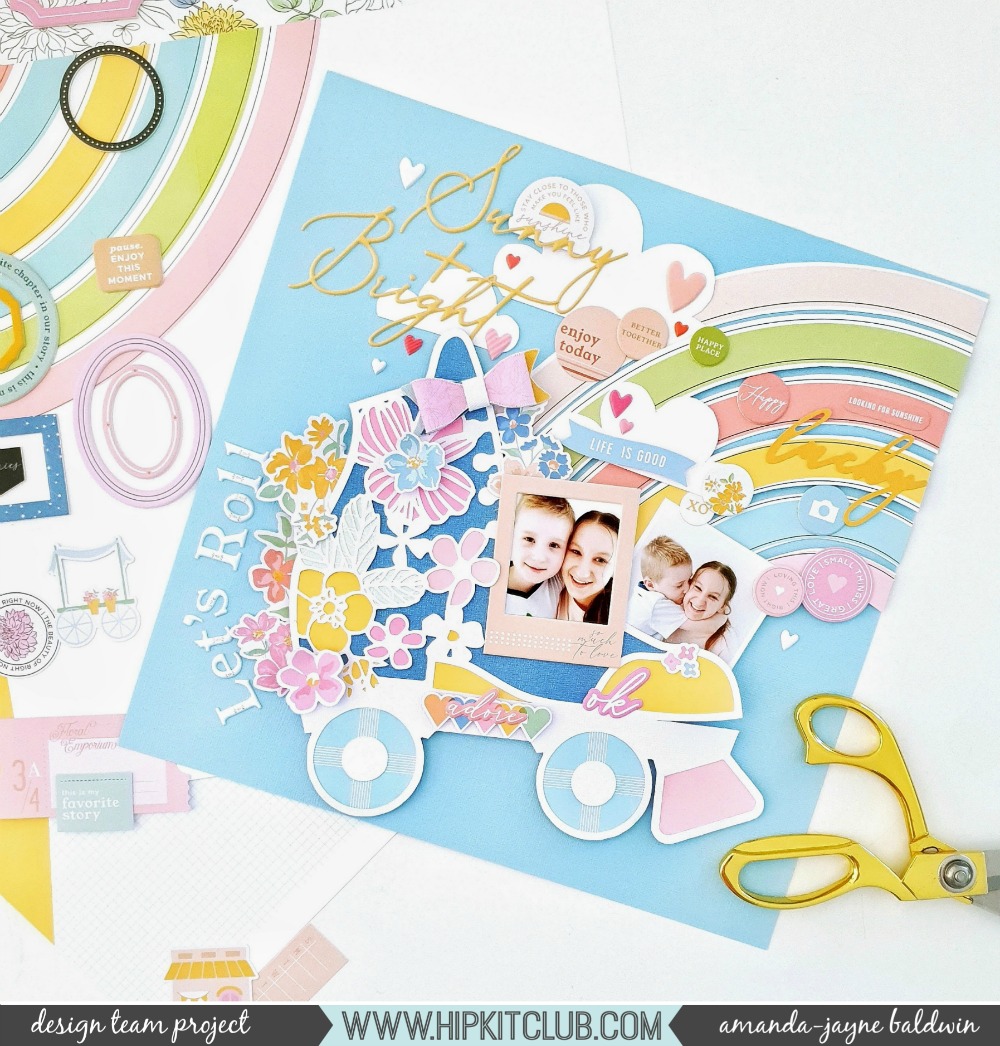
Today I am being inspired by the February Mood Board, and in particular, the rainbows, florals, hearts & those rollerskates! You'll also spy the fabulous February HKC Subscriber Exclusive rollerskate cut file - but rather than rave, here's a quick look at my happy-go-lucky vibes page!

"Let's Roll"
HKC-AmandaBaldwin-Feb21st-Blog-02

Oh how fun, and whimsical! Such a bright and playful page for my two darlings! I just couldn't resist fussy cutting that rainbow paper from Pinkfresh Studio: My Favorite Story collection (courtesy of the HKC January 2020 Main Kit) and combining it with our amazing rollerskate HKC Exclusive Subscriber Cut File! I mean, rainbows and rollerskates go hand in hand, right?!
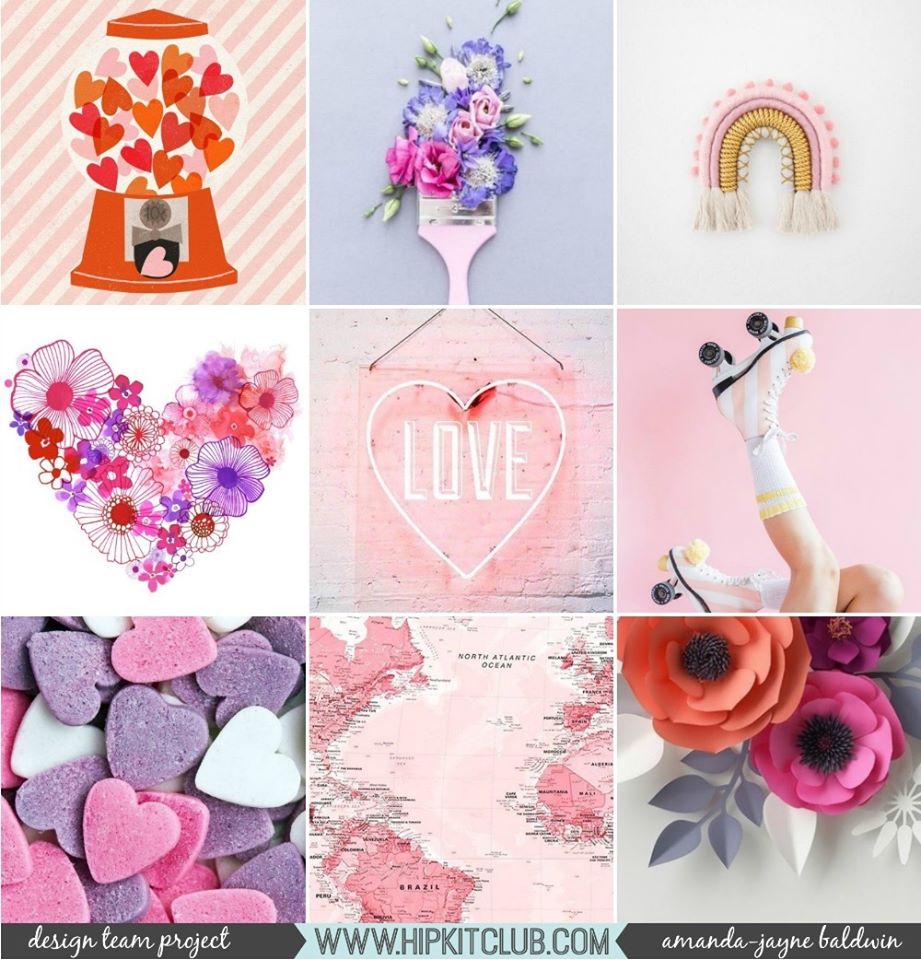
If you missed seeing the February mood board, it looks like this....
83086838_3691446797532946_74651127219486720_o

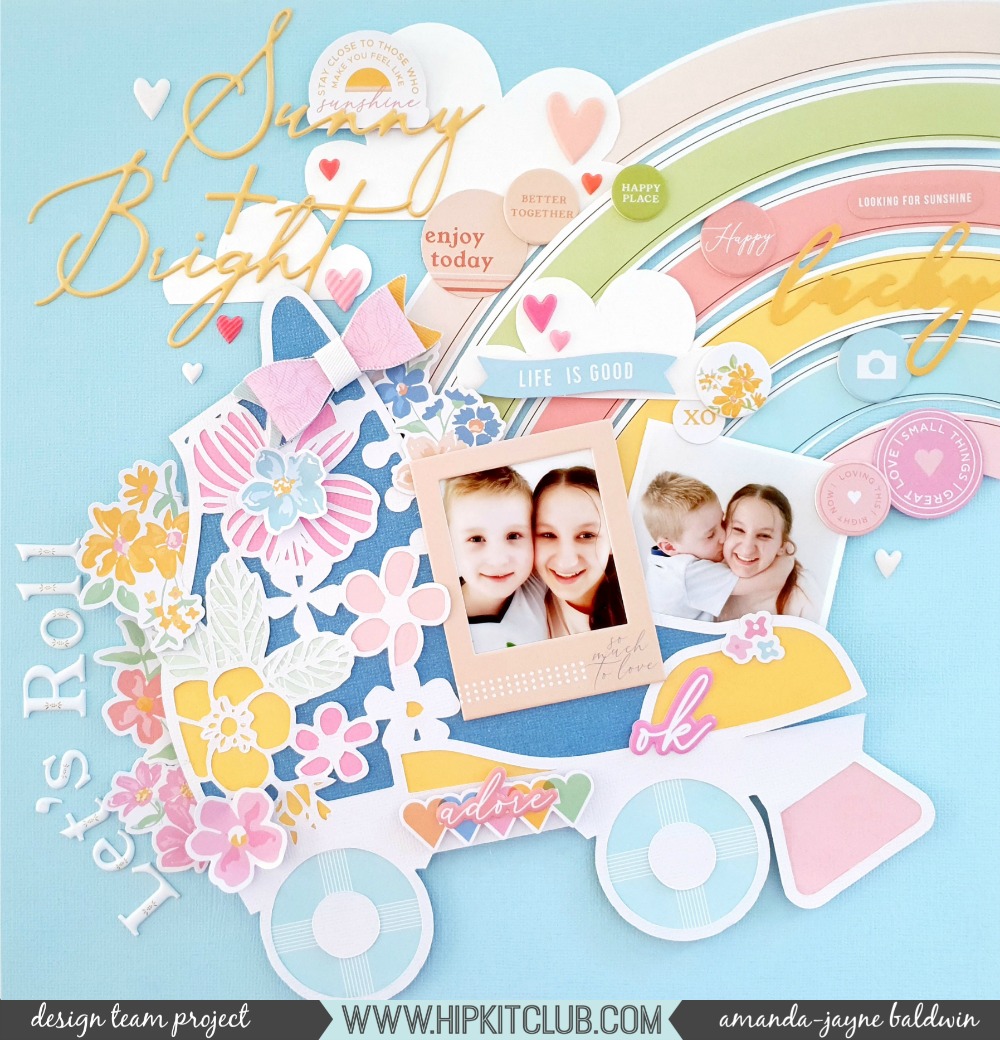
Wow! All kinds of pretty, huh?! You can interpret this board so many ways, and best part, it coordinates with both our January and February Hip Kits - Yay!!! I hope you'll see something that sparks some creativity and inspires you! But back to today's project, here's a better look at my layout.....
HKC-AmandaBaldwin-Feb21st-Blog-01

Sunny + Bright, indeed! So.much.fun!!!
I started my scrapbook page with the beautiful  Bazzill Starmist Cardstockfrom the January Cardstock Kit - such a pretty color for my background and base. Next I backed the fabulous rollerskate HKC Subscriber Cut File with two of the Pinkfresh Studio: My Favorite Story papers from the January 2020 Main Kit, as well as that stunning, sparkly Bazzill Prince Charming Bling Cardstockfor added wow factor! I can't even begin to tell you how ahh-MAY-zing that cardstock is!!!
I fussy cut that divine rainbow, Joyful Heart paper, also from theMain Kit, and layered it onto that fabulous Starmist base. For added interest, I foam mounted every second stripe in the rainbow and then adorned every stripe with tone on tone embellishments from both the January Main & Embellishment Kits. Such a pretty effect!
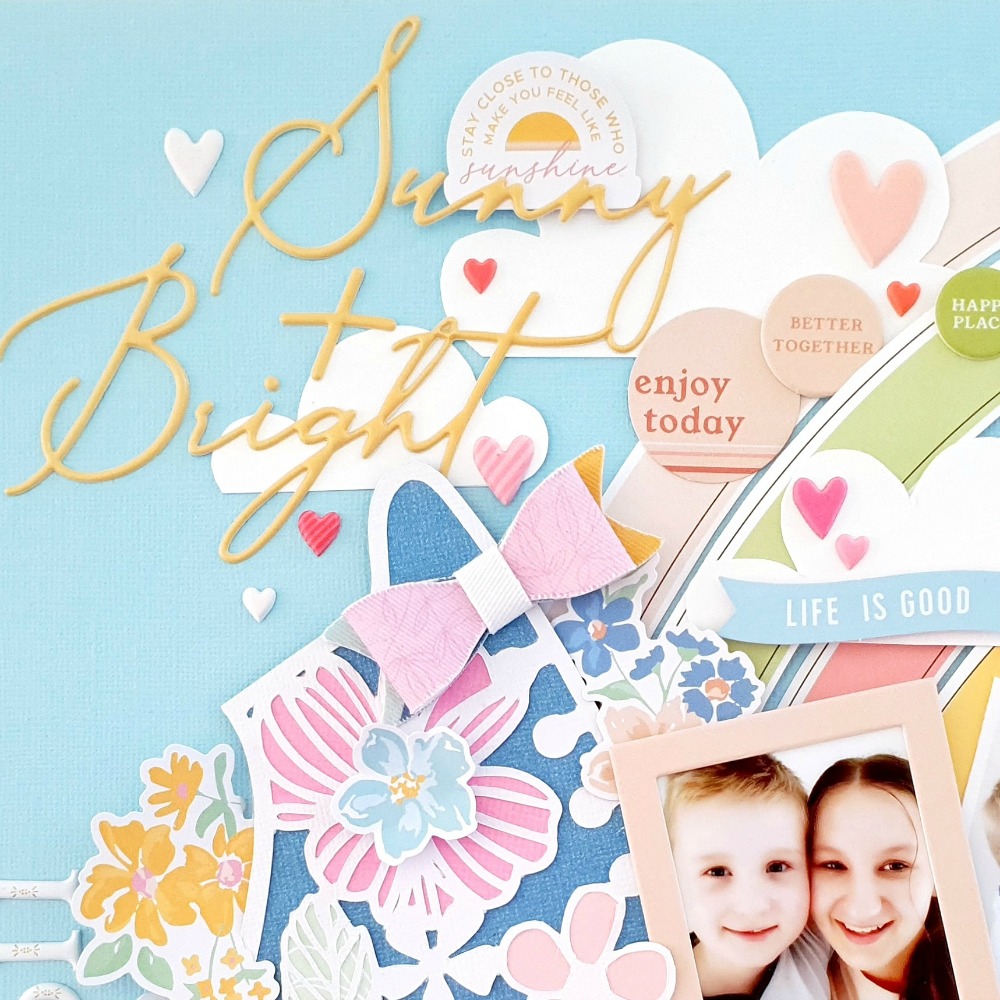

I framed my main photograph with one of the Pinkfresh Studio Chipboard Frames from the Embellishment Kit, and then positioned it onto that cute skate! To complete the rollerskate, I added lots of the Floral Die Cuts and a Fabric Bow (also from our Embellishment Kit) as well as a couple of the Puffy Phrase Stickers. I layered it all onto the end of the fussy cut rainbow and tucked in my second photo into this cluster. Love it!


I used the White Puffy Alphas (with gold accents, no less!) from the Embellishment Kit to form my title, and then added a subtitle - Sunny + Bright - with thePuffy Phrase Stickers courtesy of the Main Kit. I cut out and adhered a few fluffy white clouds from the Bazzill White Cardstock, and then finished off with a good sprinkling of the Pink Paislee Lucky Us Puffy Shape Stickers. 


Such a magical design! 
Please watch my process video for a much more detailed look at how my page came together:


Alternatively, you can watch it in Full HD on my channel by clicking the link HERE. 
Thanks so much for watching! 

I hope I have inspired you to get creating with the beautiful January & February 2020 Hip Kits- they really are divine!!!

til next time,


SpiegelMom Scraps: Scraplift Challenge!


Hi Friends!

Welcome back for more sparkly inspiration with my latest project for the Sparklers DT! 
Today's layout is for the scraplift challenge being hosted in the Spread The Sparkle Facebook group!
If you haven't seen it yet, we're lifting this fabulous layout by papercrafter, Katie Scott....

Image may contain: 4 people, people smiling

Gorgeous, huh?
Apart from those stunning sequins, 
I was instantly taken in by that fabulous heart cut file, the partially backed puzzle pieces & the embellishment cluster at the base, on the right hand side. 
Here's what it inspired....

"Baby Girl"


Sigh! Soooooo pretty! 
I have combined the That Summer Feelin' and Happy Vibes sequin sets to create this gorgeous page!
Best part? These sequins are still available in the SpiegelMom Scraps Shop HERE & code AMANDA15 will save you 15% too! Yay!!!

Here's a closer look for you....

Just stunning!

I have also used the beautiful Just A Lil Lovely collection from Pinkfresh Studio, as well as one of their brand new digital cut files, Heart & Floral. Inspired by the partially backed puzzle pieces, I decided to partially 'fill' my cut file with sequins. In particular, the leaves and blooms!
I just LOVE how effective this looks....

Super sparkly, & just divine!!!
And how cute are those tiny scattered hearts from the That Summer Feelin' sequin set?! 
LOVE!!!

Here's a look at those sequins adorning my sweet girl's photo....

Absolutely gor-jus!!!

And there you have it!
My take on the October Scraplift Challenge!
I hope you feel inspired to play along too! 
And good luck! (There's a $15 Gift Card prize up for grabs!)
Get all the details in the Spread The Sparkle Facebook Group HERE

Thanks so much for visiting, 
til next time, 


Pinkfresh Studio: Everyday Musings Layout & Process Video


Hi Crafty Friends!

Welcome back for more Pinkfresh Studio inspiration with the delightful scrapbook collection;  


It's no secret that I adore this line! 
I've created quite a number of layouts, and this is my third process video with it too! 
Yep, it's that pretty! 

But enough chatter, here's what I've created with Everyday Musings today....

"Summer Days Spent Together..."


Oh isn't this just the prettiest?!!
I can't get enough of those pretty pastels, and those incredible chipboard sticker frames! 
Here's a closer look for you...


Absolutely divine! 
That Happy Place pattern paper is errrrrything!
Cut file credit: Handipaper
You can see how I created this sweet page in my process video below....


 Thanks so much for watching! 
Pinkfresh Studio Everyday Musings is my favorite release of 2019 so far! 
I really hope you feel inspired to create with it too. 
til next time, 


Pinkfresh Studio 5th Birthday Blog Hop Celebration


Hi Friends!
Welcome to the Happy Arty Days blog!

I am so super excited to be part of the Pinkfresh Studio 5th Birthday celebrations!
This is such a momentus occasion and milestone achievement,

Biggest Congratulations Pinkfresh Studio!


This is one epic blog hop!

If you've just arrived here from the amazing
Lea Lawson's blog
then you're in the right place!
If not, or you're a lil unsure, go back to the Pinkfresh Studio blog HERE to check the hop order.

Like all good blog hops there are some Aaah-may-zing giveaways!!!!


There are 3 Grand Prizes which will be randomly picked from comments left on the

 Pinkfresh Studio 5th Birthday Blog Hop post. They are:

1. Full Set of Pinkfresh Studio Liquid Watercolors

2. A set of the 3 current Pinkfresh Studio paper collections
and
3. The entire April Essentials Die release

Awesome!!!

But that's not all folks!
Every stop along the hop will also have a $25 Pinkfresh Studio Gift Card up for grabs too!


So be sure to type a comment at every stop along the way as winners will be randomly selected from the comments left on each blog.

All giveaway winners will be announced on the Pinkfresh Studio Giveaway Page HERE on Sunday, March 14th.

It is the entrants' responsibility to check the page, and claim their prize within 2 weeks of the announcement.
Good Luck!!!!

Oh, and because Pinkfresh Studio are so incredibly awesome, they're also hosting 2 very special birthday promotions....


1. Receive a free die (XO word) with purchase. There is no code necessary, and the die will automatically load into your cart while supplies last.   

and
2. Free/discounted shipping from April 5-7th on orders $25+. using code FREESHIP5THBDAY.
Shipping is free in the USA, and $5.50 off for our International friends.
Yay!

With all the formalities taken care of, 
here's what I've created for the 5th Birthday celebration

"Puppy Love"


Sigh! Isn't this pretty?!!
I've combined a few of my favorite Pinkfresh Studio things to create this layout. 
You'll spy both the Everyday Musings & Joyful Day collections, as well as the incredible Pinkfresh Studio Liquid Watercolors (Sapphire & Lavender).
 Adore!


The cut file featured is designed by my fellow Pinkfresh Studio DT member, Anett Gelencser and is called, Floral Wreath. It's so delicate, and looks perfect backed with the 6 x 6 Paper Pad papers from the Everyday Musings & Joyful Day collections! 
Here's a closer look.....


I've adorned the flower centers with a wooden epoxy button from the Joyful Day mixed embellishments pack, as well 2 letter 'O's from the Joyful Day Mini Puffy Alpha Stickers. Such a cute touch! 
I scattered enamel dots and a few puffy stickers around the wreath too!


I love how the folded cardstock reveals that stunning pattern paper, reverse side of BIG IDEAS from the Joyful Day collection. Such a beautiful color! 


I used the Joyful Day Puffy Alpha Stickers to form my layout title too! 
Isn't that font errrrything?!!
Love it! 
And there you have it! 

I hope you enjoyed seeing my project!
***Don't forget to leave a comment below to go in the drawer to win a $25 Gift Card***

Time to send you hopping over to the incredibly talented Heather Hoffman's blog HERE!

Thanks so much for stopping by &
Good Luck with the giveaways!
til next time,

Happy Arty Days,

Amanda xo 

Pinkfresh Studio: April Challenge!


Hi Friends! 

Welcome back for more Pinkfresh Studio inspiration! 

Wow! A new month already!
& that means a new monthly challenge too! 

Here's what the April challenge looks like.....


Well this is just all kinds of awesomeness!!!
The colors (& frames) had me diving straight into the gorgeous new Out & About collection!

Here's what I created, 

"Go.See.Do"


Whoa! 
This is EPIC!!!
Such a super cool travel collection that is perfect for all your vacay adventures! 
(& ideal for scrapping my fave boys with too!)


As well as the stunning Out & About collection, you'll also spy my favorite 
& one of our fabulous FREE cut files! 
This cut file is called Floral Globe and is #11 of the Freebie files available from the 

Here's a few close ups of my layout.... 


That rainbow stripe paper, "New Places" is errrrything!!! LOVE it!
& how awesome are those frames?!!
Actually, how awesome are ALL the embellishments in the Out & About line?!!
SO many amazing components to this collection!


So cool! 

Now it's your turn! 
Create any project inspired by this month's challenge board & upload it to go in the draw to win a prize! 
Good Luck! 

Thanks so much for stopping by today! 
til next time, 


Pinkfresh Studio: Joyful Day Scrapbook Layout & Process Video!


Hi Friends!

Welcome back for more Pinkfresh Studio inspiration! 

Today I am creating with the gorgeous new Joyful Day collection! 
Such a dreamy collection to work with! 

Here's what I came up with.....

"Birthday Girl"


Told you it was dreamy!!! 
So much pretty going on here! 

Here's a closer look.....


Sigh! 
This is totally swoon worthy! 
For this 8.5" x 11" layout, I decided to  make a real feature of the floral wreath pattern paper, Big Ideas. I fussy cut almost the entire sheet, and made a decorative border around my white cardstock base. I just love how effective this looks! 


I layer a few of the wreaths with foam tape for added interest & dimension. 
I tuck my sweet chipboard framed photos into the border too! 


I add my title with the tiny puffy alphabet stickers in coordinating colors, and embellish with die cut ephemera, and enamel dots from the mixed embellishments pack. 
Such a simple design, but oh so lovely! 


The sweetest! 


Big fussy cut Ideas never looked so good! 
If you're interested, I have a process video for you to watch...


I hope you enjoyed watching! 

Thanks so much for all your support, 
Have an amazing week!

til next time, 

Pinkfresh Studio: March Challenge


Hi Friends

Welcome back for more Happy Arty Days inspiration! 
Can you believe it's March already?!!
Time sure does fly! 
A new month signals a new monthly challenge over at Pinkfresh Studio. 

Here's what the March challenge looks like....


So.much.pretty!!!
And it's no secret that I LOVE me some florals! Yay!!!
I was totally drawn in by those gorgeous colors,
and the new Pinkfresh Studio Joyful Day collection was the perfect choice! 

Here's my take on this challenge, 

"Beautiful"


Oh my, isn't this pretty?!!
The soft colors and delicate nature of Joyful Day makes creating such a dream!
& that floral cut file is just exquisite!
It's a new FREE cut file which will be available in the 
very soon. 
Let's take a closer look.....


Such a beautiful ballerina, I just love documenting her stories! 
Speaking of beautiful, how stunning is that Puffy Word Sticker?! 
Such an awesome font too! 


All the pretty pastels and florals here!
Those die cuts are too pretty for words!!!


Love it!

I hope my layout has inspired you to play along this month!
See all the challenge details on the Pinkfresh Studio page HERE 

Thanks so much for stopping by,
til next time,

Happy Arty Days, 
Amanda xo 


Pinkfresh Studio: Holiday Vibes & Free Cut File Inspiration!


Hi Friends!

Welcome back to the Happy Arty Days blog! 
Today I am sharing some Christmas inspiration with the gorgeous Pinkfresh Studio: Holiday Vibes collection! Infact, for today's post I am using this collection with one cut file & one photo to create two different, but very beautiful scrapbook layouts! 
The cut file being featured is a Pinkfresh Studio one called: 
Jingle Bell and you can download it for FREE HERE. 
Here's my first layout, 
"Merry"
 

Merry, indeed! 
Such a happy moment on Christmas Day morning, in front of the tree! LOVE this photo, and you can see why I needed to scrapbook it twice - once for her album, & once for his! Too adorable! 
I have used the 'bell' section of the cut file as a frame for this darling photograph, and then paper pieced the bow with the B-sides of pattern papers VERY MERRY, & CHRISTMAS CHEER. I also embellish the bow with a snowflake EPOXY STICKER for added dimension & interest! For my page design, I use the Jingle Bell as both my focal, and central point of the layout. I 'build' around the bell with all my embellishments - keeping to a circular design to compliment my sweet photo. 
You'll also spy a few fussy cut shapes from pattern paper CHRISTMAS CHEER - including the presents, and those oh-so adorable bunnies! 
Here's a closer view for you....


The sweetest! I foam mount the 2 bunnies to make them a little more noticeable & also because they're kinda like my two cute characters in the photo! Love them so!
How fabulous are the COLOR DIPPED WOOD ALPHA STICKERS which I use as my subtitle Fa La La?! The inclusion of these alphas & the WOOD EPOXY BUTTONS really adds some warmth to my otherwise cool & crisp color scheme. 
Such a simple way to maintain balance in the design!  


As well as cute fussy cuts, there's also some beautiful DIE CUT EPHEMERA supporting this Christmas photo. I just adore the Merry tag, & had to use it as my layout title. To help it 'pop' I used thick foam dots for added dimension, as well as a natural twine bow for added interest. 
Did you spot those super cute PUFFY STICKERS?!! 
I have used three on my layout, and adore them all! 


For finishing touches, I add a sprinkling of ENAMEL DOTS to fill a few gaps in my circular design. So good! 
Crisp.Clean. White Christmas perfection! 

As I mentioned earlier, both my layouts feature the same photograph & cut file, but have quite a different look. Here's my second take on using these same items....
"JOY"  


Isn't this lovely?! 
Again, I've kept to a clean look, but softened this one with the inclusion of gray in the color scheme. The layering of pattern papers, MERRY CHRISTMAS and CHRISTMAS CHEER also enhances the gentility of the design by breaking up all the white space. To compliment the gray, I've also edited my photo to black & white which creates the false sense of a whole new look! I've also opted for a vertical design which contrasts greatly to my previous layout.
Let's take a closer look....


Like my previous layout, I have used the bell design to act as a frame for my darling photo. However, this time I paper piece the bow with the reverse side of pattern paper LET IT SNOW.  That soft blue is just divine! I adorn the bow center with that sweet WOOD EPOXY BUTTON and embellish the left side of my photo with that perfectly coordinating CHIPBOARD STICKER jingle bell. Love!
Speaking of coordinating, I selected lots of circular embellishments to partner with my round photo. You'll spot ENAMEL DOTS, WOOD EPOXY BUTTONS, DIE CUT EPHEMERA & even an EPOXY STICKER! 


The Jingle Bell cut file is all kinds of awesomeness! 
Love how it looks when it's backed with pattern paper LET IT SNOW for the bell, & MAGICAL FOREST for the bow! To add a lil interest, I adorn this bell with a foam mounted DIE CUT EPHEMERA sentiment, as well as a WOOD EPOXY BUTTON.  
Such a great point of interest! 

I use those fabulous COLOR DIPPED WOOD ALPHA STICKERS for my title, as well as that sweet Noel DIE CUT for my subtitle. So lovely! 

And there you have it!
One photo, one cut file, one amazing Holiday Vibes collection = 2 beautiful Christmas layouts! 
I hope you have enjoyed seeing my creations today 
& feel inspired to get creating this Holidays! 

Merry Christmas! 

Pinkfresh Studio: Holiday Vibes Inspiration!


Hi Creatives! 

Welcome back for more Pinkfresh Studio: Holiday Vibes scrapbook collection inspiration! 
Today I have 2 very different but oh so stunning,
Christmas Cheer layouts to share with you! 
First up is this soft & subtle, snowflake inspired design...

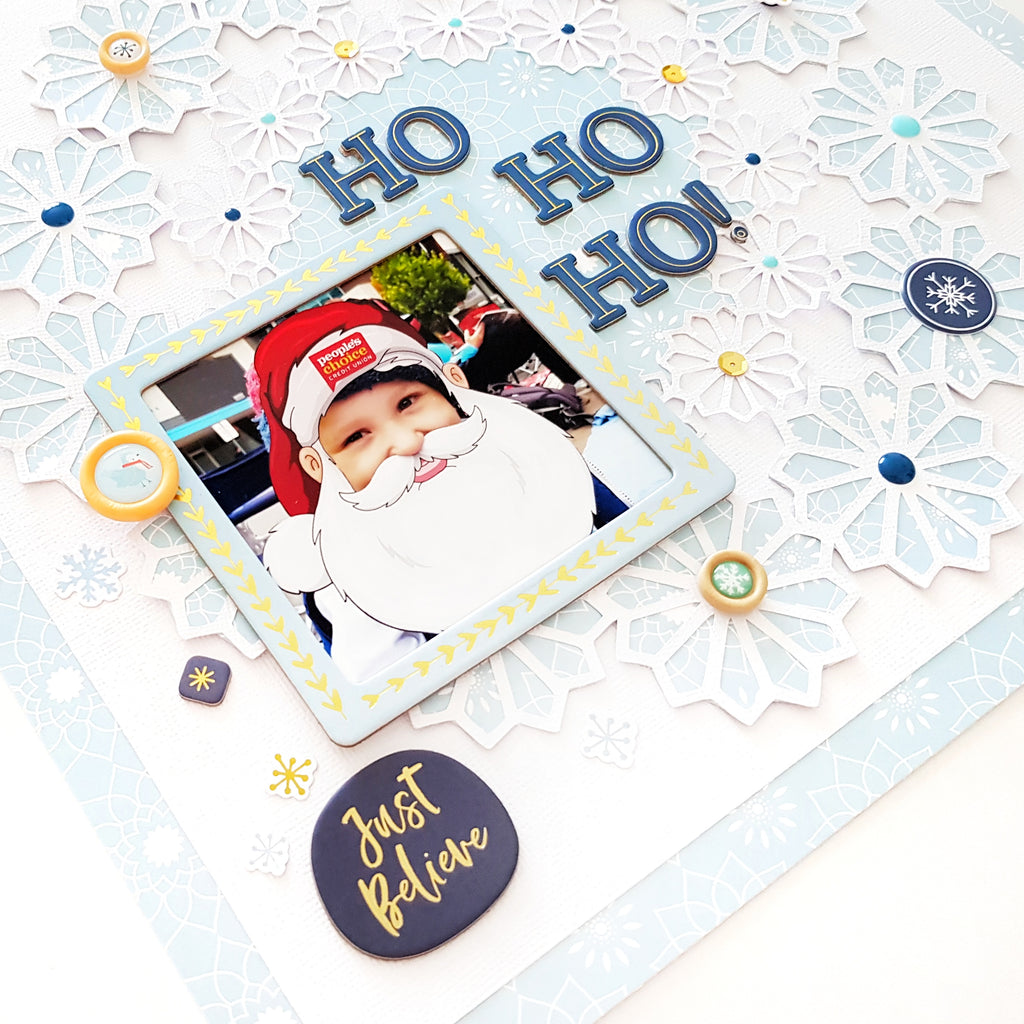
"Ho, Ho, Ho!"


Pardon the pun, but this is Snow, much fun!
I just instantly fell in love with pattern paper, LET IT SNOW & knew I'd make a feature of it! I love how soft and pretty this is!
And how super cute is my mini Santa in the photo?! 
I use the LET IT SNOW  paper as the 12" x 12" base, and then layer it with an 11" x 11" white cardstock background. I then use more white cardstock to cut out the free cut file called Fancy Floral (it's from The Cut Shoppe), and back the outer ring of flowers with more LET IT SNOW paper. With such a geometric look to them, these 'fancy florals' make excellent faux snowflakes and look really effective! Using the same pattern paper, I also 'fill' the inner section of the cut file, and then adhere it to the white background. 


With such a soft look, I embellish the fancy floral snowflakes with WOOD & EPOXY BUTTONS, snowflake DIE CUTS, ENAMEL DOTS, a PUFFY STICKER & a few gold sequins (from my stash) to prevent them from blending into the background. Such a fun & decorative way to create interest!
 

I embellish the inner section with that very cool, Ho, Ho, Ho! CHIPBOARD ALPHAS STICKERS title - love the pop of bright blue against the icicle blue, LET IT SNOW! 
With the bright red Santa hat, my photo is easily identified on the page. To avoid over embellishing it & I decide to adorn it with a pale blue CHIPBOARD STICKERS frame and embellish with just the one WOOD & EPOXY BUTTON. 
Here's a better look at it......


What a cutie! 
 I scatter a few snowflake DIE CUTS & a CHIPBOARD STICKER around this sweet framed image. For finishing touches, I add the Just Believe CHIPBOARD STICKER sentiment. Simple. Sweet & oh-snow-Christmassy! 


Love it! 

Next up, I have this very festive layout with our gorgeous Holiday Vibes collection....
"Xmas Cheer"


O' Christmas Tree, O' Christmas Tree!
Told you it was festive!
This time I've created a really bright, bold & playful layout to celebrate the Season! 
Inspired by the Christmas Tree in my daughter's Christmas Parade artwork, & the trending layered 'flaps' look, I've created this stunning feature tree in the center of my page. I have used 1 1/2" wide strips of the B-sides of pattern papers LOVE & PEACE and VERY MERRY, & arranged them to resemble the 'triangle' tree shape. I stitch them into place with my sewing machine, and then use fringing scissors to create a Fir tree appearance. SO cool!  
I use the 25 ephemera DIE CUT for the base of the tree trunk, and then decorate the tree with all the Christmas trimmings! 

Let's take a closer look....


So many gorgeous details & embellishments!
From the gold star atop of the Tree, to the DIE CUT tree lights & ornaments, and those oh-so shiny EPOXY STICKERS and ENAMEL DOTS, this Christmas Tree is just divine! 
With such a striking main feature, I really needed to make sure that my sweet photos didn't get lost amongst it all! To help define them, I place both photos into CHIPBOARD STICKERS frames and position them on an angle to create extra interest. I also embellish them with those very sweet & super cute Winter birdy DIE CUTS. And lastly, to really attract your eye, I position the COLOR DIPPED WOOD ALPHA STICKERS titles above each frame so that you see the photographs as you read the title. 
Speaking of titles, how lovely is the banner subtitle, Christmas Family Traditions?!
 

I love the layered banners look, and just look at those packages under the tree!!!
Such a super fun & adorable layout! 

Whether you like the softer, more subtle, snowy Christmas or
 prefer the bright & bold festivities, the Holiday Vibes collection is bound to impress!  
Be sure to leave me a comment below to tell me which one was your favorite! 
Either way, I hope I have inspired you to start documenting the Reason for the Season
 and celebrate all the Christmas Stories! 

Thanks so much for stopping by today!
Merry Christmas!