Showing posts with label Card. Show all posts

Spellbinder's Card Kit of the Month for December!


Hi Friends! 

I am so excited to be joining you today for more Spellbinders inspiration with their incredible 
Card Kit of the Month! 

Card Kit of the Month Membership

And let me tell you, the December kit is all kinds of awesome!!!
It's jam packed full of Winter Wonderland & Christmassy delights!
Here's a few sneaks for you....

 OH.WOW!!!
How fabulous is this card kit?!!
 And the 6 x 6 Winter Wishes pattern papers are pretty fantastic too!
So many beautiful designs!
Here's another look for you....

What an amazing kit!


Here's just a handful of cards I've made, using only items from the kit.....


Wow! All the Winter Wishes here! So many lovelies!
And they're all made entirely from the kit - no extra items from my stash. How awesome is that?! 
Such a fabulous kit!
Let's take a closer look at them all.....


Aren't they pretty?!! 
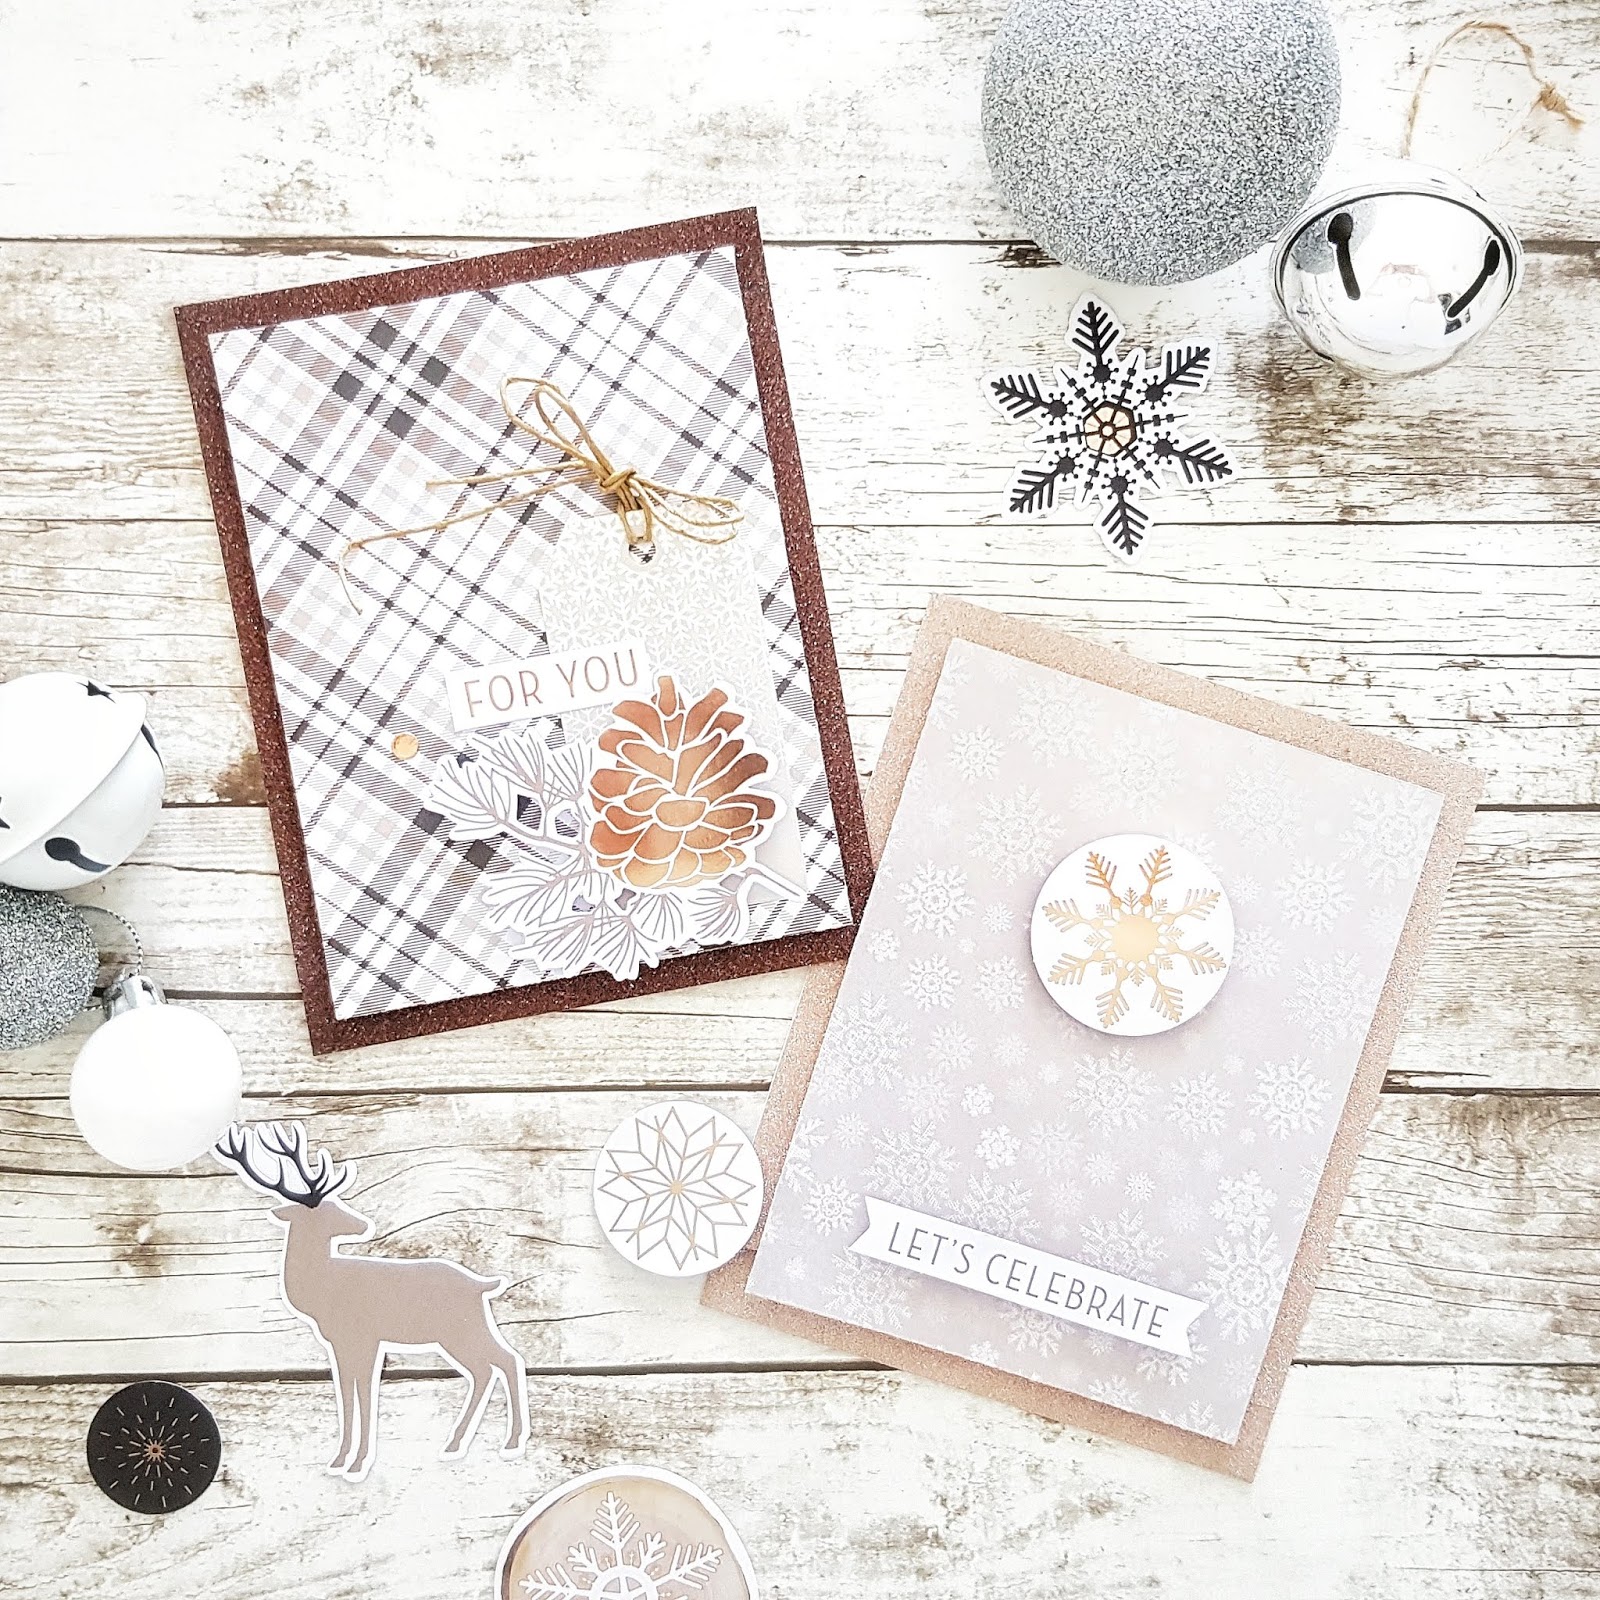
I've used the glitter washi tapes in this month's kit to border the card bases, and give the appearance of glitter cardstock. I've also featured the exclusive 6 x 6 pattern papers and die cuts. So gorgeous! 
Here's another look ....


Oh so lovely! This one also features the twine in this month's kit too! 
I just adore that pinecone! 
Next up are a few cards made with the amazing metal dies in the kit.....


Winter Wonderland perfection!
The metal dies are always my favourites! LOVE!!!
You'll spy the teal enamel dots and gold glitter puffy alpha stickers also making a statement on these two cards! 


That polar bear is just adorable!!!


Those gold glitter puffy stickers are so sparkly! & I'm totally crushing on all those intricate snowflakes! 

For my next card, I'm demonstrating the versatility of this Christmas themed kit with a simple birthday card.....


Super sweet! & how awesome to be able to get more than just Winter themed Christmas cards out of this kit! 
I love all the foil elements on the tags, it really makes them pop! 


And now for some Winter Wishes.....


How cute is that Santa hat die cut with the antlers?! 
It inspired me to create more antlers with some of the leafy metal dies. 


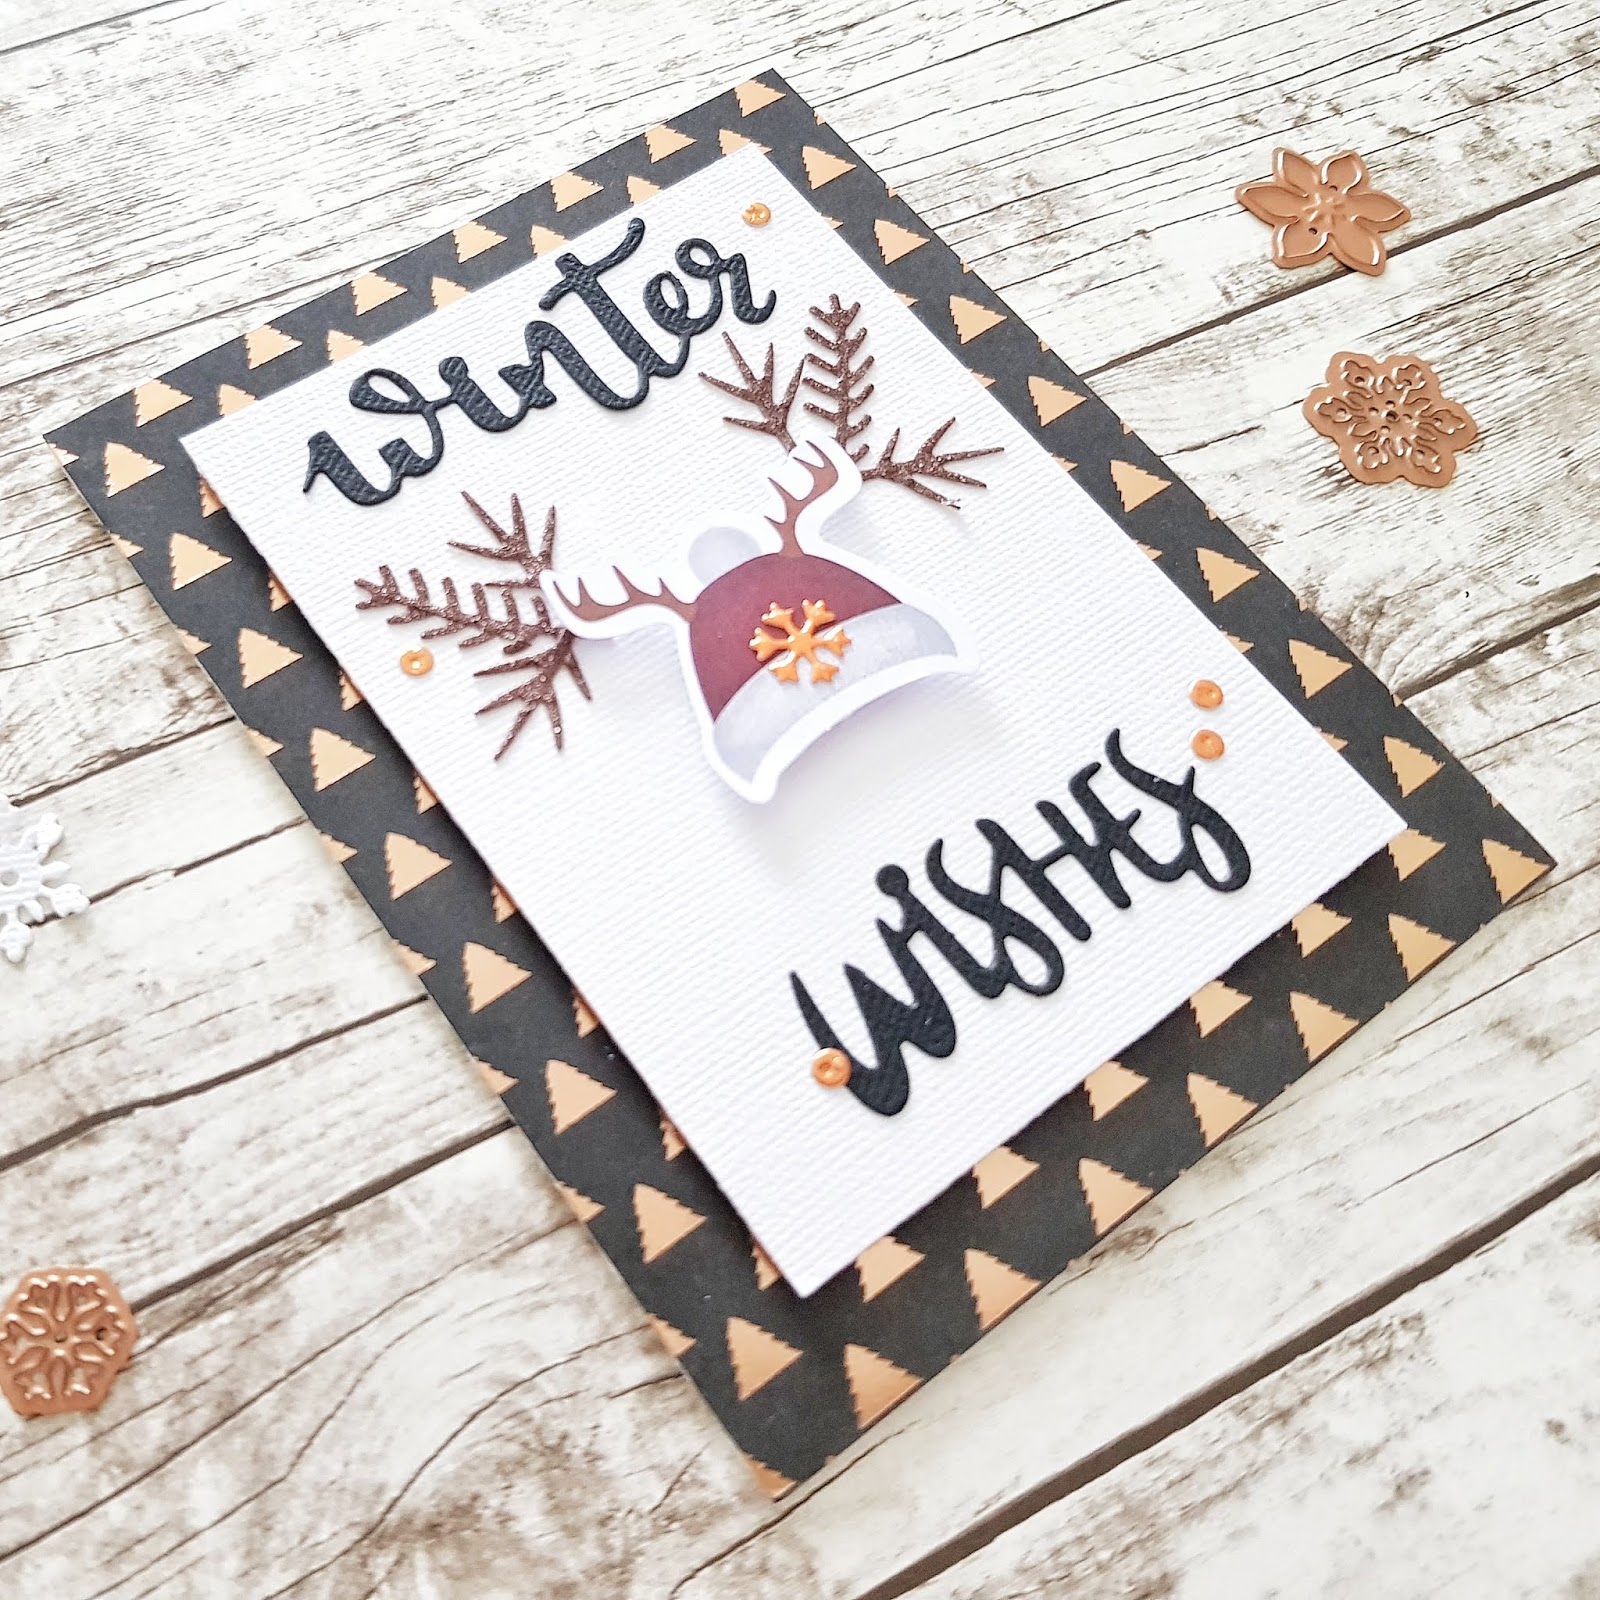
You'll spot that the faux antlers are a lil sparkly!  
That's because I die cut them from the glitter washi tape in the kit! 
I just love how effective the die cut washi tape looks, that I double it's width and cut my sentiments with it for the next card.... 


Oh.how.stunning!!!
Everything in this kit is just so beautiful! 


Total gorgeousness!

I hope I have inspired you with my first installment of creations with this kit! 
 I have so many leftovers that I'll be using this kit all month - it's amazing!
I haven't even got to the stamps yet! 
So good! 


Thanks so much for visiting, 
til next time, 

Happy Arty Days, 
Amanda xo 

Pebbles: Patio Party:Teacher Appreciation!


Hi Everyone!

Welcome back for another super sweet, but oh so easy Pebbles gift idea! 
This week is all about Teacher Appreciation on the Pebbles blog,
 and as a teacher myself, I can't begin to tell you how wonderful it is to receive a gift made from a child's hand! 
Hence, today's post is super simple because I had my 5 yr old son make it for his school teacher! 
Yes, it's that easy! So let's get started!

Begin with a recycled jar, some fabric netting or tulle, ribbon and your favourite Ephemera pieces from the Patio Party collection...


Have your child wrap the jar with the netting, tie the ribbon in a bow and accessorize with the ephemera. Add an extra 'special' detail with a layered butterfly sticker, as shown below.....


Isn't this sweet?! Have your child select some flowers from the garden and arrange them in the vase, while you assist with cardmaking!
Start with a simple 6" x 4" white card. Trim pattern paper Citrus Sweet to size 5 3/4" x  4 3/4" and adhere to card front. 

Attach ephemera leaves and blooms as shown below....

Cut apart pattern paper Just For You and use the woodgrain thankyou tag. Mount it with adhesive foam dots for added dimension. Embellish with a couple of 6 x 12 Cardstock Sticker butterflies, and finish with a bow!

Super simple, but seriously sweet! Didn't he do a great job?!


An absolutely darling gift that any teacher (or Mom for Mother's Day) would love to receive from your child! 
I hope it has inspired you to spend a little creative time with your children too! 
(It's never too early to start them on the crafty path) 
I'd love to see their takes on this lovely gift - so please be sure to share them with us on the Pebbles Inc Facebook page!

Thanks so much for visiting, 
til next time,

Happy Arty Days, 
Amanda xo

PATIO PARTY SUPPLIES:
OTHER SUPPLIES:


Cocoa Vanilla Studio: More Than Words for Valentine's Day!


Hi Cocoa Vanilla Studio Friends & Fans!

Amanda here, & I am so excited to be sharing some very pretty Valentine's Day inspiration with our new More Than Words collection. This collection is so swoon worthy! & with the big heart day tomorrow, there's still plenty of time for you to create this sweet Valentine gift and card set.....


Oh isn't this lovely?! 
 And it really is super easy to create!
I made my own heart wreath from cane strips, but you can find plenty of pre-made wreaths at florists, and gift stores. I gave mine a rough coat of white gesso, and twisted some soft pink wool around it to soften those edges. 
The fun part is all the embellishing!  
Select your fave recent photo of your Valentine, choose a sentiment (I cut out the Love You To Bits card from pattern paper CV-MT006 TREASURE ) and heat up your glue gun!


I arrange DIE CUT EPHEMERA pieces, CHIPBOARD STICKERS, & a FLAIR BUTTON around my heart and once happy with their position, I hot glue them into place. I string up the EPHEMERA feathers with twine, and dangle them from the base of the heart. I love the interest this creates! 
I also layer quite a few of EPHEMERA pieces......

 
SO pretty! Those butterflies are just divine!


And the FLAIR are always so perfectly coordinated! Such a sweet gift!
Now for the card....


You make my heart sing, indeed! Such a lovely card to give to your beloved!
I start with a 6" x 4" white card, and use pattern papers from the 6 x 6 PAPER PAD. These smaller size designs are perfect for cardmaking!
I embellish my card with a DIE CUT EPHEMERA frame, and then adorn it with CHIPBOARD STICKERS, & ACCESSORY STICKERS. 
Simple, but oh so effective!


And there you have it!
 A very beautiful (but super quick & easy) Valentine!
I hope I have inspired you to get creating with More Than Words!
Thanks so much for visiting, & Happy Valentine's Day!
til next time,

Happy Arty Days, 
Amanda xo 

Pebbles: Forever My Always, Valentine!


Hi Creatives!
My turn on the Pebbles blog, & today I am sharing some Valentine's Day card inspiration with the gorgeous Forever My Always collection! 
I just adore this holiday! 
Nothing more beautiful than proclaiming your love (or secret admiration) to that special someone! 
I am so blessed to have three very special people in my life; a loving husband, and two darling children! I have created a trio of Forever My Always cards to surprise them with....


Oh aren't they something?!  3 pattern papers, three very pretty cards!
Here's how to recreate them!
Start with trimming up pattern paper, XOXO Quotes. The 3x4 journal cards on this paper make card making a dream! Select which sentiments work best for your beloved - everything in this line coordinates beautifully, so any of the XOXO Quote cards will be perfect!


Tip: I even trim the reverse (pattern side) of the barcode strip, to use in my cards too!


My card 'planning' starts off by arranging pattern papers with the trimmed 3x4 journal cards, and a few pieces of ephemera....


I like to shuffle my pattern papers around and make sure I'm happy with my design before I start gluing.
I just LOVE the combination of the diagonal stripe paper, Follow Your Heart and floral print, Sprinkled Blossoms, so I decide to use them as my feature papers on all 3 cards.
Here's my first card which is for my One True Love, "I Think About You A Lot"....


SO pretty!
To recreate:
1.Trim pattern paper Follow Your Hear to 8 1/4" wide x 6" long. Score and fold in half to create your 4" x 6" card.
2. Trim pattern paper Sprinkled Blossoms to 4" wide x 3 1/2 " long.
3. Adhere pattern papers together ( as shown below)


4. Tape the journal card and ephemera into position. Use adhesive foam dots for the sentiment, to make it 'pop'.
5. Embellish with a sewn button, and some fabulous Forever My Always 6 x 12 Stickers. Voila!


Absolutely perfect, indeed!
Next up is this fun Valentine for my tween-age daughter, "Heart Mail".....


Still loved up and oh-so-pretty,  but much cooler for a young girl!
Here's how:
1. Trim pattern paper Sprinkled Blossoms to 8 1/4" wide x 6" long. Score and fold in half to create card base.
2. Trim pattern paper Follow Your Heart to 3 3/4" wide x 5 1/2" long.
3. Attach pink satin ribbon to Follow Your Heart Paper, & then attach the XOXO Quotes sentiment card. Using the same ribbon, add a bow to the top of the 3 x 4 card. (shown below)


Tip: To make this card less formal and more 'young 'n' fun', I use my Becky Higgins Project Life Corner Rounder Punch on my 3 x 4 card. Such a simple, but effective result!
4. Using thick foam tape, attach the Follow Your Heart embellished paper to the Sprinkled Blossoms card base.
5. Embellish with the Heart Mail 6 x 12 Sticker & a few buttons from your sewing kit.


Love it!
Last, but by no means least, is this lovely card for my darling Mister 5, "You're Pretty Much My Favorite Person"....


This is just gorgeous!
1. Trim white cardstock to 8 1/4" wide x 6" long. Score and fold in half to create card base.
2. Trim pattern paper Sprinkled Blossoms to 4" wide x 3 3/4" long.
3. Trim pattern paper Follow Your Heart to 3 1/2" wide x 5 1/2" long.


4. Tape the Sprinkled Blossoms paper to the bottom of the cardstock base. Attach satin ribbon to Follow Your Heart paper, and then tape this pattern paper over the top of the Sprinkled Blossoms and white cardstock base, as shown below.


5. Apply foam dots to the XOXO Quotes 3 x 4 card, and then position over the ribbon trim.
6. Embellish with lace trim, button & twine and another of those fabulous 6 x 12 Stickers.
   
Voila! Three papers, 3 very special Valentine's Day cards.
 

I hope I have inspired you to get creating with our beautiful Forever My Always collection!

Thanks for stopping by today!
til next time, 
Happy Arty Days, 
Amanda xo


Supplies:

Elle's Studio: January Product Spotlight


Hi Friends!

Have you seen all the fabulous New Releases over at Elle's Studio?!!
There's so many yummy products!

From the January Kit....


to the awesome New Release Extras!
Stunning!!!
Today I am shining the spotlight on the Wood Veneer Love Tags. 
My brief for this product spotlight was to create just one card that really highlights those awesome tags. 
The January Kit lends itself beautifully to Valentine's creating, 
so here's the card my Valentine will be receiving - I hope he likes it ;) 


Oh, isn't this sweet?! 
I just love the natural look of wood veneer, and the warmth it adds to any project.  
My card is a simple 4" x 8" design, and features pattern paper from the XOXO 6 x 6 Paper Stack, Love You Die Cuts, Enamel Dots, & Hand Drawn Acrylic Hearts. 
But it's those wooden tags that really impress!


I've arranged the tags in a grid layout, and embellished them with those sweet tiny bows. 
Apart from adding dimension & interest, the bows also 'cover up' the tops of the wood tags. This means you can mix & match the shapes (& sentiments) and still have a 'clean look'. 
The bows are made from my leftover scrap pieces in the XOXO 6 x 6 Paper Stack.


The pretty heart paper beneath the tags is stitched into place, and so is the xoxoxoxo sentiment. 


The Love You Die Cut hearts, and acrylic heart anchor the overall design. 
Enamel Dots add the finishing touch! 

Voila! 
Valentine's Card with Wood Veneer Love Tags.
I hope I have inspired you to create with these fabulous veneers!
Visit the Elle's Studio Store HERE for all your supplies!

Thanks so much for visiting, 
til next time, 

Happy Arty Days, 
Amanda xo