Showing posts with label WOW Em!. Show all posts

WOW! Embossing Powder Creative Guest - Fabulous layout!


Hi Creatives! 

Welcome back for my second official post as a Creative Guest Designer for

WOW! Embossing Powder Blog

WOW Embossing Powder!

Yippeeee & lucky, lucky me!
If you missed my previous Creative Guest post earlier this month, you can check it out on their blog HERE.

For today's project I am focusing on incorporating more Glitter Embossing and Sparkles into your scrapbook layouts.
Here's what I'm talkin' 'bout.....

"Fabulous"


Oh how super cute & playful is this?!! 
So much glittery goodness here! 
You'll spy Black Twinkle, & Totally Teal Embossing Glitters, as well as those super sparkly, Celebration Sparkles! 
Here's a closer look at my layout....


Aboslutely darling!
And the best part? Well, it's super fun (& really easy) to recreate! 
Here's how....


Start with stamping the Pinkfresh Studio Heart & Soul Stamp set with the WOW! Embossing Pad, and then coat the images with WOW! Embossing Glitter in Black Twinkle. 


Use your WOW! Embossing Heat Tool to heat and set the Glitter Embossing Powder. 


Use the Heart & Soul coordinating metal die to precisely cut out the embossed image. 

(You will be amazed by the Black Twinkle Embossing Powder - see the close up below!)


Black Twinkle, indeed! Just look at that glittery result! SO incredibly beautiful!


Next, stamp up the owls, birds and butterflies from the Pinkfresh Studio Playful Animal Friends 1 stamp set, with the WOW Embossing Ink Pad. Sprinkle with WOW Embossing Glitter in Totally Teal, and heat set with the WOW Embossing Heat Tool. 


Be still my heart!!! Ga ga gorgeousness! 
This may a new favorite color of mine - so divine!!!


Fussy cut the embossed images to create your own glitter ephemera die cuts. 


Trim white cardstock to 11" x 11" and then use Pinkfresh Studio Liquid Watercolors in Sky Blue to paint a small circle in the center of the layout. Add a few gentle flicks of paint splatter around the circle too! 
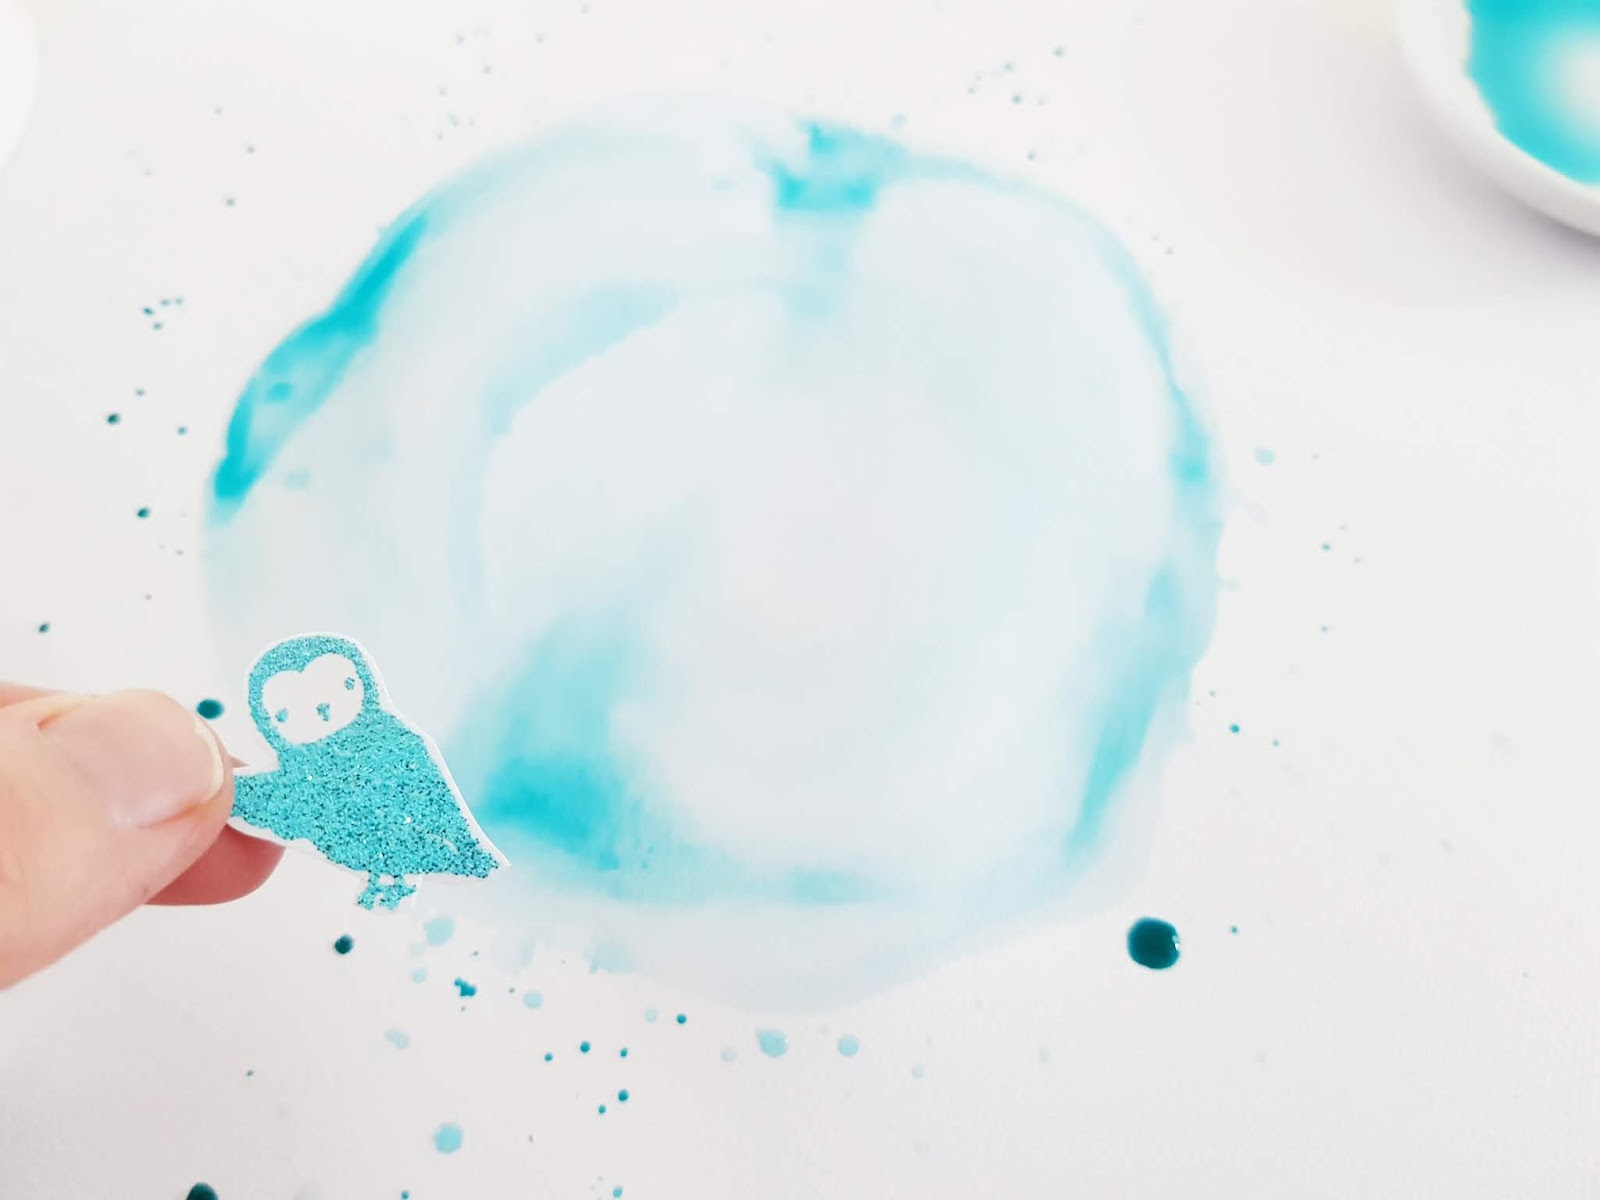

You can see the Sky Blue Liquid Watercolor is a beautiful match with the Totally Teal! 
SO pretty!!!


Attach the white cardstock to the Joyful Day 12 inch pattern paper called, Perfect Moment. This creates a soft border trim &looks really effective. Foam mount the Heart & Soul embossed image and tuck a framed photo beneath it. Embellish around the 'circle' with the Totally Teal Playful Friends. Add a Joyful Day ephemera tag and sentiment beneath the circle, and embellish with more of the Totally Teal Friends! 

For finishing touches, and that added WOW'Em factor, apply Celebration Sparkles to the layout....


The perfect glitter finish! 
To hold my Sparkles in place I applied a clear, fast drying glue sparingly around the design and sprinkled the Celebration Sparkles over the top. 


Add the layout title, I chose fabulous from the Joyful Day Puffy Phrase Stickers pack. 


Thankyou for making everything around me beautiful, 
Thank YOU for joining me today!

I really hope I have inspired you to incorporate the beautiful Glitter Embossing Powders into your memory keeping crafts! 

And a super big thankyou to WOW! Embossing Powder for inviting me to be their Creative Guest this month! 
I just adore the products and can't wait to share more inspiration with them! 

'til next time, 


Products Featured:

WOW! Em June Creative Guest - Lovely Layout


Hi there, crafty friends!

 I am so super dee duper excited to be this month's creative guest for

WOW! Embossing Powder Blog

WOW Embossing Powder! 

I know, awesome!
For today's post I wanted to showcase how easy it is to incorporate glitter embossing into your scrapbook layouts! 
Here's what I'm talkin' 'bout....

"Lovely"


Sigh! So.much.pretty!!!!
Did I mention that Florida Sunset Glitter  is my new FAVE powder?!! 
Like seriously, how amazing is that sparkle?!
LOVEEEEEE!

Let's take a closer look....


Lovely, indeed!
Simple, beautiful & super easy to recreate!
Here's how....


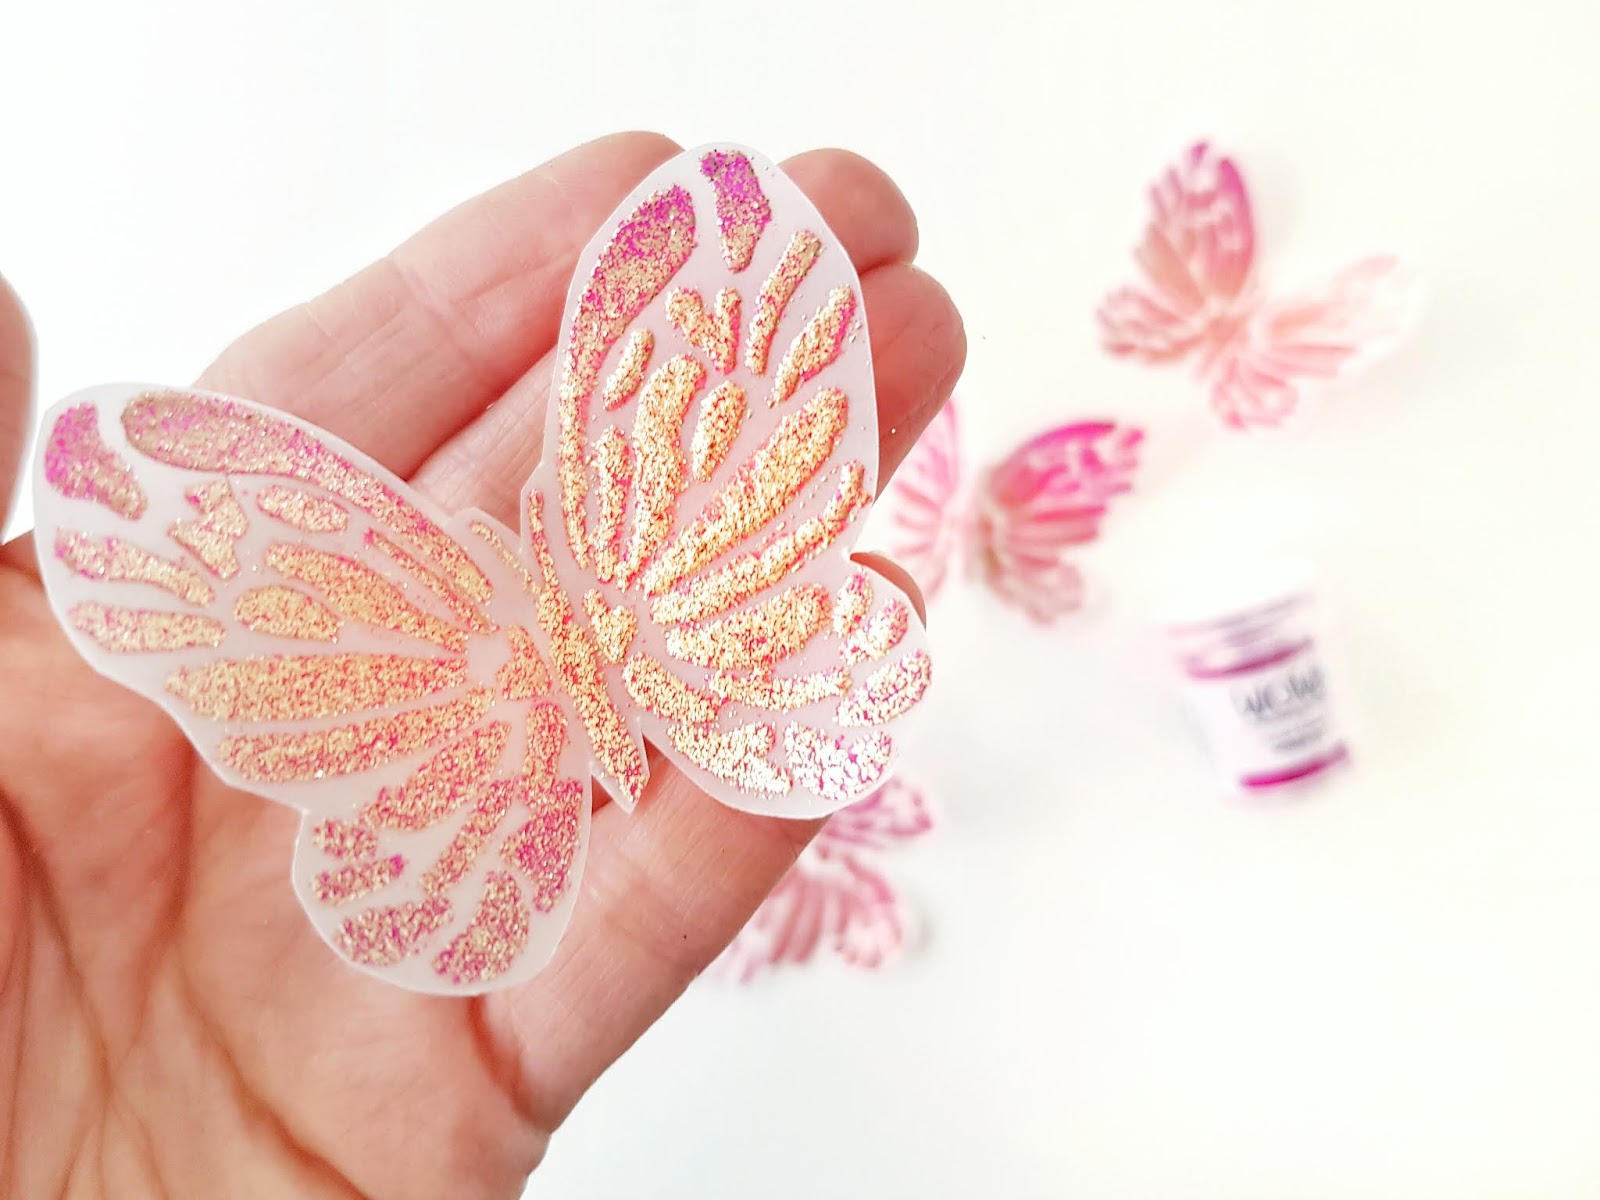
Take your WOW! Embossing Pen & use it to draw (or stencil color ) a butterfly onto clear vellum. 


Sprinkle generously with WOW! Embossing Glitter: Florida Sunset WS95R(O).


Use your WOW! Embossing Heat Tool to heat set the powder. 
Just look at that gold!!!


Repeat process until 5 Florida Sunset butterflies are created. 


Fussy cut each butterfly. 
Ahh-may-zing! Told you that this glitter was something else!!! 
Absolutely MAGICAL!


Paint a watercolor heart onto 12 x 12" white cardstock. 


Once dry, draw in a few more 'heart lines' with the WOW! Embossing Pen. 
This will add  both interest to the layout & really highlight the heart shape. 


Sprinkle & heat set with the fabulous Florida Sunset Glitter Embossing Powder!
Such an effective result!
To complete the layout, embellish the heart with the fussy cut Florida Sunset butterflies, some of your favorite scrapbook supplies (I used Cocoa Vanilla Studio: Happiness collection), photo & title! 
Voila! 
Super simple, but oh so beautiful scrapbooking with WOW! Glitter Embossing Powder!

Here's a couple of pretty close ups for you.....


Such gorgeously rich colors & intense sparkle!


WOW, indeed!!!!


And there you have it! 
WOW! Embossing Glitter is just errrrrything to me right now! 
I hope I have inspired you to use these awesome powders on your next creative project (or even scrapbook layouts) - 
Trust me, you'll be SO happy with the result!

Thanks so much for stopping by today!
I'll be back later in the month with more creative inspiration,

til then, 

Products Featured:
WOW! Embossing Pen 
WOW! Embossing Glitter: Florida Sunset WS95R(O)
WOW! Embossing Heat Tool
Clear Vellum Acetate
Cocoa Vanilla Studio: Happiness Collection 
Watercolor Paints


Pinkfresh Studio + WOW Embossing Powders Blog Hop!


Hi Friends! 

Welcome to the Happy Arty Days blog! 
I am so super duper excited to be participating in this incredible blog hop!
What an amazing opportunity, & such an awesome collaboration between
Pinkfresh Studio & WOW! Embossing Powder.

Throughout the hop, you'll spy tons of  inspiration from designers from both teams,
combining some of our gorgeous products together. Yay!!!

If you've just arrived here from the Pinkfresh Studio blog, then you're in the right place! 
If not, (or you find yourself a lil lost along the way)
head back over to the WOW! Embossing Powder & Pinkfresh Studio blogs for the complete listing of designers participating in the hop!

Like all good blog hops, there are a couple of amazing prizes up for grabs....

WOW! Embossing Powders prize: 6 powders from your choosing along with a WOW carry case to safely store your new powders.
&
Pinkfresh Studio prize: $50 gift card


***The Winners will be chosen at random from the comments left on ALL of the blog hop posts. Comments close on Friday, September 7th.
The winner of the Pinkfresh Studio prize winner will be posted on the
Pinkfresh Studio Giveaway Page on Saturday, September 8th. ***

Good Luck!

----------------------------------

Now, time for me to share my card inspiration!

I have created 2 cards using very similar products, with 2 very different results!
Here's my first card,

"It's Your Time To Shine"


Wow 'em, indeed!!! What a striking card!


To re-create this card, turn a glass upside down onto a white card base. 
Spray water around the exterior of the glass, and add Liquid Watercolor Sapphire around the glass rim. As the Sapphire reacts with the water, and begins to spread, also add Liquid Watercolor Licorice to blend with. 
When the watercolors are almost dry, flick a few water droplets onto the background to create the appearance of faux stars. 
Allow to dry completely before removing the glass. 
Voila! One instant moon, and starry sky card base! 


Next, use the Brilliant stamp and apply white ink stars, as well as embossing with WOW! Embossing Powder in Bright White. 
While this stamp set is out, stamp the sentiment in black ink, as well as emboss the Brilliant title in Ebony Wow! Embossing Powder. Use the coordinating metal die, and cut out the embossed Brilliant title. 
Use permament black ink, to stamp the tiny fox from the Itty Bitty Elements stamp set. Color with Faber-Castell Pitt pens in Sanguine, and use the coordinating metal die to accurately cut the fox out! 


Glue the sentiment into place, & use foam dots to make the Brilliant title, & tiny fox 'pop'! 
Adhere the card base onto a gold glitter cardstock, and then a black card base. 
For finishing touches, add gold sequins! 
Super simple, but oh so stunning! 

My second card is all about the pretty.....

"Brilliant Friend"


Gasp! So soft and beautiful! 
Perfect for a treasured friend! 


To recreate this pretty card, use pink ink to repeat stamp the white card base with a Dainty Botanicals clear stamp. Stamp & emboss (with Misty Sky powder ) the Brilliant title, and use a sky blue ink for the 'friend' stamp. Use the coordinating metal die to perfectly cut out the Brilliant title. 


Attach a few embellishments from the Pinkfresh Studio Simple & Sweet collection, as well as foam mounting the Brilliant title. Glue 'friend' underneath, and add a few Nuvo Drops in Bubblegum Pink for finishing touches!
Another simple, but oh-so-beautiful card!


Two very different cards and looks created using similar products from both Pinkfresh Studio & WOW! Embossing Powders. 
I hope my cards have inspired you to get creating! 
**Be sure to leave a comment to enter you into the giveaway draw**

Thanks so much for visiting!

Time to send you hopping over to the gorgeous Caly Person's blog HERE
she has some amazing inspiration for you!

til next time,
Happy Arty Days, 
Amanda xo