Hi Friends!
It's time to bust out the Michael Buble music as "It's beginning to look a lot like Christmas!"
I am so excited to be preparing for the Season of Giving!
I just love the Holidays, and the new Elle's Studio 6 x 6 Paper Stack - 'Tis The Season is perfect for documenting all our stories with!

Whether you trim this paper into pocket size note cards, create greeting cards, include it in your Document December albums, or even craft some Holiday decor, this paper pack is simply the best!
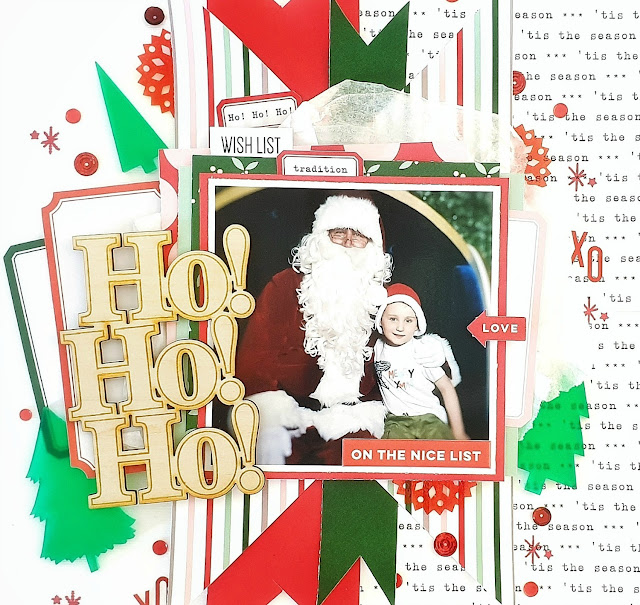
I used the 'Tis The Season papers for documenting my son's visit to see the Jolly Ole Elf himself!
Here's my layout,
"Merry & Bright"
Ho! Ho! Ho! What could be merrier?! Such a cute photo!
Other Supplies: Red Stamping Ink, SpiegelMom Scraps Red Rapture Sequins, White Tissue Paper.
Let's take a closer look at my sweet Santa scrapbook page!
So adorable! And just look at all those pretty papers!
So many gorgeous designs!
It's well known that I like to maximize the 6 x 6 Paper Stack papers for 12 x 12 scrapbook pages, & for today's post, I really wanted to share my top 5 ideas on how to do this!
1. Use the bold pattern paper designs to matte your photographs onto!
I always print my photos with a white border and tend to forget how important that pop of color is. A striking base for your photo/s will really direct your eye and draw attention to your most important part of the layout! That red beneath my photo is just stunning!!!
2. Create paper layers to mount your photograph onto!
Layered papers create texture, give shape & add visual interest. They also give us the opportunity to mix and match colors and designs, adding greater elements to the overall design. You'll notice that I even add some white tissue wrap in between my paper layers to add further emphasis & interest to my pattern paper cluster!
3. Pull out your punches, or favorite fussy cutting scissors, for some fun pattern paper shapes!
Think rows of pattern paper circles stitched together, concentric paper hearts or in today's example, layered dovetail banners! A really simple, but oh so effective, way to incorporate 6 x 6 papers into our projects!
4. Be an illusionist!
Create the impression of larger papers with careful cuts and clever paper placement! I did this two ways with the dovetail banners in my layout.
Firstly, for the striped and wider looking banner, I diagonally cut the 6 x 6 paper from the top right corner to the bottom left corner. I then re-arranged the two cut triangles so that the longest lengths were vertical, and on opposite sides from one another. Next I overlapped one of the triangles over the other and taped it into place. You can't see the taped join because it's all hidden behind my photo cluster! So cool!
Secondly, I cut my thinner banners through the centers so that they became two pieces which I then shortened or lengthened beneath my photograph.
The trick is just to make sure they align correctly ;)
5. Build 'em up!
Connect your 6 x 6 papers together to build a longer or wider piece of paper! You'll see that I joined two sheets of the typed 'tis the season pattern paper to create a 6 x 12 sheet of paper. I also butted strips of papers together which I then tucked under the folded edge of the 6 x 12 paper. So clever!
That's just a few of my fave ways to incorporate the smaller pattern papers into my creating.
I hope it gives you some inspiration and ideas for the latest 6 inch 'Tis The Season Paper Stack.
How do you like to use your Elle's Studio 6 x 6 Paper Stack papers?
Be sure to share your tips and creations with me in the Elle's Studio Facebook Group HERE.
Thanks so much for stopping by today!
til next time,


Post a Comment