Elle's Studio: Digital Cut Fun Part 2!


Hi Creative Friends! 
Welcome back for more Elle's Studio inspiration!  

As you already know, I am just crazy for the monthly Digital Cut Files!
& today I am expanding on that love with

 Digital Cut Fun: Part 2! 

***If you missed Digital Cut Fun you can go back and check it out HERE***

Today's focus is on combining those awesome digital files with the monthly printable designs - yay!
Here's what the March set looks like....


Totally awesome, huh?!

I just adore all the cute bunny designs in the latest Happy Day Printables set, and couldn't resist creating an Easter page with them!

Here's my layout, 
"Bunny Love"


Oh the cuteness! Does it get any sweeter than this?!! And yes, yes, yesssss to all the bunnies!

You'll be surprised just how super easy it is to re create this look! 
Simply open the Happy Days Printables and select the images you wish to print. Edit sizes according to your needs & print away!
 I was super lazy and selected my images and just hit the 'share' & 'print' options in Microsoft Windows. I selected my sizes according to the options in Print Pictures. 
Yes, it's honestly that easy! 
 Fussy cut them out (or if you're really clever print & cut with your silhouette software) and voila! Rabbit season!
I especially love the heart icon which I over size to create the cut file bunnies tummy with! 
And speaking of cut files, here's how I created those sweet big feature bunnies....


Enlarge the white tail bunny digital design to 11 inches in height, left align the image and cut it out with white cardstock. Keep the cut out to use as a future template, and use the bunny 'hole' or negative to back with pattern papers. I love the softness and whimsy of the gray stars design in the Live Laugh Love 6 x 6 Paper Stack. As I opted to use 6 x 6 papers, I rounded the bunny chin & glued it over the other sheet of paper to avoid the appearance of ugly join marks. I then add that extra large heart icon to create the bunny tummy. So cute! Using black cardstock scraps, I snip out a nose and eyes for our sleepy bunny. A pink bow and faux stitching (black felt tip pen) complete the main rabbit. 


For the second pattern paper rabbit, you will need your previously cut out rabbit template. Position the template over the paper you wish to use. I chose the pretty pink hearts from the Live Laugh Love collection because they coordinated perfectly with the heart icon printable, and then it's a simple trace & cut! SO easy! Apply the faux stitching and glue into position. 

Now it's time to make the bunny banner! 


Suspend some baker's twine onto the top right hand corner of your page, and glue into place. Take your Happy Days Printable bunnies and adhere them to the string like flags. Divide each bunny with a Puffy Sticker star from the March Kit & Add-Ons, and add a pom pom cotton tail to each one! Adorable!

Use more of your printed bunnies to both adorn & layer your photo onto....


You'll also spot a few items from our March Kit here ;)

I add more of the printed bunnies to the left side of my feature rabbit too! 
Complete your layout with Puffy Alphabet Stickers, Enamel Dots & Heart Of Gold Chipboard Stickers. 
Simple, fun and oh so perfect for Easter memory keeping!


Layering cut files with printables is super easy but looks so effective!
I hope you'll give this technique a try! 

Thanks so much for visiting today!
til next time, 

Happy Arty Days, 
Amanda xo 


Shimmerz Paints: Exciting NEW Stampz & Inspiration!


Hi Everyone! 

Welcome back for more Shimmerz Paints inspiration!

I was SO excited when Shimmerz Paints announced that they were expanding their product range to include Stampz! Yayyyyy!!!!

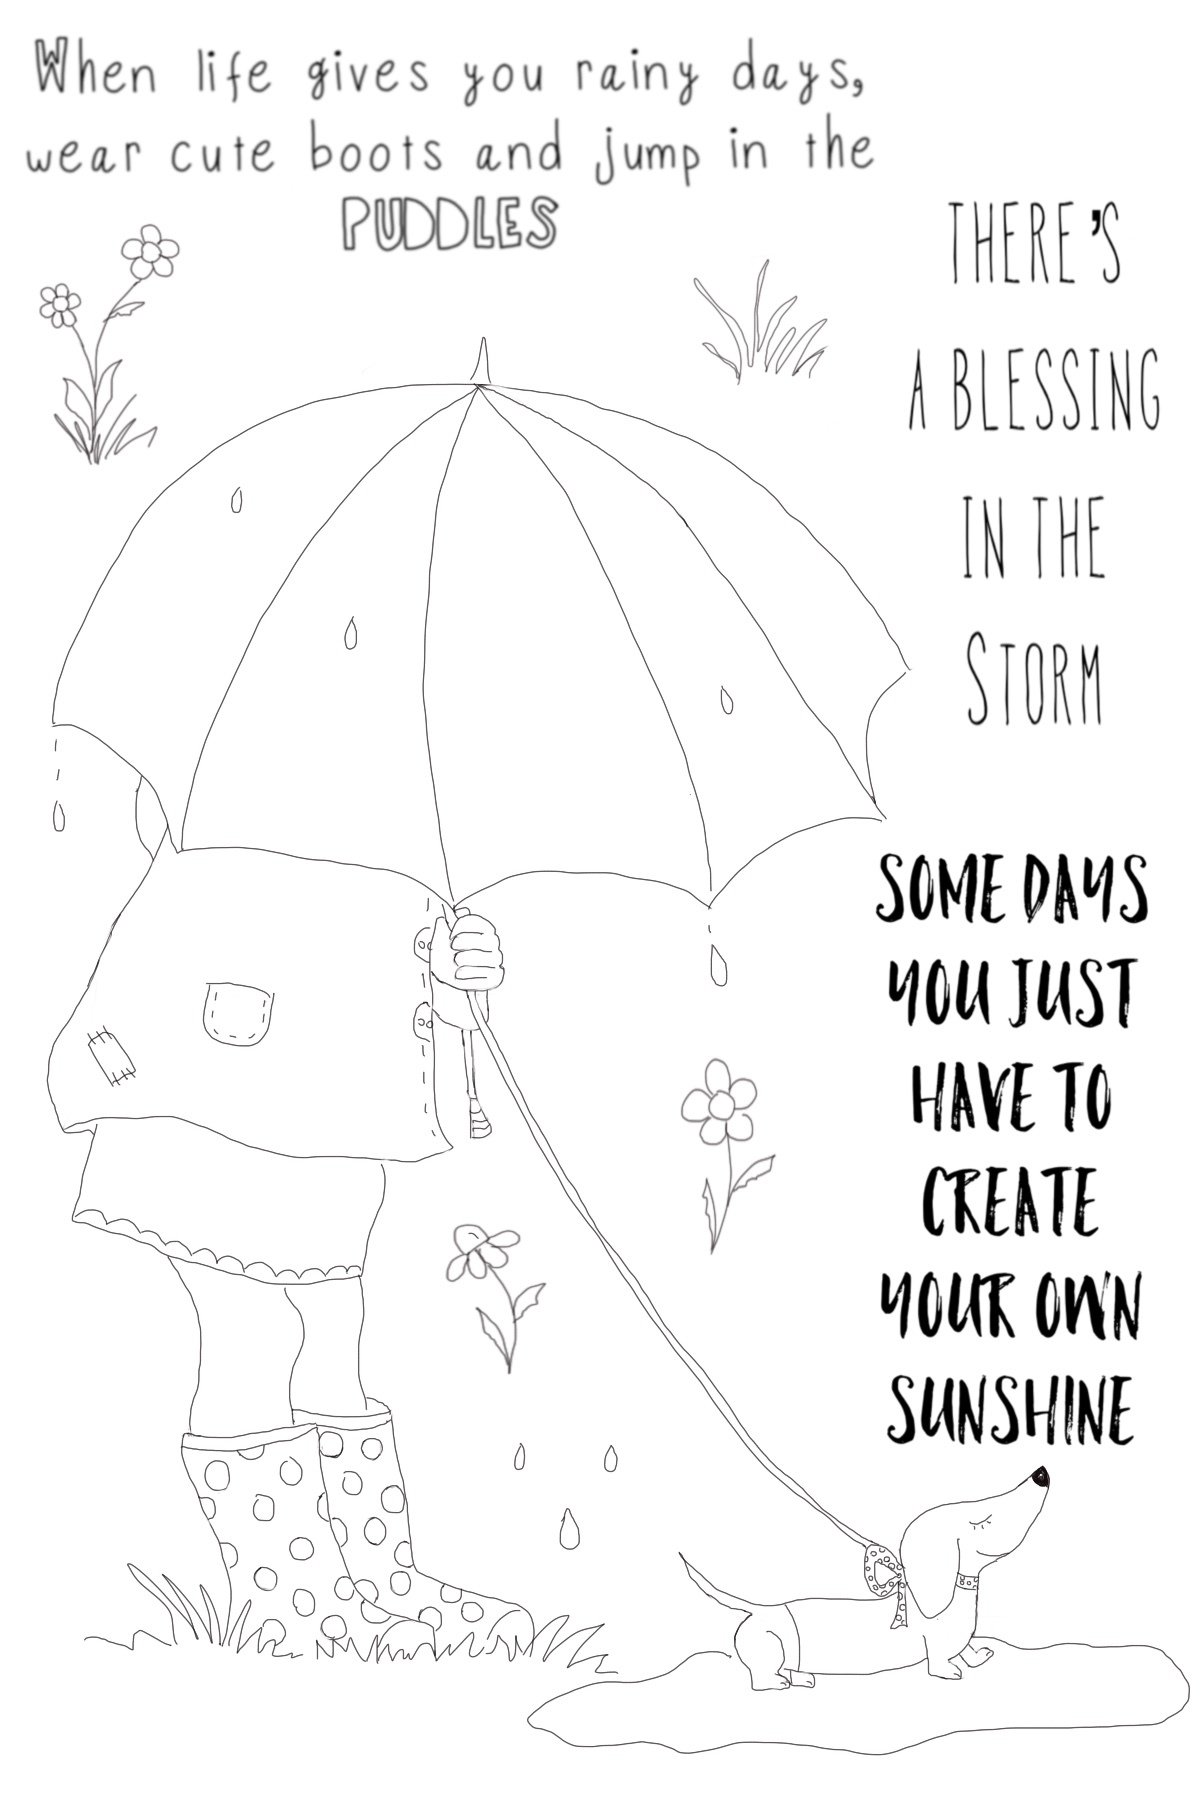
Here's my first card creations with them.....


Oh WOW!!! These Stampz are just sensational!!! 
Let's take a closer look at them.....


I heart this! It's such a sweet design!
I chose the last phrase for my first card.....


Create your own sunshine, indeed!
This is so fun & fresh! 
I have used a permanent black ink to stamp with, 
and then coloured the image with Shimmerz Paints Inklingz!

But if you prefer something softer, and more subtle, 
this second card may be more to your liking....


Oh isn't this divine?!!
I have used the first phrase, and coloured with Shimmerz Paints Creameez.
I just LOVE how this turned out! So soft and dreamy - it's my favourite!

Have a thing for florals?! Well this next Stampz set will be sure to win your heart!


So pretty, huh?! 
This time I coloured the intricate details with fine point pens, and then used Creameez Boogie Boardin' Blue for the sky background. So Sweet! 

And saving the best for last,


Sigh! Isn't this beautiful?!!
I couldn't adore this more if I tried! All.the.pretty.things in this Stampz set!
La la love it all! 

And there you have it! 
My first play and create with the stunning new Stampz from Shimmerz Paints!

See more of the fabulous Stampz, and order yours HERE! 

& REMEMBER: Type AMANDA in the comments section of your order to receive a free paint! Yay!!! 


Thanks so much for visiting today - I hope I have inspired you!
til next time, 

Happy Arty Days, 
Amanda xo 

Pebbles: Patio Party & Planner Inspiration!


Hi Creative Friends!

It's planning theme week over on the Pebbles Inc blog! 
And for this theme post, I wanted to share a makeover of my less glamorous, everyday planner! 
Not the over sized, over decorated planner that sits on my desk for flat lay photo shoots -  but the honest, everyday, no frills, pocket size one that I carry around in my purse! 
My 'real life mom' planner! 
You know the one, it has scribblings of new phone numbers, a reminder to pick up the dry cleaning, a few coupons and a list of bills to pay!


Yes... the boring, unexciting planner. 
BUT, that's all about to change with a quick planner make over!
I am using the gorgeous, bright & happy Patio Party collection for this cute planner inspiration today...


This line is so pretty, and the colors in Patio Party will brighten any dull organizer! And while I want to create a much happier, prettier planner I also want to keep it practical and easy to use -
Here's how....
My planner make over starts with creating my own custom dividers.


To make these 'fit' perfectly, use the original dividers that your organizer came with as a template. Trace the template onto your favourite Patio Party pattern paper and cut out. I also trace the holes so I know exactly where to hole punch my new dividers. As the first divider is the one I'll always see when I open my planner, I use the striking gold foil specialty paper from the 6 x 6 Paper Pad.

*Note: The 6 x 6 papers are single sided, so you'll need to repeat this process - reverse side up for the template, and adhere both sides together to create the one divider*

The striped, shiny gold pattern is just gorgeous but as this is the front cover divider, it still needs more....


I embellish with a few stickers from the 6 x 12 Accent Stickers sheet. Cute! 
That sentiment sticker has just the right amount of inspiration too! Now that I'm happy with my first divider, I proceed to make one for every tabbed section in my organizer. 
This time, I use the double sided 12" x 12" pattern papers so I only need to trace each template once. 
Here's a look at them all, right side up.....


Aren't they the sweetest?! I'm already feeling uplifted! 
Here's the reverse side....

Pretty florals, and oh my heart, flamingos!!! 
What a difference a set of dividers can make to your organizer!
And when it comes to being organized, having a bookmark to instantly locate your fave section of your planner is essential!


How sweet is this book mark?! 
Like the dividers, I use the original as a template to trace around, cut out and hole punch. 
So simple, and yet such a practical and pretty adornment to  your organizer.
Speaking of practical, how about something cute 'n' fun to store all those ugly coupons in?


Oh hello flamingos & hello happy! This planner pocket makes me smile!
There are a number of ways to create pockets, but the simplest one is to trace your divider template, but double the width. In my example my planner is 3 1/2" x 5", so I cut out a 3 1/2 " x 10" piece of paper. Score down the center, fold and tape the base and sides together.  Be sure to leave the top unsealed so you can insert your bits 'n' pieces into the pocket. 
Looking for something more sturdy? 
Instead of tape, machine stitch the sides and base.
The next step in 'dressing up' my everyday planner was to convert the plain plastic pocket inserts into something a bit more special....


Eeep! Sequin shaker pockets are my favourite!!! So cool! 
This pocket now doubles as a super pretty divider!
To create this fun (& practical) pocket, you'll need to insert a piece of pattern paper into the pocket. It needs to be a snug fit to help hold the sequins in place. Add sequins, and then fuse or glue the top of the pocket to the pattern paper. Embellish with another of those gorgeous 6 x 12 Accessory Stickers. You'll see in the image below that the back of the pocket still opens, and remains suitable for storing small items, receipts, tickets etc. ...


Love this! So perfect & so much fun!!!
Time to dress up that dashboard and boring cover!
I start by selecting a few of my favourite Die Cuts, and hot glue a large paperclip to the back of each of them. 
Here's a closer look for you....


Oh what a stunning page marker! Planner clips never looked so sweet!
Insert them into your cover, add a few more stickers and voila!


Now that's more like it! 
Still lightweight, & practical for my purse, but oh so pretty too!!!
Here's a look at that shaker pocket in action....

Gorgeous!!!
When it comes to jazzing up your organizer, or updating it with a fresh Spring look, Patio Party is the perfect choice!

I hope you feel inspired to get creative in your planners and organizers with our beautiful products!

Thanks so much for visiting today,
til next time, 

Happy Arty Days, 
Amanda xo
PATIO PARTY SUPPLIES:


Pinkfresh Studio: Let Your Heart Decide!


Hi Creatives!

Welcome back for some stunning Pinkfresh Studio inspiration using the gorgeous
 Let Your Heart Decide collection! 
I have created two very sweet pages for my share today - 
one for the girls, and one for the boys! Perfect!
As the saying goes, ladies first - so here's my feminine layout, 
"Sweet Girl"

Oh isn't this delicate and divine?!!
Such a clean, and crisp look that is so refreshing and fun!
She really is such a sweet girl, and the pretty colors in this collection simply make her black and white photograph shine! 
I absolutely adore the WHIM pattern paper, and that gorgeous hue of pink was perfect for backing my cut file heart onto. The cut file is a FREE one from Paper Issues called Autumn Blessings and you can download it HERE
With so many floral elements to this line, I just had to make a feature of them! 
I back the cut file blooms with pattern papers QUIRK & ESCAPADE from the 6 x 6 PAPER PAD, and embellish them with WOOD VENEER STICKERS, LEATHERETTE STICKERS & EPHEMERA DIE CUTS. 
Simple, but so effective!


I position my photograph on the other side of the cut file heart, and embellish it with a few floral LAYERED STICKERS, and that  DIE CUT EPHEMERA subtitle, Dreamer. To add a lil whimsy, the subtitle is underlined with that cute scalloped LEATHERETTE STICKER....


SO much fun! 
And those PUFFY ALPHA STICKERS for my Sweet Girl title are just incredible!
I balance all the crisp white cardstock with the warmth of another WOOD VENEER STICKER and then embellish around my photo - how cute is that hummingbird?!! Love it! 
For finishing touches, I add a super sweet PUFFY STICKER bow to the top of my heart....


Simple, sweet and such a pretty page that you could easily recreate at home!  
And now for the boy!
He's called Mister A for Awesome in our house, and you'll see why....

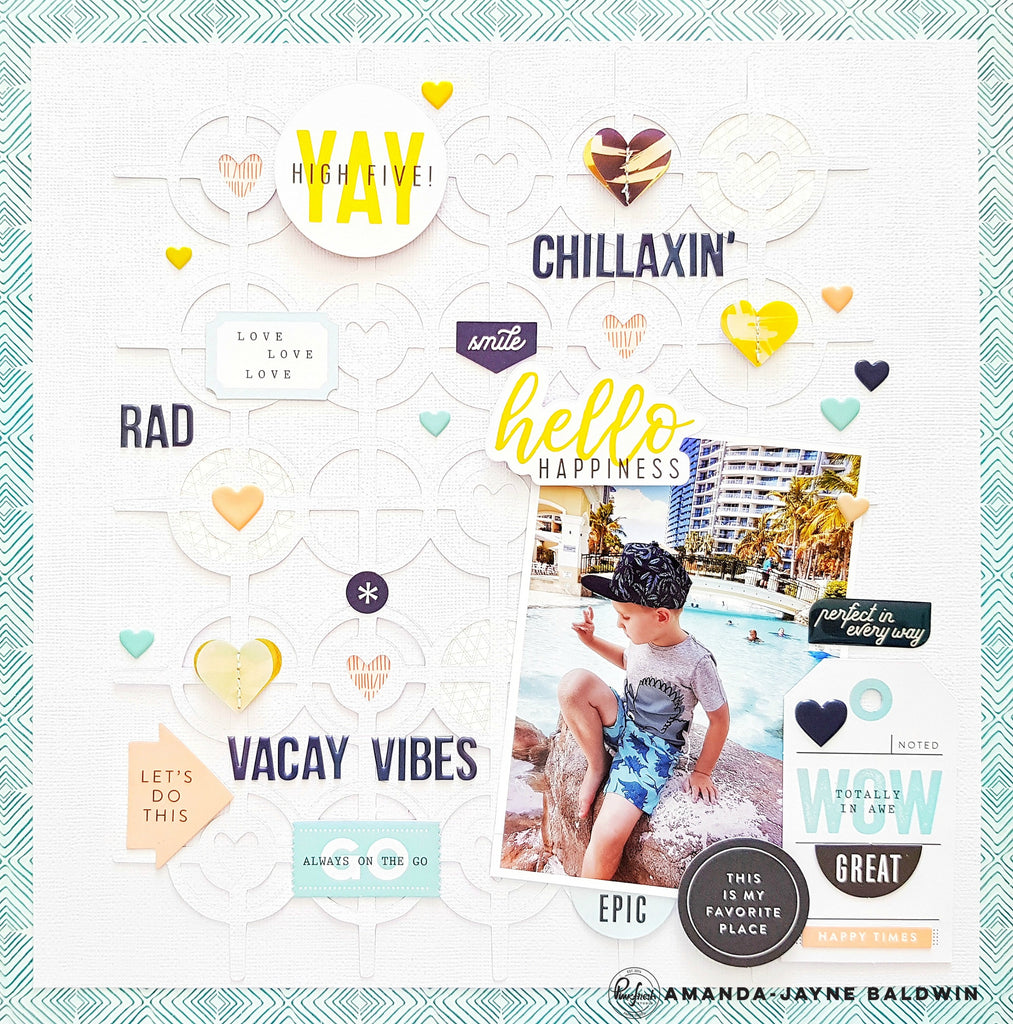
"Vacay Vibes"


Oh Mister Cool, indeed!
This photo is from our recent vacation, and as you can see he had all the chillaxin' under control, lol! He is so much fun to hang out with! 
In keeping with my previous layout, I have opted for another cut file on my white cardstock base. To add 'strength'  I have used a more masculine target style heart cut file - it's also a FREE one from Paper Issues (they have ALL the best free files) called Mark Your Spot. Grab yours HERE! I have also reduced my white cardstock base to 11 x 11 inches, and layered it onto pattern paper, CAPER.
I back a few of the cut file hearts with pattern paper QUIRK from the 6 x 6 PAPER PAD, and then use the embellishments from The Mix No. 2 collection to adorn my layout. 
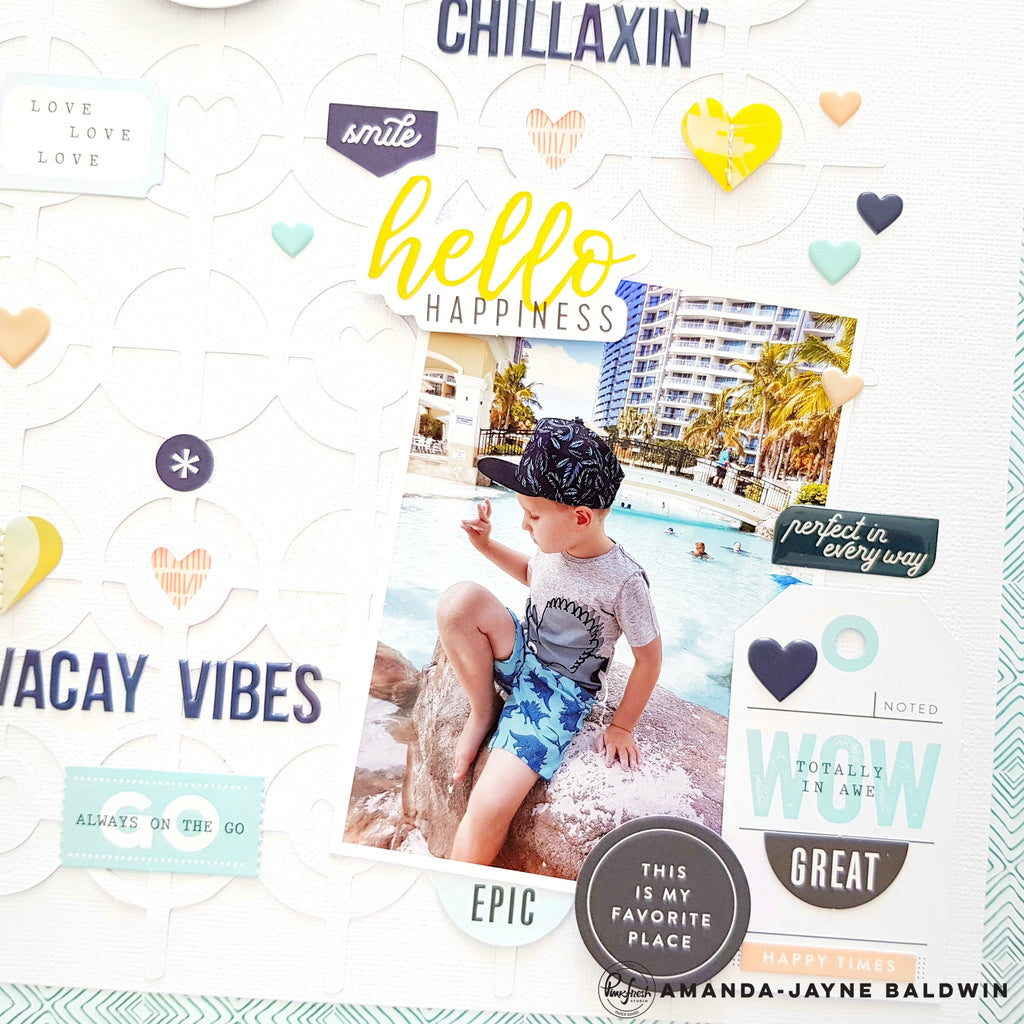
The PUFFY ALPHABET STICKERS are my favourites..... 


So awewsome, huh?! And the navy color really pops against all the white!
The DIE CUT EPHEMERA and CARDSTOCK STICKERS are pretty cool too - but it's those STITCHED HEARTS that I can't get enough of! Such a fun embellishment! 


For my photo cluster, I have layered a few stickers onto a DIE CUT EPHEMERA tag, and then positioned the tag onto the edge of my photo. You'll also spot that fabulous EPOXY STICKER, and my mounted subtitle Hello Happiness


For finishing touches, I scatter PUFFY STICKER hearts throughout the design. Love it! 
And there you have it! One for the girls, & one for the boys with the delightful
Let Your Heart Decide collection!

Love the Pinkfresh Studio as much as I do?! 

Shop all the Pinkfresh in the Paper Issues store HERE
& REMEMBER: Code AMANDA will save you 20% off your total spend! Yay! 
Which layout was your favorite today? Be sure to let me know in the comments section, 
and thankyou for stopping by today!
 I hope my layouts have inspired you!

til next time, 
Happy Arty Days, 
Amanda xo 

Paper Issues: April Swag Bag Spotlight!


Hi Everyone!

Welcome back for more Paper Issues awesomeness with this month's edition of 


It's no secret that I LOVE the Swag Bags and the March Kit: I've Got This! is just brimming with treasures!
Here's what it looks like....


Oh me, oh my!!! This IS awesome!

Here's what I've created....

"Dream"


Ohhhh! So very dreamy, indeed! 
I just loved the soft colour palette of the Pinkfresh Studio embellishments that were included in the Swag Bag! I use them to inspire both my design and color scheme! 
You'll also spot some fabulous FREE Paper Issues Cut Files on my layout - they're from the Sky's the Limit set which looks like this.....


What a terrific cut file! You can grab it HERE for free!!!

Cut files are the perfect partners to Swag Bags, and the possibilities with them are just endless!

Here's a closer look at my layout.....


Oh hello everyday magic, indeed! 
Those clouds are the cutest! I've embellished them with cute heart stickers and that tassel bow from the Pinkfresh Studio: The Mix No.2 collection. Love!


Lots of lovely layers beneath my photo too!


How gorgeous is that background?! 
The blue really makes the cut file title stand out. 
The die cut butterfly is from the new Paige Taylor Evans collection - Pick Me Up, and was from the Swag Bag too. It just adds that extra element of whimsy and playfulness! 

And there you have it! 
My first layout with the March Swag Bag!
 I say first because since creating this layout, I've made another 2 pages! 
Yep, the Swag Bags are that good!!!

Swag Bags sell out in the Paper Issues store super fast! 
To beat the rush & avoid disappointment, you can get a subscription HERE

REMEMBER: Code AMANDA will save you 20% off your total spend too! Yay! 


And, if you need Shimmerz Paints visit their store HERE
& Type AMANDA in the comments section of your order to receive a freebie! 
Yay for free paint! 

Thanks so much for stopping by today!
I can't wait to see what you'll create with your Paper Issues Swag Bags! 

Be sure to upload your new creations in the Paper Issues Friends and Fans Facebook group HERE (April Challenges Album) to go in the draw to win a Paper Issues Gift Card!

til next time, 

Happy Arty Days, 
Amanda xo 

Pinkfresh Studio 4th Birthday Bash Blog Hop!


Hi Crafty Friends!

Welcome to the

Pinkfresh Studio 4th Birthday Bash Blog Hop!


If you've just arrived here from lovely Vicky's blog, then you're in the right place!
If not, here's the hop line up for you.....

Blog Hop Order:

Start here--->Pinkfresh Blog
You are here--->Amanda Baldwin

**Remember you need to visit and comment on ALL the stops along the way to be eligible for all the amazing giveaways!**
And speaking of giveaways, here's the prize you could win just for commenting on this post!
Displaying PFGiftCard-40PrizePackage.jpg

Oh Yay!!! A scrapbook prize pack worth $40!!! 
Infact, every stop you visit along the hop has its own prize up for grabs PLUS there's a few more giveaways happening including this awesome one....


Instagram 24 Hour Stories Giveaway

Pinkfresh Studio will give one lucky winner a $100 Gift Card to the Pinkfresh Store. All entrants have to do is repost the Birthday Bash story. A winner will be selected within 24 hours.  


Note: All other giveaway entries close Monday April 9th at 6am PST, & winners will be posted on the Pinkfresh Studio blog on Monday 9th April, at 12:30pm PST. You will need to check the Pinkfresh Studio blog to see if you're a winner. 


I absolutely adore Pinkfresh Studio and all their incredible, modern and contemporary paper crafting products. It is such an honour to design for them and I wish them many happy returns for their birthday!
Enough chatter, let's get onto the good stuff!
Here's my scrapbook layout,

"So Lovely"


Sigh! So lovely, indeed! 
I have used the gorgeous Be You collection, and am totally swooning over this line! 
From the soft colors, to the rose gold foil accents & all those pretty blooms, this collection has my heart! 
You'll spy pattern paper REAL as the base for my layout, and because of its unique pattern, it doubles as a border for my centered photo cluster too! 
Pattern paper that does all the hard work for you - love it! (& it's a floral - need I say more?!)
I mount my photo onto a base of hand coloured, floral cut files, and all those fabulous Be You embellishments! 

Let's take a closer look..... 


The Ephemera Die Cuts with Foil Accents are perfect for building up my floral base with, as are the Chipboard Sticker leaves! You'll also spot a few Puffy Stickers and even some Wooden Epoxy Buttons too! Just gorgeous! 
To complete the photo cluster, I adorn the main cut file flower with a Chipboard Sticker, and then add a subtitle Puffy Sticker to my sweet photograph. 


To complete this sweet page, I use the super shiny, rose gold Puffy Alpha Stickers for my title!
And there you have it!
Simple. Uncomplicated. And oh SO lovely! 

I hope my layout has inspired you to get creating with this Be You tiful collection ;)

***Please remember to leave a comment to be eligible for the giveaways!***

Thanks so much for stopping by today! 
Time to send you hopping over to the super talented Amy's blog! She has something wonderful to share with you! 

Goodbye & Goodluck!

til next time, 
Happy Arty Days, 
Amanda xo