Elle's Studio: September Kit & New Releases!


Hi Creative Friends!

Welcome back to the Happy Arty Days blog!

It's the 10th day of the month & we all know that means {squeal!} it's 

Elle's Studio New Release time! 

Yessssss! 
So.much.awesomeness! 

Here's the a look at the Exclusive September Kit....


How fabulous is this?!! Another amazing kit full of fun & fresh designs! 
And the Add Ons are just as good.....

Wow! Stamps, veneers, acrylics and more!
This makes my creative heart happy!

And last, but by no means least, here our the incredible Digital Cut Files and Printables for September....


Label LOVE!!!!

Before you race to the store to shop all these yummy products, 
here's a little inspiration and eye candy with them for you.....

"All The Details"


My Favorite indeed! 
What a wonderful moment captured & documented! 
And how amazing is that stamping?!! 
I have repeat stamped the Love This heart icon from the Right Now Stamp Set in Saffron Yellow ink. I also stamp lime colored ink sentiments around the border of my design - so cool! 
Here's a better look.....


So awesome! 
As well as the lime ink sentiments, you'll also spy a border of Here + Now Phrase Stickers too! 
The remainder of my layout is made from the Exclusive September Kit, September Labels, and our Noteworthy collection. 

Here's a few close ups for you....


Those stamps are just incredible!!! 


The Epoxy Stickers are from our Noteworthy collection, and are the perfect addition to any project!


Such a fun way to document the start of the Fall Season! 

I am sharing more stamp love on my second layout today too.....

"You Are My Favorite Story"


Oh WOW!!!
How awesome is this?!! 
So many beautiful products, cool layers and amazing stamped details!
Here's a better look.....


LOVE this! 

Inspired by the Story Acrylic, and the art of telling stories, I tried to make my Noteworthy layout base similar to an envelope. I position that fabulous title (made from our Hazel Alphabet Stickers, Story Acrylic and Good Eats Wood Veneer) onto the faux envelope fold - really drawing attention to it!


The Elle's Studio Add Ons are always super awesome & that exquisitely cut Story Acrylic is just errrrything!!!
But it's the September Kit teamed with our new Quoted Stamp that I am totally crushing on!!!


How cool is that stamp?!!! 
I stamp the speech bubbles in the royal & sky blue inks, and then use more of those fabulous Hazel Alphabet Stickers to add my sentiments & journaling.
I also stamp the quotation marks in royal blue ink around my photo cluster. Such a fun, inky alternative to using scattered enamel dots or adding painty splatters to a background! 
My photo layers combine the cards & die cuts from the September Kit, as well as the September Labels, Here + Now Phrase Stickers, September Label Stickers, & our Noteworthy collection


So.much.fun, indeed! 

I hope my layouts have inspired you! 


I'll be back in a few days with more Elle's Studio inspiration for you!
'til then, 
Thanks so much for visiting!

Happy Arty Days, 
Amanda xo 

Pebbles: Fall Memory Keeping with Spooky Boo!


Hi Friends!

Today I'm sharing the Pebbles love,
 with a super sweet Fall themed layout!
Created with the new Spooky Boo line, the warm tones and pretty plaids are sure to win your heart!
Here's my layout....

"Dream Big"


Isn't this Halloween line just perfect for Fall memory keeping?! I was totally inspired by the Falling Leaves paper, as well as the plaid patterns, and my own memories of quilting and sewing in the cooler months. I love that this fun geometric heart design has a cut file appearance, but is actually created from hand cutting!
Here's how to recreate it....

Start by preparing the layout base. I select pattern paper Falling Leaves , 
and layer it with an 11" x 11" white cardstock background.


Next, select your Spooky Boo pattern papers, and then trim at least five  3"x 3" squares. I chose papers Meow, Hocus Pocus, Hey Pumpkin & Falling Leaves for my layout.

Trim each 3 inch square into equal triangle quarters by cutting diagonally.

Take the triangles and arrange them into a geometric heart design. Play around with the patterns & design, and once happy glue into place.

Prepare your photograph. I use a layer of vintage book paper, and those super cute pumpkins from the Printed Cardstock Shapes pack. These pumpkins are actually Jack-o-Lanterns with spooky faces, so I strategically covered them with the sentiment and blooms. Perfect!

Adhere your photograph to the geometric heart.


Embellish around the photo with more Printed Cardstock Shapes, as well as that gorgeous Wood Sticker from the Jen Hadfield Patio Party collection. The inclusion of the wooden embellishment really adds to the warm, outdoorsy, Fall feel of the layout.


Add the layout title and subtitle, with the Patio Party Thickers. Again, the wooden appearance really emphasises the  Fall look.


I even add a few of the laurel leaves from the Patio Party Thickers into my photo cluster.


So simple, and yet, oh so beauti-Fall!


In keeping with the quilted look, I also embellish with buttons and sequins from my sewing box. Cute!
I add the gold stars from the Printed Cardstock Shapes pack, as well as a few tiny butterflies which I fussy cut from the barcode trim on the bottom of the Falling Leaves pattern paper.
For final touches, I use my WeRMemoryKeepers Typewriter to add a little journaling beneath my photograph.


Voila!
 A lovely seasonal page that's super easy to recreate! Love it!
I hope I have inspired you to get creating with the beautiful Pebbles products!

Thanks so much for visiting today, 
til next time,

Happy Arty Days, 
Amanda xo

Pebbles Supplies Featured
Other Supplies:
WeRMemoryKeepers Typewriter


Spellbinders Guest Designer : Inked Messages Stamp & Die Sets #3


Hi Crafty Friends!

Welcome back my final guest post projects with Spellbinders
If you missed my earlier posts you can go back and check them out here. 
I have really enjoyed creating with the beautiful 
I hope my projects will inspire you to try these fabulous products! 


Roses are a favorite of mine, so I couldn't wait to play with that stamp first!
Here's what I created....


Sigh! Aren't these stamps divine?!! 
With such beautiful and intricate designs, I opted for a clean & simple approach to really highlight them! 
Both cards are created from smooth white cardstock. The stamps are also printed onto this cardstock, and applied using black permament ink. I use colored markers to fill the images, and then use my Platinum 6 Die Cutting & Embossing Machine & their coordinating dies to precisely cut them out. 
Here's a closer look....................


Isn't that Siren / Sea Faring Girl just stunning?! 
But it was the roses that had my heart! Gor-jus!
I pop a little white tangled thread beneath the large rose, and then glue the rose on top. I use thick foam tape beneath the Siren, and attach to the card front. 
A few clear rhinsetones complete this striking CAS card! 

I use a similar approach for the larger 5" x 7" version.....


Loving the red for the roses! So elegant and beautiful!


That Siren is a lil mesmerising! What a heartbreaker!
SO many creative possibilities with this set! LOVE!

Last, but by no means least, I am sharing two support and healing cards.....


Oh, how lovely! 
What a beautiful way to show someone that they're loved & not alone during tough times! 
Like the previous cards, I have stamped onto smooth white cardstock, and filled the images with ink markers. I use their coordinating dies to cut them out, and again, feature tangled threads beneath the main image. I use foam tape to add a little dimension, and embellish with a few pearls. 
Super quick & simple, but oh so pretty! 


The inclusion of lace trim beneath the stamped image really softens this somber card. With it's cooler color scheme, this card would be very appropriate as a sympathy card.  


With a modern and warm color scheme, this card is ideal for your bestie's break up blues! The warm colors signal playfulness and hope. Such a great idea for this stamp & die set!


Absolutely Beautiful! 

Spellbinders Supplies: 

Thankyou so much for visiting today!
I hope you enjoyed seeing my creations with these gorgeous products!
I have loved being a Guest Designer for Spellbinders and hope to share more with you again soon!

til next time,  

Happy Arty Days, 
Amanda xo 


Spellbinders Guest Designer: Inked Messages Stamp & Die Sets #2


Hi Crafty Friends! 

I'm back with my second installment of Guest Designer creations for Spellbinders

I am just loving these coordinating stamps and dies! 
SO many beautiful designs with tons of creative possibilities! 
For today's post I am creating with the stunning 


I just adore the feather in this set - it really had my heart! 
But enough chatter, here's what I created with it......


Oh.my.heart! 
Did I mention how much I adore that feather stamp?! 
CAS card perfection! 
This stamp & die set is just divine!
Let's take a closer look......


How pretty is this?!!
Inspired by all things good luck; horseshoes, peacock feathers, wreaths and dream catchers - this card has it all!
I start with a 5" x 7" white card base, and layer the front with a 4" x 7" sheet of clear vellum. 
On smooth white cardstock, I stamp 8 feathers and one lucky horseshoe in black permanent ink. I color them with ink markers, and use their coordinating dies to precisely cut them out. 


I arrange 5 of the feathers into a circle (wreath) design, and glue into place. 


Next, I position the remaining 3 feathers below the wreath to create a dream catcher look. I place a twine bow over the join, and then foam mount the lucky horseshoe over the bow center. 
For finishing touches, I apply white Nuvo Drops on the flowers, and aqua gemstones on the peacock feathers. 


Simple, but oh so striking!!!

The second card is totally CAS, and I just love it!


Simplicity at its best!
Beautifully stamped, colored & cut images that are so striking they need very little to embellish them! 
Here's a closer look at that tonal coloring for you....


Just beautiful!

Spellbinders Supplies: 

Other Supplies:
Black Stamping Ink, Color Markers, Smooth White Card, Foam Tape, Aqua Gemstones, Nuvo Drops, Sequins, Twine.

I hope today's cards have inspired you and you'll pop back soon for my final guest post!
I can't wait to share my next projects with you!
Thanks so much for visiting, 

Happy Arty Days, 
Amanda xo 

Spellbinders Guest Designer: Inked Messages Stamp & Die Sets #1


Hi Crafty Friends!

 I am so super excited to be a guest designer for Spellbinders this month! 
I hope you will enjoy seeing my card creations over the coming week!
I will be sharing three creative posts as part of my guest role & they all feature the gorgeous
For my first post today, I am focusing on two fabulous stamp & die sets,

SDS-136 Rough Waters Stamp & Die Set 

Rough Waters Stamp and Die Set Inked Messages Collection by Stephanie Low

&
SDS-138 Grow Newer With Me Stamp & Die Set

Grow Newer With Me Stamp and Die Set Inked Messages Collection by Stephanie Low


I just love encouragement 'hang in there' cards so it was only natural that the first cards I created were from the Rough Waters Set.......


Oh aren't they pretty?!! 
The 'calm seas' sentiment combined with that fabulous anchor stamp immediately inspired the waved design, and a sense of being in the ocean. 
For both cards, I use black permanent ink to stamp my images, & then fill them using colored pencils. I don't use any particular techniques when coloring, but I am thoughtful with shadow & tone. I use the corresponding dies and my Spellbinders Platinum 6 Die Cutting & Embossing Machine to precisely cut the images. 
I would like to mention that they cut like butter in only one pass! Perfection!
 Here's a closer look at each card....


This card is 5" x 7" and is made with pattern paper. 
To keep with my feminine style, and to soften the anchor image, I layer my waved pattern paper with clear vellum. I also include the floral stamp from this set, using it to layer both my sentiment & anchor onto. Florals always add gentleness, and create a more delicate 'feel'.
Both my sentiment & anchor are applied with thick foam tape. This adds dimension to the card, and also ensures that they remain the focal points too!
Between the layers you'll also spy some white tangled threads. 
I love the inclusion of textiles, and these threads add both texture and interest. 


The attention to tonal detail really creates beautifully colored images.


I darken the colors in the shadow lines of the anchor to add more depth and definition to the stamped image.
A stitched trim & a few white Nuvo Drops complete this pretty, nautical themed, encouragement card! 

 The second card is 5" x 5" and makes for a sweet lil encouragement note!


For this card, I use a combination of the wave pattern paper & white cardstock. To draw attention the anchor 'bobbing' in the ocean, I cut the pattern paper along the wave line and mount it to the cardstock on the front of the card with thick foam tape. With no flowers to soften this anchor, I decide to color it with warmer tones. I use shades of brown instead of  the cool steel gray. I position tangled white threads beneath the anchor, and then attach the anchor with thick foam tape too! The sentiment is also mounted with foam tape. Lots of dimension for this tiny notelet! 
For finishing touches, I use the white Nuvo Drops, as well as a few watercolor droplets in blue. 
Voila! 
Beautiful cards to support a friend in troubled times! 

My second set of cards today are created from the Grow Newer With Me Stamp & Die Set and are also very pretty....  


Sigh! Totally swooning over this sweet romantic card!
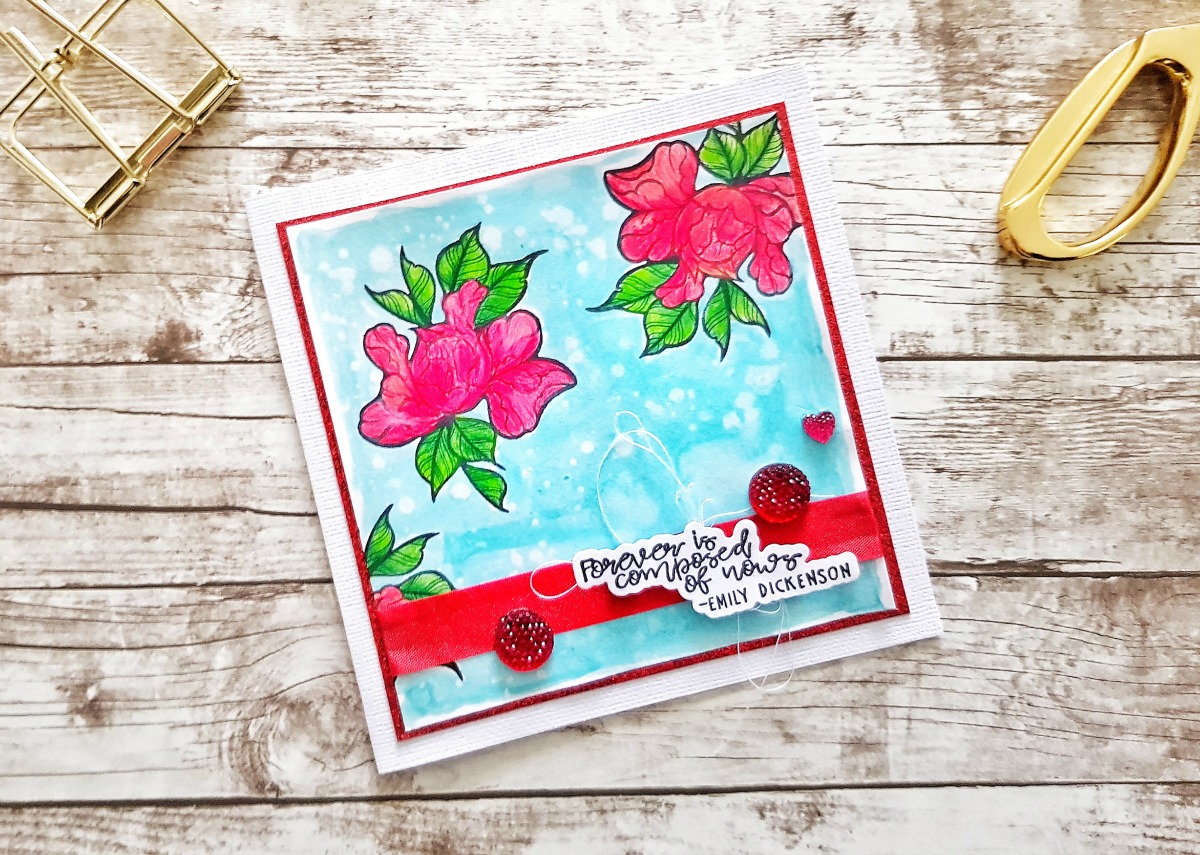
It is also a 5" x 5" note card, and I have stamped the blooms in both the top right and bottom left corners of the white watercolor paper base. I used permanent black ink, so that I could watercolor the images without fear of bleeding. For the leaves I use three different shades of green, and blend them just a little. I use two pink colors for the blooms, and then a pale blue for the background. I stamp & die cut my sentiment, and apply it with foam dots between the two blooms. Tangled threads, enamel dots & tiny pom pom trim complete the card front. 


So super pretty! I loved this set so much I whipped up another using both colored pencils and shimmering paint.....


Gor-jus!


Spellbinders Supplies: 


Other Supplies: 

Permanent Black Stamping Ink, Scrapbook Pattern Paper, White Cardstock, Nuvo Drops, Enamel Dots, Cotton Thread, Ribbon, Sparklets, Coloring Pencils, Watercolor Paints & Foam Tape. 

I hope my cards have inspired you to try these fabulous new release Stamp & Die Sets! 
Thanks so much for visiting! 
Remember to stop by soon to see more of my creations with the Inked Messages collection!
til next time, 

Happy Arty Days, 
Amanda xo