Elle's Studio: Document December: Prepping Your Album!


Hi Friends! 

Welcome back for more Elle's Studio inspiration! 
Today I am so excited to share how I've prepared my Document December album, as well as give you a few top tips & early glimpses too! 

What can I say?
 I just LOVE this Season, and Buddy the Elf maybe one of my idols, ha! #nogrinchhere
This year, I'm a little time poor so I've opted for a smaller, easier album to record this year's Festivities.

Top Tip #1:   Selecting a smaller pocket size album will ensure that we don't get overwhelmed by the enormity of documenting the season. 

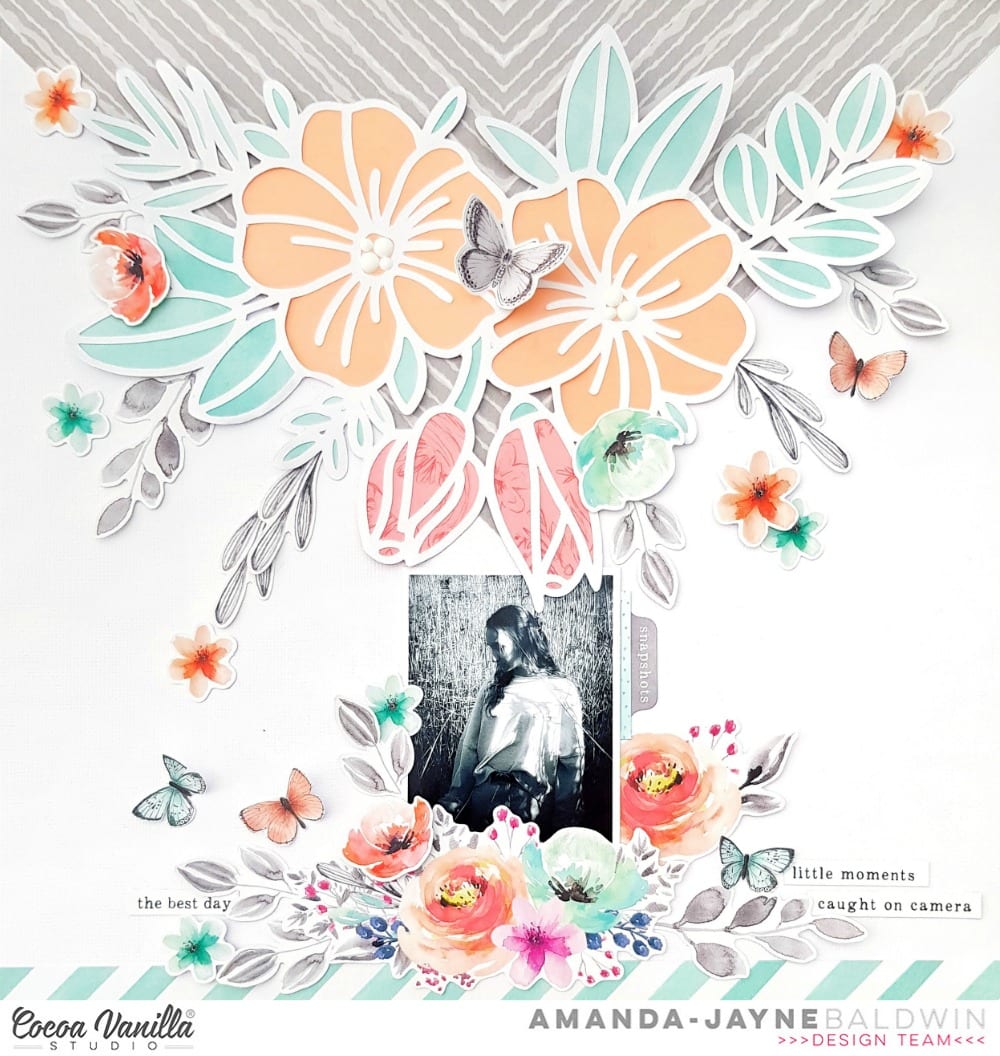
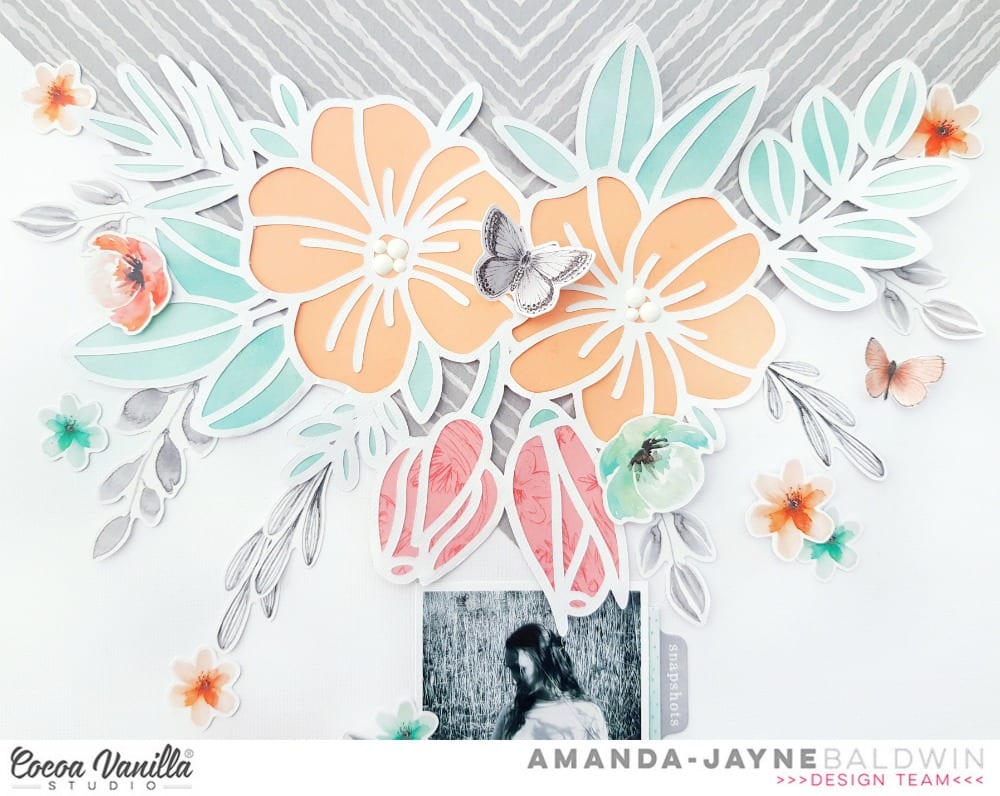
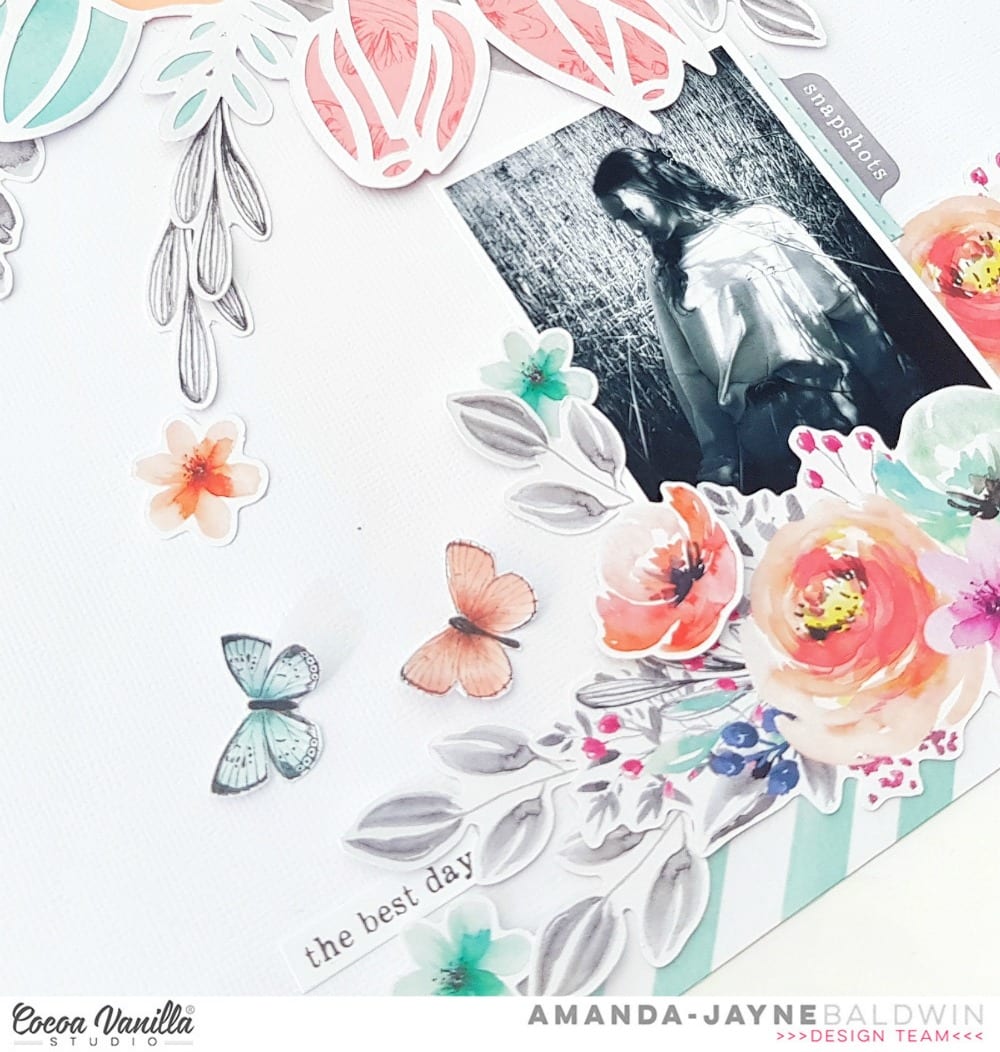
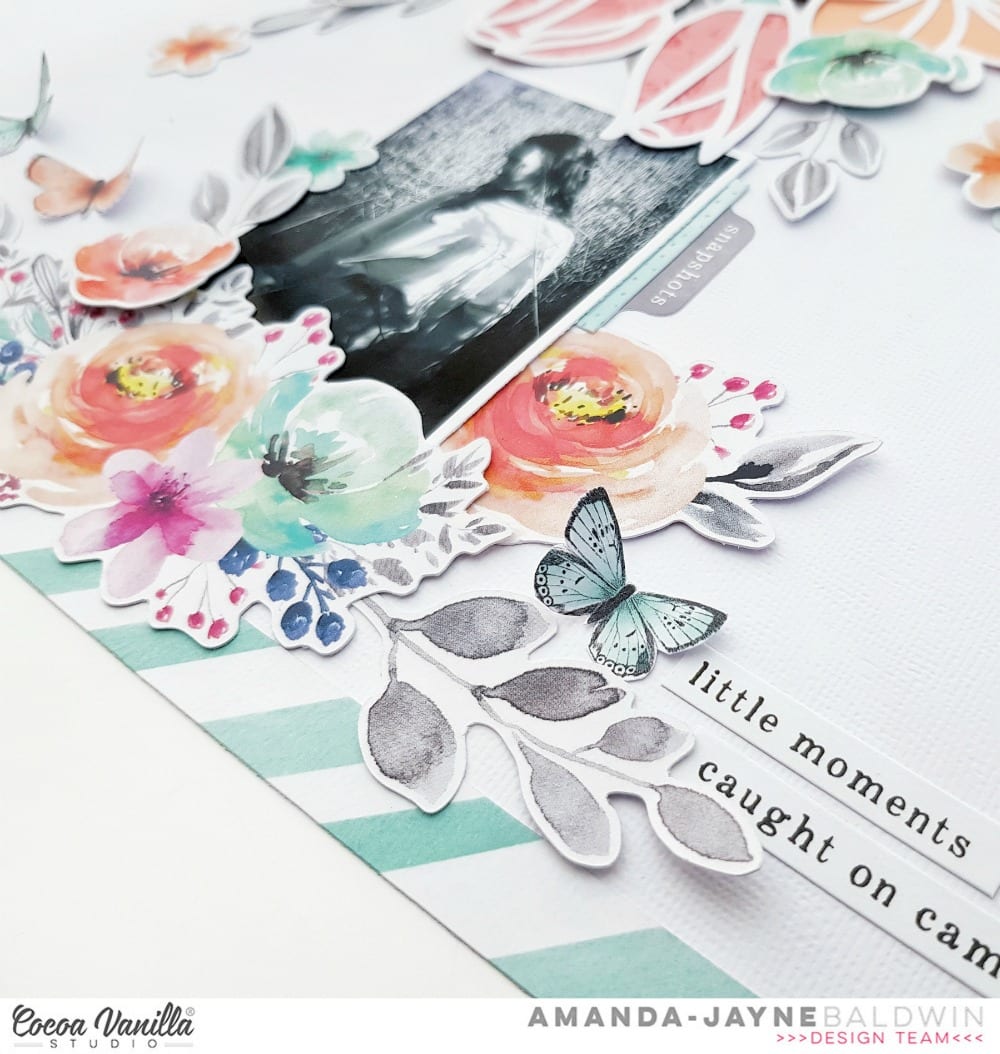
Here's a look at my album with a few of my fave Elle's Studio Document December supplies.....


The album is one of those 4" x 4" Instagram pocket page albums, but it was a tad boring for my liking! No surprises then that my album preparation involved quite a bit of embellishment & decoration. I started with the book plate and spine of the album, and added the year with our Red Dipped Puffy Alphabet Stickers. 


You'll also spot those cute candy canes from the Ho! Ho! Ho! Puffy Stickers and a heart from the Christmas Shapes and Dots Puffy Stickers. Super cute!  I also glued pom pom trim (from my sewing box stash) across the top of my album cover. The tiny pom poms reminded me of snow and really added a fun & playful element to the cover. 


And speaking of fun, I just loved decorating the cover! The Merry Christmas white acrylic was a perfect title & adornment for this year's album - take a peek! 


I'm so happy with how this turned out! Simple, sweet and really pretty! Those stocking Die Cut Shapes are errrything! And of course, I couldn't just do the front cover - so here's a peek at the inner cover too.


Umm, okay, wow! 
I may be completely smitten with the Document December Kit and this Season of Giving! 
It's the most wonderful time of the year, indeed! 

You'll notice that on my desk I have cut a whole lot of pattern papers to the 4" x 4" size to aid my album preparation. I have used both the Document December Kit papers, as well as one of the Noteworthy 12 x 12 Paper Collection papers too! 

Top Tip #2: When it comes to unusual sized albums, it helps to pre-cut a bunch of background papers so that all you need to do is print your photo and add a sentiment and sticker or two! 

Here's a closer look inside...


For the inside cover of my album, I combined the new Good Cheer Acetate Die Cuts with more of our Puffy Stickers. 

Top Tip #3: To avoid the appearance of glue behind the clear acetate, I used the puffy stickers to hide the spots and help hold the acetate in place.  

In keeping with my love for fabric trims and textural elements, I also added some vintage burlap lace & a couple of tassels from my stash. 


I attached the tassels to one of the album rings, and while I was there I decided to hole punch the Good Cheer Acetate star banner and thread it onto the ring as well. For maximum impact, I also threaded the large Gold Acrylic Star onto this ring as it's embellishments galore for this mini album! 

Top Tip #4: Hole punch Die Cuts & maximize embellishments with openings to use as 'dangling charms' on album rings. Great for adding interest & texture to your pages, as well as softening the appearance of the album rings. 


And lastly, but by no means least, to avoid over filling my pockets I adhered the Gold Dec 2019 Acrylic to the front of my clear pocket - not to the pattern paper base card! Such a great opening page to my super sweet DD album! 

Top Tip #5: Adhere larger embellishments to the exterior of your pockets to keep them from getting too bulky!

So it's beginning to look a lot like Christmas for me! I hope my DD album preparation has inspired you to get started on your Christmas documenting too! 

Thanks so much visiting,

Happy Arty Days, 
Amanda xo 

SpiegelMom Scraps: Scraplift Challenge!


Hi Friends!

Welcome back for more sparkly inspiration with my latest project for the Sparklers DT! 
Today's layout is for the scraplift challenge being hosted in the Spread The Sparkle Facebook group!
If you haven't seen it yet, we're lifting this fabulous layout by papercrafter, Katie Scott....

Image may contain: 4 people, people smiling

Gorgeous, huh?
Apart from those stunning sequins, 
I was instantly taken in by that fabulous heart cut file, the partially backed puzzle pieces & the embellishment cluster at the base, on the right hand side. 
Here's what it inspired....

"Baby Girl"


Sigh! Soooooo pretty! 
I have combined the That Summer Feelin' and Happy Vibes sequin sets to create this gorgeous page!
Best part? These sequins are still available in the SpiegelMom Scraps Shop HERE & code AMANDA15 will save you 15% too! Yay!!!

Here's a closer look for you....

Just stunning!

I have also used the beautiful Just A Lil Lovely collection from Pinkfresh Studio, as well as one of their brand new digital cut files, Heart & Floral. Inspired by the partially backed puzzle pieces, I decided to partially 'fill' my cut file with sequins. In particular, the leaves and blooms!
I just LOVE how effective this looks....

Super sparkly, & just divine!!!
And how cute are those tiny scattered hearts from the That Summer Feelin' sequin set?! 
LOVE!!!

Here's a look at those sequins adorning my sweet girl's photo....

Absolutely gor-jus!!!

And there you have it!
My take on the October Scraplift Challenge!
I hope you feel inspired to play along too! 
And good luck! (There's a $15 Gift Card prize up for grabs!)
Get all the details in the Spread The Sparkle Facebook Group HERE

Thanks so much for visiting, 
til next time, 


Cocoa Vanilla Studio: Unforgettable Little Moments!


Hi Friends!

Welcome back for more Cocoa Vanilla Studio inspiration!
Today I am sharing another super pretty layout with the gorgeous UNFORGETTABLE collection. For this layout, I wanted to create something really special for my sweet girl - I hope she likes it!
Here's what I came up with...

"Little Moments" 


Oh how preeeeeeeeeetty!!! Such a beautiful, floral page for my darling daughter!
Here's a better look for you...

 
Absolutely stunning!
You'll spy the B-side of pattern paper CV-UF 001 GLORIOUS taking center stage! I fussy cut this paper along its own pattern line, and took advantage of the directional quality it posesses. Not only does this clever cut paper encourage movement and flow, it essentially draws attention straight into my sweet photo - LOVE!!! Such a clever way to trim & use this paper! For added impact, I adorned this paper with that sensational floral cut file.

***Note: The cut file is called: Floral Bouquet Set and is courtesy of Cut To You***


It really is something, isn't it?!
 I used papers from the 6 x 8 PAPER STACK, as well as some peach coloured cardstock to back this file. I filled the flower centers with ENAMEL DOTS pollen, and then embellished on and around the cut file with DIE CUT EPHEMERA blooms & leaves. To complete the look, I positioned a DIE CUT EPHEMERA butterfly in between the two large cut file flowers. 
Perfect! 
Like the GLORIOUS pattern paper, these cascading blooms lead you straight to my beautiful photo.....


Beautiful, indeed!
I tuck my photo into that gorgeous array of blooms, which are from the DIE CUT EPHEMERA pack. I also anchor my layout with a half inch trim of the reverse side of pattern paper, CV-UF007 SPRIGHTLY. This trim is errrrything!!! I just adore how it encompasses my overall design and forms the perfect base to this page!


I embellish this photo cluster with tiny fussy cut butterflies from the 6 x 8 PAPER STACK, more DIE CUT EPHEMERA flowers, and a couple of ACCESSORY STICKERS which I position beneath my photo!


For finishing touches, I add a few of the sentiment stickers from the ACCESSORY STICKERS sheet.


Simple. Sweet, and oh-so pretty!


A beautiful little moment captured! 
I hope it has inspired you to document your little moments too!
Thanks so much for visiting!
til next time, 

SpiegelMom Scraps: Captured Layout & Process Video


Hi Friends!

Welcome back to the Happy Arty Days blog! 
Today I am super excited to be sharing another sparkly creation for the SpiegelMom Scraps, Sparklers Design Team!

Here's a quick look see at my project....

"Captured" 

Oh isn't this pretty?!!

You'll spy the following SpiegelMomScraps sequins on this layout....
&

You can shop ALL the lovely sequins HERE
& remember: code AMANDA15 will save you 15% off! Yay!!!

I teamed these pretties with the beautiful Cocoa Vanilla Studio: Unforgettable collection, to create my lovely Fall themed layout. 

Wanna know more?
Please stop by my channel to watch the process video for this pretty page....


Thanks so much for watching & subscribing to my channel - your support means so much! 

I hope I have inspired you to get creating!
til next time, 


Technique Tuesday: Thankyou & Gratitude Stamping Inspiration!


Hi Friends!

Welcome back for more Technique Tuesday inspiration!
This month we're focusing on all the fabulous Thank You & Gratitude Stamps! 
Just in time for you to start documenting all those wonderful Fall, Thanksgiving & Grateful memories!
And speaking of Giving Thanks, Technique Tuesday would like to offer you a small token of appreciation by inviting you to their

Season of Thanks sale! 

From now through Thursday, 10/24, you can save 20% on thank you, grateful-, and Thanksgiving-themed stamps and dies.


Don't forget to use coupon code Thanks19 when you checkout! 

Here's a look at the fabulous stamp & die set bundle that I am featuring...


All kinds of awesome, huh?! 

Now, onto my project....

"Thankful, Blessed, Grateful"


WOW!!!
Isn't this gor-jus?!!
You'll spy most of the stamps from the Perfectly Wonderful Stamp Set here, and I couldn't help but use all the metal dies too!
Here's a closer look for you...


Absolutely stunning!!!
I've combined the August 2019 Hip Kits (in particular lots of Pink Paislee: Paige Evans: Truly Grateful collection), and the Gum Drops sequins from SpiegelMom Scraps with the Perfectly Wonderful Stamp & Blessed Crafting Dies set to create this lovely page.
I started my layout by die cutting my two titles (and a few leaves) in smooth goldfoil cardstock. 


I just love how effective this looks! 
I mean, those script words are errrrything!!!! 
SO incredibly good! 
& even better, they cut like butter!!! 
Yay for user friendly, beautiful script, word dies!

Here's an even closer look....


You'll also spy that amazing arrow stamp! 
I repeat stamped it onto some smooth white cardstock in black ink. I fussy cut the arrows out, foam mounted them for added dimension and used them to embellish my title.


Speaking of repeat stamping, you'll notice that I repeated the leafy vine in clementine dye ink to trim the base of my layout. I also stamped up a variety of the leaf & vine stamps onto my page using both red & orange inks. Gorgeous! 
To build up the page, and add even further texture & dimension, I used the leaves metal dies on some  pattern paper from the Paige Evans Truly Grateful collection. This really creates interest to the design, and adds that extra wow!


For finishing touches, I stamped a number of the sentiments in black ink across my scrapbook page. 


So very beauti-Fall!
I hope I have inspired you to get creating with these wonderful products!

Be sure to grab your favorite Thankyou & Gratitude Stamps (and discounted bundles) from the Technique Tuesday store HERE. 

And remember if you shop between now & Thursday 24th October, 2019 the coupon code Thanks19 will save you 20% off when you checkout! Yay!!!

Thanks so much for stopping by today! 
til next time, 


Pinkfresh Studio Ink Pad Release Blog Hop


Hi Friends!
Welcome to the Happy Arty Days blog! 

I am so super dee duper excited to be participating in the 

Pinkfresh Studio Ink Pad Release Blog Hop! 

These premium dye inks are absolutely mind-blowing!!! Like seriously, aaaah-MAZING!!!!

If you've just arrived here from the Pinkfresh Studio blog, then you're in the right place! 

If not, or you feeling a lil lost on the hop, visit Pinkfresh Studio HERE to find your way.

It's a pretty big hop, but I assure you the inspiration from all our designers, plus the fabulous prizes make it worth all the effort! 

And speaking of prizes, here's what you need to know about the Giveaway.....


Pinkfresh Studio will be giving away the full sized ink pad release on the Pinkfresh Blog.
Pinkfresh Studio will also giveaway the full mini cube release on their IG feed.
PLUS
Every designer featured in this blog hop will be giving away a $25 gift card on their blog post.

The winners will be picked by Pinkfresh Studio from the comments, & posted
on Monday, Oct 21st on the Pinkfresh Studio GIVEAWAY PAGE.
It is your responsibility to check this page & claim your prize within 2 weeks.

Good Luck!!!


Oh, and before I forget, there's one more piece of important information I need to share...


FREE shipping in the USA for all orders $100+ (USD)!!!


Yes, you read correctly!

Spend $100+ USD and you'll receive free shipping within the United States without a code.
The shipping will be discounted automatically - you just have to select the correct shipping method upon checkout.

***Shop ALL the Ink Pads HERE***

Okay, now it's time to share my lovely scrapbook layout featuring a few of the beautiful new inks....


"Precious"


Oh, precious indeed!

Such an elegant and beauti-Fall layout!
And the colors in those inks are just divine!!!
Told you they're Aaaaaa-MAY-zing!
Here's a closer look for you....


Other supplies: white cardstock, watercolor paper & clear vellum.

Simply exquisite! 
The quality of these premium dye inks is second to none! SO impressive!
As this is a huge blog hop, I'll keep my write up short - but you can find out more in my process video at the end of my post ;)


For this pretty Fall inspired layout, I stamped up a variety of the leaves & foliage stamps from the Embroidered Blossoms Stamp Set. 

I also inked up some watercolor paper in Fresh Pear & Regal Kiss. 
I used these freshly inked papers to back the leaves & blooms in the Heart & Floral Digital Cut File. 
I think you'll agree that the results are truly stunning!!!


Beyond words beautiful!

Want to see how this layout was created?

Or maybe just wanna see these amazing inks in action? Please watch my process video below:


Thanks so much for watching!

I hoped you enjoyed my video!

Be sure to leave a comment on this post to go in the drawer to win a $25 PF Gift Card.

Time to send you hopping!
The super talented Anett Gelencsér is the next stop along the way!
Visit her blog HERE

Thanks so much for joining us today & Good Luck!

til next time,

Happy Arty Days,

Amanda xo

Elle's Studio: Halloween Trick or Treat! Shaker Cards


Hi Friends! 

Welcome back for moreElle's Studio inspiration!
Today I am sharing two spook-tacular Halloween greeting cards using the fabulous 
October Kit & new releases!


Say BOO!!! 
Aren't they just the cutest?!


Other: Black cardstock, circle cutter tool, cellophane/glassine bags, SpiegelMom Scraps sequins, enamel dots.

Halloween is all about the element of surprise, and having fun! 
And nothing screams childhood fun like a pocket (err, shaker pocket) full of candy! 


This card will have your recipients guessing if it's a trick or a treat, as it is such a fabulous card but you can't eat the candy, ha! Perfect sentiment for Halloween! 

Shaker pocket cards are really easy to create and give your cards that extra wow factor! 
Okay, enough of the chatter...  
Hocus Pocus, it's time to focus!

For these cards, I used two sheets of black cardstock. I cut each piece to the following specifications: 10" x 7"  to create the cards, plus a 5" x 7" sheet to create the shaker window. 
I scored & folded the 10" x 7" sheets of card at the 5" mark to create the card bases. 
For the card fronts, I used a circle cutting tool to cut a large circle window at the top of the 5" x 7" sheets of cardstock.


For this particular card, I placed the Halloween Acrylic Treats into a cellophane bag, and then sealed it off. I used hot glue to back this bag of sweet treats to the circle window, and then positioned one of the Home Sweet Home pattern papers behind it all. I love the added interest of the pattern paper behind the window. So much more interesting (& fun) than the plain black cardstock! 

While I had this pattern paper handy, I also added a trim of it to both the top & bottom of my card front. I overlapped this pattern paper with another trim, this time cut from one of the 6' x 4" Halloween Journaling Tags. I added lots of the Halloween Puffy Stickers to embellish, & then adhered it all to one of the 5" x 7" card fronts. 
Awesome!


For the spooky boo card, I used the same techniques but replaced the Halloween Acrylic Treats with some black and silver star sequins from my stash. I also used another pattern paper from the Home Sweet Home Paper Stack to back my circle window, and trim the top & bottom of the card front.


I embellished with the ghosts and pumpkins from the Halloween Puffy Stickers, and then added the Boo! title with the Candy Corn Puffy Alphabet Stickers. Those alphas are the best! 


For finishing touches, I foam mounted one of the October Labels and added the A spooktacular time Halloween Puffy Sticker sentiment, as well a scattering of orange enamel dots from my stash.

And there you have it! 
Trick or Treat greeting cards that scream fun!
I hope I have put a spell on you to get creating some frightfully fun cards!

Happy Halloween!

Til next time,