Showing posts with label Sequin Shaker. Show all posts

Scrapbook & Cards Today: Free SUMMER Cut File Inspiration!


Hi Friends! 

I am so super excited to be a featured guest designer over on the SCT Magazine blog

Here's a sneaky peek at my layout...

Isn't this fun?! 

I love a good stitching file, & this one is just perfect for documenting those sweet Summer moments! Also, this is a FREE cut file, so be sure to download yours HERE today!

To see more of this fabulous SUMMER Stitching layout, and grab that cut file, click the link HERE! 

I really hope it inspires you! 

Thanks so much for stopping by today, 

til next time,

Happy Arty Days, 

Amanda xo 


Elle's Studio: Hip, Hip, Hooray Shaker Cards!


Hi Friends! 

Hip, Hip, Hooray, it's Elle's Studio 14th birthday!

 To celebrate this momentus occasion, I have created a twin set of super fun, shaker cards!

Woohoo! Let's get this party started! 

Oh my goodness! How cute 'n' fun is this card duo?! 

Elle's Studio Supplies: Happy Birthday Journaling Tags, Happy Birthday Chipboard Stickers, Happy Birthday Wood Veneers, Acrylic Balloons & Presents, Celebrate 6 x 8.5 inch Paper Stack, Make A Wish Stamp, Layered Card Metal Die & Acrylic Stamp Block 3 x 4 inches. 

Other Supplies: Smooth Bazzill Cardstock - Coconut Swirl, Black Stamping Ink & Sequins. 

Did you spy my Elle's Studio pen?!

All current and new subscribers will receive it with their March Kit subscription! Another great reason to start a subscription - discover all the benefits and more HERE. 

Let's take a better look at each individual card...


What a fabulous birthday card for someone special! The blue card definitely has my heart, but the purple and red version is pretty awesome too...


So gorgeous! 
I know, you're probably thinking shaker cards are tricky to make, but honestly these cards were really easy to assemble! Elle's Studio products are cleverly designed to coordinate together - they make creating a dream!
Here are my top tips for making these fun cards...


1. Take advantage of the Happy Birthday Journaling Tags! These tags are the perfect base to any layered birthday card design, and are super easy to customize too! I chose the balloons design for my both my cards, personalized them with some repeat stamping from the Make A Wish Stamp, and used their colors to dictate my overall color schemes.


2. Select papers that coordinate with the color palette and theme. I used the new Celebrate 6 x 8.5inch Paper Stack papers to enhance both my birthday cards. These papers are super cute, and the colors just pop! I even fussy cut some bows out of my papers to add that extra somethin'!


3. Use the Elle's Studio Layered Card Metal Die! Possibly the most genius metal die ever invented! It ensures that all layered cuts are accurate, plus saves me so much time ( and frustration) on measuring and cutting! This die set is so good, it even makes my Elle's Studio:  'Hall Of Fame' must-have product list!


4. Use your old Elle's Studio packaging to form the clear acetate pockets! Such a simple idea, but it really takes the 'tricky' out of pocket shakers. I mounted these clear packaging bags onto the back of the layered die cut frames before filling them with a Happy Birthday Journaling Tag and all the sprinkles!


5. Maximize embellishments to create shaker 'stoppers'. I adhered the Happy Birthday Chipboard Stickers and the Acrylic Balloons to the Happy Birthday Journaling Tags to prevent the sequins & sprinkles from falling straight to the bottom of the card. Super pretty, and purposeful!

and lastly, 

6. Add a sentiment that is easy to read, despite all the 'shaking sequins'. The Happy Birthday Wood Veneers were ideal for this - the warmth of the wood cut through all the bright colors, created balance and were easy to see when positioned over the layered frame and shaker pocket. 

Simple, easy tips for beautiful birthday cards! 
I hope my cards have inspired you to give shaker cards a try!

Thanks so much for stopping by, 
til next time,

Elle's Studio: Halloween Trick or Treat! Shaker Cards


Hi Friends! 

Welcome back for moreElle's Studio inspiration!
Today I am sharing two spook-tacular Halloween greeting cards using the fabulous 
October Kit & new releases!


Say BOO!!! 
Aren't they just the cutest?!


Other: Black cardstock, circle cutter tool, cellophane/glassine bags, SpiegelMom Scraps sequins, enamel dots.

Halloween is all about the element of surprise, and having fun! 
And nothing screams childhood fun like a pocket (err, shaker pocket) full of candy! 


This card will have your recipients guessing if it's a trick or a treat, as it is such a fabulous card but you can't eat the candy, ha! Perfect sentiment for Halloween! 

Shaker pocket cards are really easy to create and give your cards that extra wow factor! 
Okay, enough of the chatter...  
Hocus Pocus, it's time to focus!

For these cards, I used two sheets of black cardstock. I cut each piece to the following specifications: 10" x 7"  to create the cards, plus a 5" x 7" sheet to create the shaker window. 
I scored & folded the 10" x 7" sheets of card at the 5" mark to create the card bases. 
For the card fronts, I used a circle cutting tool to cut a large circle window at the top of the 5" x 7" sheets of cardstock.


For this particular card, I placed the Halloween Acrylic Treats into a cellophane bag, and then sealed it off. I used hot glue to back this bag of sweet treats to the circle window, and then positioned one of the Home Sweet Home pattern papers behind it all. I love the added interest of the pattern paper behind the window. So much more interesting (& fun) than the plain black cardstock! 

While I had this pattern paper handy, I also added a trim of it to both the top & bottom of my card front. I overlapped this pattern paper with another trim, this time cut from one of the 6' x 4" Halloween Journaling Tags. I added lots of the Halloween Puffy Stickers to embellish, & then adhered it all to one of the 5" x 7" card fronts. 
Awesome!


For the spooky boo card, I used the same techniques but replaced the Halloween Acrylic Treats with some black and silver star sequins from my stash. I also used another pattern paper from the Home Sweet Home Paper Stack to back my circle window, and trim the top & bottom of the card front.


I embellished with the ghosts and pumpkins from the Halloween Puffy Stickers, and then added the Boo! title with the Candy Corn Puffy Alphabet Stickers. Those alphas are the best! 


For finishing touches, I foam mounted one of the October Labels and added the A spooktacular time Halloween Puffy Sticker sentiment, as well a scattering of orange enamel dots from my stash.

And there you have it! 
Trick or Treat greeting cards that scream fun!
I hope I have put a spell on you to get creating some frightfully fun cards!

Happy Halloween!

Til next time, 


The Cut Shoppe: Merry Christmas Star!


Hi Friends!

Welcome back for more digital cut file inspiration for The Cut Shoppe!
Boy oh boy am I getting excited for Christmas! 
It's the most wonderful time of the year! & I just love spreading the Christmas cheer!
For today's layout I wanted to create something fun 'n' magical, 
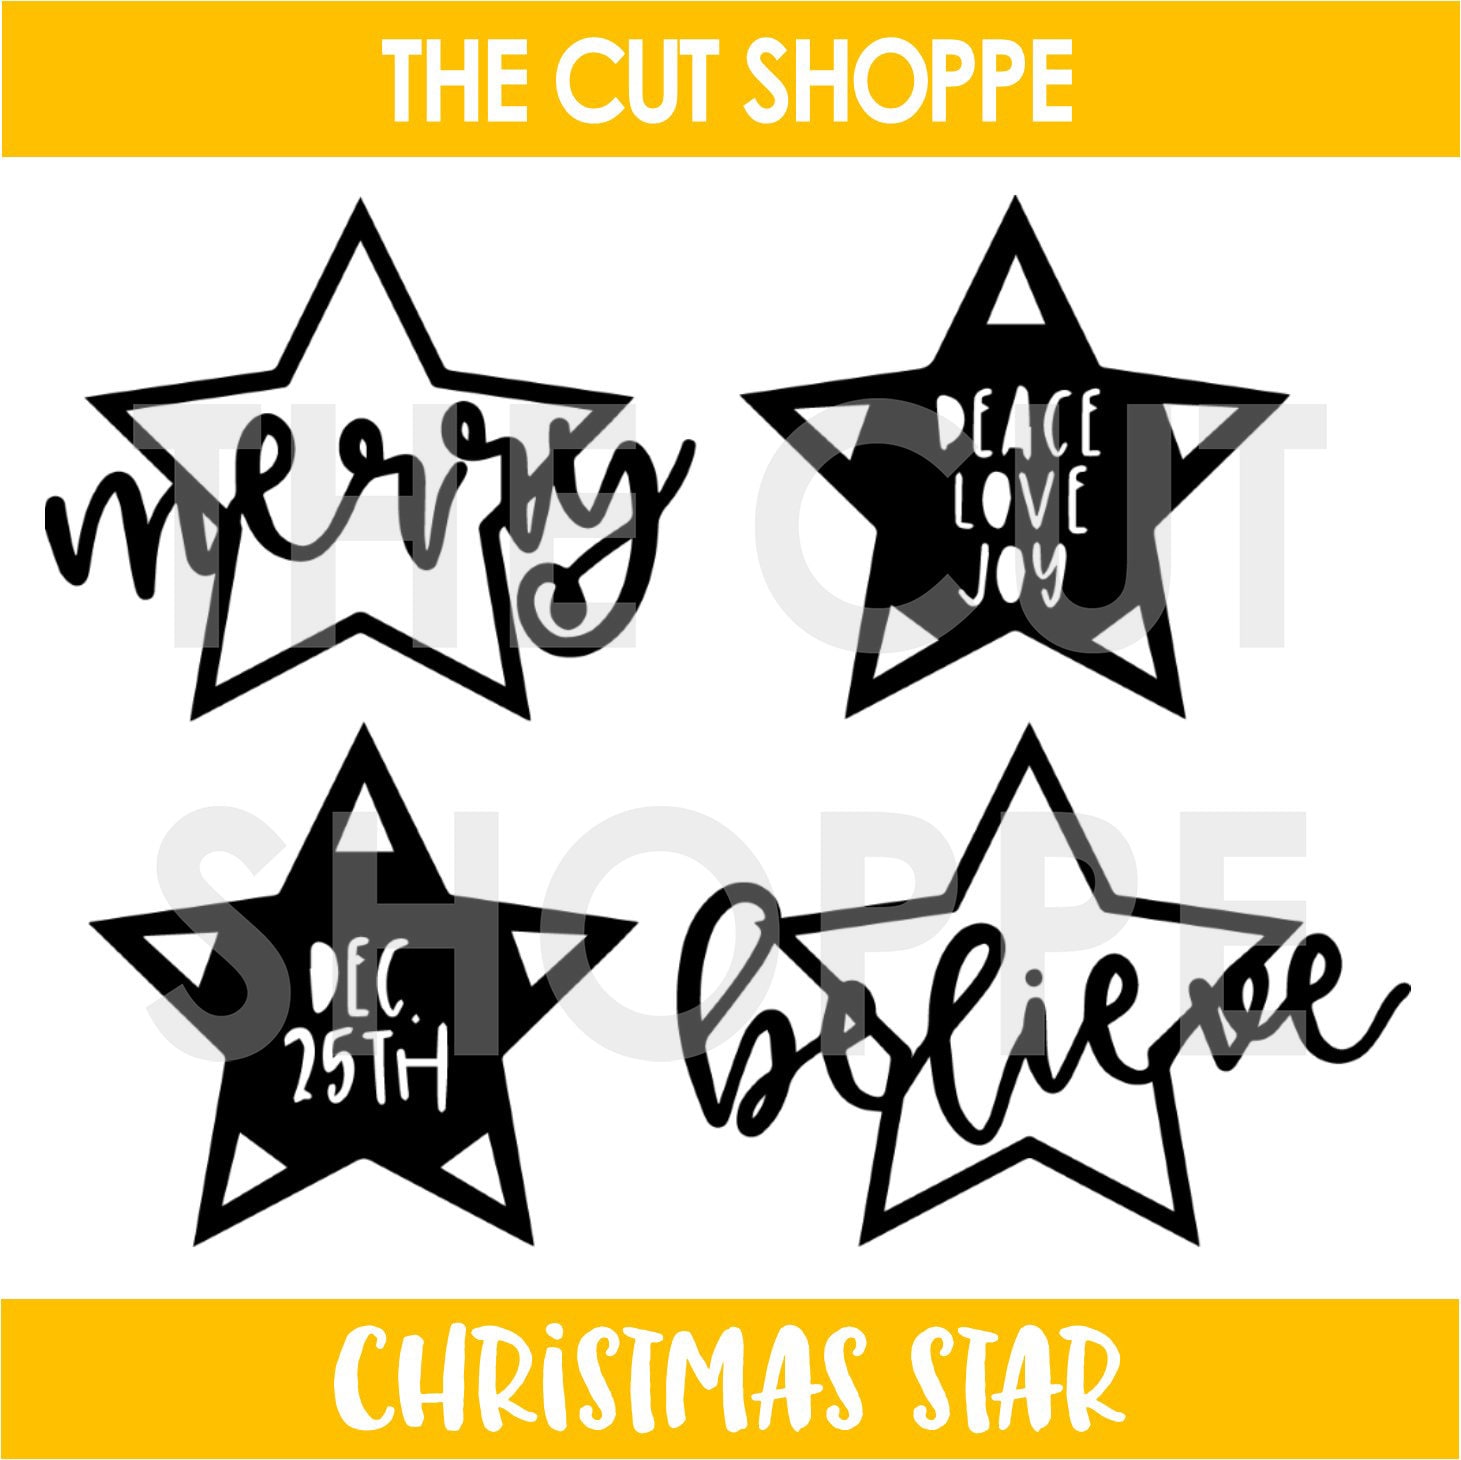
The Christmas Star cut file was the perfect choice!

Here's my layout, "Merry"


Isn't this magical?!! 
I have been inspired by visions of sugarplums and used all the pink, glitter & sparkles! 
That giant sequin shaker star is just stunning! And I just adore the super glittery Merry title! 
There's no denying that the Christmas Star digital cut file is all kinds of awesome!
It looks like this....


Wow! What an amazing file with SO many possibilities!
You can get this fabulous cut file from The Cut Shoppe HERE. 

For today's layout, I simply enlarged the Merry star to 8 inches wide and cut it out in white Bazzill cardstock. I created a 'pocket' by backing the star with a layer of pattern paper & vellum. Before I sealed off the pocket, I filled it with sparkly sequins. 
To add extra sparkle and interest, I glued more sequins over the top of the vellum, and then dressed the title in pink glitter paste. 
I just loved how this turned out! So festive & fun!
Here's a closer look for you....


To enhance the magical feel of this layout, I created a whimsical, cotton candy style background with 


***Remember: If you're purchasing Shimmerz Paints, type AMANDA in the comments section of your order to receive a FREE gift. No minimum order, not valid with any other offers & code can be used on repeat orders.***

 This mixed media base really makes the Merry star stand out.
 For added 'pop' factor, I mount the Merry star on thickened foam tape. So effective! 


On closer view, you'll also spot that I embellish the Merry star with a few stickers, and some cotton floss threads! Very pretty details! 


Just look at that glitter title! So.much.sparkle!!!
The Christmas Star cut file is just a stunning addition to any Festive project! 


Aren't they adorable?! Such a Merry Christmas moment! 

With only 3 days til Santa comes, I want to take this opportunity to wish you and your loved ones a safe and very Merry Christmas! 
And a Happy New Year!

Thanks so much for stopping by today, 
You can shop the Christmas Star file & more in The Cut Shoppe HERE.