Showing posts with label December Kit. Show all posts

Elle's Studio: Product Spotlight: My Star Stamp & Die Set


Hi Friends! 

Welcome back for more Elle's Studio inspiration!

Today I am shining the product spotlight on the amazing My Star Stamp & coordinating Die Set! 

So awesome, right?
It's no secret that I love to get inky, but this stamp and die set really has my heart! 

For today's post I wanted to share a few different ways you can use this awesome set in your story telling & memory keeping - all in the one layout! 

Enough, said! Here's what I created, 

"Twinkle"


Wow! So bright & fun for my two superstars!

Other: Bazzill - Smooth White Cardstock, Stamping inks - black, aqua, pink, dark blue & orange. 

This really is a happy & joyful page! Let's take a better look at it....


Gosh, so many beautiful details and layers created with the one stamp & die! My Star is really somethin'! 
Here's a few simple ideas on how I incorporated the My Star Stamp & Die;


1. Use them as intended! Stamp & die cut til you heart's content! 
Tip: Choose a color scheme that flatters your photo/s and emanates 'the feel' of your story. 

2. Use the My Star Die with your paper scraps -even the smallest pieces can be cut into tiny stars!
Tip: Color match inked and pattern paper die cuts to create a tone on tone effect, for a more layered and detailed look.


3. Use the negative die cut space as a stencil, template or mask! I used gel pens for my example, but this would also work well with an ink blending tool or texture paste too!
Tip: Paper stencils don't last long, so replace them regularly or, if using wet media, die cut with a sturdier material like acetate or card.


4. Create more interest by stamping the My Star Stamp as a base to layer onto!
Tip: Use the Elle's Studio Acrylic Stamp Blocks for greater control & precision. I used the Elle's Studio Acrylic Stamp Block - 3 x 4inches for my layout. 


5. Mix and match different sized stars and layer them onto one another for greater effect!
Tip: Mixing colors or patterns will also make the stars 'pop'!


6. Use repeat stamped sentiments to add emphasis to both photo & embellishment clusters!
Tip: Black stamping ink is easier to see and read, and it can also create balance by cutting through a colorful page!


7. Use the My Star Stamp to decorate other embellishments! I used the tiny open star over the Joyful Chipboard Sticker title, 'Twinkle' to really make it shine!
Tip: Always test the quality of stamping inks on the surface they are intended for first, before applying to embellishments. Lesser quality inks bleed when applied to veneers & chipboards. 


So bright, so beautiful & tons of fun to create! The My Star Stamp & Die are definitely in my 'Craft Essentials' kit!
I hope you feel inspired by my project, & are able to get creating today! 
Please be sure to share your top tips and crafty creations with us in the 
Elle's Studio Facebook Group HERE - we love seeing what everyone makes!  

Thanks so much for stopping by!
til next time, 

Elle's Studio: December Kit & New Releases Inspiration!


Hi Friends! 

Welcome back for more Elle's Studio awesomeness with the December Kit & new releases!

It might be the last kit of the 2020, but let me tell you, it's going to make your crafty projects a December to Remember! 

Check out these fabulous new products....

December Kit

Oh, how good is this?! Loving all the Christmas, Winter & New Year's elements especially!

The Add-On items are going to amaze you....

Whoa!!! 
So.much.awesomeness!!! 
I can't even begin to pick a favorite here - all so fabulous!

And the Digital products don't disappoint either!


Love it all!!! 


I couldn't resist getting into the Festive Spirit, and sharing a lil Christmas love...

"'Tis the Season"


So fun and playful! Love this! A joyful moment, indeed! 

Other Supplies: Bazzill Cardstock - Avalanche, Clear Crystals, & Sewing Machine Stitching. 

Let's take a closer look....


The mix of Fa La La & Christmas Basics 6.5" x 8" papers with the new December Kit is so good! 
I fussy cut my papers to create the illusion of  mistletoe hanging on my layout. I really love how effective this looks! 


The die cuts included in the December 2020 Kit were perfect for embellishing around my mistletoe with!


How cute are the bow and cork tag?! Adore!


So magical, indeed! Love this Christmas page! 

My second layout is all about my super son, 

"My Bright Star"


How bright & fun!!!


I've mixed the Stitched Stars Wood Veneers with some fussy cut stars from the December 2020 Kit, and opted for a really bold color scheme. 


Acetate alphas are always for the win!


Such a super cool page for my super star! 

I hope my projects have inspired you! 

Thanks so much for visiting, 
til next time,

Elle's Studio: December Kit Reveal & Inspiration!


Hi Friends! 

Welcome back for more Elle's Studio awesomeness with the December reveal! 
There are so many gorgeous new products this month, starting with the 


How fabulous is this month's exclusive kit?!! 
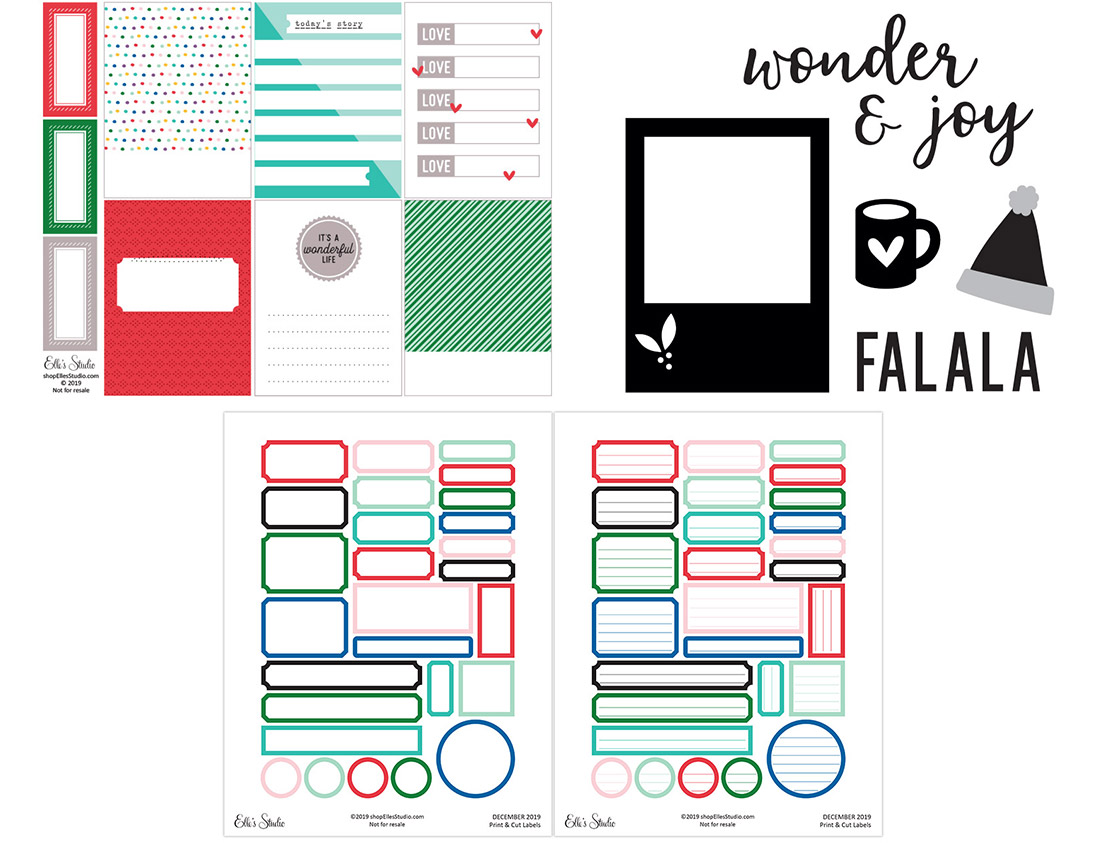
La la LOVE!!! So many great note cards to document the season with! 

The Add-On items are pretty amazing too.... 


As always, the stamps have my heart - so good!
And let's not forget our amazing digital cut files and printable elements too...


So cool! 


Now, time for some inspiration with these fabulous new products! 
First up, I just had to use those Winter Wood Veneers and those fabulous stamps....

"Hot Cocoa"


How fun is this?! La la LOVE!!!

Other supplies: Bazzill Cardstock - Avalanche, machine stitching, natural twine, Staz-On Ink - black, Scrapbook.Com Premium Hybrid Ink - Cardinal Red

Let's take a better look at this 8.5" x 11" layout.....


Aren't those veneers and stamps errrything?!!
SO good! 

You'll spy that I used the Tis The Season papers down the left hand side of my layout, and then stamped a coordinating pattern down the right side. While I had the Wonderful Life Stamp handy I also stamped the Celebrating the little things phrase onto that 3" x 4" note card with my photo, as well a few phrases around the photo cluster. The layers beneath my photo are created from a mix of the December Kit note cards, die cuts and more of the Tis The Season pattern papers.


I fussy cut and hole punched a tag from the Tis The Season papers to complete the cluster layers, and embellished it with some natural twine. Around the cluster I added a couple of the stickers from the Goals Phrase Stickers, as well as stamped a few icons from the Black Friday Sales Exclusive "Currently During The Holidays" Stamp in red ink. Here's another view for you....


Such pretty layers! 
 I decided to add machine stitching to compliment the twine, and add a little softness to this fairly crisp page. For some added interest, warmth & balance I also embellished with the Winter Wood Veneers. 


Absolutely stunning! Those veneers are a must-have item this month!

For my second project, I have created a 12 x 12 scrapbook layout documenting our beautiful Christmas tree this year...

"Oh, Christmas Tree"


Oh how pretty!!!

Other supplies: Bazill Cardstock - Avalanche, Nuvo Drops - Bubblegum Pink. 


Like my previous layout, I just had to use the fabulous 6 x 6 Tis The Season Paper Stack papers to trim the edges of my page. These papers are definitely a favorite of mine, and will likely feature in this year's December Daily album too! 
I used a few of the December note cards to back my photo with, and then halved a couple of the December Labels to create the appearance of more cards. I foam mounted this photo cluster, and tucked a mix of stickers, die cuts and The Best This Year Wood Veneers beneath it all.  


Next I grabbed my scissors and fussy cut out the tree from one of the December Kit note cards, and then cut a variety of hearts from one of the pick colored cards.  I used these fussy cuts to embellish my photo with! 


To complete this page, I used the super versatile Jane Alphabet Stickers in red - perfect! 
Simple. Easy. Beautiful! 

And there you have it! 
My first two projects with the gorgeous December Kit & new releases! 


Thanks so much for visiting today!
til next time,


Shimmerz Paints: December Color Kitz!


Hi Friends! 
 I'm so super excited to be sharing more Shimmerz Paints inspiration with the brand new December Color Kitz! 
This month's kits are just stunning and look like this....


All the cozy Christmas feels with the new "Farmhouse December Color Kitz".
 This kit includes the following:
1 1oz bottle of Snow Storm Vibez
1 jar of Wed Wagon Shimmerz
1 jar of Run! Forest Shimmerz
1 package of exclusive Dotz "Cozy Christmas"
1 jar of Gold Glimmer Blingz


Make this season the sweetest ever with "The Sweet December Color Kit"


This Kit includes the following:
1 1 oz bottle of Frost Bite Vibez
1 jar of Pip-Pip Cherry-O Shimmerz
1 jar of Twinkle Twinkle Inklingz
1 package of exclusive Dotz "All I want for Christmas is You" Set
1 jar of Bubblegum Blast Shimmerz
1 exclusive Christmas Candy cut file created by Paige Taylor Evans

WOW!!! 
I'd be racing to the Shimmerz Paints store to shop these kits now - before it's too late! 
Shop both Color Kitz HERE
otz
Both kits are absolutely divine, and for today's inspiration (& process video) I am using the Sweet December Color Kit!
Here's my layout, 

"Magic of Christams"


Whoa! Isn't this pretty?!! 
Such gorgeous colors and those exclusive, All I Want For Christmas, Dotz are just the best!!!
You'll notice that I did miss using the beautiful Christmas Candy cut file (it wasn't quite available at the time I created this layout) but I did use another Paige Taylor Evans cut file from the Silhouette store. I think this different choice of cut file just demonstrates how versatile the month's colors are! So beautiful!

Let's take a closer look....


That Vibez Frost Bite blue has my heart! 
Such a stunning color to spray the cardstock base with! I also flicked this color around the layout to add more interest. Love it! 

For my cut file, I painted both the Shimmerz Bubblegum Blast and Pip Pip Cherry-o onto sheets of scrap paper. I used these pretty pink papers to fill the bow and berries. To add soft texture & dimension I foam mounted the cut file and layered it onto the super pretty Frost Bite base. This looks so effective!


The "All I Want For Christmas" Dots were too pretty to ignore, so I used all three of them on this page. Such a sweet adornment!
I also combined the Pretty Little Studio: Glitter & Ice collection with the SpiegelMom Scraps Winter Delight sequin mix for the 'scrapbook' element of the design. The Inklingz Twinkle Twinkle is the perfect amount of shimmer & shine to complete the look. 


So much pretty! 
You can see me create this pretty page over on the Shimmerz Paints channel HERE

https://youtu.be/MwROxXofLpA

Thanks so much for watching! 
I hope I have inspired you to get a lil painty today! 


And if you're adding extra paints into your cart, type AMANDA in the comments section of your store order to receive a FREE paint! Yay!!


Thanks so much for visiting! 
til next time, 


Elle's Studio: Document December: Prepping Your Album!


Hi Friends! 

Welcome back for more Elle's Studio inspiration! 
Today I am so excited to share how I've prepared my Document December album, as well as give you a few top tips & early glimpses too! 

What can I say?
 I just LOVE this Season, and Buddy the Elf maybe one of my idols, ha! #nogrinchhere
This year, I'm a little time poor so I've opted for a smaller, easier album to record this year's Festivities.

Top Tip #1:   Selecting a smaller pocket size album will ensure that we don't get overwhelmed by the enormity of documenting the season. 

Here's a look at my album with a few of my fave Elle's Studio Document December supplies.....


The album is one of those 4" x 4" Instagram pocket page albums, but it was a tad boring for my liking! No surprises then that my album preparation involved quite a bit of embellishment & decoration. I started with the book plate and spine of the album, and added the year with our Red Dipped Puffy Alphabet Stickers. 


You'll also spot those cute candy canes from the Ho! Ho! Ho! Puffy Stickers and a heart from the Christmas Shapes and Dots Puffy Stickers. Super cute!  I also glued pom pom trim (from my sewing box stash) across the top of my album cover. The tiny pom poms reminded me of snow and really added a fun & playful element to the cover. 


And speaking of fun, I just loved decorating the cover! The Merry Christmas white acrylic was a perfect title & adornment for this year's album - take a peek! 


I'm so happy with how this turned out! Simple, sweet and really pretty! Those stocking Die Cut Shapes are errrything! And of course, I couldn't just do the front cover - so here's a peek at the inner cover too.


Umm, okay, wow! 
I may be completely smitten with the Document December Kit and this Season of Giving! 
It's the most wonderful time of the year, indeed! 

You'll notice that on my desk I have cut a whole lot of pattern papers to the 4" x 4" size to aid my album preparation. I have used both the Document December Kit papers, as well as one of the Noteworthy 12 x 12 Paper Collection papers too! 

Top Tip #2: When it comes to unusual sized albums, it helps to pre-cut a bunch of background papers so that all you need to do is print your photo and add a sentiment and sticker or two! 

Here's a closer look inside...


For the inside cover of my album, I combined the new Good Cheer Acetate Die Cuts with more of our Puffy Stickers. 

Top Tip #3: To avoid the appearance of glue behind the clear acetate, I used the puffy stickers to hide the spots and help hold the acetate in place.  

In keeping with my love for fabric trims and textural elements, I also added some vintage burlap lace & a couple of tassels from my stash. 


I attached the tassels to one of the album rings, and while I was there I decided to hole punch the Good Cheer Acetate star banner and thread it onto the ring as well. For maximum impact, I also threaded the large Gold Acrylic Star onto this ring as it's embellishments galore for this mini album! 

Top Tip #4: Hole punch Die Cuts & maximize embellishments with openings to use as 'dangling charms' on album rings. Great for adding interest & texture to your pages, as well as softening the appearance of the album rings. 


And lastly, but by no means least, to avoid over filling my pockets I adhered the Gold Dec 2019 Acrylic to the front of my clear pocket - not to the pattern paper base card! Such a great opening page to my super sweet DD album! 

Top Tip #5: Adhere larger embellishments to the exterior of your pockets to keep them from getting too bulky!

So it's beginning to look a lot like Christmas for me! I hope my DD album preparation has inspired you to get started on your Christmas documenting too! 

Thanks so much visiting,

Happy Arty Days, 
Amanda xo