Showing posts with label Tutorial. Show all posts

WOW! Em June Creative Guest - Lovely Layout


Hi there, crafty friends!

 I am so super dee duper excited to be this month's creative guest for

WOW! Embossing Powder Blog

WOW Embossing Powder! 

I know, awesome!
For today's post I wanted to showcase how easy it is to incorporate glitter embossing into your scrapbook layouts! 
Here's what I'm talkin' 'bout....

"Lovely"


Sigh! So.much.pretty!!!!
Did I mention that Florida Sunset Glitter  is my new FAVE powder?!! 
Like seriously, how amazing is that sparkle?!
LOVEEEEEE!

Let's take a closer look....


Lovely, indeed!
Simple, beautiful & super easy to recreate!
Here's how....


Take your WOW! Embossing Pen & use it to draw (or stencil color ) a butterfly onto clear vellum. 


Sprinkle generously with WOW! Embossing Glitter: Florida Sunset WS95R(O).


Use your WOW! Embossing Heat Tool to heat set the powder. 
Just look at that gold!!!


Repeat process until 5 Florida Sunset butterflies are created. 
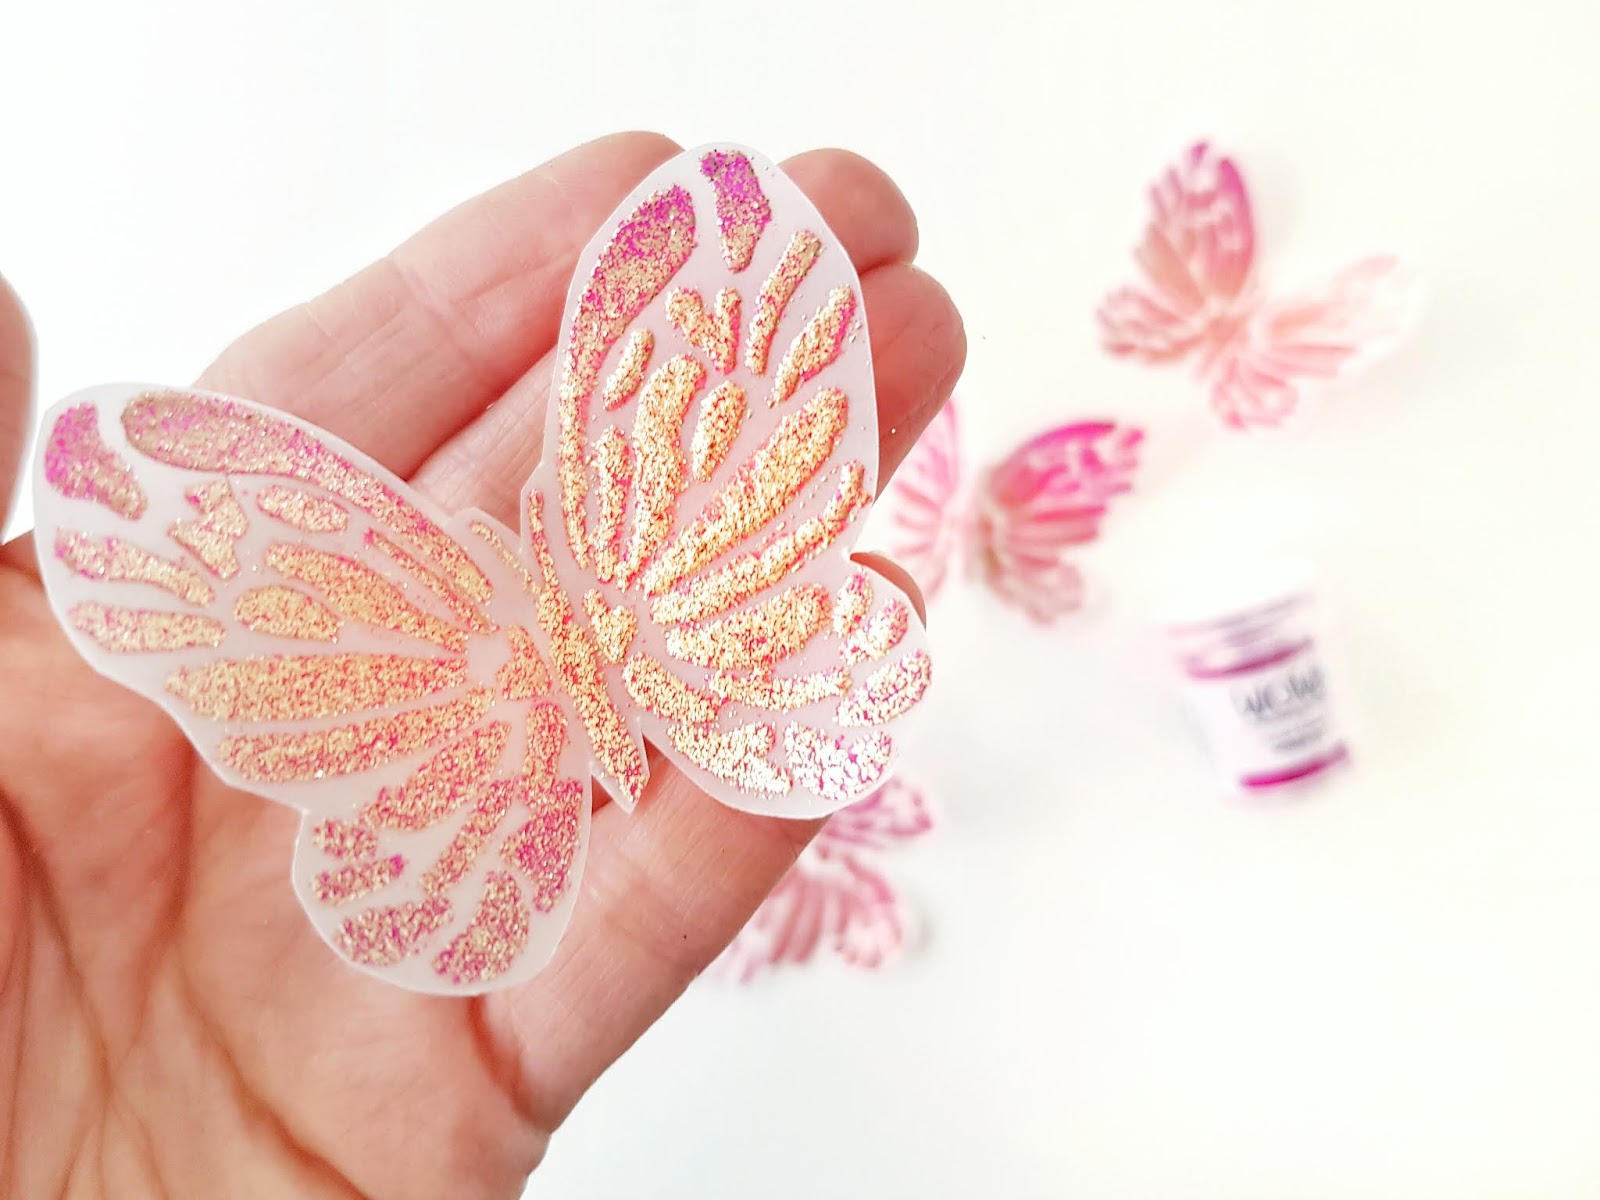

Fussy cut each butterfly. 
Ahh-may-zing! Told you that this glitter was something else!!! 
Absolutely MAGICAL!


Paint a watercolor heart onto 12 x 12" white cardstock. 


Once dry, draw in a few more 'heart lines' with the WOW! Embossing Pen. 
This will add  both interest to the layout & really highlight the heart shape. 


Sprinkle & heat set with the fabulous Florida Sunset Glitter Embossing Powder!
Such an effective result!
To complete the layout, embellish the heart with the fussy cut Florida Sunset butterflies, some of your favorite scrapbook supplies (I used Cocoa Vanilla Studio: Happiness collection), photo & title! 
Voila! 
Super simple, but oh so beautiful scrapbooking with WOW! Glitter Embossing Powder!

Here's a couple of pretty close ups for you.....


Such gorgeously rich colors & intense sparkle!


WOW, indeed!!!!


And there you have it! 
WOW! Embossing Glitter is just errrrrything to me right now! 
I hope I have inspired you to use these awesome powders on your next creative project (or even scrapbook layouts) - 
Trust me, you'll be SO happy with the result!

Thanks so much for stopping by today!
I'll be back later in the month with more creative inspiration,

til then, 

Products Featured:
WOW! Embossing Pen 
WOW! Embossing Glitter: Florida Sunset WS95R(O)
WOW! Embossing Heat Tool
Clear Vellum Acetate
Cocoa Vanilla Studio: Happiness Collection 
Watercolor Paints


Shimmerz Paints + Cocoa Vanilla Studio = Beautiful Layout & Process Video


Hi Creative Friends! 

Welcome back for more shimmery inspiration!
Today I am sharing a gorgeous layout & process video with the fabulous
Shimmerz Paints April Color Kit! 
This exclusive Color Kit is absolutely GOR-jus & I just couldn't resist creating with it again -
 while I anxiously await the June Kit release in a few days time!

**Hint, hint! Set your alarms for June 1st kit reveal day - it's going to be epic!**

If you missed the April Color Kit, it looks like this.....


SO divine!

***These are limited edition kits, BUT there is one or two remaining in the store - if your quick!***

The kit contents are: 

Here's the layout I have created with this fabulous Color Kit....

"Beautiful"


Sigh! Beautiful indeed! 
Such a pretty page for my darling ballerina! 

Here's a closer look for you....


Swoon! So much gorgeousness! 
I can't even!!!
From that pretty Pink-A-Boo Inklingz, to the richness of the Vibez Quit Yer Wine-n & those stunning pops of Lapis Dance Creameez - well, it's just pure bliss! 
And don't even get me started on the Pick Your Plum sequins!!!
La La LOVE this kit! 
I have combined it with the Cocoa Vanilla Studio Midnight collection, as they're clearly a match made in heaven!

Here's a few pretty close ups for you.....


Just look at those colors!
So much loveliness in the April Color Kit!


Such a soft and pretty page for my darling ballerina! 


You can watch how I created this pretty heart page design on the Shimmerz channel HERE
Happy watching!


I hope you enjoyed my seeing how my layout came together. 
I just adore the April Color Kit & I hope I have inspired you to use yours!
(Or race to the store for the last remaining one HERE! )

Thanks so much for visiting, 
til next time, 


Pinkfresh Studio: Joyful Day Scrapbook Layout & Process Video!


Hi Friends!

Welcome back for more Pinkfresh Studio inspiration! 

Today I am creating with the gorgeous new Joyful Day collection! 
Such a dreamy collection to work with! 

Here's what I came up with.....

"Birthday Girl"


Told you it was dreamy!!! 
So much pretty going on here! 

Here's a closer look.....


Sigh! 
This is totally swoon worthy! 
For this 8.5" x 11" layout, I decided to  make a real feature of the floral wreath pattern paper, Big Ideas. I fussy cut almost the entire sheet, and made a decorative border around my white cardstock base. I just love how effective this looks! 


I layer a few of the wreaths with foam tape for added interest & dimension. 
I tuck my sweet chipboard framed photos into the border too! 


I add my title with the tiny puffy alphabet stickers in coordinating colors, and embellish with die cut ephemera, and enamel dots from the mixed embellishments pack. 
Such a simple design, but oh so lovely! 


The sweetest! 


Big fussy cut Ideas never looked so good! 
If you're interested, I have a process video for you to watch...


I hope you enjoyed watching! 

Thanks so much for all your support, 
Have an amazing week!

til next time, 

Shimmerz Paints: Happy Heart Process Video!


Hi Friends! 

Welcome back for more Shimmerz Paints awesomeness!
Today I am sharing some sweet Heart Day inspiration for you,
& there's also a process video too!
Valentine's Day is one of my all time favorite Holidays,
& I just LOVE creating all the heart things!
But enough chatter, here's my layout......

"Happy Heart"


Oh.my.heart!!!
This is so super sweet and completely melts me!
You'll spy the following Shimmerz Paints products:

Spritz Ruby
Spritz Cotton Candy
Vibez Pop Art Pink
Paste-eez Peach Fuzz
Paste-eez Salt of The Earth

What a wonderful color combination!
Here's a closer look for you.....


Gor-jus!!!
As well as our super shimmery, and divine paints I've also used the Cocoa Vanilla Studio: More Than Words collection & the Hello Hearts cut file from The Cut Shoppe.

I start this layout by spraying Spritz Ruby to the top of the Hello Hearts cut file.
This very pretty red is so vibrant!


Next, I apply Vibez Pop Art Pink to the center of the cut file, and at the base of the cut file I spray Spritz Cotton Candy. I also add a couple more light sprays of the Ruby to add a lil tonal interest too!
Just look at the golden shimmer from the Pop Art Pink - Stunning!!!


These colors have my heart!

Before I attach the Shimmery cut file to the pattern paper base, I prep the paper with a light coat of Jo Sonja's White Gesso. I then apply Pop Art Pink with a very watery paint brush, creating a soft base of color. I then add splatters and droplets in Spritz Ruby Cotton Candy, as well as the Vibez Pop Art Pink. I then apply those beautiful textured hearts with a Vicki Boutin Stencil & Paste-eez Peach Fuzz. So pretty!


The pink textured hearts are made from combining Paste-eez Salt of the Earth with Spritz Ruby - another gorgeous color combination!


For finishing touches, I add more Ruby droplets and a lil paint around my photo to complete my Happy Heart themed layout. 
Here's one last close up for you....


Absolutely beautiful! 

Want to see more of how this layout came together?
Please watch my process video below, & thanks for liking & subscribing! 


I hope you enjoy watching! 

*REMEMBER*: Type AMANDA in the comments section of your Shimmerz Paints Store order  HERE to receive a FREE paint! Yay! 
(No minimum spend, not valid with any other offers & code can be used repeatedly) 


Thanks for stopping by, 
til next time, 


Shimmerz Paints: A Special Delivery for Christmas!


Hi Creative Friends! 

Welcome back for more colorful, Shimmerz Paints inspiration! 
Today I am sharing my take on the Shimmerz Paints November Color Challenge. 
This month's challenge has a Winter Wonderland theme to it - so it's all our fave icicle colors and shimmering delights! 
My color of choice is the gorgeous Texturez: Patina color, and here's why.......

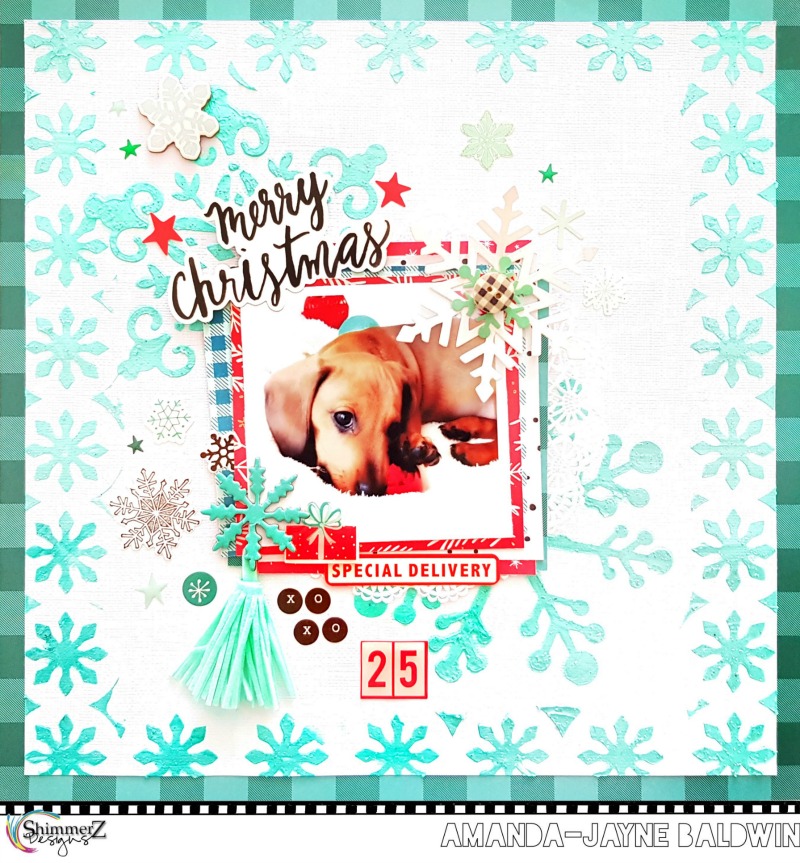
"Merry Christmas"


Oh.my.heart! Isn't this just divine?!!
Meet out special delivery, ( and a lil early) Christmas present - our new mini Dachshund puppy! 
Isn't he just adorable?!! Puppy Love!
& talk about a one color wonder! 
Texturez Patina is just sensational!!! A perfect color for all your Christmas creations!
I've applied it around the border of my white cardstock base, using a repeat snowflake pattern and palette knife. Once dry, I then add two larger snowflake stencils with the pretty light green Patina color. LOVE!!! 


Texturez paints are just incredible! 
They boast the sheen of our Dazzlerz paints with an added textural element. 
Think Dazzlerz with a coarse, sand like substance within them. 
So gritty, dimensional and WOW!
You can check out ALL the fabulous Texturez Colors HERE

Let's take a closer look at that amazing Patina color.....


So.much.gorgeousness!!!
I've teamed our pretty mint Patina with Crate Paper's Fa La La collection, and let's just say, it's a match made in heaven! 
I just adore the fresh mint, white and red color scheme! Beautiful!


Just look at all that dimension! Stunning!


That grittyness is a texture lover's dream! 
And the color intensity is all kinds of awesomeness! So vibrant! 


We're All About The Color, and Texturez Patina is all that and more! 
I hope I have inspired you to add this amazing color to your mixed media kit!

Wanna know more about this awesome color?
Visit the Education Team channel HERE to watch my process video. 

& REMEMBER: Type AMANDA in the comments section of your Shimmerz Paints Store order to receive a FREE paint! Yay! 


Thanks so much for visiting
til next time, 

Happy Arty Days, 
Amanda xo 


Pebbles: Cozy & Bright Christmas Cardmaking!


Hi Friends!

Welcome back for more Pebbles inspiration with the gorgeous new Cozy & Bright collection!
As we head into December, it's time to start getting all those beautiful Christmas cards created and ready to write! 
Today I'm sharing a super quick & simple tutorial on how to make a set of beautiful cards in next to no time!
Here's a little look at my completed cards.....


Oh aren't these the sweetest?!! So super cute!
I can't help but sing, "Have a Holly Jolly Christmas, It's the best time of the year..."
I may have put the Christmas Carols on while I created these pretty cards ;) It really is my most favorite Holiday!
But enough chatter, 
here's how easy it is to recreate these lovely cards...


Start with two sheets of white Bazzill cardstock and trim each sheet 6" x 8". Score and fold each cut to create a total of 4 card bases (repeat this process for as many cards as you need). Use the Cozy & Bright Washi Tapes to border the front of each card - as shown above.


Using the reverse side of pattern paper Warm And Cozy, trim 4 rectangles each measuring 3 1/2" x 5 1/2". Add a 1 inch thick ribbon 1/2" from the base of each rectangle.


Foam mount the Warm And Cozy rectangles and adhere to card fronts.


Use the Cozy & Bright 6 x 6 Paper Pad & punch out 4 large circles . Select an ephemera sentiment, and foam mount onto the large cirlces.


Glue the circle sentiments to the card fronts.


Embellish with  more Cardstock Shapes Ephemera, and an Embellished Brad.
Note: I prefer to remove the pins from the back of my brads and adhere them with foam dots, creating a flair button appearance.


So simple, and yet, oh so pretty!!!
Here's a better look at my Cozy & Bright card set....


SO cute!!!


Absolutely adorable and oh so easy to make!!! You could easily make a dozen of these sweet cards at your next craft afternoon and be prepared for the Season of Giving!
I hope I have inspired you! 
Happy Holidays & thanks so much for visiting!
til next time, 

Happy Arty Days,
Amanda xo


OTHER SUPPLIES: