Showing posts with label Made with Pebbles. Show all posts

Hip Kit Club: Sew Beauti-Fall Thank You Cards!


Hi Lovelies! 

Welcome back for more Hip Kit Club inspiration! 
Today I am celebrating World Card Making Day!
Ok, so I'm a few days late, but that's ok - belated cards & warm wishes are always well received! 
I mean, who doesn't love the opening their mail box to find something beautifully handcrafted inside? The September 2019 Hip Kits are perfect for creating such gorgeous treasures!

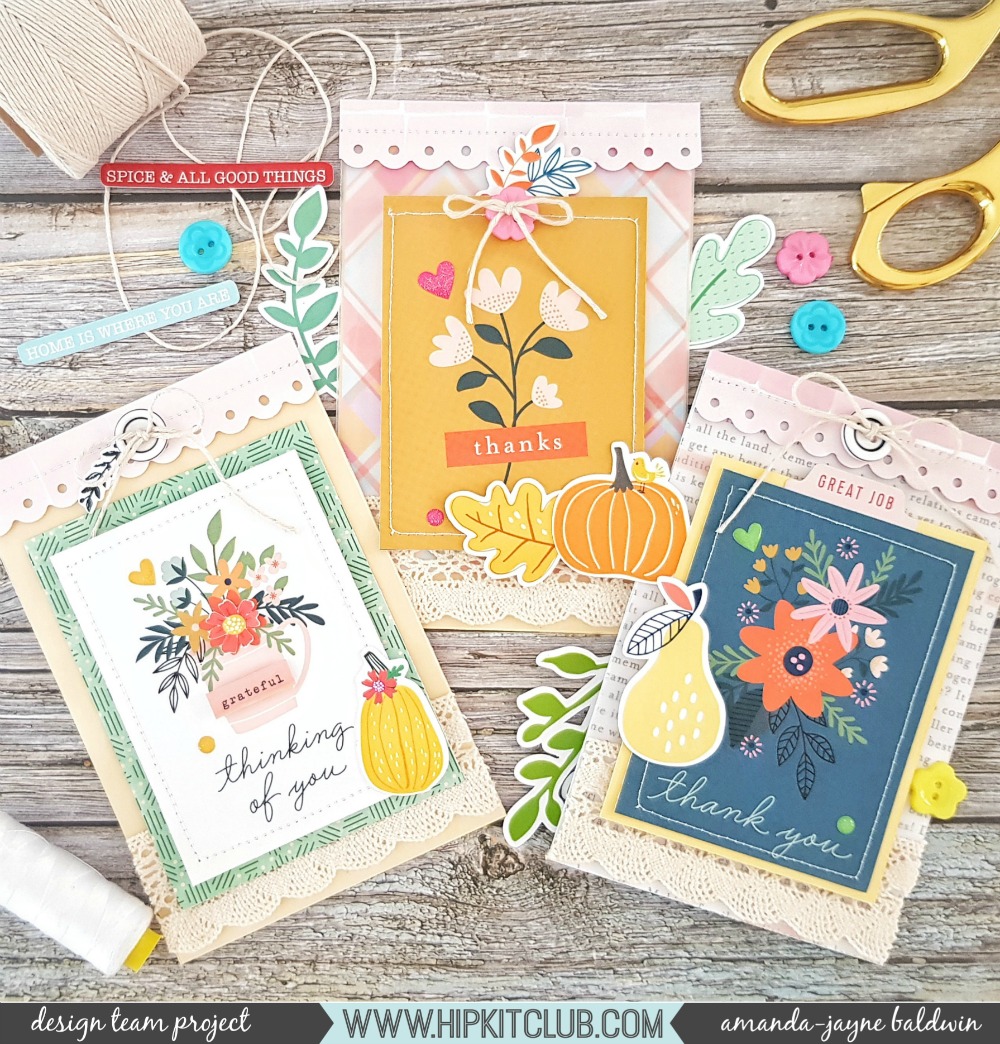
For today's inspirational post I've created a pretty trio of Thank You cards. 
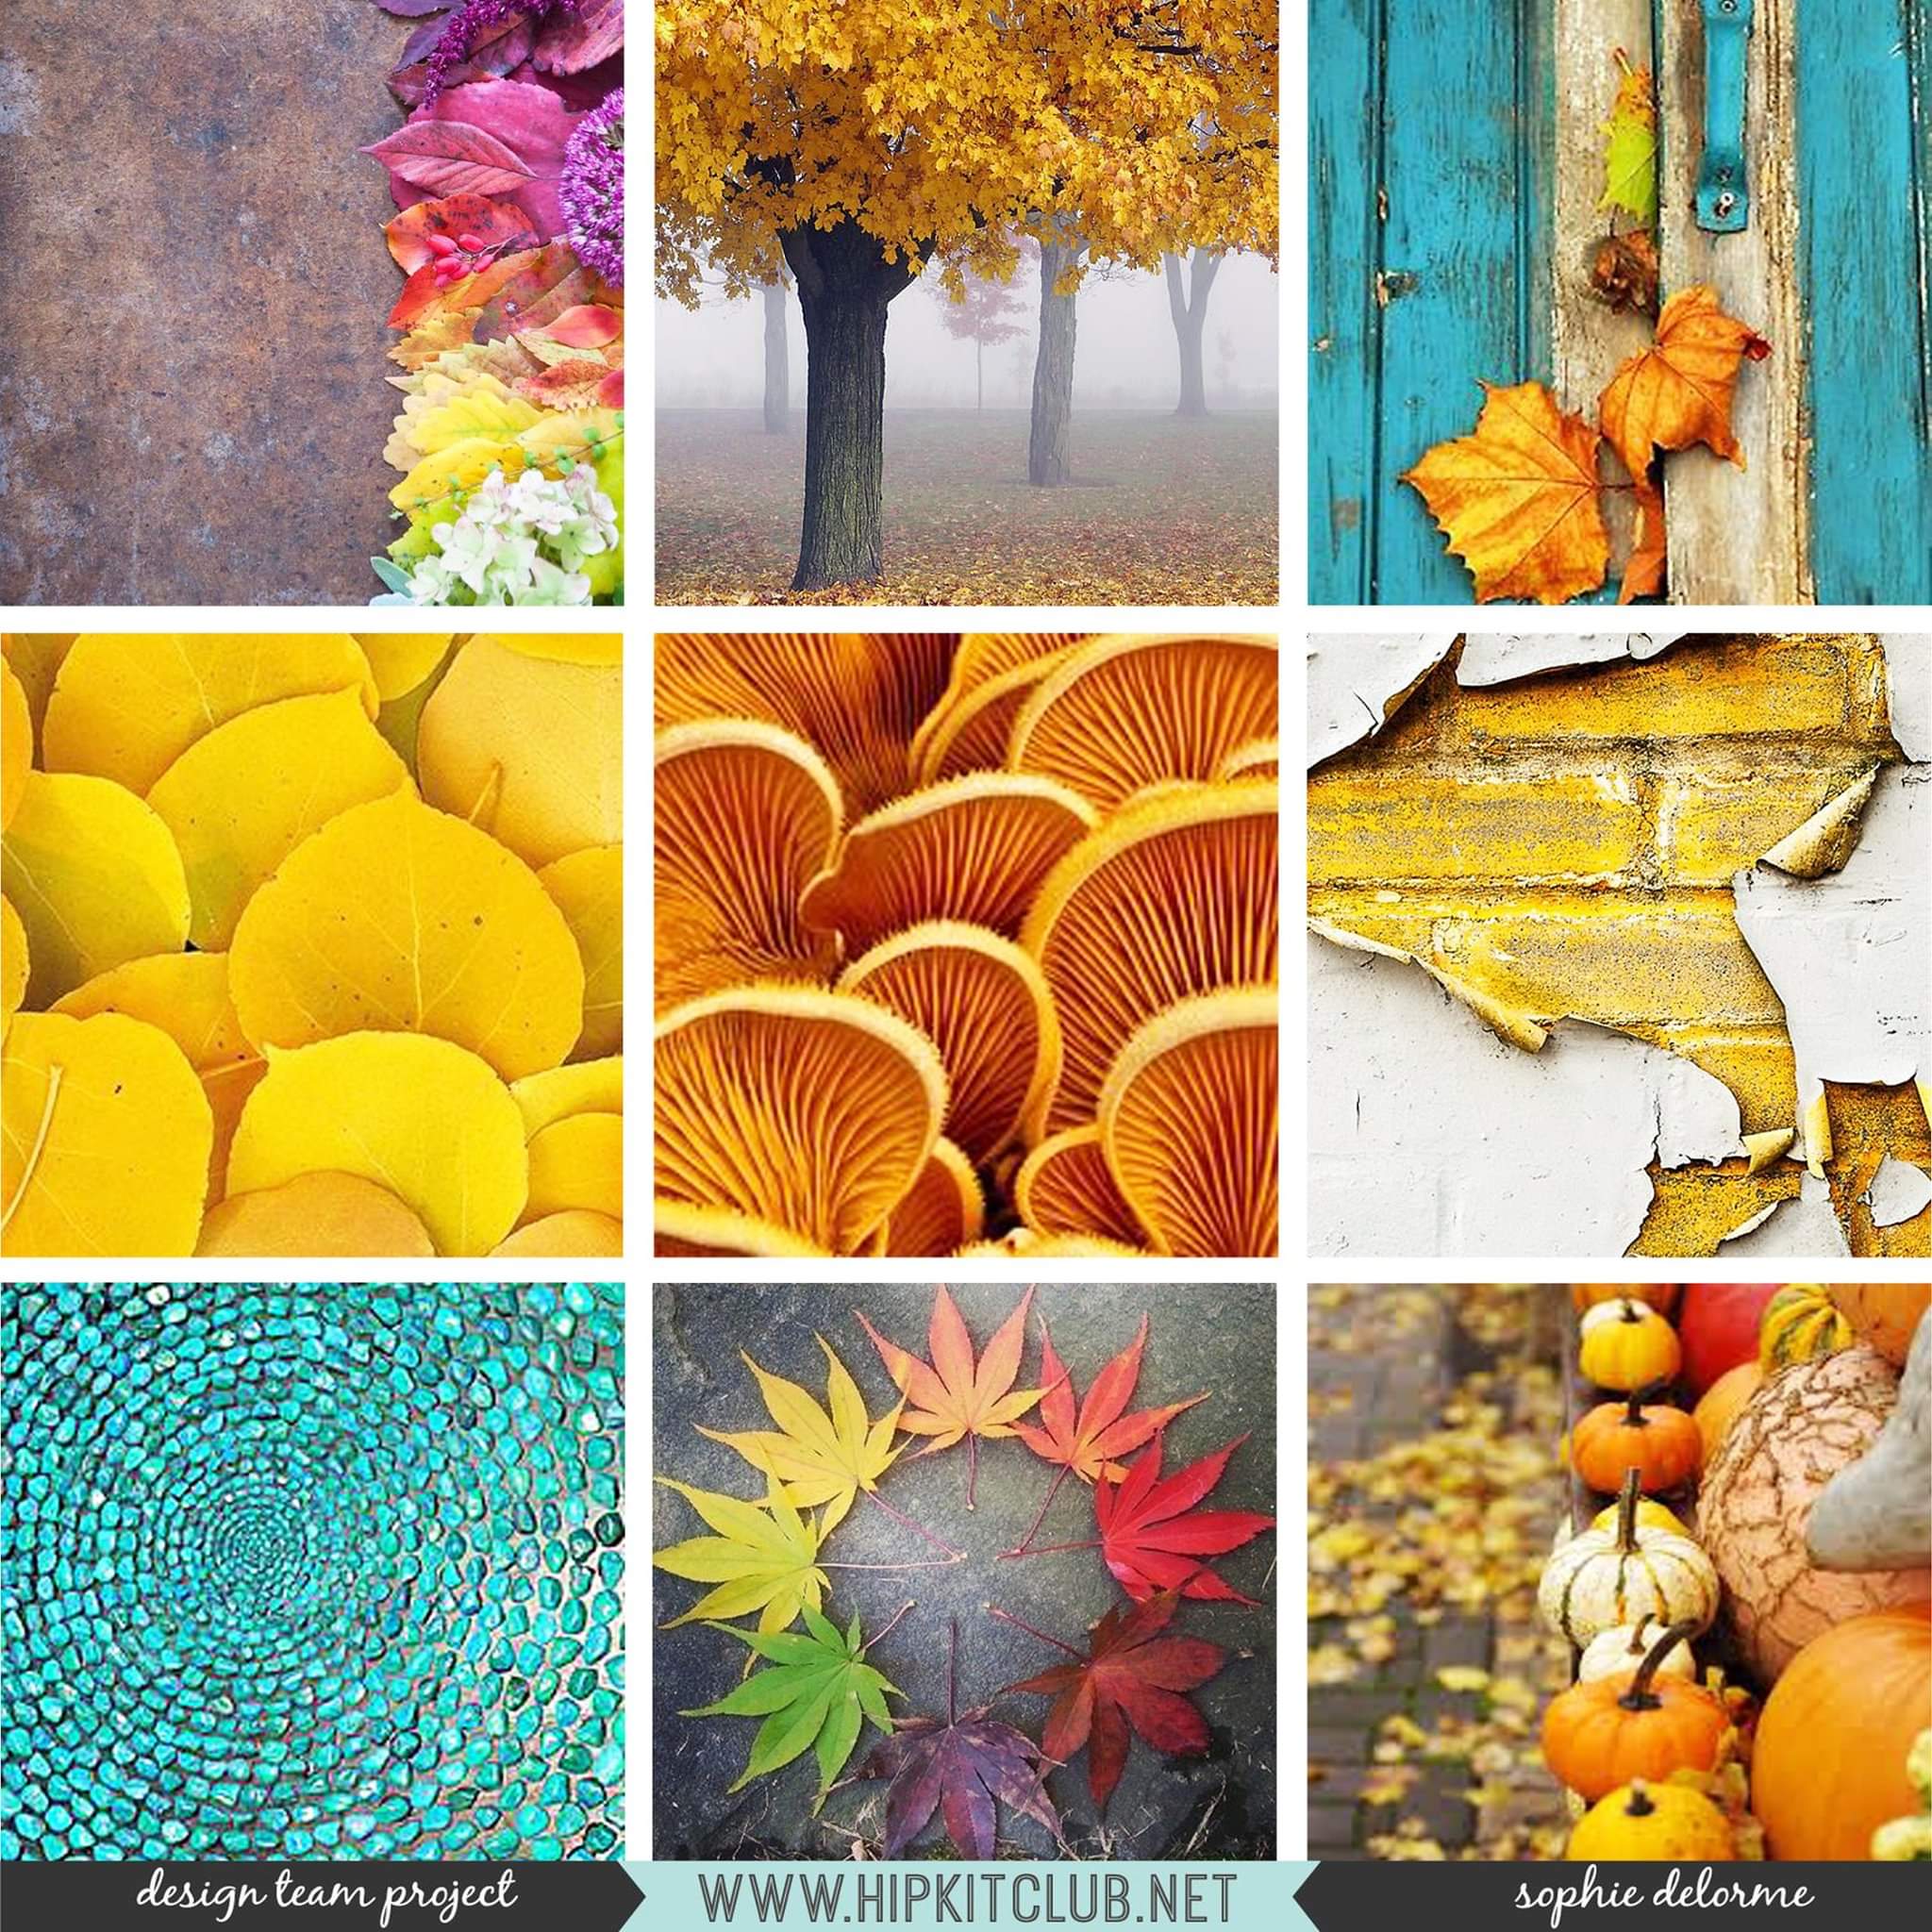
They're totally inspired by the beautiful HKC October mood board, courtesy of the lovely Sophie Delorme. 
If you haven't seen this month's mood board, it's a stunner & looks like this....
FB_IMG_1570306712519

SO gorgeous!!! 
A truly magnificent array of images to spark & ignite your creativity!  
Thank You & Gratitude cards instantly came to my mind - but enough chatter, let's take a look at them....

Sew Beauti-Fall Card Trio 
HKC_AmandaBaldwin_Oct26th_Blog_01

Sew beauti-Fall, indeed! 
Aren't they just the prettiest?! 
I love the use of sewn details, buttons,  & lace on my cards. They really enhance the hand made nature of the cards, and create a bespoke feel! Don't get me wrong, mass produced printed cards are always appreciated but nothing expresses gratitude and thankfulness than your time and attention to detail. 
Card making is such a beautiful form of art! 

For this card set, I used a mix of the September 2019 Main, Embellishment & Cardstock Kits. The cards all measure 4" x 6" and include the fabulous Pebbles: This Is Family collection, Fun Times, pattern paper as their main image. This paper really reminded me of the mood board, plus it had the added bonus of cut apart 3" x  4" note cards that all encompassed the grateful theme. 
Perfect for the upcoming Fall & Thanksgiving season! 

Here's a closer look at these pretty cards....
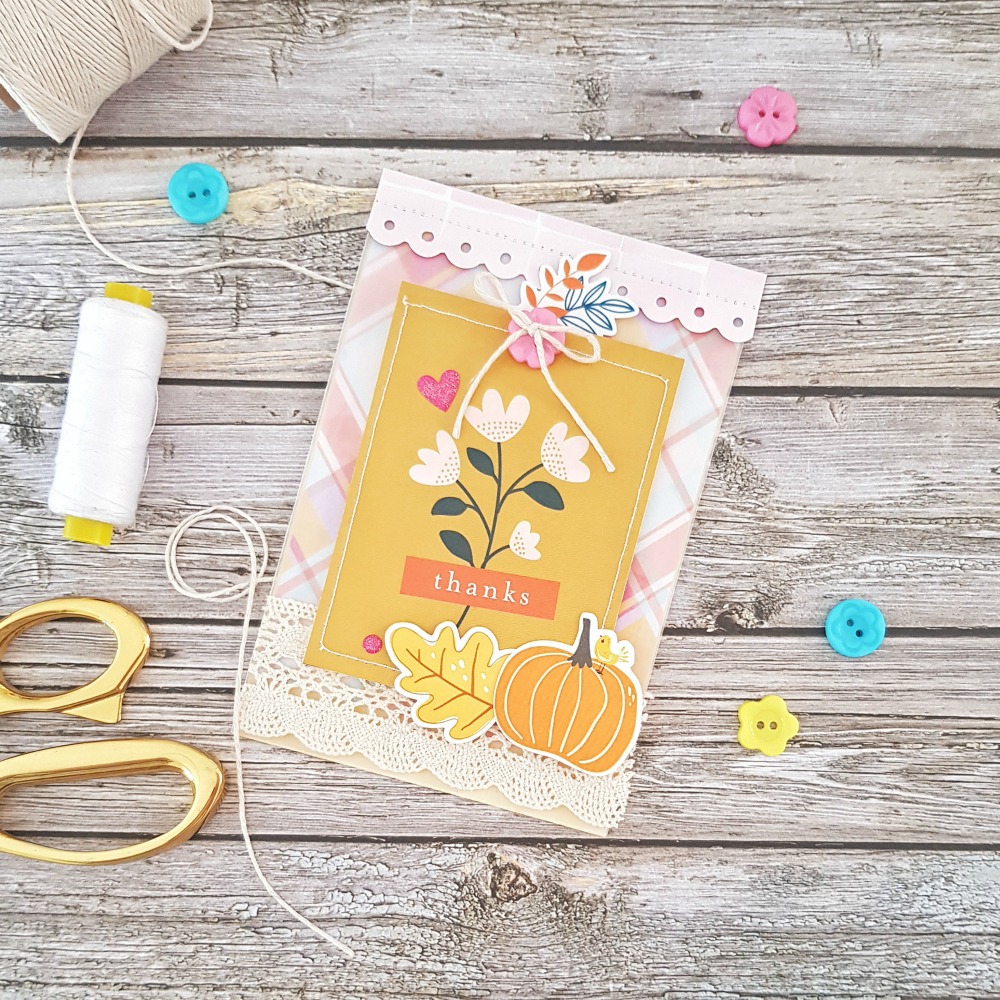
HKC_AmandaBaldwin_Oct26th_Blog_06

So very pretty! 
I LOVE a good plaid pattern (esp. for Fall!), and the Pretty Little Studio Indian Summer Ephemera Combo packaging had me excited! Yes, you read correctly - I totally fell for the packaging! 
And clearly, I wasn't the only one who loved this pattern - you'll spy it in it's full paper glory in the October 2019 Main Kit
Yay! Totally swooning on this one!

To soften it just a little, I layered a sheet of Bazzill White Vellum over it and mounted it to my Bazzill Lemonade card front (both are from the September Cardstock Kit).  The packaging didn't quite stretch to the base of my card, so I covered the gap with a trim of natural colored, scalloped lace from my stash. As most of you know, I love repeat design in all my creations, so I trimmed a soft pink section of the Dear Lizzy: She's Magic - Dreaming paper and used an old punch to re-create the scallop pattern. I machine stitched this trim to the top of my card, so that the top and base had a cohesive feel. 

Here's a closer view....
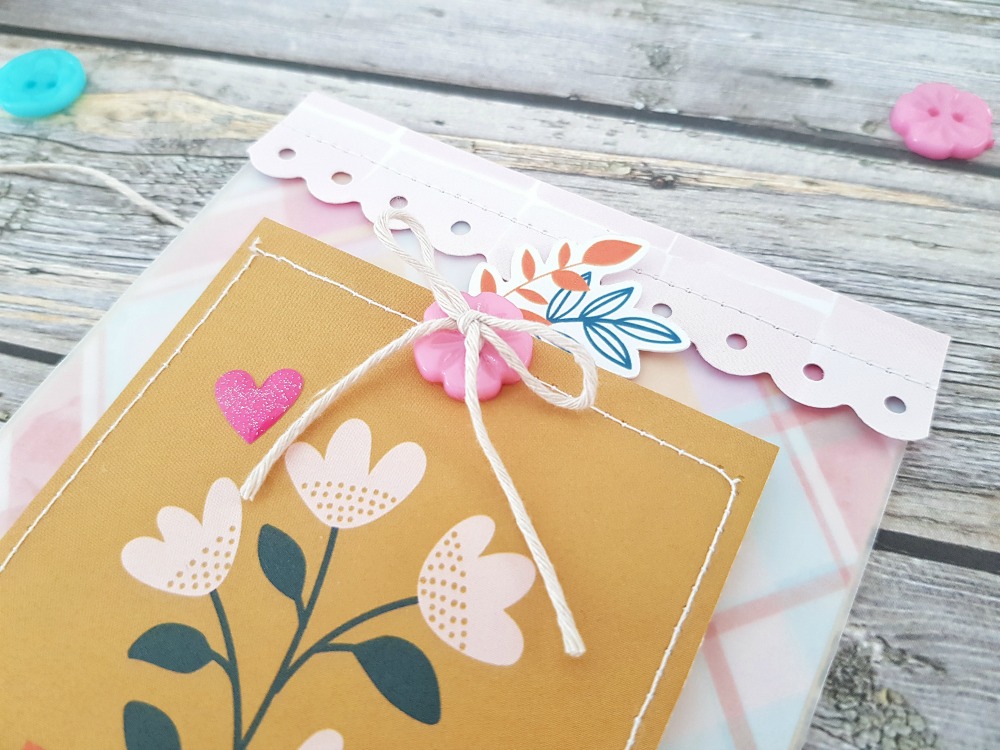
HKC_AmandaBaldwin_Oct26th_Blog_08
So sweet! 
The Dear Lizzy: She's Magic - Decorative Buttons were a gorgeous addition to the both the sewn & hand crafted look of the card. For more repetition, I threaded the button with natural colored twine and tied it in a bow. 
Such a pretty detail!
HKC_AmandaBaldwin_Oct26th_Blog_07

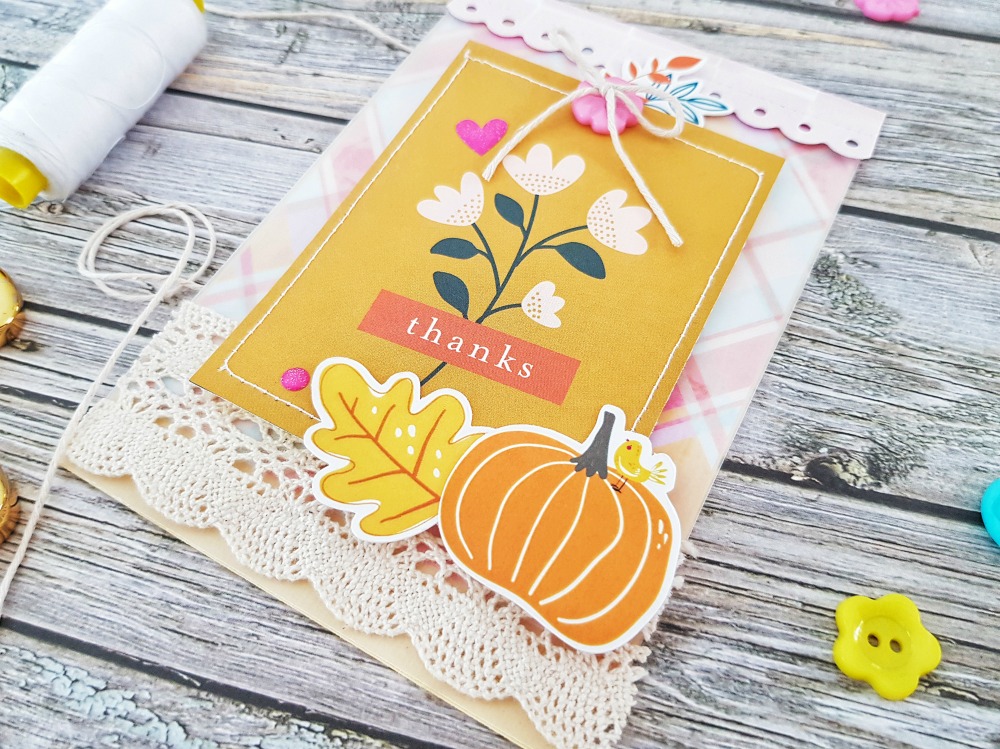
To complete the card, I foam mounted the stitched Fun Times note card and embellished with the gorgeous Pretty Little Studio: Indian Summer Ephemera Combo die cuts. Last, but by no means least, I added those sparkly Dear Lizzy: She's Magic - Epoxy Stickers from the Embellishment Kit. The pop of pink coordinates with the pink in the plaid background and that sweet little button. Love it!
With my first card completed, it then determined the design and style for the other two! 
Here's my second Thank You card....

HKC_AmandaBaldwin_Oct26th_Blog_09

The similarities between the cards is obvious, but on closer inspection, it's those small differences and details that make each card special & unique! I loved the softness that the vellum created in the first card, so I decide to use it again, but this time just over the plain Bazzill Lemonade Cardstock base. Super pretty! As I wasn't featuring a pattern paper background, I layered my stitched Fun Times note card onto a 3 1/4" x 4 1/4" sheet of the reverse side of the Dear Lizzy: She's Magic - Magic paper
That green is gor-jus!!!

HKC_AmandaBaldwin_Oct26th_Blog_10

To make this card a lil more special, I embellished the vase of flowers with an Indian Summer die cut bloom. I folded up the petals on this die cut to create soft texture & dimension. I also foam mounted a Dear Lizzy: She's Magic - Mini Phrase Sticker (from the Embellishment Kit) to the vase. Small & simple details that produce that extra wow factor! 
You'll also notice that I altered the position of the bow-tiful button & embellished it with a tiny laurel leaf die cut too! Super cute & sweet!

For my third and final card, I combined elements of the previous two cards as well as a couple new additions....
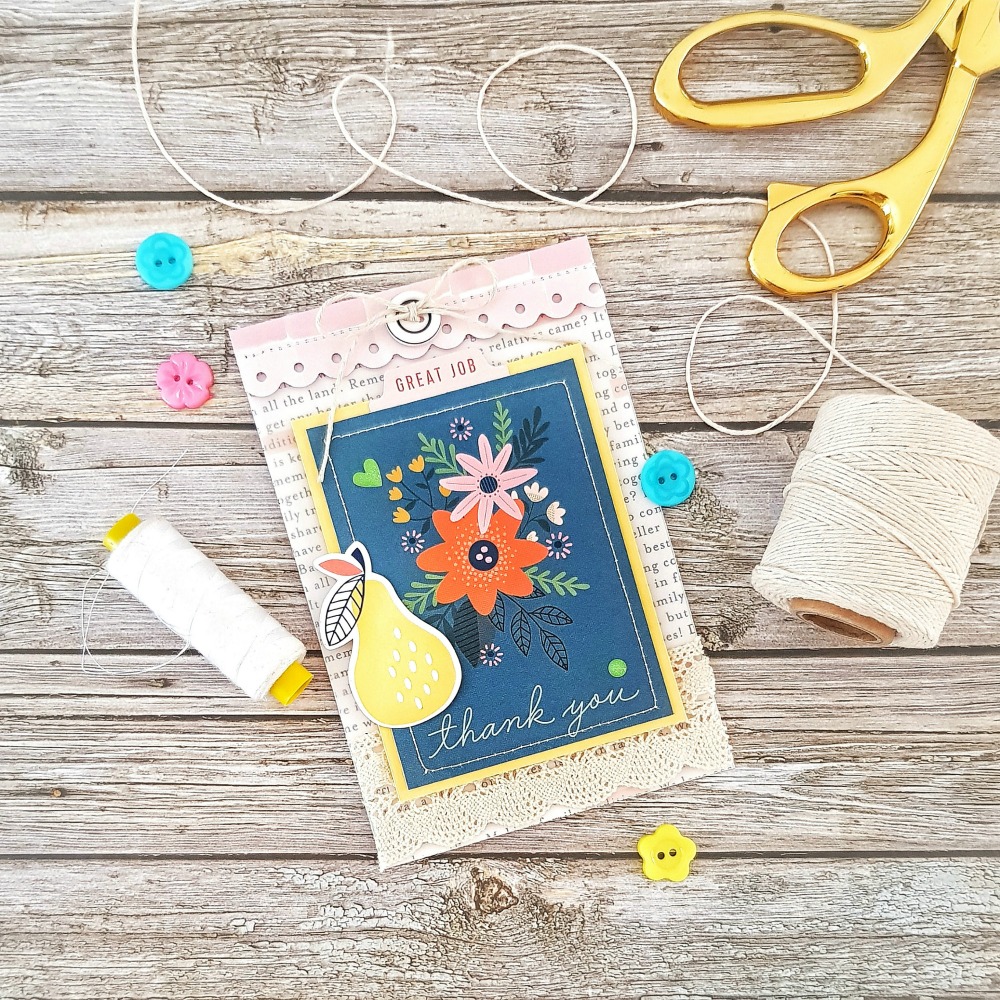
HKC_AmandaBaldwin_Oct26th_Blog_11

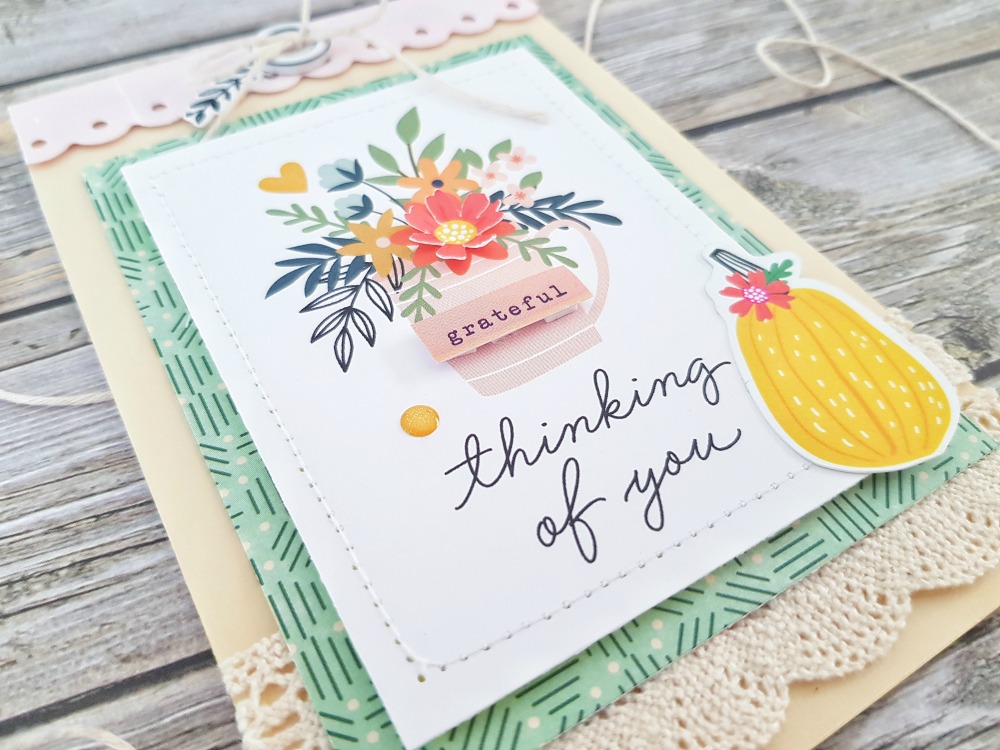
LOVEEE!!! That blue makes my heart happy! 
Here's a closer look...

HKC_AmandaBaldwin_Oct26th_Blog_12

You'll see that I swapped out the pumpkin die cuts for that lovely yellow pear, and as yellow was such a predominant color in the mood board, I think it worked in beautifully! 
The other noticeable difference is the inclusion of the sentiment tab at the top of the note card...

HKC_AmandaBaldwin_Oct26th_Blog_13

The Great Job tab is actually a Pinkfresh Studio: Office Hours - Cardstock Sticker from the Embellishment Kit! How cute! That soft pink coordinates with the flowers, as well as the scallop trim at the top of the card. Beautiful! 

And there you have it! 

Sew Beauti-Fall cards inspired by the fabulous October mood board! 
I hope I have inspired you to create an extra card or two this month with your Hip Kits! Be sure to upload and share your handmade lovelies in the Hip Kit Club Facebook Group HERE - I can't wait to see what you create! 

Thanks so much for stopping by!
til next time, 

Hip Kit Club: September Moodboard Inspiration!


Hi Friends!

Welcome back for more Hip Kit Club inspiration! 
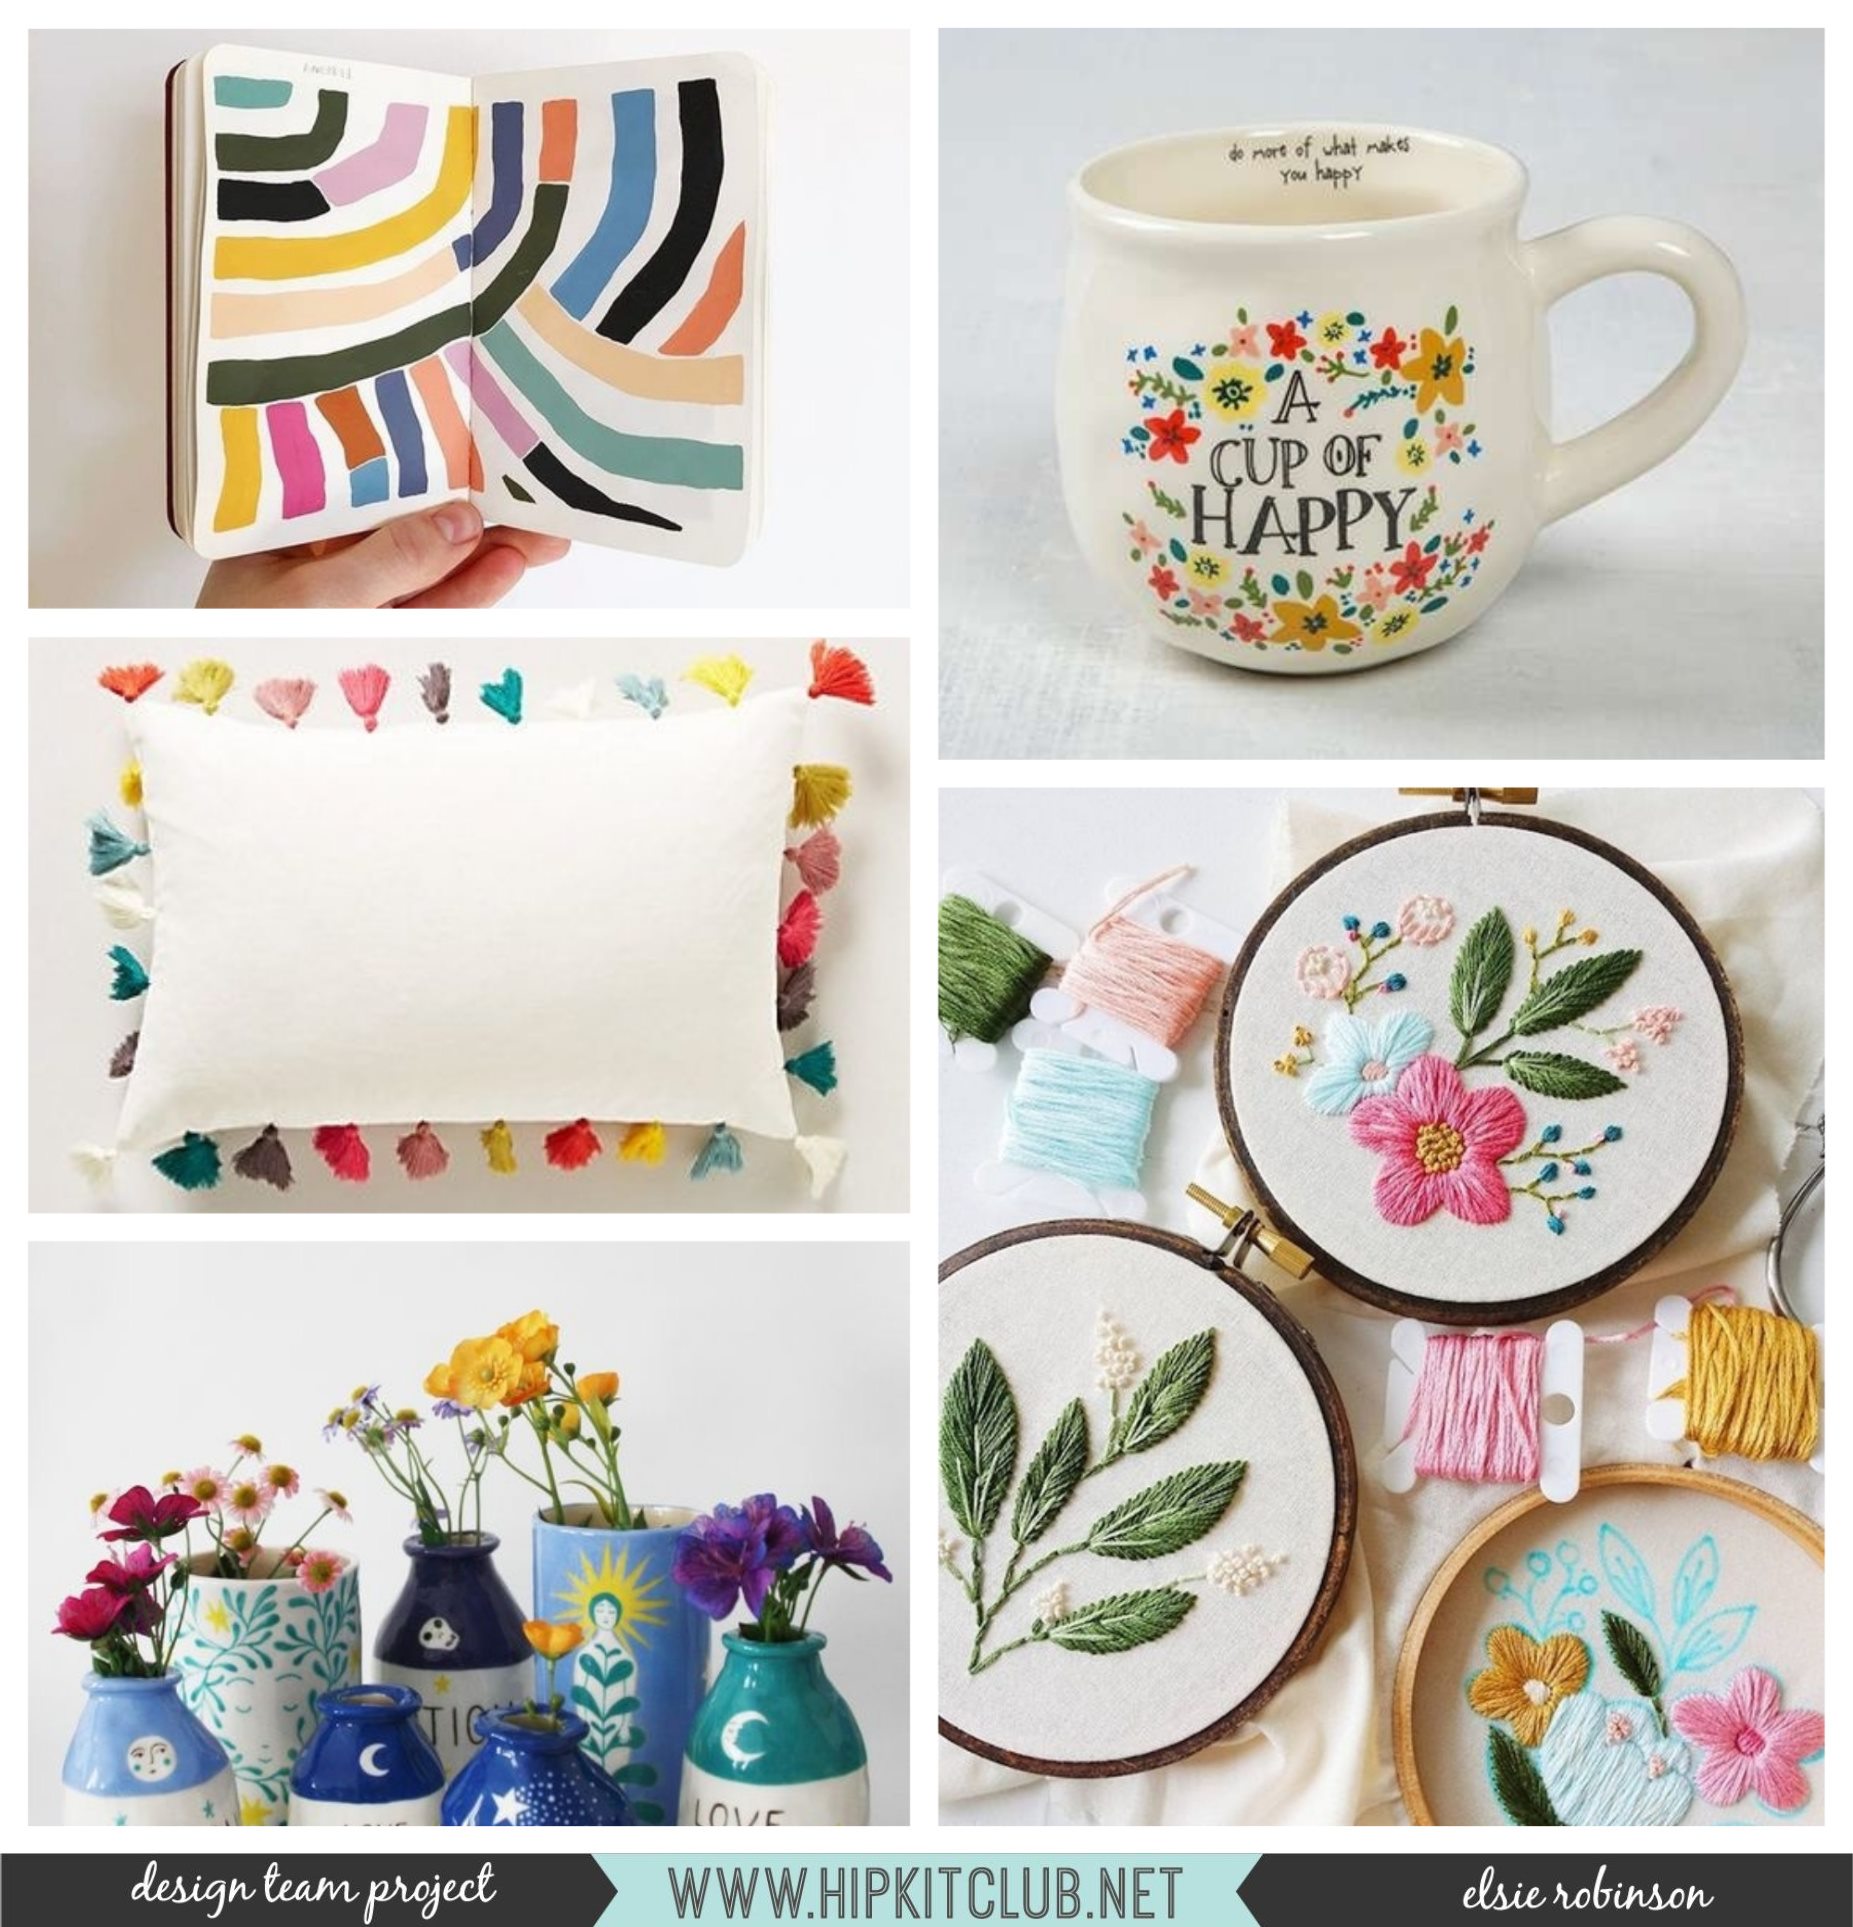
Today I'm sharing a super pretty layout inspired by the September 2019 Moodboard which was created by our amazing DT member, Elsie Robinson!
If you've missed or forgotten the September Moodboard, 
here's a quick reminder of what it looks like....

69580470_724397031347839_8303390432893599744_o

Totally gor-jus, huh?! Such beautiful imagery!
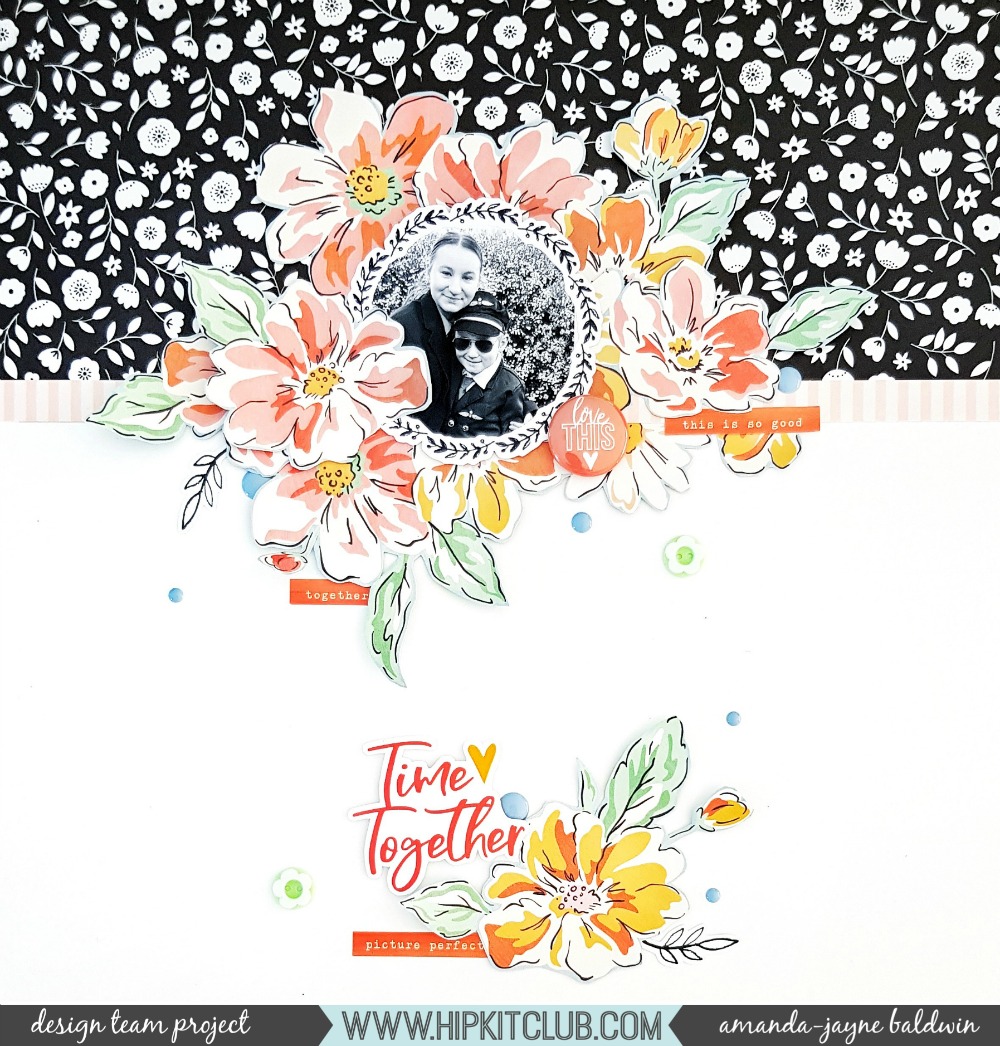
So without further ado, here's the layout that this board inspired...

"Time Together"
HKC_AmandaBaldwin_Sept29th_Blog_01

Oh how preeeeeeetty! 
I have combined the beautiful September 2019 Main, Embellishment & Cardstock Scrapbook Kits to create this gorgeous layout.

You'll notice that I was inspired by the striking pops of black in the first image, as well as all the florals throughout the board! The 'a cup of happy' image really got me thinking about gratitude and thankfulness. My 'cup' is so full. I am so blessed (& happy!) and my family are my every reason! I knew I had to document and convey this sense of happy gratitude somehow on my page. 
I also took inspiration from the embroidery hoops, and framed my greatest masterpieces (my two darling children) inside the Pretty Little Studio die cut ephemera wreath. 
Just beautiful!

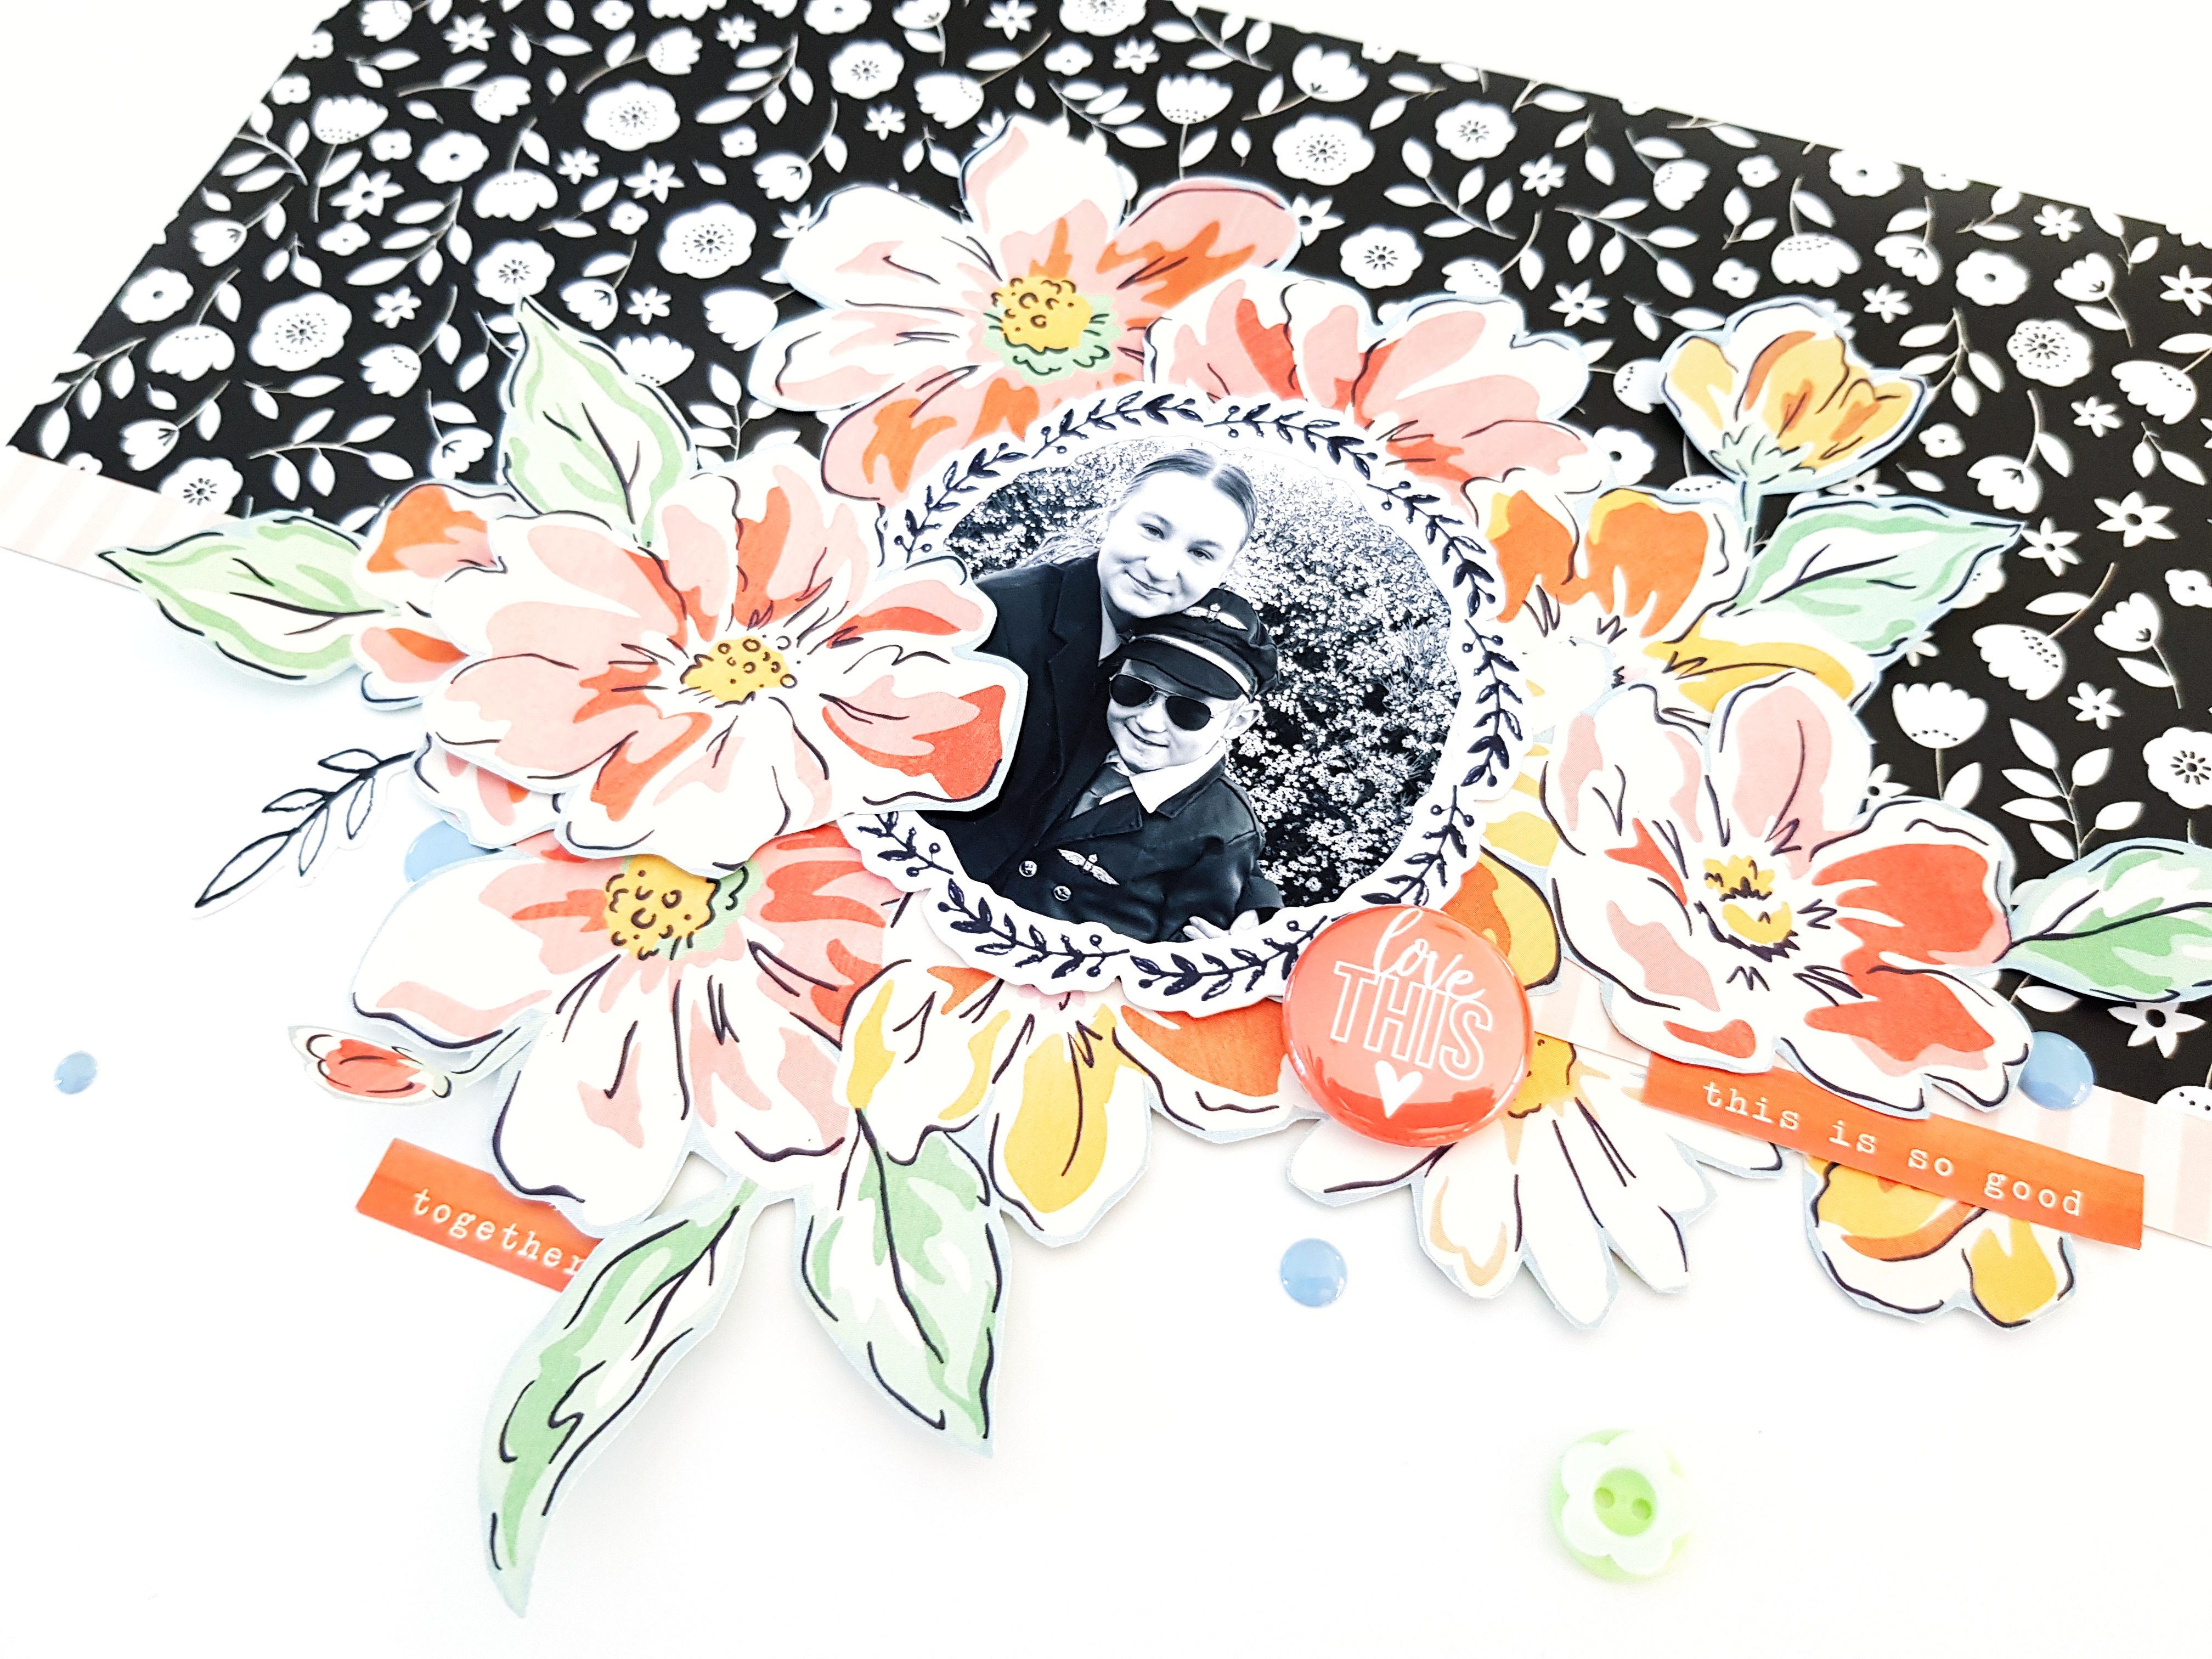
Here's a better look at my scrapbook page.....

HKC_AmandaBaldwin_Sept29th_Blog_02

So very lovely! 
Cherish this time together!

I started my layout with the Bazzill Marshmallow Cardstock from the September 2019 Cardstock Scrapbook Kit. I love a good 'white space' layout! I also love all things black & white, and that striking Jen Hadfield pattern paper (reverse side of Home Sweet Home from the This Is Family collection) completely had my heart! It really captured my attention, plus it featured florals - so win, win! The pink & white stripe branding strip at the base of this pattern paper also impressed me, so I kept it intact to act as an anchor for both my pattern paper and photograph.

The Dear Lizzy 'Magic' pattern paper was just begging to be fussy cut,  and naturally, I had to oblige! Ha! I mean, who can resist those stunning blooms?! Infact, it was this pattern paper that then dictated the rest of my color scheme for the remainder of my layout.

20190925_151641-01-01

Those blooms are errrything! I layered them beneath & around my photograph to visually draw attention to my treasured picture. The fine black outline on them also coordinated perfectly with the Home Sweet Home paper as well! 
Speaking of coordination, the Pretty Little Studio: Indian Summer Ephemera Combo pack contained a few pretty black & white pieces too! I used that divine wreath to frame my darling photo, and tucked a few leaves beneath the fussy cut Dear Lizzy blooms. 
Gor-jus!

20190925_151658-01-01

The warm red color tones in the Magic blooms really excited me, (red isn't my usual go-to color) & I loved using this color as an accent in my design. 
Using the September 2019 Embellishment Kit, I adorned my framed photo with that stunning red flair from the Indian Summer Love This Flair buttons pack. I also chose some of the warm red Mini Phrase Stickers from the Dear Lizzy: She's Magic collection to add a few sentiments to my page. 
To avoid too much red, I also drew on the green and blue from the Magic paper, and sprinkled a few of the She's Magic Decorative Buttons and Pinkfresh Studio Office Hours Mixed Embellishments enamel dots from the Main Scrapbook Kit. This created both balance and harmony to my layout and offered a more light-hearted and fresh look!

20190925_151616-01-01-01-01

For finishing touches, I positioned one of the golden yellow fussy cut blooms in the center of the base of the page, and embellished with more enamel dots, buttons, a phrase sticker and my title, Time Together. The title is from the Pretty Little Studio Indian Summer Ephemera Combo pack and is the perfect sentiment (& colors!) for my page.
And there you have it! 
Simple.Beautiful.Heartfelt creating! 
Inspired by that delightful moodboard and the gorgeous September Kits! 
I wonder how this moodboard will influence your next project? 
Be sure to share with us in the Hip Kit Club Facebook Group HERE. 

Thanks so much for stopping by today!
til next time,

Pebbles: Patio Party Scrapbook Process Video!


Hi Friends! 

Welcome back for more Pebbles Design Team inspiration! 
2018 saw the release of so many gorgeous collections for Pebbles, 
but my very favorite would have to be the bright and beautiful 
Jen Hadfield: Patio Party. Just beautiful! 
So, just before we reveal the first of many stunning new lines for 2019, let's take another look at this wonderful collection!
Today I am sharing a very sweet & fun scrapbook layout,

"Smile"


Oh isn't this pretty?!!
Such a beautiful page that really draws on all the gorgeous florals and blooms in both my photo, & the Patio Party collection! Love it!
Here's a closer look for you....


Sigh! This is soooooooo pretty!
I have featured the beautiful Backyard Blooms pattern paper as both the layout base and 'border', and then used this very same pattern in the 6 x 6 size to back my silly selfie photo with! The repeat patterning creates unity within my design, and pulls everything 'together'. As it is such a busy pattern paper, I avoid adding other designs or patterns and instead, opt for lots of complimentary embellishments to support my photo with.


How pretty are all those blooms?!
You'll spy them in Die Cut Ephemera, Dimensional Stickers, Puffy Stickers and even the 6 x 12 Accent Stickers - so many beautiful embellishments to create layers and interest with!


Just look at those layers!!! All the heart eyes for these pretty details!


With all those bright, pop colors & layered blooms, I feature the Wood Stickers to create balance in my design. The strong, rectangular shape combined with the dark wood grain offer a hint of masculinity and structure to this otherwise girly page.
I use the gold Puffy Sticker, Smile for my title - perfect for my selfie!


For finishing touches, I add a little watercolor paint and splatter droplets to complete my lovely page!
Want to see more?

Thanks so much for liking & subscribing too!
I hope you enjoy my video!
Thanks so much for visiting today!


Pebbles: Holly Jolly Christmas!


Hi Creatives!

Welcome back for more Pebbles inspiration!
Today I am sharing a really simple process video with the super cute Cozy & Bright collection! 


I just love this adorable collection - it's so playful & fun! 
Perfect for documenting all the holly jolly Christmas moments!
But enough chatter, here's what my finished project looks like.....

"Holly Jolly"


Oh isn't this the sweetest?!! 
Nothing's more precious than a puppy for Christmas!!! Holly jolly, indeed!
I've featured one inch strips of the bright stripes pattern paper, MERRY & BRIGHT to act as an anchor at both the top and base of my 12 inch white cardstock page.  I've also drawn on the less traditional Christmas colors in this collection, and used the light blue and pink for a more whimsical look!
Here's a closer look for you.....


This is oh so pretty! 
Lots of beautiful embellishments to adorn and support my sweet photo!


I fussy cut those  blue & pink tags from pattern paper GIVE JOY, and use them to layer my photo with. The use of tags is a great alternative to blocks of pattern paper, and adds a more playful and fresh look!


Just look at the soft glitter on the 6 x 12 ACCENT STICKERS - those red baubles are just divine!


Loving those DECORATIVE BRADS too!


Want to see more, including how this layout came together? 
Please watch my short process video HERE.
Thanks so much for subscribing to my channel too!


I hope you enjoy and feel inspired to get creating with Cozy & Bright for the Holidays!

Merry Christmas, & Happy Arty Days, 
Amanda xo


Holly Jolly Holiday Hop!


Hi Friends! 

Today I am super - dee - duper excited to share that I am participating in the 

YouTube Crafters

Holly Jolly Holiday Hop

Join me and some of the BEST creatives in the papercrafting industry as we share some 
Holiday Cheer on our channels! 
There's so much fun to be had, & even this FREE Holly Jolly Cut File to download....


SO awesome, huh?!! 

Here's a sneaky peak at the layout I've created for this fabulous hop....

"Holly Jolly"

Isn't this just adorable?!!
I've combined my favorite Shimmerz Paints, 
Pebbles: Cozy & Bright collection
 and the FREE Holly Jolly Cut File to create this super cute layout! 
Want to see more?
Stop by my channel HERE to start the hop, and see how this page came together! 

Thanks so much for watching! 
I hope I inspire you, & that you enjoy the hop! 

Merry Christmas!

Happy Arty Days, 
Amanda xo 

Pebbles: Cozy & Bright Christmas Layout!


Hi Friends!

Welcome back for more Pebbles Christmas inspiration!
This week's theme post for the DT is all about documenting a Christmas Tradition in your 'home' country. For those of you who don't know, I'm an Aussie girl and spend most of my days at the beach! And Christmas is no exception! But before we get to the big day, we have quite a few traditions that we like to participate in.
 The festive season doesn't officially start for us until the Christmas Pageant (think Christmas Parade) has occurred. 
So, for today's post, I am documenting my children participating in the Christmas Pageant. Yay!
Here's my layout.....

"Pageant Day"


Isn't this the sweetest?! Such a bright, happy & adorable page! So.much.fun! 
Best part? It's super simple and easy to recreate - here's how....


Start by trimming the reverse side of pattern paper Tis The Season (candy cane stripes) on an angle. I made my paper strip 3" at the widest end and 2" at the shortest point. Attach to the top of the white cardstock background. Repeat this process, but this time use the candy canes pattern of Tis The Season, and reduce all measurements by one inch. Layer over the top of the stripes paper & glue into place (as shown above).

Take your square photograph, and tuck a Cozy & Bright Tag beneath it. Add a a few layers of torn white tissue wrap to the back of the tag. This torn paper adds both dimension and interest to the photo cluster.

'
Foam mount the photo cluster onto the top right hand side of the layout, & embellish with a few Die Cuts.


I just adore that cookies n cocoa Santa - so super cute!


Embellish with more Die Cuts, as well as some fabulous 6" x 12 " Accent Stickers.

Add a 1/2" trim of pattern paper, Tis The Season (reverse side) to the very base of the page
.

Embellish with those amazing Decorative Brads.


Add some Puffy Stickers - they make everything look awesome!

Create your title (& xo subtitles) with the Cozy & Bright Maggie Thickers. So cool! Love these amazing candy cane print alphas!


Build on your title work with a Decorative Brad!


Continue to embellish with stickers, brads and die cuts until your happy!
And Voila! An adorable page that is oh-so easy to create!
Here's a few close ups for you......


And there you have it! 
Cozy & Bright - perfect for documenting the Festive Season!
I hope I've inspired you to get creating with this amazing new line!

Happy Holidays, Friends!


The Cut Shoppe: Flutterby Butterfly Love!


Hi Friends!

Welcome back for more cut file inspiration, with my latest layout for The Cut Shoppe!
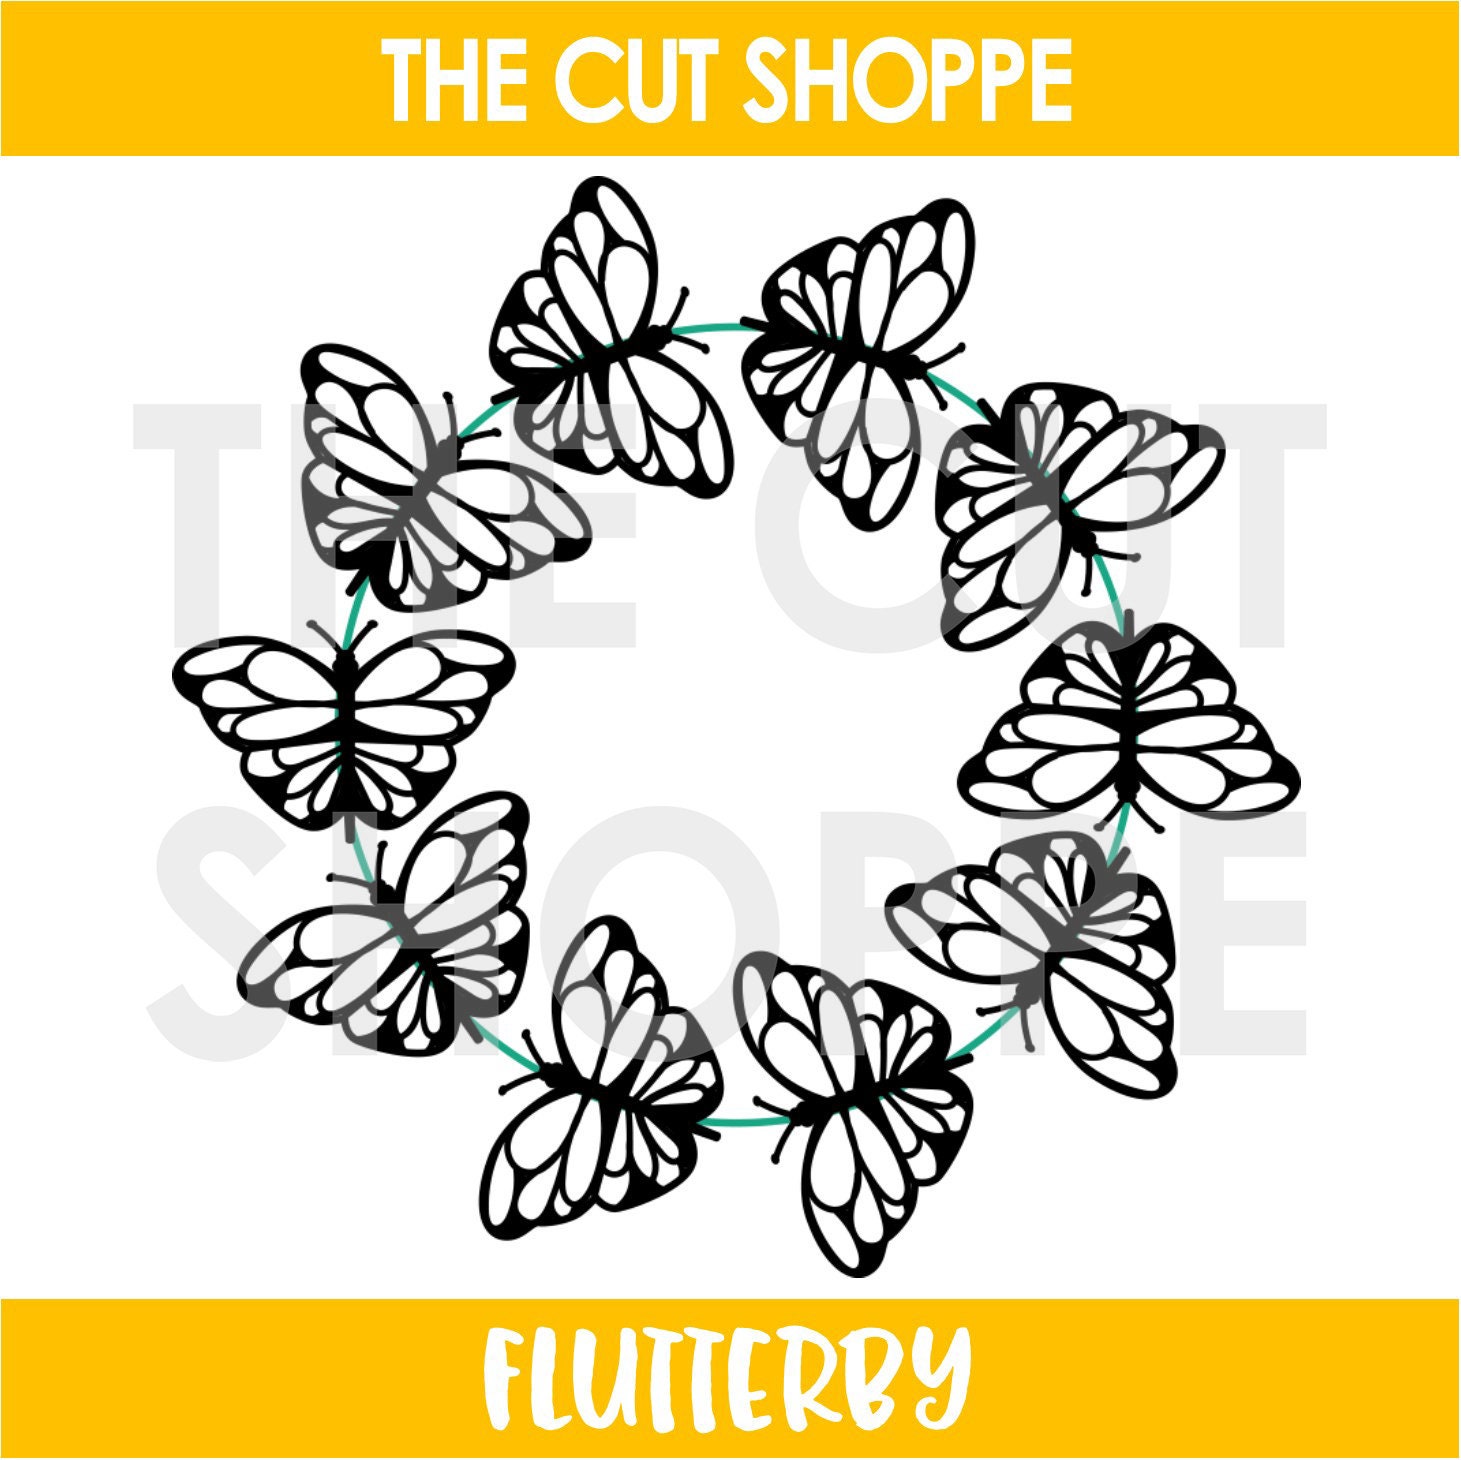
Today I am sharing a very pretty page with the fabulous Flutterby cut file! 
I just love butterflies, & pop them in a wreath and well, I'm one happy creator! 
Here's what I've made with this file today.....
"Hello, Sunshine"


Sigh! Isn't this just lovely?!
The Flutterby digital cut file is just so intricate and oh-so-beautiful!


Absolutey divine! 
You can find this incredible file in The Cut Shoppe Etsy Store HERE. 

Let's take a closer look at my layout....


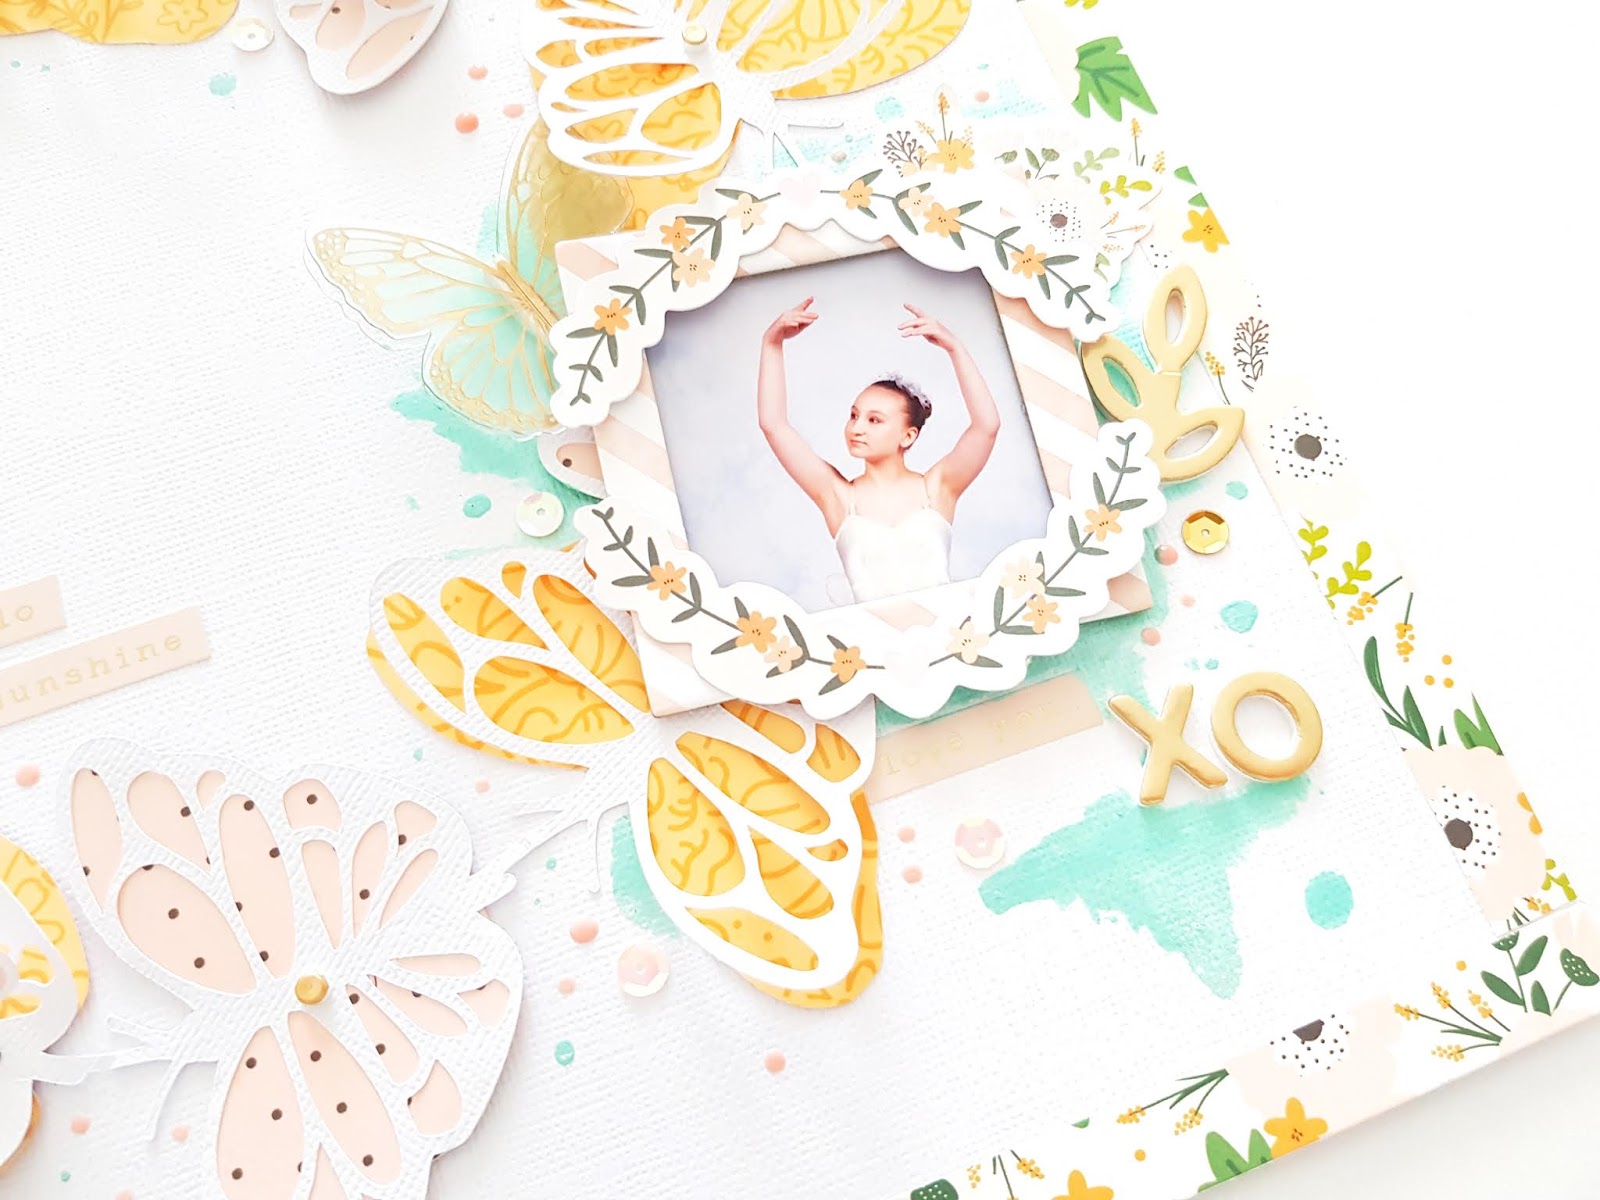
I've teamed that amazing Flutterby file with the beautiful Pebbles Jen Hadfield: Along The Way collection & I think you'll agree that this is perfect combination!
You'll also spy my fave Shimmerz: It's Mint To Be as an accent color.
So.much.pretty!
I love the white on white look, & regularly cut our files in white cardstock to use on white backgrounds. I really like how this creates a clean and fresh look to layouts, and allows the cut file to be supported with bright pops of color - without being too busy on the eye! 


I've backed half of the butterflies with that soft pink polka dot paper, gluing them perfectly into place. 


The other butterflies are backed a lil differently! I have traced the remaining butterflies with pencil onto that pretty golden yellow paper, cut them out and semi attached them to the Flutterby cut file. I love how they create that layered wing look! 


I've also dressed the Flutterby cut file with lots of pretty embellishments including die cuts, stickers and dots. 


To ensure my photo isn't lost amongst all those beautiful butterflies, I pop it into a frame before layering it onto the Flutterby file. Pretty! 
Such a gorgeous layout for my gorgeous ballerina! 
I think you'll agree that the Flutterby digital cut file is a must have! 

I hope my layout has inspired you to add the Flutterby to your TCS collection today!

Thanks so much for visiting,