Showing posts with label Midnight. Show all posts

Cocoa Vanilla Studio Midnight Layout & Process Video!


Hi Creative Friends!

Welcome back for more Cocoa Vanilla Studio inspiration!
Today I am sharing my take on this week's design team theme post using the divine MIDNIGHT collection. The theme this week is....
creations that "put a ring on it". 
Think rings, wreaths, circles, dots - basically include any round element! Such a fun theme!
Here's what I came up with....

"Love This"
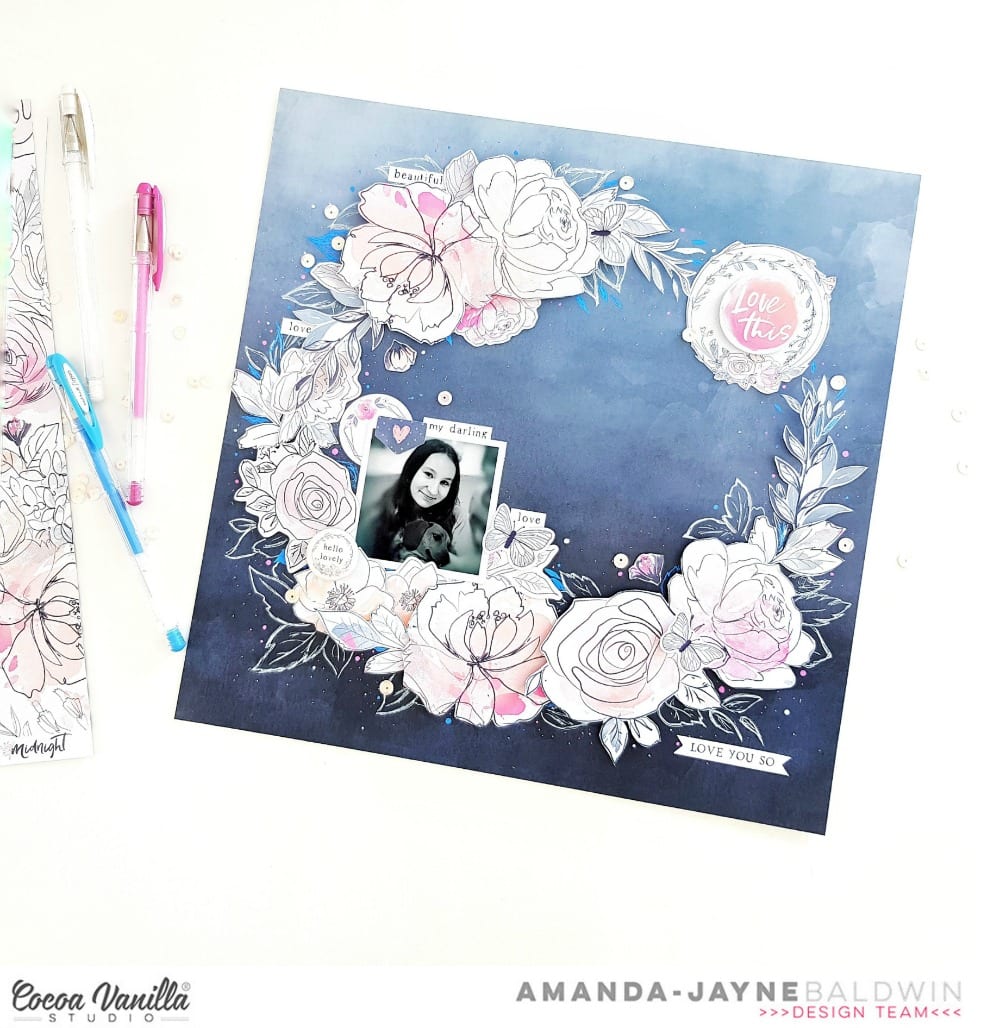


Oh.my.heart!!! So dreamy & divine!
The MIDNIGHT collection is so elegant &  beautiful! It's the perfect collection for documenting stories of my sweet girl!
Here's a closer look for you....
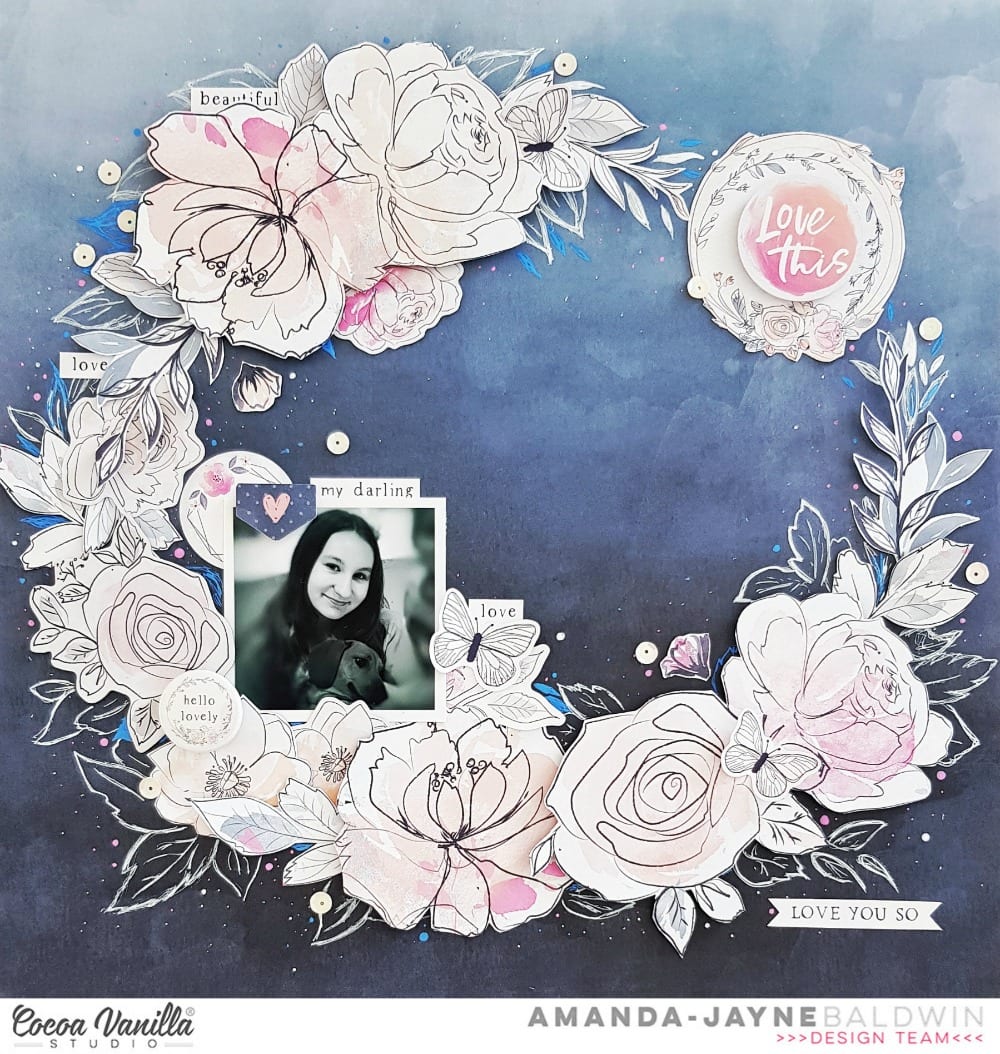

So incredibly beautiful!
I start this layout with pattern paper, CV-MN007 INKY DEPTHS - it's the perfect base! Such a stunning background paper & I just love how it reminds me of the night sky and clouds. To this paper, I trace a circle shape to create a guideline for my wreath (ring) design.
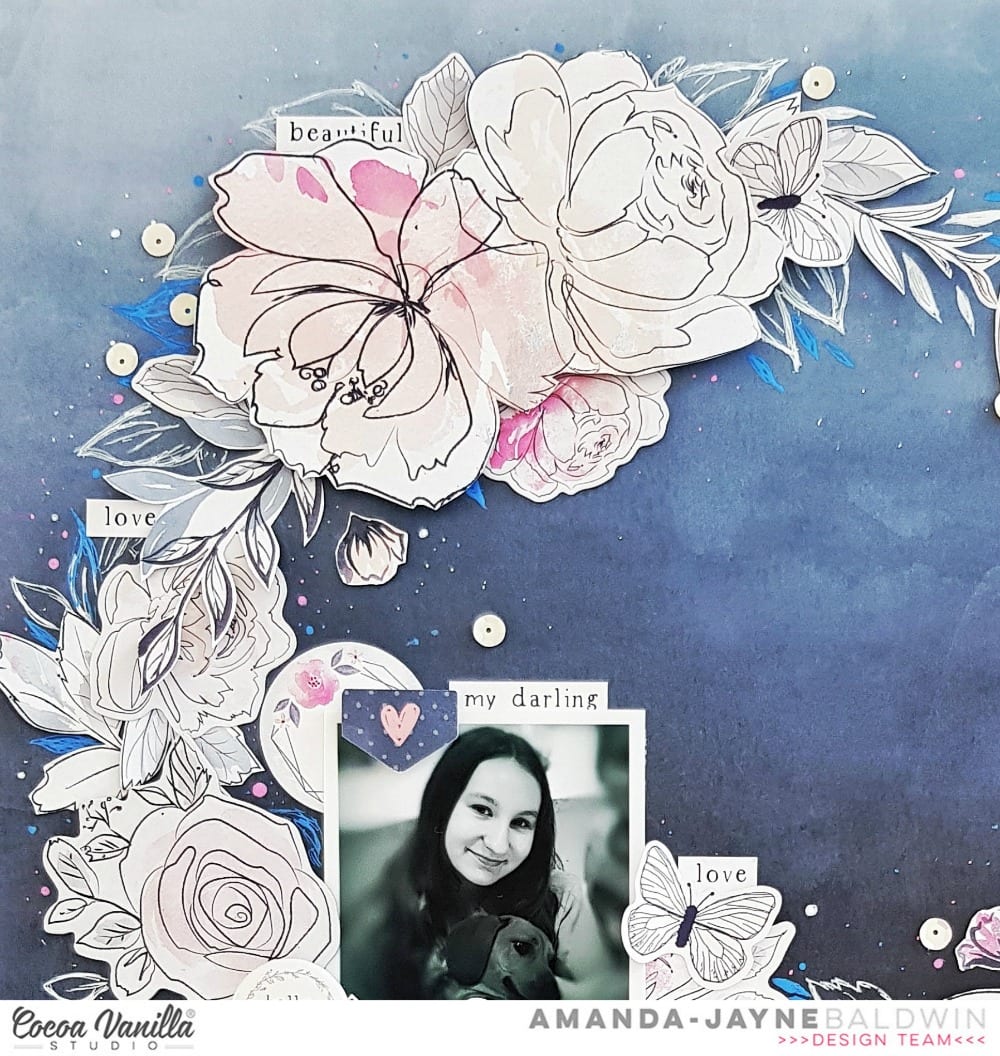

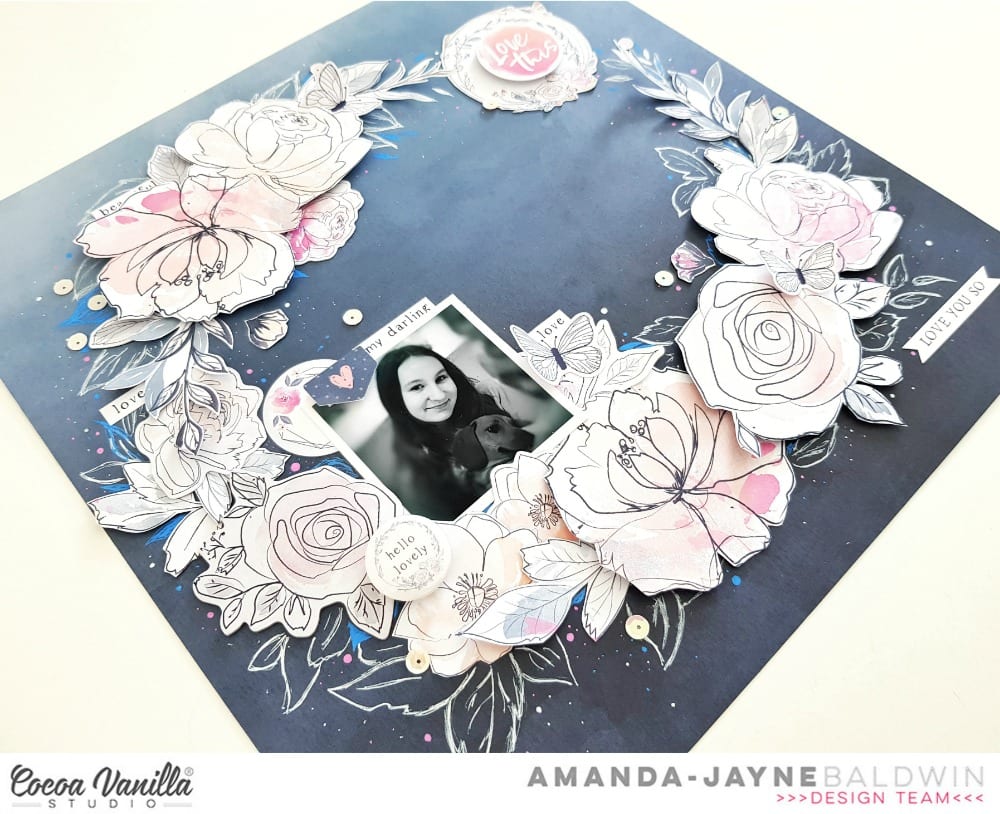
To form the wreath, I fussy cut pattern paper CV-MN001 BLOOM &GROW. I arrange these larger blooms over the traced circle, and adhere with a mix of double sided tape and foam mounting tape. This adds a sense of dimension, soft texture, and brings interest to the design.
I also fussy cut the wreath icon from the CV-MN006 ALL THE THINGS pattern paper, and adhere it to the opening of my ring design (top right corner). 
Here's a close up for you...


SO pretty!!!
Next, I pull out my gel pens, and draw a mix of sketchy leaves that are not dissimilar to that of the BLOOM & GROW pattern paper. The white gel pen is super striking on the INKY DEPTHS paper!
The scribbled leaves serve two purposes - they add a new design element (& visual stimulus) to the layout, plus they also 'build up' the wreath so that it looks full and attractive. In keeping with the whimsical feeling of the page, I add lots of tiny dots in both white, pink & blue pen.
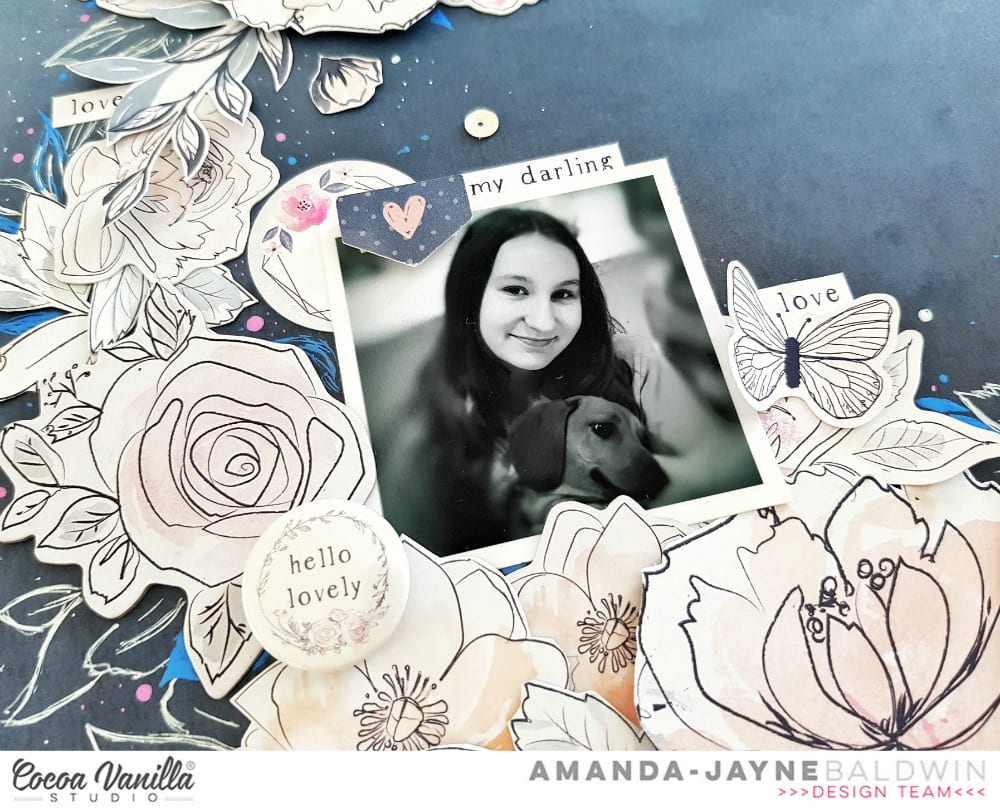

I just LOVE how effective the gel pen looks!
Design Tip: If you like this look, but are nervous about drawing on your  layouts, you could always achieve the same look using stamps and white embossing powder.
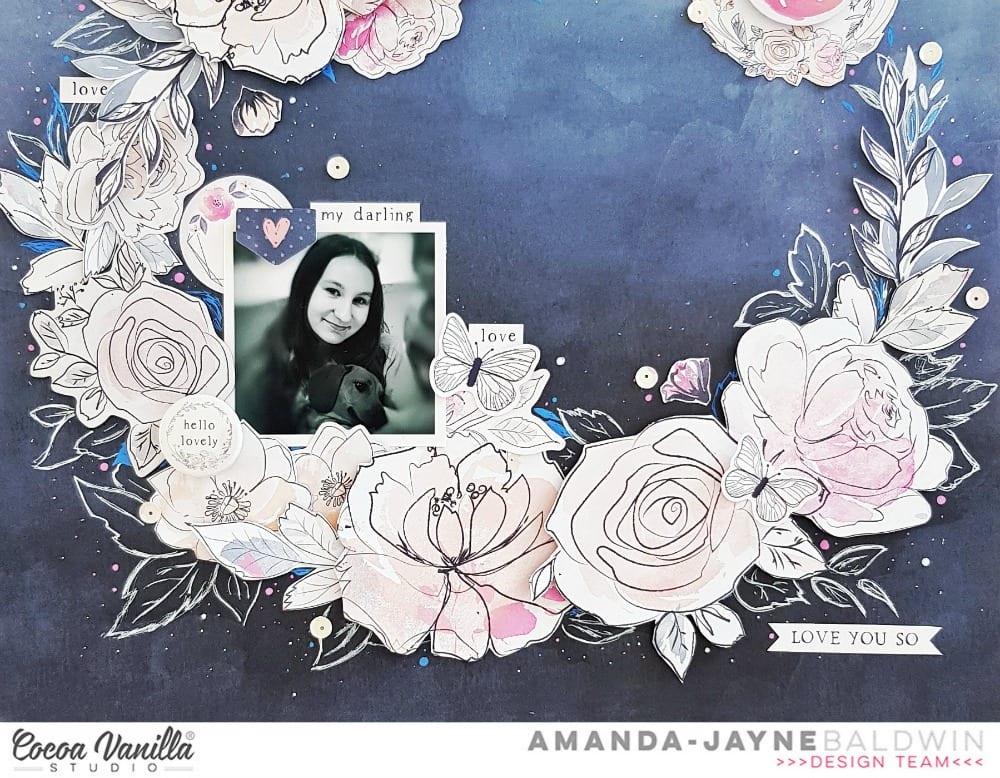

Next, I tuck my photo into the left hand side of the wreath and decorate around it with a few ACCESSORY STICKERS. I also embellish with that fabulous FLAIR BUTTON (which also features a pretty wreath on it!). Lots of rings and wreaths and pretties on this sweet page!
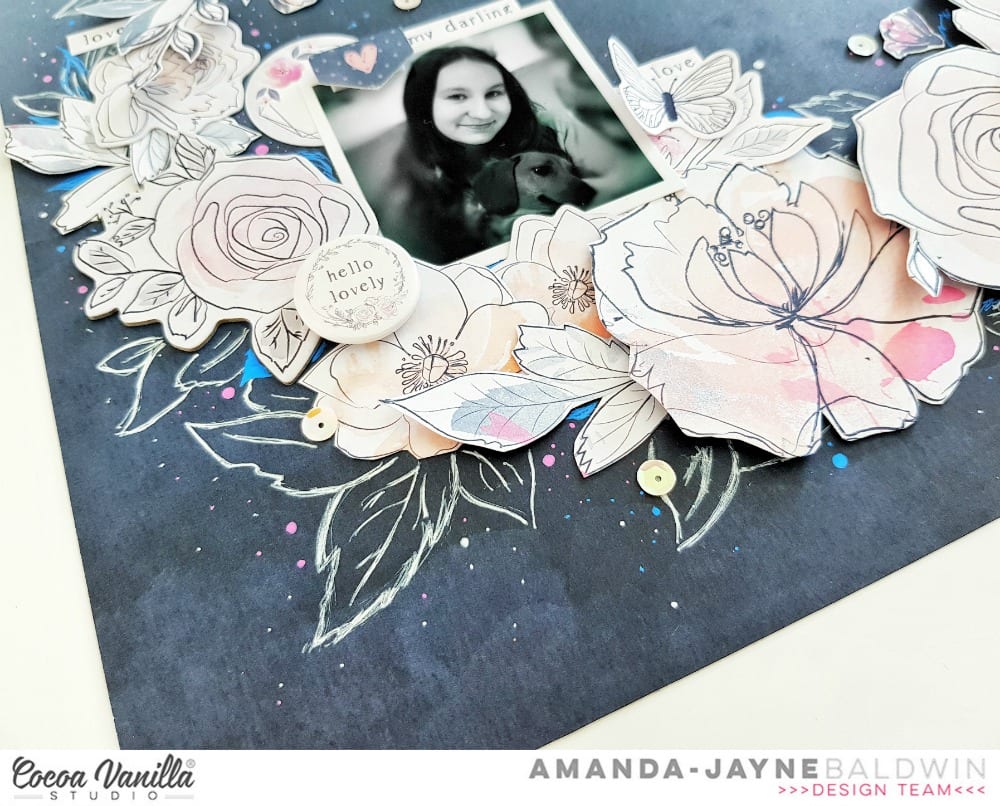

With the ACCESSORY STICKERS handy, I also add some butterflies to the wreath and add a subtitle to the bottom right corner, Love you so....
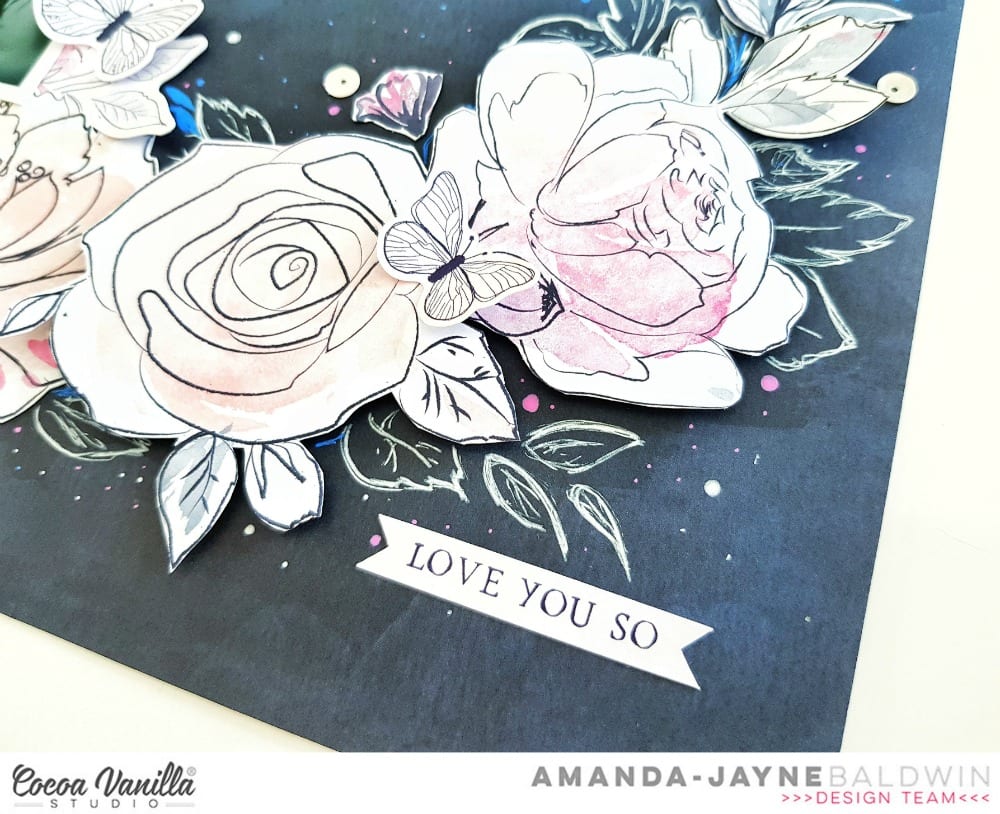

For finishing touches I foam mount the Love this DIE CUT EPHEMERA title to the fussy cut ALL THE THINGS wreath, and sprinkle a few HELLO LOVELY sequins!


Voila! Beautiful creating in a matter of minutes!
Wanna see more of how this pretty page came together? 
Please watch my process video below...


Thanks so much for joining me today!
I really hope that I have inspired you to not only 'put a ring on it',
but also to make some marks & get doodling on your memory keeping projects!
'til next time,

Shimmerz Paints + Cocoa Vanilla Studio = Beautiful Layout & Process Video


Hi Creative Friends! 

Welcome back for more shimmery inspiration!
Today I am sharing a gorgeous layout & process video with the fabulous
Shimmerz Paints April Color Kit! 
This exclusive Color Kit is absolutely GOR-jus & I just couldn't resist creating with it again -
 while I anxiously await the June Kit release in a few days time!

**Hint, hint! Set your alarms for June 1st kit reveal day - it's going to be epic!**

If you missed the April Color Kit, it looks like this.....


SO divine!

***These are limited edition kits, BUT there is one or two remaining in the store - if your quick!***

The kit contents are: 

Here's the layout I have created with this fabulous Color Kit....

"Beautiful"


Sigh! Beautiful indeed! 
Such a pretty page for my darling ballerina! 

Here's a closer look for you....


Swoon! So much gorgeousness! 
I can't even!!!
From that pretty Pink-A-Boo Inklingz, to the richness of the Vibez Quit Yer Wine-n & those stunning pops of Lapis Dance Creameez - well, it's just pure bliss! 
And don't even get me started on the Pick Your Plum sequins!!!
La La LOVE this kit! 
I have combined it with the Cocoa Vanilla Studio Midnight collection, as they're clearly a match made in heaven!

Here's a few pretty close ups for you.....


Just look at those colors!
So much loveliness in the April Color Kit!


Such a soft and pretty page for my darling ballerina! 


You can watch how I created this pretty heart page design on the Shimmerz channel HERE
Happy watching!


I hope you enjoyed my seeing how my layout came together. 
I just adore the April Color Kit & I hope I have inspired you to use yours!
(Or race to the store for the last remaining one HERE! )

Thanks so much for visiting, 
til next time, 


Cocoa Vanilla Studio: Sealed With A Kiss!


Hi Friends!

Welcome back for more Cocoa Vanilla Studio loveliness!
Today I'm sharing a Valentine's inspired layout with the gorgeous Midnight collection!
A super sweet, melt your heart kinda moment....

"Sealed With A Kiss" 

Oh how divine! Such a beautiful page!
This sweet little boy always makes everyday amazing, and this photo of us is just a bit precious! So very dear to my heart! When I was I reflecting on the photograph & memory, my title Sealed With A Kiss came to mind. This title fostered the idea of sealed envelopes, love letters, & writing paper, and so my layout design evolved. That's how simple my creative process is! Inspiration can be found in the smallest of details!
I used the lovely script pattern paper, CV- MN005 MOONLIGHT for my layout base, and softened it's edges with lilac watercolor tones. I also added a watercolor base for my envelope cut file to rest on. Speaking of cut files, this one is from Paige Evans and is called "Envelope Flowers" - SO pretty!


I back the envelope hearts, flowers and leaves with an assortment of papers from the 6 x 8 PAPER PAD, & CV-MN004 MIXED BLESSINGS. The actual envelope is backed with pattern paper, CV-MN003 INSPIRED - totally gorgeous! I embellish the flower centers with ENAMEL DOTS & ALPHABET STICKERS from our LIFE IS BEAUTIFUL collection. 
The colors compliment the MIDNIGHT collection beautifully.


The alphas featured are the O's which I fill with the enamels. Such a small, but oh so effective detail. Love the soft dimension and texture this creates! I use these same ALPHABET STICKERS for my layout title. Perfect!


I seal my envelope with a FLAIR BUTTON, and also embellish it with the take note DIE CUT EPHEMERA. My sweet love letter is really looking the part!
I adorn my treasured photo with a DIE CUT EPHEMERA frame, which I mount with thick foam tape. I embellish it with two sentiment stickers from the ACCESSORY STICKERS sheet. 
Here's a closer look....


Adore! Melts my heart every.single.time!!!
For finishing touches, I add a sprinkle of sequins, and a few more flower and heart DIE CUTS around the love letter.


So very beautiful!
I hope you have enjoyed seeing my Valentine's theme layout & feel inspired to get creating with the delightful MIDNIGHT collection!

Thanks so much for visiting,
til next time, 

Cocoa Vanilla Studio: Happy Together!


Hi Friends!

Welcome back for more Cocoa Vanilla Studio inspiration!
 Today's layout is inspired by Valentine's Day and features the beautiful Midnight collection!

Also, it's a very rare moment when hubby & I get in front of the camera at the same time - 
so I just had to make the most of this photo! 
So endearing to document our happy union!
 And today we celebrate our wedding anniversary - 
so a very special layout and post for me personally, too!
But enough of the gushy stuff, here's my loved up layout,

"Happy Together"


So very happy together! The sweetest! Happy Anniversary to us!

Isn't this pretty?! I've featured the divine script pattern from the reverse side of paper, CV-MN005 MOONLIGHT as my background. I used pattern paper, CV-MN002 SHINE BRIGHT for the cut file heart, and paper pieced the linked hearts with assorted pink papers from the 6 x 8" PAPER PAD. I use these same 6 x 8" papers as layers beneath my cherished photograph. So beautiful!

Note: The cut file featured is a free one from The Cut Shoppe & is called With Love.
Here's a closer look at my layout.......


Sigh! Such a happy moment documented!

Before I attached the cut file heart, I added lots of paint splatters and even lightly coloured a few of the pattern paper edges. That fabulous title is part CHIPBOARD PIECES & part CARDSTOCK TITLES - I just love how they coordinate so perfectly together!


I foam mounted the 'together' die cut title for added dimension and to better match it's CHIPBOARD counterpart.
Speaking of titles, you'll also spy that I used the DIE CUT EPHEMERA subtitle, XOXO at the top of the heart.


Such pretty details! This title was also foam mounted for extra dimension, before being layered onto the heart cut file. I tucked a DIE CUT EPHEMERA & ACCESSORY STICKER bloom beneath it all too. SO gorgeous! Lots of pretty paint splatters and Cocoa Vanilla Studio sequins as well!


There are so many lovely embellishments in this collection, and I couldn't resist layering a few of them together! I adorn my photo cluster with DIE CUT EPHEMERA, CHIPBOARD PIECES & some ACCESSORY STICKERS too. Aren't the hand drawn hearts and blooms divine?!!


Such a simple page design, and yet oh-so-beautiful! It really is a dream to create with the Midnight collection!
I hope my layout has inspired you to get creating with Midnight today!

Thanks so much for visiting,
til next time, 


Cocoa Vanilla Studio: Bloom & Grow with the Midnight Collection!


Hi Creative Friends!

Welcome back for more Cocoa Vanilla Studio awesomeness! 
Today I am sharing a super pretty layout with the divine MIDNIGHT collection! 
I just adore this gorgeous collection, and it's fast become my favorite collection of 2018! 
From beautiful patterns, sweet florals and a beautiful colour scheme this collection has it all! 
But enough of the chatter, here's my next layout with MIDNIGHT.... 

"Bloom & Grow"

Sigh! Isn't this just the prettiest?!!
It's no secret that I love ALL the floral things, and this is exactly why! So very beautiful!
If my layout looks a little familiar to you, you'd be correct! I'm actually taking inspiration from my own monochromatic layout from last month. 
It's called, "Our Happy Story" & looks like this......

Just divine! You can revisit this layout and blog post HERE
So sweet! 
You can see why I just had to create a pink version too! 
Highlighting just one colour, and creating monochromatic magic with the MIDNIGHT collection is really beautiful & so effective! 

For today's variation, I rotate the design, and opt for a more floral and feminine look! 
I feature the remaining half of the large mandala die from the LARGE DIE CUT & BACKING KIT (from last month's layout) and spray it in my favourite shimmering pink colours. I try to mimic the colours & tones from the 'Love This' die cut that features in the embellishment cluster in the top right hand side of my layout.  I just love how this turned out! 
A bright pop of colour, and with such depth, it allowed me to back the die with a busy pattern paper and not get 'lost'. Speaking of that floral paper, it's actually the reverse side of CV-MN007 INKY DEPTHS - yes, the paper I used to back my original design last month! #useallthethings! 
I think I need at least 20 sheets of this paper - it features both my favorite colour (indigo blue) and pretty florals!!! 
So I'm totally crushing on INKY DEPTHS! 
 You'll also note that I foam mount this floral backed, half LARGE DIE CUT & adorn it with gold sequins from our past HELLO LOVELY collection. Before I adhere it to my white cardstock base, I use the same shimmering pink sprays & the packaging technique to create a softened mixed media base. I do this where the half LARGE DIE CUT, and the vertical paper strips on the right, will be positioned. I then tuck a few floral ACCESSORY STICKERS, CLEAR STICKERS, DIE CUT EPHEMERA pieces & even floral CHIPBOARD ACCENTS alongside & beneath the LARGE DIE CUT rim. Amongst these florals, I also add my CLEAR STICKERS title Bloom & Grow, as well as some journaling with the typed ACCESSORY STICKERS. 
I select the gem like DIE CUT EPHEMERA as an unlikely, but very pretty, frame for my sweet ballerina photograph. I foam mount 2 CHIPBOARD ACCENTS blooms onto the rim of the LARGE DIE CUT. Next, I foam mount & layer my framed photo onto them. Lots of foam mounting in this layout to create dimension and clearly defined layers! 
Definition is important with so many pretty details! 
It really is a beautiful page for my darling girl! And such a happy moment to document! This photo was taken of her trying on all the Bloch Pointe ballet slippers for the first time - such a milestone moment for her! 
As we move across the page, you'll spot that softened mixed media layer. It is followed by a half inch strip of pattern paper CV-MN007 INKY DEPTHS (reverse side), and a 1 1/2 inch strip of pattern paper CV-MN009 SOPHISTICATED (reverse side also).  I love how these paper strips anchor my layout, and in particular, that LARGE DIE CUT.

Let's take a better look....
Stripes are always for the win, & I just LOVE the ombre pink stripes in pattern paper, CV-MN009 SOPHISTICATED! Over this pretty paper, I foam mount that gorgeous terrarium DIE CUT EPHEMERA, tucking a few die cut blooms beneath it. I add the Love This sentiment DIE CUT with thick foam tape too! 
For finishing touches, I scatter a few more of the HELLO LOVELY gold sequins! 

And there you have it!
 Beautiful layers, all the pink and lots of florals for my beautiful girl! 
I hope my layout has inspired you to get creating with the gorgeous MIDNIGHT collection! 
(& maybe try some monochromatic magic too!)

Thanks so much for visiting,
til next time,

Cocoa Vanilla Studio: Our Happy Story


Hi Creative Friends! 

Welcome back for more memory keeping inspiration! 
Today I'm sharing my take on the Cocoa Vanilla Studio multi photo theme week;
using our delightful new Midnight collection. 
I just love the blue hues and indigo in this collection - so beautiful! 
Needless to say, I just had to create a monochromatic page with it all! 
But enough chatter, here's my layout with more than one photograph......

"Our Happy Story"


*Sigh!* Oh-so-beautiful!
And what a happy story this is! 
All our Christmas wishes have come early this year with the arrival of our new miniature dachshund puppy! Yay!!! All the feels for this happy moment! 
And don't those CV-MN007 INKY DEPTHS blues make it even more lovely?! There are just SO many beautiful creative possibilities with the Midnight collection!

My layout begins with gluing one inch paper strips of pattern paper, CV-MN01 BLOOM & GROW (reverse side), on both sides of the white cardstock base. I then apply lots of inky blue splatters and droplets to the white cardstock base. Next, I remove the large die cut from CV-MN018 LARGE DIE CUT & BACKING KIT, and snip it in half. I back this half die with my favourite paper, CV-MN007 INKY DEPTHS & foam mount it to the top center of my layout design. Awesome!

To this fabulous die cut feature, I layer my super adorable puppy pictures....


You'll spot DIE CUT EPHEMERA frames beneath both my photographs, as well as an INKY DEPTHS layer from the 6x8 PAPER PAD. I foam mount the over hanging edges, and tuck the blue watercolor wash CLEAR STICKERS beneath my photos too! 
I embellish my multi photo cluster with DIE CUT EPHEMERA, & an ACCESSORY STICKER or two.....


I use the CARDSTOCK TITLES to form my title, Our Happy Story, which I layer over my photos as well. I love the midnight blues, and this title just enhances my monochromatic look! I add subtle journaling around the photos with those gorgeous sentiment stickers from the ACCESSORY STICKER sheet. Perfect! 
Here's another view for you......


So much gorgeousness! 
Who would've known that blue is my favourite colour?!! 
And seriously, how cute is our new addition? We've called him Maxwell, and he is just as divine in nature, as he is in appearance - puppy LOVE!!!

Moving down the page, you'll spy more inky splatters, CLEAR STICKERS, ACCESSORY STICKERS & even a CHIPBOARD PIECES mason jar filled with hearts....


Oh my heart!!! Could it get any sweeter than this?!!
I'm loving the CLEAR STICKERS in the Midnight collection - so versatile & the quality is amazing! Those navy crosses are so effective that they don't even look like stickers - incredible!!!


The sweetest thing, indeed!
The mason jars filled with hearts are the perfect ending to this happy story - all the love for little Maxwell the Miniature Dachshund! To bring even more attention to the CHIPBOARD PIECES one, I've foam mounted the DIE CUT EPHEMERA heart onto it. I've also tucked in a couple stickers beneath it, as well as that directional arrow from the CLEAR STICKERS.


Such a happy moment, beautifully documented with the Cocoa Vanilla Studio Midnight collection!
I hope you've enjoyed seeing my take on the multi photo theme 
& that my layout has inspired you to get creating too!

Thanks so much for visiting today,
til next time, 

Happy Arty Days, 
Amanda xo

Cocoa Vanilla Studio: Midnight Collection Inspiration!


Hi Friends!

Welcome back for more Cocoa Vanilla Studio loveliness with our gorgeous new collection; 
Midnight!
This collection is totally swoon worthy & perfect for my beautiful ballerina! 
Here's my layout.....

"Beautiful"


Isn't this lovely?!!
The Midnight collection is oh-so pretty and makes my sigh every single time I look at it! From the soft and dreamy color palette to the pretty patterns and sweet florals - this collection is errrything! And yes, perfect for documenting the girls (or in my case all the ballet photos) with! Love it!
I have opted for a simple vertical design for my layout today.  I have also been inspired by all the trending vertical titles on layouts that I've been seeing in my social feeds. I love how the horizontal striped CV-MN009 SOPHISTICATED paper really directs your eye into the CHIPBOARD PIECES Beautiful title! And of course, I am crushing on all the blooms and florals on this layout too!
Let's take a closer look.....


That title is really stunning! I position it so it's also aligned with the center of the page, and then support it with those indigo leaves from the DIE CUT EPHEMERA pack. Beautiful, indeed!
I use the CV-MN0009 SOPHISTICATED paper on the right hand side of my layout also. However, this time I overlay it with the reverse side of the super pretty CV-MN007 INKY DEPTHS.To soften the join between the two pattern papers, I add the pom pom trim. Such a small detail, but what a difference it makes! So lovely!
Here's another view of that fabulous CHIPBOARD PIECES title....

Truly stunning!


The remainder of my layout is built around my darling photograph, and involves lots of lovely embellishments! I especially adore those layered CHIPBOARD PIECES & ACCESSORY STICKERS  blooms, and DIE CUT EPHEMERA cascading leaves!


Instead of layering my photo onto pretty pattern papers, I decide to mount a CHIPBOARD PIECES frame onto it. I lightly stick it  onto the white cardstock base, and then tuck a few of the brush stroke CLEAR STICKERS beneath the frame. I also tuck in a couple of the bloom ACCESSORY STICKERS.
Next, I adorn the CHIPBOARD PIECES frame with the leaves DIE CUT EPHEMERA. I foam mount the main DIE CUT bloom over the top left corner of the frame, and apply both an EPHEMERA & CHIPBOARD PIECES sentiment to the base of the frame.
I embellish around the photo cluster with ACCESSORY STICKERS hearts & butterflies, falling leaves DIE CUTS, as well as a CHIPBOARD PIECES heart.  

For finishing touches, I add the ACCESSORY STICKERS journaling sentiments, and a sprinkling of our Hello Lovely collection sequins.  So beautiful!
I hope my layout has inspired you to get creating with the divine Midnight collection!

Thanks so much for visiting,
til next time,

Happy Arty Days, 
Amanda xo


The Cut Shoppe: Go With The Flow!


Hi Friends!

I am so super excited to be sharing another gorgeous layout for The Cut Shoppe Design Team!
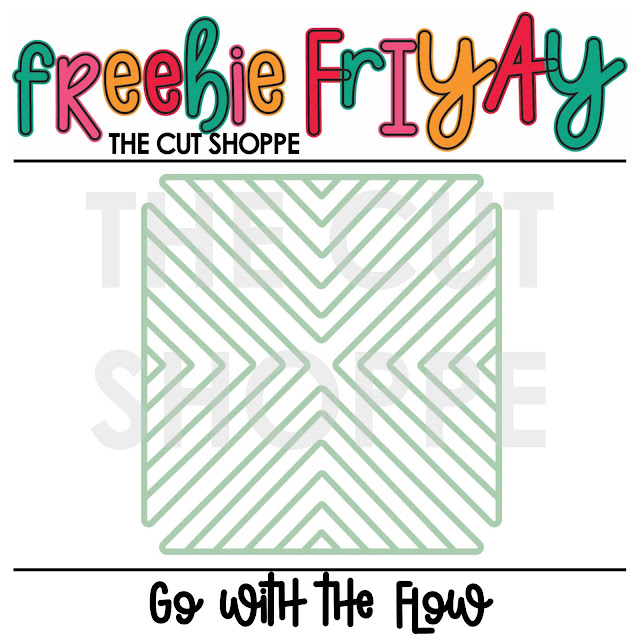
Today I am featuring the stunning Go With The Flow digital file with the very dreamy
 Cocoa Vanilla Studio Midnight collection!

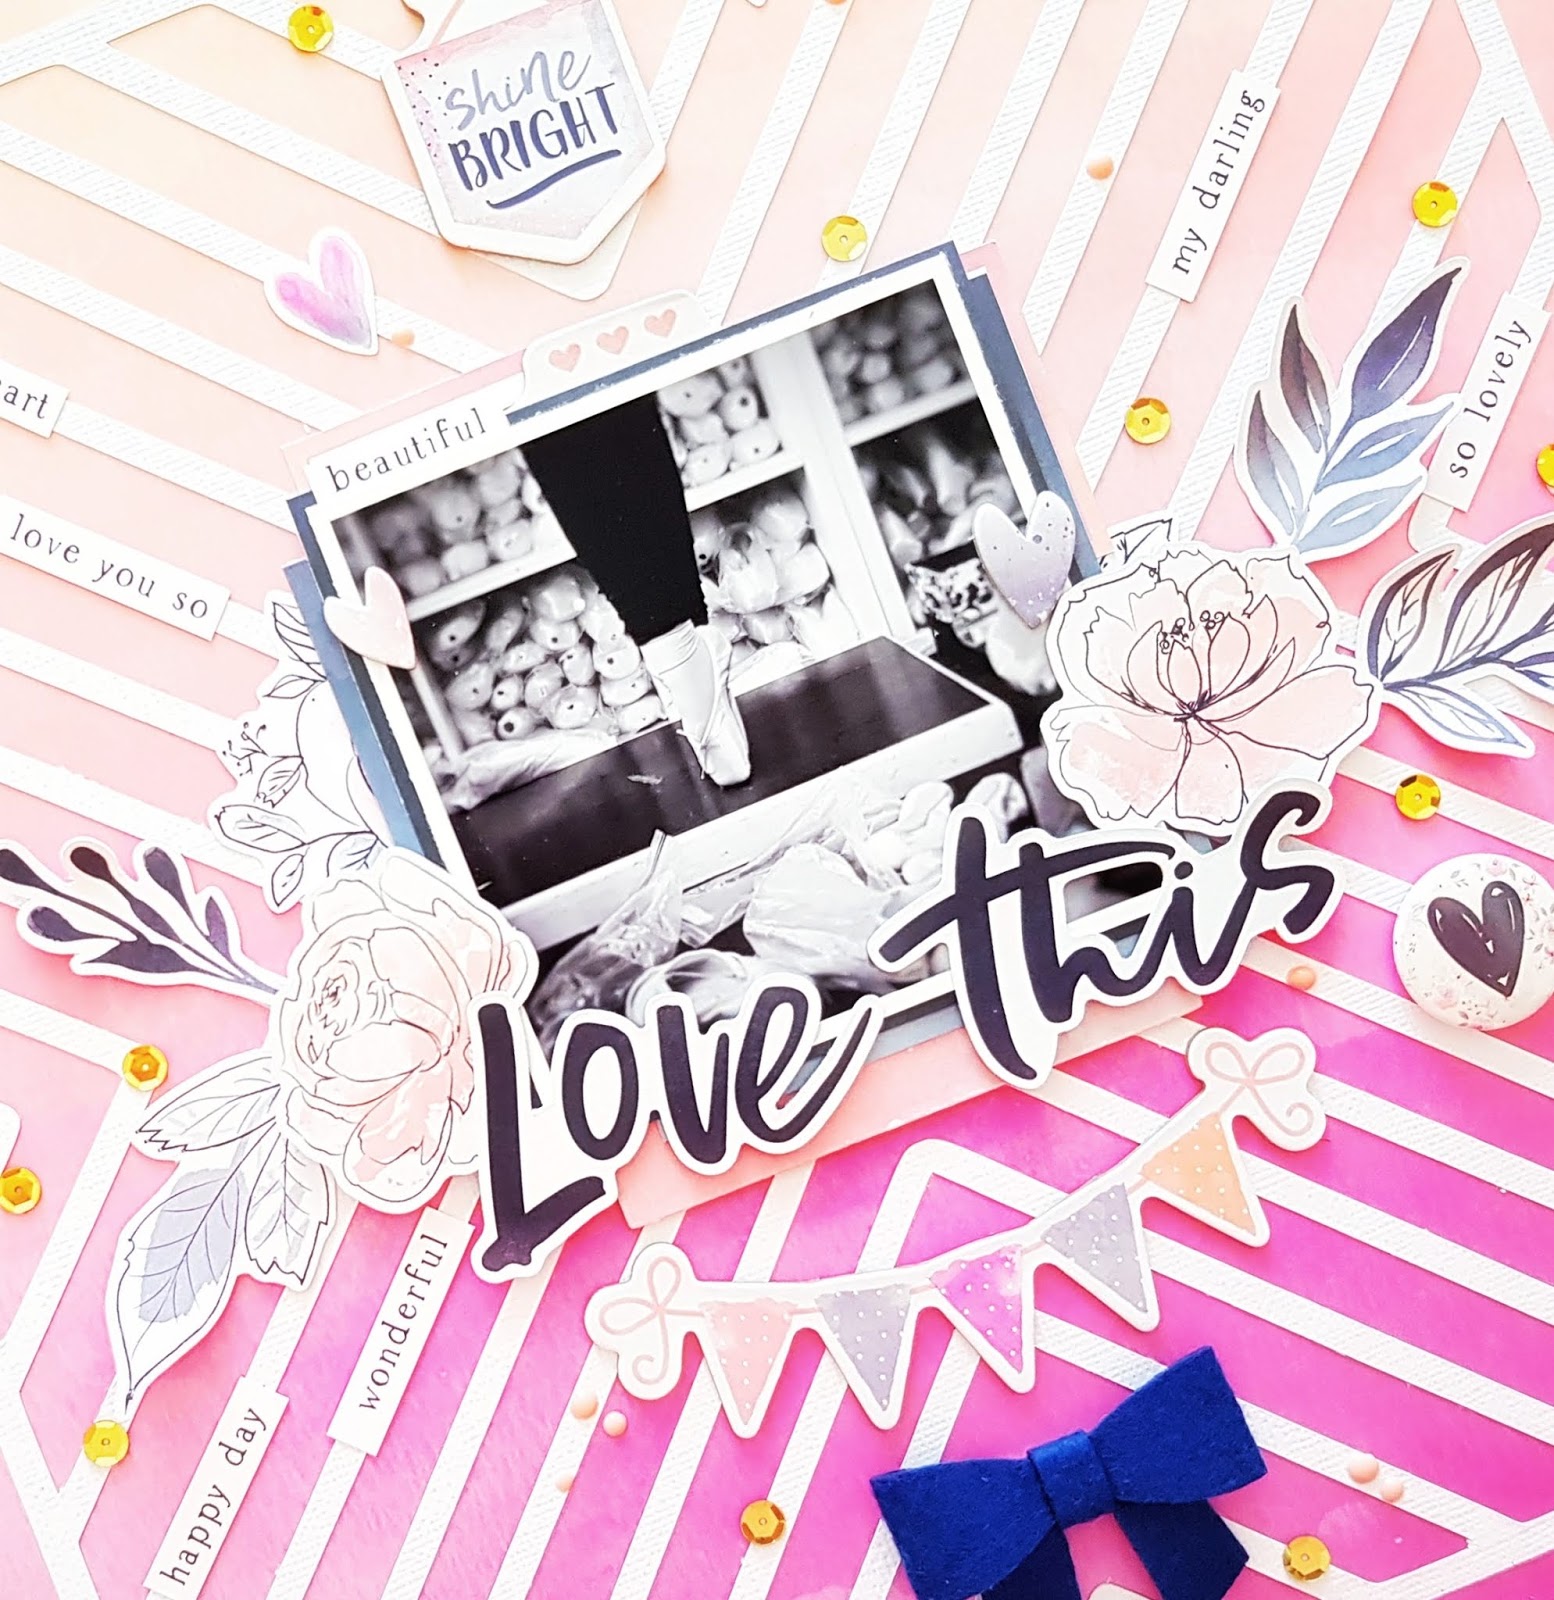
"Love This"


Love this, indeed! Oh so beautiful!
Such a milestone moment as my (not-so-little anymore) girl earned her very first pair of pointe shoes! This momentous occasion had to be documented, and the Go With The Flow cut file was the perfect choice! The triangular segments dictate that your eye is drawn straight into the center of the layout, so naturally that's where I've positioned my special photo! 
And the best part? This is one of the many Freebie FriYAY files that you can download for free HERE


https://app.box.com/s/pfkbtmk8rsj4qhuac3audxk76wrj1qa2

It's super awesome, huh? I LOVE a good freebie, and I especially love how versatile this file is! It would definitely work for a variety of projects and themes - yay! 

Here's a closer look at it on my layout....


Instead of backing this cut file, I simply glue it directly onto my pretty ombre pattern paper background - the white against the pink is so striking & I think it really makes this incredible file shine! I then embellish the Go With The Flow cut file with sequins, Bubblegum Pink Nuvo Drops & those Cocoa Vanilla Studio Accessory Stickers. The stickers are the perfect sentiment additions to my layout. I also adorn the cut file with a flair button, chipboard banner & that sweet Bella Blvd bow!
Here's another view for you....


SO.much.pretty!
And such an easy look to recreate! Simple cuts, no fancy paper piecing and a beautiful result! 


Yep, Love This,  sums it up perfectly! 
I hope you feel inspired by my layout too! 

See more amazing cut files in The Cut Shoppe Etsy Store HERE
Thanks so much for joining my today, 
til next time, 
Happy Arty Days, 
Amanda xo