Showing posts with label You Tube. Show all posts

Elle's Studio: April Sketch Day!


Hi Friends!

Welcome back to the Happy Arty Days blog!
I am so excited to share today's fabulous sketch for Elle's Studio!
It's such a fun design, and I've even made a process video of this one too 
but before I get too carried away, here's what the sketch looks like...


Told you it was fun! Love this!

Sketches are a great way to remove the 'I don't know where to start' vibes, or even loosen up a design block! They discourage overthinking, and allow us to just simply enjoy the creative process! Here's what I created,

"Love This"


Love this, indeed!


Other Supplies: Bazzill cardstock - avalanche, watercolors, sewing machine, cotton thread, & doily.

Here's a closer look at my layout....


Gosh, this is so pretty!!!
The colors and designs in the April Kit are really something!

When it comes to creating with a sketch, I always approach it with my photograph as the focus. For this particular layout, my photograph encouraged me to rotate the sketch by 90 degrees. You'll notice that my darling girl is positioned on the right hand side of my photo, & looking out to the left. By rotating the sketch I was able to compliment the movement in my photo, and flatter the directional flow. 


My photograph also dictated the color scheme for my layout too! 
When I looked through the April Kit note cards and the Flourish 6 x 8.5" Paper Stack papers I noticed that there were lots of coral & vermilion reds, peach, and mauve patterns which were not only really pretty, but also complimented my photo. The 'let the good times roll' sentiment card was the perfect descriptor of the memory associated with the photo plus it was also a clever camouflage to hide the join of the butted together pattern papers
 (A great trick for maximizing the 6 x 8.5" papers for 12 inch scrapbook pages).


At this point in my creating, I decided to 'mix things up' again and I rotated that sentiment card back to its original position. I diverted from the original sketch to make the design work better for me, and my storytelling. And that's the great thing about sketches - they get you 'started', but there's no rules and you can make it what you want! 


To add a bit more interest to my page, I machine stitched & foam mounted the mauve pattern paper layer. This soft and subtle texture really lifted the design. I also foam mounted my photo cluster for added dimension. Following on from the sketch, I embellished with lots of the Beautiful Day Die Cut florals, and Lovely Puffy Stickers. 


I mimicked the banner at the top of the original sketch with the floral banner note card, which I further embellished with more of the Lovely Puffy Stickers and some cotton twine. 


For finishing touches, I ventured away from the sketch once more. I featured a bit of journaling with the Life Right Now Stickers, and the Lovely Puffy Stickers and added lots of watercolor splatters to complete the look. 

For a more detailed approach including all the paper measurements, and to hear more of my thoughts on creating from a sketch, please watch my process video here: 


Or watch in Full HD HERE 

I hope you enjoyed watching my video and feel inspired to create along with today's sketch! 

Thanks so much for stopping by today!
til next time, 

Shimmerz Paints: January 2020 Color Kitz Inspiration & Video!


Hi Everyone! 

Welcome back for more bright, colorful & shimmery inspiration with
my latest scrapbook layout (& process video) with the stunning new 


I know, amazing right?! 
The Shimmerz Paints Color Kitz are bigger & better than ever before! 
The new 2020 Kitz include exclusive colors and products to tie your whole page together. The January 2020 Collection includes the following colors and products:
Into The Woods Vibez
 A new exclusive color to this kit. 
This color is a vibrant hunter green hue with silver shimmer.
Before Dawn Vibez
 A black pigment spray with shimmer.
Sage Advice Shimmerz
 A new exclusive color to this kit.
This color is a soft and neutral sage green hue with shimmer mixed within.
For Shore Creameez
 A cool neutral hue watercolor.
Silver Fox Shimmerz
 A new exclusive color to this kit. 
Silver fox is a silver hue paint with shimmer mixed within.
Sheer Bliss Inklingz
 A skin tone neutral hue watercolor.
PLUS
4 journaling cards
1 exclusive Forest cut file created by Paige Taylor Evans
1 teaspoon package of Country Buttonz
1 set of "Happy Day" Dotz

Wow! That's one super impressive kit! 
The creative possibilities with this Color Kit are endless, but I wanted to create a page that featured all.the.things!!! Here's what I created, 

"Explorer"

Whoa! How awesome is this?!
The January edition Color Kitz was perfect for documenting my lil explorer! 
Think great outdoors, adventuring and lake life! So cool!
You'll spy that I even added one extra color to the mix - Ultra Marine Shimmerz! This stunning hue of deep blue coordinated beautifully with the greens and grays of the January Kit! Love it! 
Here's a closer look at my layout......

Yep, this is one super cool page for my little guy! 
As soon as I saw the Forest cut file created by Paige Taylor Evans, I knew I would create a masculine layout! If you look closely at my darling boy's photo, you'll notice that his top has a very similar design on it! Awesome!

To create this layout, I began by filling sheets of paper with all the kit colors. While they were drying, I prepared the cut file. I cut it in plain white cardstock, and removed some of the cut pieces, while keeping others intact. The mix of inset and paper backed sections really added interest to the cut file. 
The inset sun rays are left untouched, but I used the neutral For Shore Creameez to paint the mountain peaks and clouds....


Simple, but so effective! 
The remaining sections of the sun are backed with the paper which I painted with Sheer Bliss Inklingz, and the mountains are backed with the new Silver Fox Shimmerz. SO good! La la love this new Shimmerz!

The trees are mostly backed with varying depths (paint coats) of Into The Woods Vibez, except for one which I backed with Sage Advice Shimmerz for a point of difference and interest. Here's a closer look at them....


Trees 1,2 & 4 are Into The Woods Vibez and tree 3 is Sage Advice Shimmerz. Such gorgeous colors!
 I added in the Ultra Marine Shimmerz for the water element of the cut file, and I'm so glad I did! This bright pop of color adds just enough playfulness to the design without distracting from the beautiful January Color Kitz colors. 
Before I adhered the Forest cut file to the Cocoa Vanilla Studio: Boys Rule pattern paper, I added lots of inky droplets, splatter and brush strokes to the pattern paper with the Before Dawn Vibez. Once dry, I foam mounted the cut file, and glued it to the inky base. 


I have used the Cocoa Vanilla Studio: Boys Rule collection to embellish my page too, but it's those Happy Day Dotz that won me over! Aren't they fabulous?! I couldn't help myself, & used all of them to adorn my photo with! Yes, that good!
 You'll also spy that I layered my photo cluster onto one of the journaling tags, and sprinkled a few of the teeny tiny buttons around the page. Told you I used all.the.things!


Such a cool kid page! 
You can see how it all came together in my process video below....


Thanks so much for watching!
I hope I have inspired you to get creating today! 

Remember! The Color Kitz are limited edition, so be sure to get yours HERE, before they're sold out! Type AMANDA in the comments section of your order & you'll receive a freebie paint too! 


Yay! 

Thanks again for stopping by, 
til next time, 


Shimmerz Paints: November Color Kitz & Process Video!


Hi Crafty Friends!

Welcome back to the Happy Arty Days blog!
 It's a new month and that means new Color Kitz - YAY!!!

November is jam packed full of gor-jus colorz that are just bound to have you swooning! 
Here's what both kits look like....


Amazing, huh?! 
As always, I'm creating with the monthly Original Color Kitz, and boy-oh-boy, these colors are errrrything!!!!
The kit contains.....

1 x Vibez - Rollin' in the Hay - 1oz
1 x Vibez - Rose Gold Red - 1oz
1 x Shimmerz - Peacock's Plume
1 x Inklingz Imperial Amethyst
PLUS
1 x Exclusive Dotz - Pumpkins

As always, the kit quantities are limited, so be sure to get yours before they sell out!

***Shop the Color Kitz HERE***

Now time for some inspiration,
 here's what I created......

"Thankful"


Oh.my.heart!
So thankful for this season, indeed! So super pretty, too!
All the Farmhouse & Fall feels happenin' here!

Here's a better look for you....


Just DIVINE!!!

Vibez Rollin' In The Hay takes center stage in this layout, and geez, it's simply stunning!!! 
I used this amazing color to back the FLORAL PUMPKIN cut file designed by Wild Pilot & courtesy of the Silhouette Store. I just love how effective this looks, and couldn't help but pair it with that similar die cut from the Paige Evans, Truly Grateful collection and our gorgeous exclusive pumpkin Dotz!  #pumpkinsforthewin


You'll see that I used both the Shimmerz Peacock's Plume and Inklingz Imperial Amethyst to paint the flowers on the cut file, and then backed these flowers with similar colored pattern papers for that added wow factor! To create the green for the leaves, I sprayed a lil Vibez Rollin' in the Hay into a paint tray, and added a few generous droplets of Shimmerz Peacock's Plume & mixed up this pretty 'bonus' color! Vibez Rose Gold Red is the perfect color for the berries, and completes the look!


How gorgeous are the exclusive pumpkin Dotz?!! 
You'll spot two of these lovelies in this embellishment cluster, and the other one adorning my sweet photo! 
I combined the Hip Kit Club August 2019 Main Kit, and SpiegelMom Scraps: Jewel of the Nile sequin mix to decorate my layout. But in the end, it's all about the color...


Seriously stunning colors in this month's kit!
And yes, Vibez: Rollin' in the Hay is going on my official must-have colorz list! This color has absolutely wowed me! Ga-ga-gor-jus!!!!

Want to see how this layout came together?
Please watch my process video below....


Thanks so much for watching! 
It really was a fun page to create!


I hope that I have inspired you to get creating with this fabulous monthly kit!
I think you'll agree that the colors are beyond beautiful! 


Thanks so much for visiting!
til next time, 


Shimmerz Paints September Color Kitz & Process Video!


Hi Shimmerz Friends & Fans! 

Amanda here, & I am so super excited to be sharing my layout & process video with the gorgeous new September Color Kitz! 
And oh my heart! The colors in this month's kit are just divine!!!
Here's a reminder of what the September Color Kitz look like....


Wow!!!

The Kit includes the following items:
  • 1 1oz bottle of Keep Palm Vibez
  • 1 1 oz bottle of the exclusive new color: Practice What You Peach Spritz
  • 1 package of exclusive Dotz "Gingham Greatness"
  • 1 jar of Wisteria Lane Shimmerz
  • 1 jar of In A Jam Creameez
Simply stunning! 
If you're super quick, and really lucky there might be one or two of these Color Kitz still in stock - visit the shop HERE. 

Here's what I created with them...

"Cherish"

Oh my! Cherish indeed!
There's no denying that the September Color Kitz are perfect for all your Fall theme projects!
Just stunning!

My pretty layout actually began as a quick wreath painting that I shared to the Shimmerz Paintz Sharez Facebook page a couple weeks ago - you might remember it? 


Isn't this a pretty approach to testing your colors? So much more lovely than a color swatch! 
And as I like to say, when in doubt wreath it out!
I used the gorgeous Vibez Palm Reader for the leaves, Creameez In A Jam for the rose, the all new exclusive Spritz Practice What You Peach for the smaller blooms, and an array of tiny dot flowers with Shimmerz Wisteria Lane. 

With such a gorgeous wreath on my desk, I felt inspired to create another...
This time I painted straight onto my pretty pattern paper & used the beautiful Creameez In A Jam for the foliage. The blooms were painted in Shimmerz Wisteria Lane, and I added a few splatters for good measure too!  


I fussy cut around the original wreath, and foam mounted it onto the newly painted one. This created both dimension & interest to the design and also added some depth to the combined wreaths as well. 
Between the layered wreaths, I tucked in two of the Gingham Greatness Dotz - LOVE!!!!


I embellish my photo cluster with fussy cut florals from the Jen Hadfield, Along The Way collection and add a good sprinkle of the SpiegelMom Scraps Summer Morn sequins. 


Such beauti-Fall details!!!

Interested in seeing how I painted those wreaths, and created this layout?
Please watch my video on the Shimmerz Paintz channel HERE. 


Thanks so much for watching!
I hope you enjoyed my video. 


Remember: Type AMANDA in the comments section of your Shimmerz Paints store order to receive a FREE paint! 


Thanks so much for visiting today!
til next time,


Cocoa Vanilla Studio Midnight Layout & Process Video!


Hi Creative Friends!

Welcome back for more Cocoa Vanilla Studio inspiration!
Today I am sharing my take on this week's design team theme post using the divine MIDNIGHT collection. The theme this week is....
creations that "put a ring on it". 
Think rings, wreaths, circles, dots - basically include any round element! Such a fun theme!
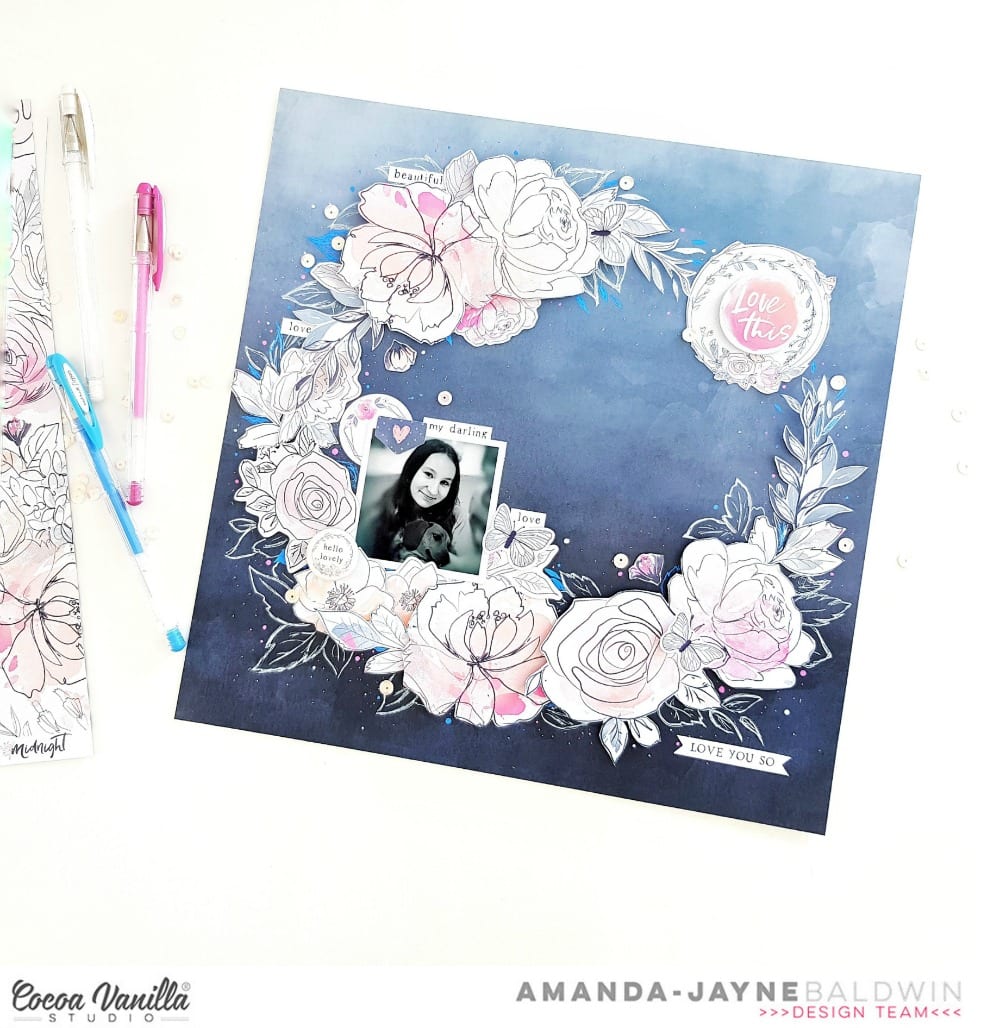
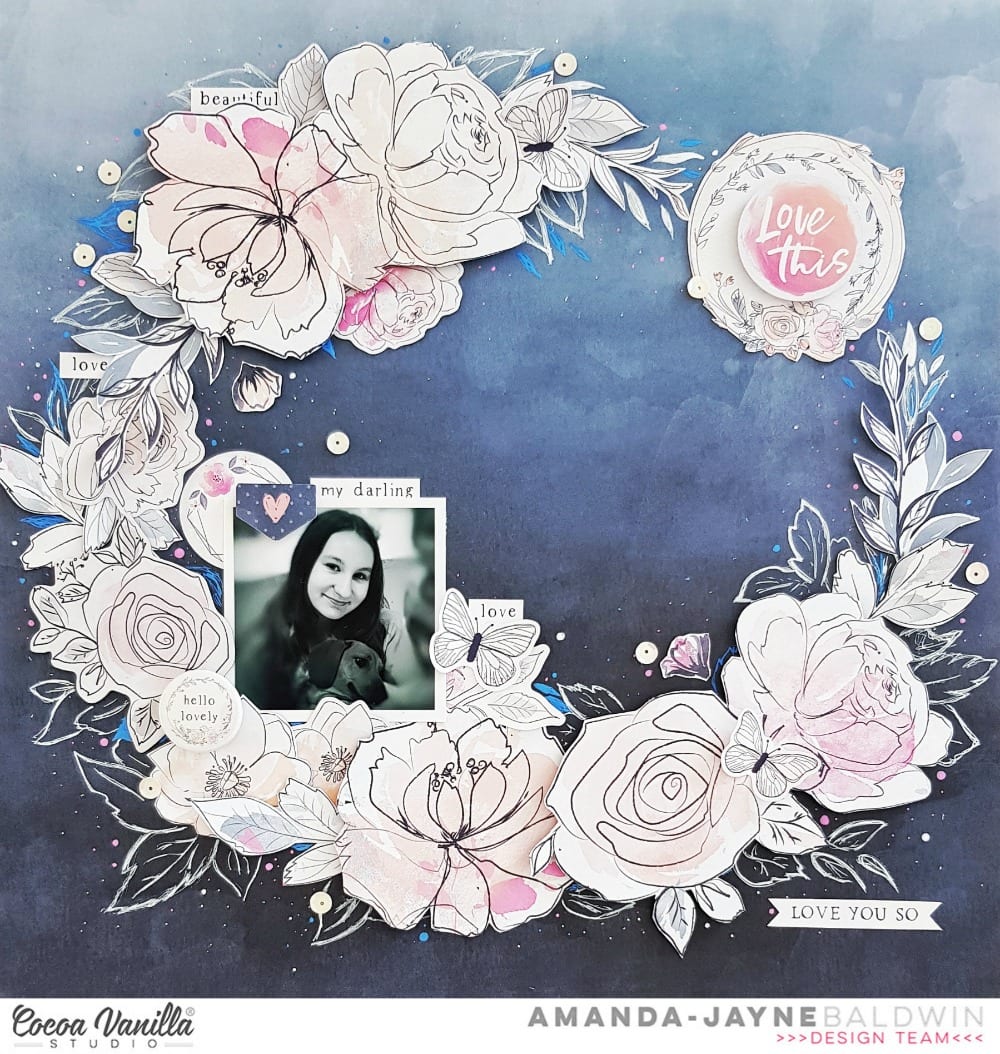
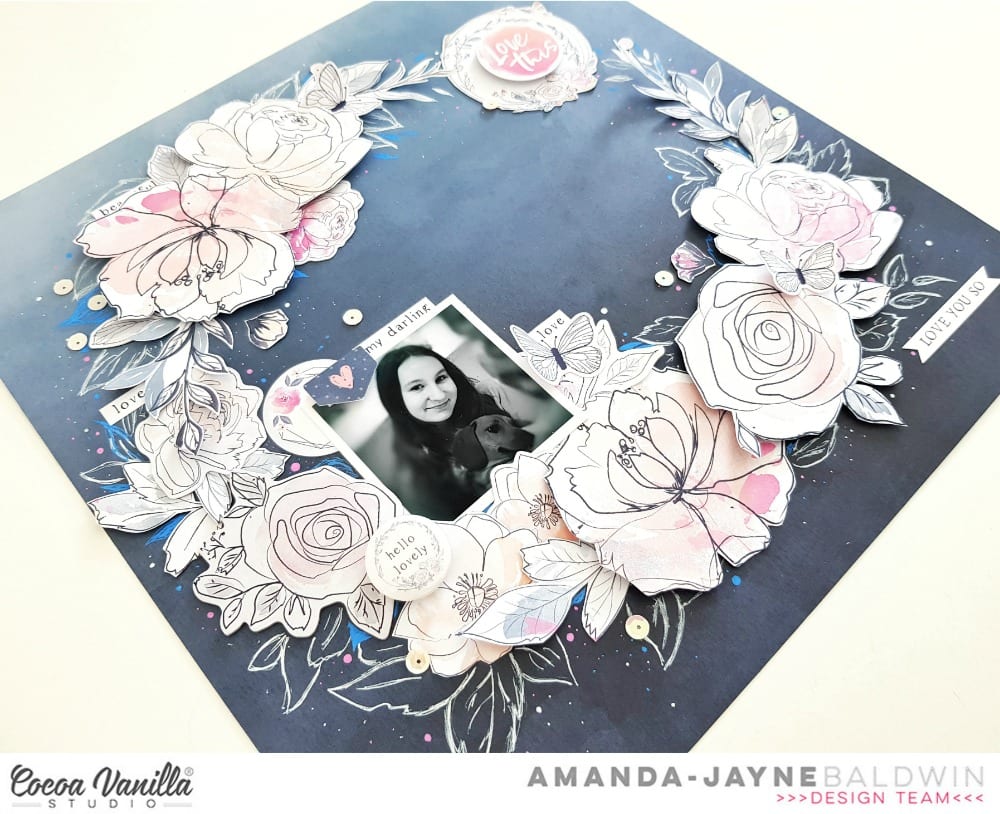
Here's what I came up with....

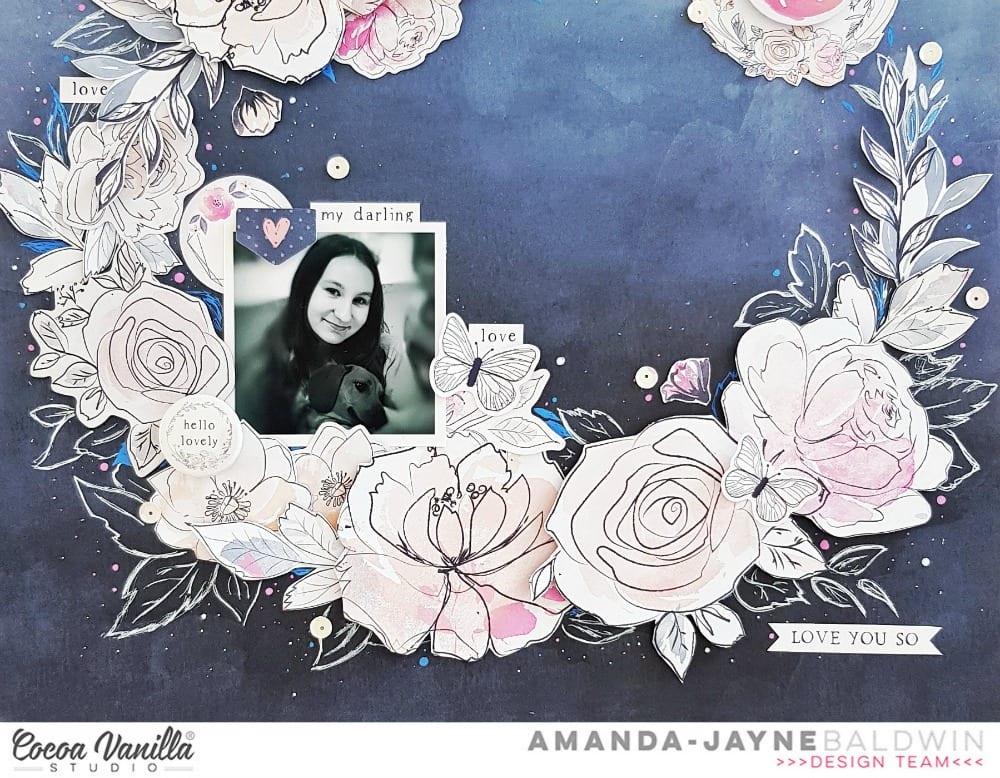
"Love This"


Oh.my.heart!!! So dreamy & divine!
The MIDNIGHT collection is so elegant &  beautiful! It's the perfect collection for documenting stories of my sweet girl!
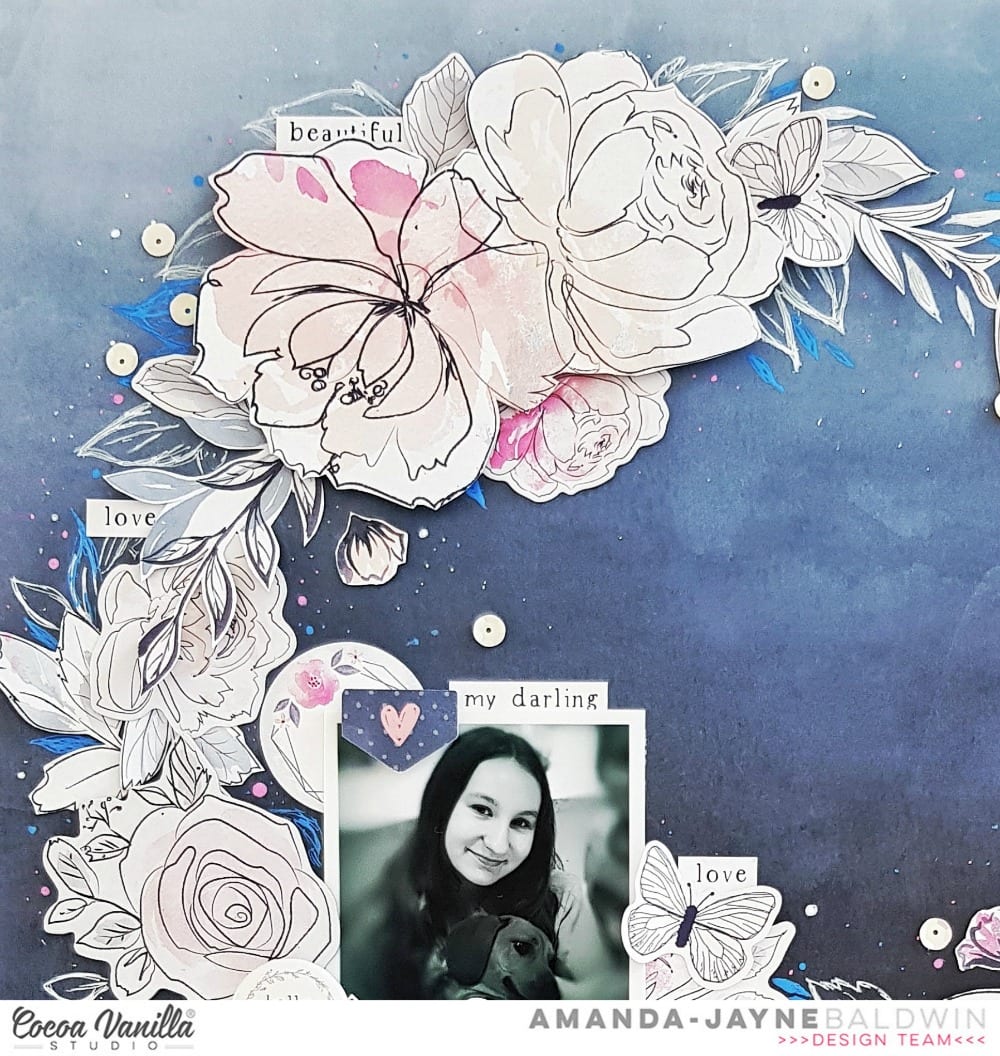
Here's a closer look for you....


So incredibly beautiful!
I start this layout with pattern paper, CV-MN007 INKY DEPTHS - it's the perfect base! Such a stunning background paper & I just love how it reminds me of the night sky and clouds. To this paper, I trace a circle shape to create a guideline for my wreath (ring) design.


To form the wreath, I fussy cut pattern paper CV-MN001 BLOOM &GROW. I arrange these larger blooms over the traced circle, and adhere with a mix of double sided tape and foam mounting tape. This adds a sense of dimension, soft texture, and brings interest to the design.
I also fussy cut the wreath icon from the CV-MN006 ALL THE THINGS pattern paper, and adhere it to the opening of my ring design (top right corner). 
Here's a close up for you...


SO pretty!!!
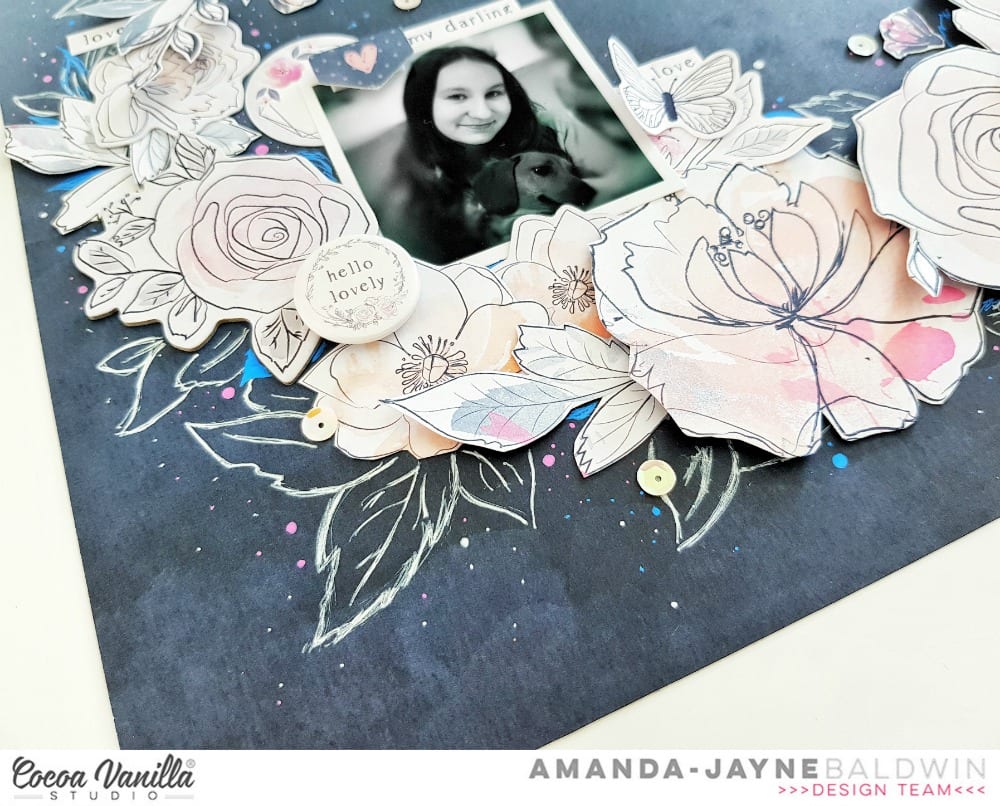
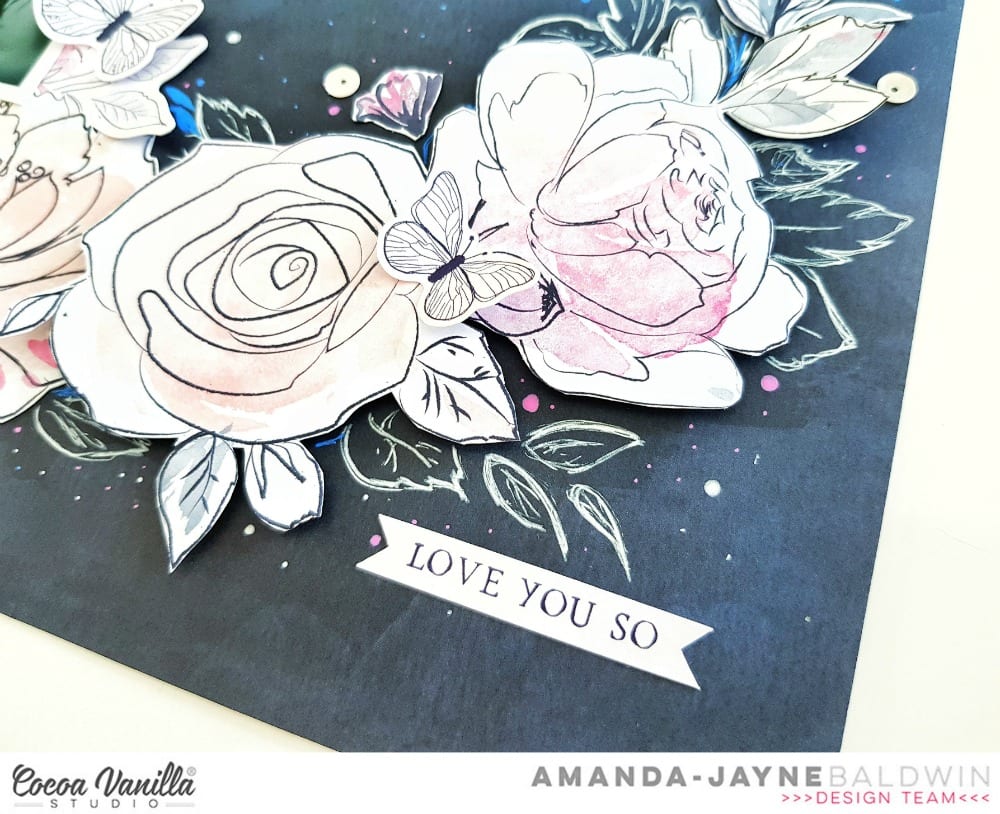
Next, I pull out my gel pens, and draw a mix of sketchy leaves that are not dissimilar to that of the BLOOM & GROW pattern paper. The white gel pen is super striking on the INKY DEPTHS paper!
The scribbled leaves serve two purposes - they add a new design element (& visual stimulus) to the layout, plus they also 'build up' the wreath so that it looks full and attractive. In keeping with the whimsical feeling of the page, I add lots of tiny dots in both white, pink & blue pen.


I just LOVE how effective the gel pen looks!
Design Tip: If you like this look, but are nervous about drawing on your  layouts, you could always achieve the same look using stamps and white embossing powder.


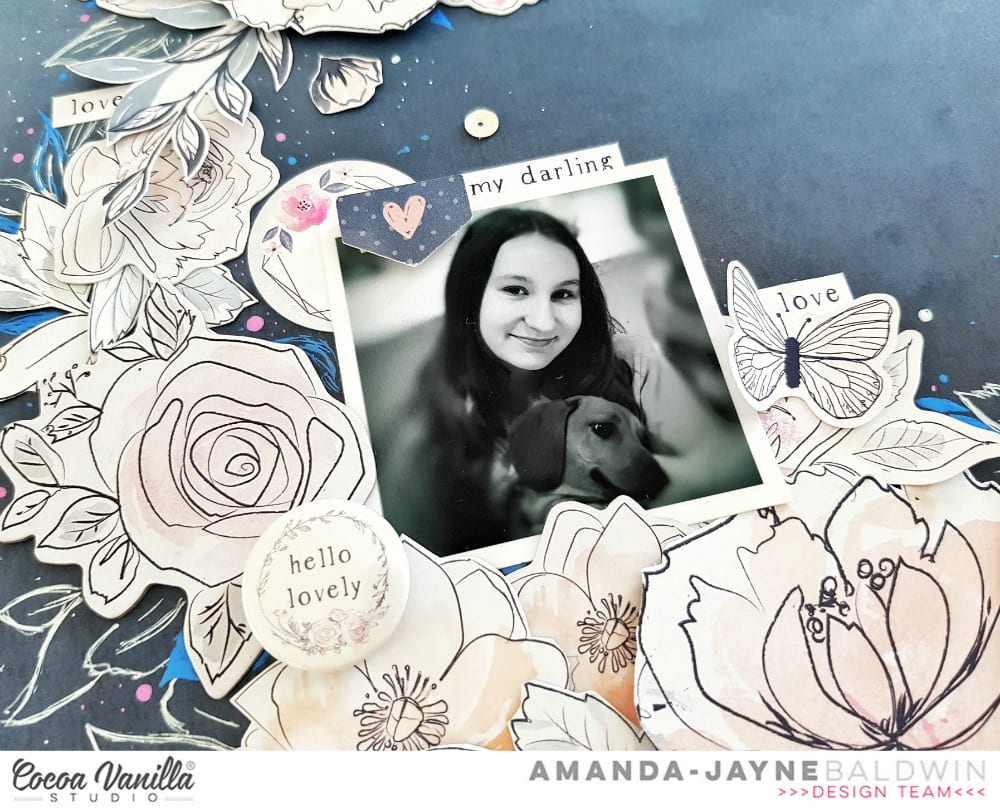
Next, I tuck my photo into the left hand side of the wreath and decorate around it with a few ACCESSORY STICKERS. I also embellish with that fabulous FLAIR BUTTON (which also features a pretty wreath on it!). Lots of rings and wreaths and pretties on this sweet page!


With the ACCESSORY STICKERS handy, I also add some butterflies to the wreath and add a subtitle to the bottom right corner, Love you so....


For finishing touches I foam mount the Love this DIE CUT EPHEMERA title to the fussy cut ALL THE THINGS wreath, and sprinkle a few HELLO LOVELY sequins!


Voila! Beautiful creating in a matter of minutes!
Wanna see more of how this pretty page came together? 
Please watch my process video below...


Thanks so much for joining me today!
I really hope that I have inspired you to not only 'put a ring on it',
but also to make some marks & get doodling on your memory keeping projects!
'til next time,

Cocoa Vanilla Studio: Loving Every Second Layout & Process Video


Hi Cocoa Vanilla Studio Friends!

 I am so excited to be sharing my take on this week's CVS design team fussy cutting theme!
I just love fussy cutting and the new HAPPINESS collection has so many perfect papers to snip away at! 
But enough chatter, here's my layout for today....

"Loving Every Second"


Sigh! Isn't this just divine?!!
Those fussy cut blooms from the CV-HA001 BOTANICAL BLISS paper are errrything! And I just adore this indigo, white, peach & blue color scheme - so, so pretty!
Here's a better look at my layout....


Swoon! Florals, butterflies, pretty colors and a giant heart - what could be more perfect for scrapbooking my two darlings?!
That indigo base paper is the reverse side of CV-HA001 BOTANICAL BLISS & just happens to be my favourite colour! So striking and it teams perfectly with the crisp white cardstock, and beautiful peach florals. Speaking of white cardstock, I trimmed mine to 11 inches square, and stitched it to that gorgeous indigo base paper. I layered the cardstock with the heart cut file, which I mounted with foam tape to create gentle texture & dimension. The heart cut file is actually the large die cut from the LARGE DIE CUT & BACKING KIT. Such an easy way to incorporate a cut file look without needing a digital cutting system! (and even better, you'll still have the beautiful backing paper left over for a future layout -  so win, win!)


Next, I layered fussy cut florals from the CV-HA001 BOTANICAL BLISS paper onto the large die cut. You'll also spy some fussy cut butterflies from CV-HA008 BRIGHT & BEAUTIFUL. Gorgeous!!!


There are also some sweet ACCESSORY STICKER & DIE CUT EPHEMERA butterflies and blooms too!
But it's that sweet framed photo in the center of the heart that really makes my layout!


I love making my photos the 'hero' of my page. Ultimately, that's why I scrapbook. Recording those precious memories & telling our stories is so important. I used a DIE CUT EPHEMERA wreath to frame my photo, and then foam mounted it over the central layer of fussy cut and DIE CUT EPHEMERA florals. 
My title is also from the DIE CUT EPHEMERA pack, and positioned to the bottom left of the framed photograph. Beautiful!


 I embellished the page with sequins from my stash of our 2015 LIFE IS BEAUTIFUL collection. (I *may* have been hoarding these pretties) For finishing touches, I applied the typewriter font journal stickers from the ACCCESSORY STICKERS sheet. Perfect!


Simple.Classic.Beautiful!
Fussy cutting is definitely 'a must do' with the HAPPINESS collection!
If you want to see how this lovely layout came together, please watch my process video here...


Thanks so much for watching!
I hope my video inspired you to get fussy cutting with your favorite Cocoa Vanilla Studio papers!
til next time,