Cocoa Vanilla Studio: Cool Kid!


Hi Creatives!

Welcome back for more Cocoa Vanilla Studio inspiration!
For today's DT assignment I am scraplifting the incredibly talented, Anna Komenda
I know, what a task! 
Everything Anna creates is pure awesomenss, and today's layout is no exception!
Here's her original layout, created for last month's Throwback Thursday.....


Told you it was pure awesomenss!!! What a stunning page!
I decided to create a boy version of it using our super cool, Boys Rule collection! 
Here's my take,

"Cool Kid"


How awesome is this?!! He's one cool kid, for sure!
Just like Anna's original I have opted for a pattern paper base, & made a real feature of the frames in this collection. 
Such a clever design!

The background paper is the reverse side of CV-BR009 GOOD TIMES, and I just love its textural appearance! The concrete look is so raw and edgy - perfect for more masculine memory keeping! I have used a lime and sky blue color scheme to compliment the coolness of the GOOD TIMES paper. I opt for wood grain embellishments and frames as my accent color; to add warmth and balance to my page. Awesome!

Here's a closer look......


While Anna features flowers as her core embellishment, I have used stars for mine. 
You'll spot stars from the CLEAR STICKERS, ACCESSORY STICKERS, CHIPBOARD PIECES, & even the DIE CUT EPHEMERA pack! All.the.stars for the win!!! T
o add dimension and interest to the stars, I foam mount a few of them & even layer one or two together.


But it's the layered frames that really make this layout! I have combined frames from both the DIE CUT EPHEMERA & MISCELLANY packs to create this fun look! For my photo cluster, I dress the frames with that awesome #BOYSRULE FLAIR BUTTON, a CHIPBOARD PIECES star and arrow, and my DIE CUT EPHEMERA COOL KID title.


Tucked between the layered frames are a few more EPHEMERA stars, an ACCESSORY STICKERS tab,  as well as a flag & label from the MISCELLANY pack. The #EPIC subtitle is fussy cut from pattern paper, CV-BR006 BOY STUFF & just adds that little something extra! 
Here's another view for you....


Awesome! Loving all the details here!


That FLAIR BUTTON is the best! I use it not only for cool factor, but to balance my black & white photo and camera embellishment (rule of three and all that jazz  ;)  ) To add more dimension & interest I foam mount the DIE CUT camera too!
Travelling down the page, I add a  few more stars (you can never have too many, right?), as well more layered frames......


I opt for smaller frames to avoid distraction from my focal point and photo, and embellish with the CHIPBOARD PIECES wood grain face, ACCESSORY STICKER flag, and that Super Hero EPHEMERA. Very cool!


And there you have it!
My scraplift of our amazing Anna Komenda using our Boys Rule collection! 
I hope I have inspired you to scraplift this layout too! 
You can see more of Anna's awesome creations HERE

Thanks so much for visiting,
til next time, 

Happy Arty Days,
Amanda xo

Pebbles: Spooky Boo & Pumpkins Theme Post!


Hi Friends!

Welcome back for more Pebbles Halloween inspiration, with the super cute Spooky Boo! collection!
Today I am sharing my take on the Pebbles DT assignment: pumpkins theme! 
 Hope you like it....

"Trick Or Treat: Boo!"


Eeek! Isn't this the cutest for Halloween?! 
Totally Spook-tacular! & just check out all those amazing pumpkins!

And here's how easy it is to recreate this page....

1. Mount an 11" x 11" sheet of white cardstock onto pattern paper, Sweet Tooth.


2. Use your digital cutting machine to cut out the Paige Evans' Pumpkin Wreath cut file in white cardstock. Back the pumpkins with pattern papers Hocus Pocus, & the reverse side of Sweet Tooth. Leave a few of the cut pumpkins 'open' and without any backing, too.


3. Use watercolor paints to outline a few orange & yellow circles in the center of the background, as shown above. Add a few tiny splatters for interest.


4. While the paint dries, attach your spooky Halloween photograph to the Pumpkin Wreath cut file.

5. Position wreath onto the background paper and painted circles, then glue into place.


6. Embellish the photo cluster (& bottom right quadrant of the layout) with Cardstock Shapes die cuts, and 6 x 12 Accent Stickers. You'll spy lots of pumpkins here too!


7. Continue to embellish this quadrant with more stickers, including the fabulous Spooky Boo Puffy Stickers.


8. Use the Maggie Thickers to add a title - BOO! & add a few more Puffy Stickers for good measure!

Voila!


A really BOO-tiful Halloween memory documented, and featuring all.the.pumpkin.things!!!
Here's a few close ups for you....


Pure pumpkin perfection!!!


I just adore the the super cute mummy and skeleton Accent Stickers here - adorable!


SO much spooky fun!
I hope I have inspired you to document your Halloween memories with the fabulous Spooky Boo! collection.
Thanks so much for visiting,
til next time, 
Happy Arty Days, 
Amanda xo


OTHER SUPPLIES:

Elle's Studio: October New Releases & Inspiration!


Hi Friends!

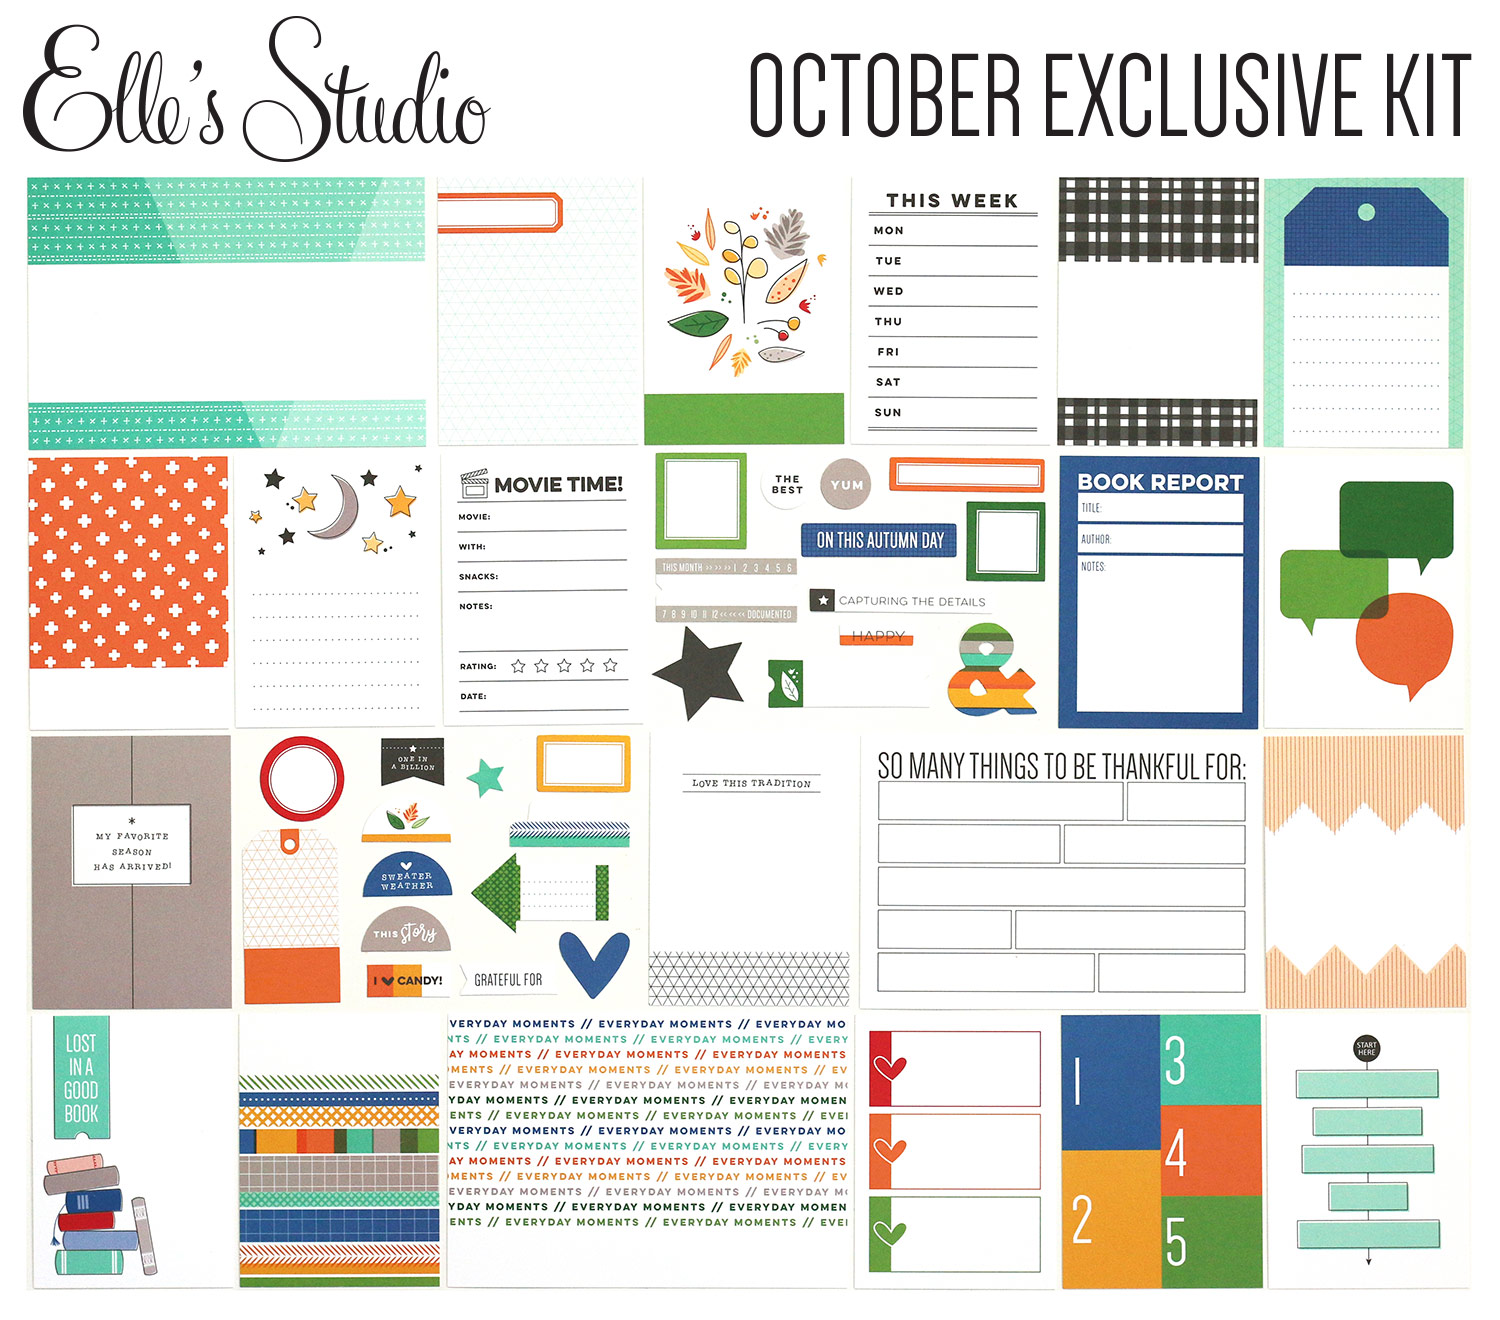
Welcome back for this month's Kit Reveal & New Releases at Elle's Studio! 

I say it every month but truly, the October Kit is all.kinds.of.awesomeness!!!
Check it out....


I told you! SO.much.awesomness!!!
All the heart eyes for all the Fall things! 
And like always, the Add-Ons are absolute Must-Haves too......

The  new 6 x 6 Sweater Weather Paper Pack is AWESOME!!! 
& I  just  have to mention that stamp!!! 
The new Thankful Stamp is errrything - you'll see it feature in a moment ;)
And of course, Fall, Halloween, Home & Coffee themes - yayyy!!!

The cherry on top of the amazing new releases would have to be the 


LOVE!!!!

***You can shop ALL the New Releases HERE***

Need a lil inspiration first?
Here's what I've created just for today's reveal.....

"Favorite"


Other Supplies: 12" x 12" Bazzil - Marshmallow, Umbrella Crafts Dye Ink Pads - Mint, Sky Blue, Cobalt Blue, Sunbeam & Shimmerz Paints: Spritz Bamboo Leaf, Coloringz: Freshly Squeezed & Lil' Yellow School Bus. 

W.O.W!!!
My favorite season, indeed!
How incredible is that stamped wreath?!! 
I have repeat stamped the leaves from the Thankful Stamp set, in a variety of colors & fussy cut them out. I arranged them into the circular shape, glued onto my watercolor base and embellished with the Puffy Dots Stickers. So cool! 


To enhance the wreath appearance, I add a baker's twine bow to the base of the wreath. I also fussy cut one of the 3" x 4" cards to use as my subtitle, My favorite season has arrived!


That stamping!!! 
Perfect for all your Fall & Thanksgiving projects!
The Thankful Stamp is my favorite kit add-on this month - so good!


The Sweater Weather 6" x 6" Papers & Autumn Shipping Tags are perfect for layering beneath photos, and on my favorites list too! 

My second layout is a little close to my heart.....

"Heart Of Our Home" 

Other Supplies: 12" x 12" Bazzil - Marshmallow, Umbrella Crafts Dye Ink Pads - Mint, Sky Blue, Cobalt Blue, Sunbeam. 

What a fun page!!!
I just couldn't resist the super cute Home Sweet Home Wood Veneer, and repeat cutting it with it's coordinating Digital Cut File with the Sweater Weather 6 x 6 papers! 
I anchor all the 'homes' to the stamped trim at the base of my layout (created with that Thankful Stamp - it's seriously awesome!) 
Such an effective look! 


That veneer is really something! I embellish the 'o' in home with those fabulous Puffy Dots! The paper cut homes are all backed with Sweater Weather papers, and a couple are embellished with Die Cuts from the October Kit.  


The heart off-cuts from the Digital Cut File are all used to embellish the top of my layout. You'll also spy more stamping from - you guessed it - the Thankful Stamp! I just can't get enough of this stamp!!!
I also embellish with Puffy Dot Stickers, Noteworthy Epoxy Stickers and use the black Jane Alphabet Stickers for my title. 


Heart of Our Home without a doubt!!! Love this so much!


And there you have it! 
Two really beautiful pages with the latest Elle's Studio products!

I'll be back a lil  later in the month to share some Halloween inspiration with this kit & add ons too!

Thanks so much for visiting today! 
I hope I have inspired you to get creating!
til next time, 

Happy Arty Days, 
Amanda xo 

The Cut Shoppe: Love Layout & Process Video!


Hi Creative Friends! 
Welcome to the Happy Arty Days blog! 

 I am so super dee duper excited to be sharing my first official project for 

 Yayyy!!! 
I LOVE The Cut Shoppe digital cut files, and have been wanting to be part of this awesome team for a long time. 
Hooray for dreams coming true! 
Such an amazing opportunity - I hope I'll inspire you!

Today's layout is all about putting the focus back on your photographs, 
and the Piece Of My Heart cut file certainly does that and more! 
Here's what I'm talkin' 'bout......

"Love" 


Sigh! Isn't this just the sweetest?!! 
All the pretty, girly things here! 
Here's a better look at the cut file......


Get this awesome file from The Cut Shoppe HERE

This file is an absolute dream to create with! 
With no intricate or tricky cuts, this file cuts out super fast! With its large, clean cut boxes you can see how it really puts the emphasis back onto your photos!
 And if you're a lil time poor (aren't we all, these days?!) it's also super quick to back! 

Here's a few close-ups for you.....


I have used the Crate Paper: Maggie Holmes: Flourish collection, as well as a few bits n pieces from the Willow Lane line, accessory stickers from Cocoa Vanilla Studio & my favourite Shimmerz Paints - for a gentle hint of color and shine! 


So lovely, indeed! 
You'll spy that I foam mounted the Piece Of My Heart cut file for added dimension & interest!


Such a fabulous cut file for my beautiful girl! 

Want to know more about how this layout came together? 
Please watch my process video  HERE 
Also includes my thoughts on layout design, page elements, and why I didn't choose to back this file with multiple pattern papers (& it isn't what you might expect!) 
I hope you'll enjoy watching! 

Thanks so  much for visiting today!
I hope you're feeling inspired to use the Piece Of My Heart cut file!
til next time,


Shimmerz Paints: Beautiful Heart Layout & Process Video!


Hi Friends! 

I am so excited to share my latest Shimmerz Paints Education Team layout 
(& process video) with you all!
Today I am all about the super pretty blues & purples, and am focusing on the gorgeous Coloringz, Spritz Vibez paints. Yayyy!!!
But enough chatter, let's get straight into the good stuff!

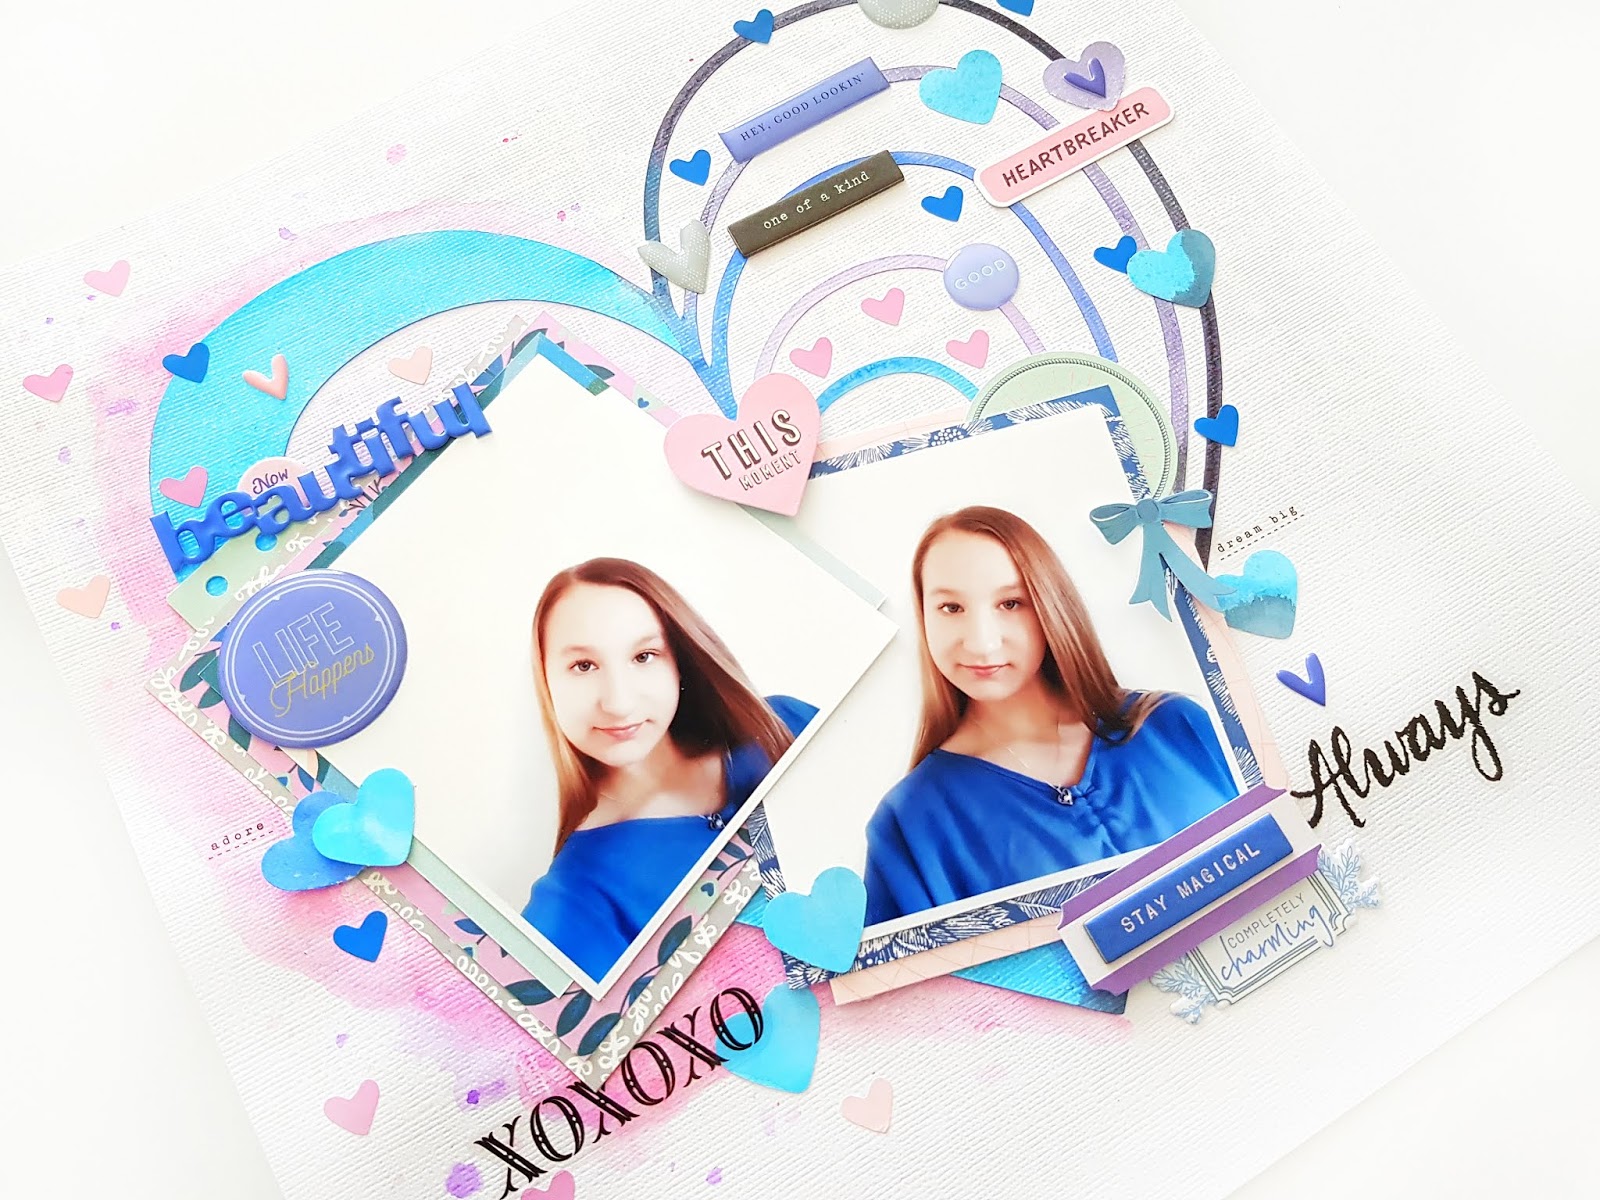
Here's my layout, 

"Beautiful Heart"


And isn't she beautiful, indeed?!! 
You can see that my color scheme is drawn directly from those sweet photos of my darling girl, and the stark white of the photo background is also reflected in my white cardstock base too. 
But it's those pretty blues & purples that are winning my heart! 

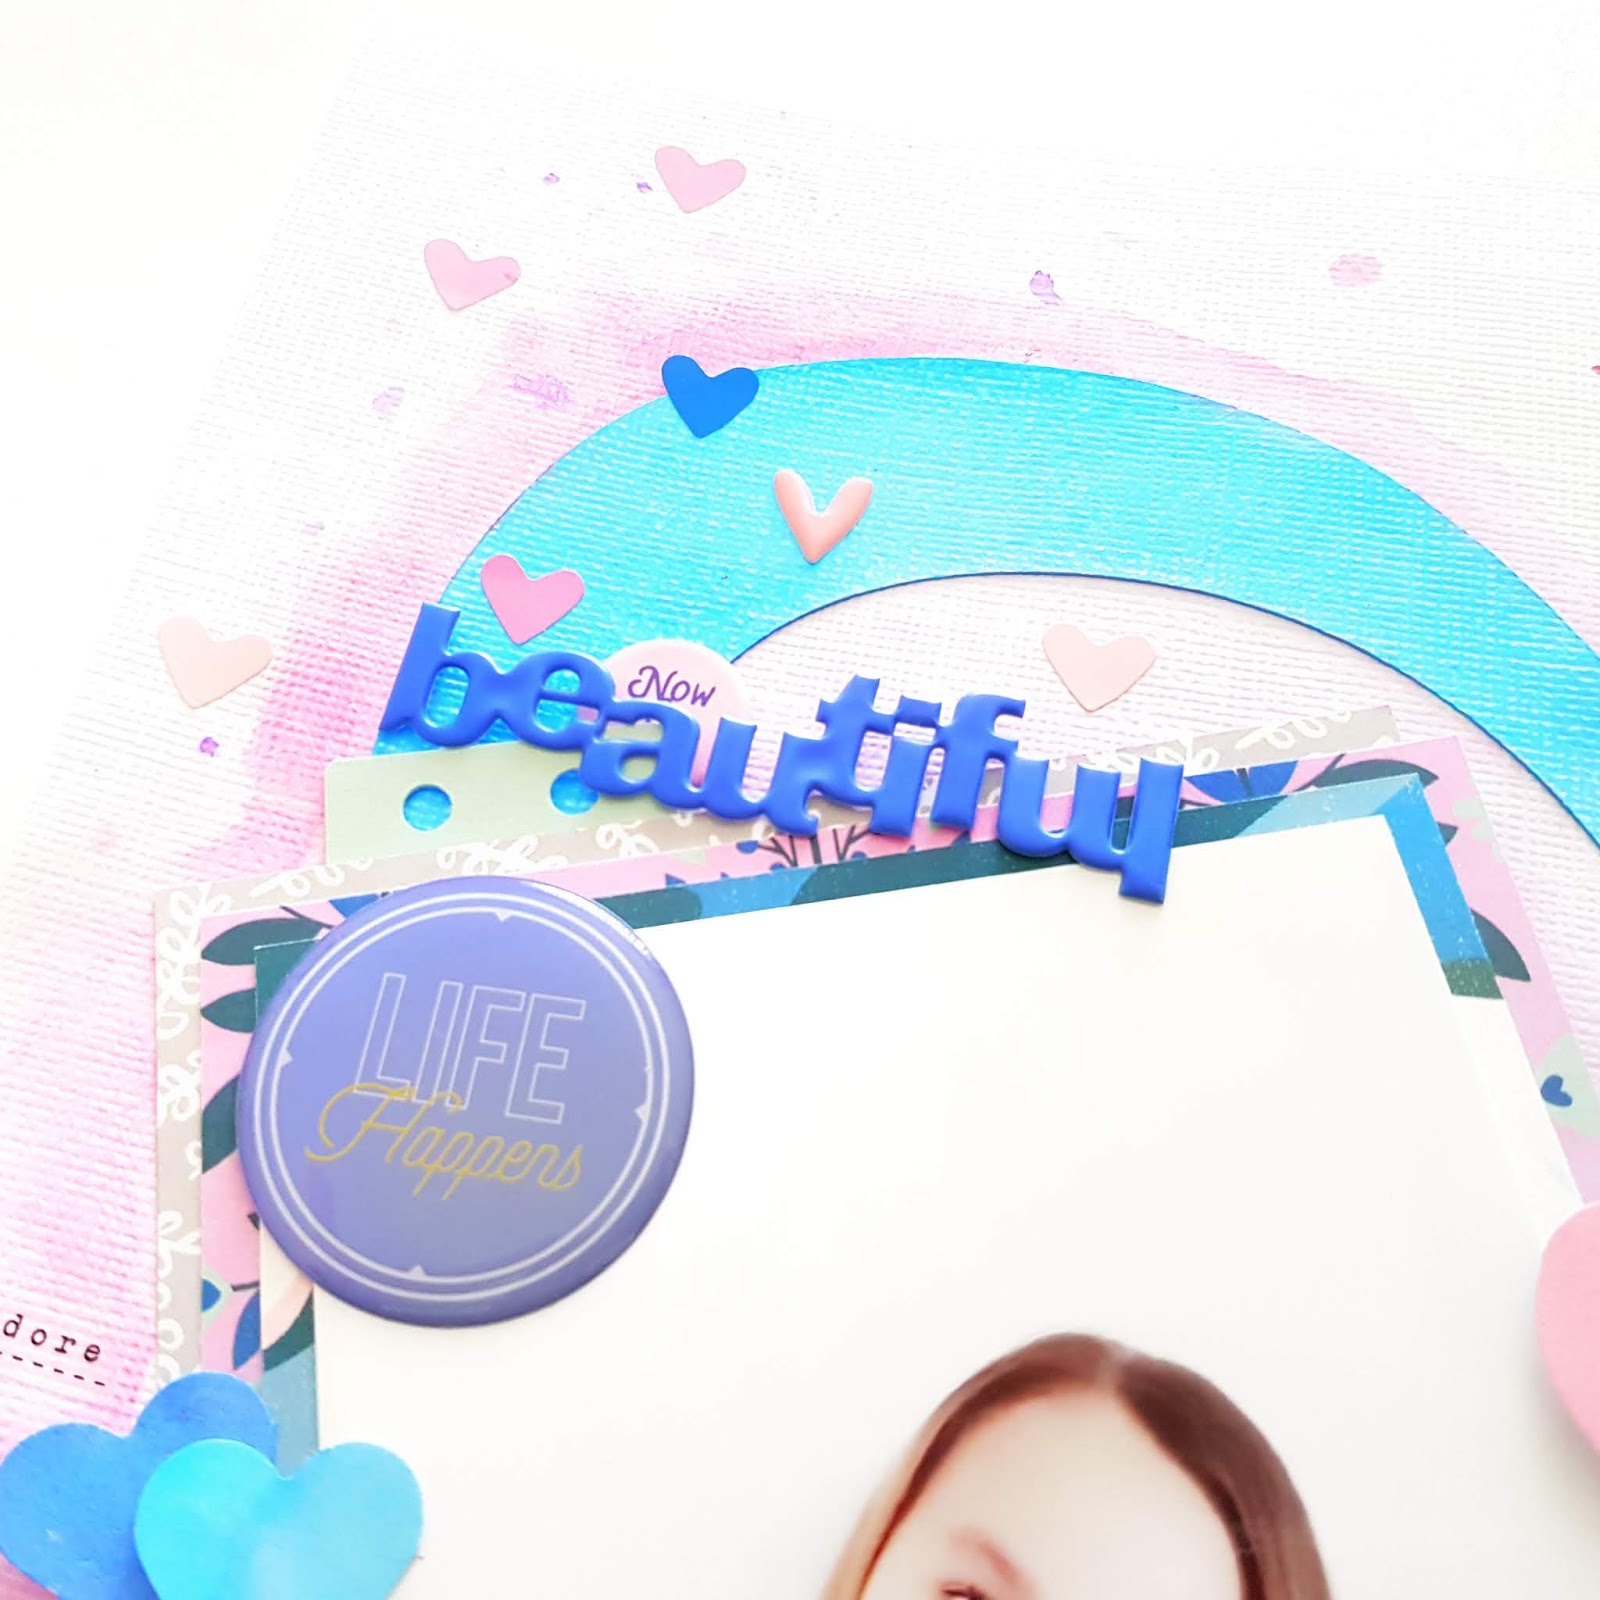
Here's a closer look.....


All the shimmery goodness!!!

I have used the Heart & Soul cut file from The Cut Shoppe, and given it a few coats of our favorite shimmery paints! You'll spy
 Vibez: Snow Way Man on the left side of the heart, 
and on the right side (going from the outer heart first) you'll spot: 


I initially start by spraying them directly onto the cut file, but to keep things neat & to stop the colors from blending into one another, I end up using a brush to paint the cut file segments. 

Surrounding the left side of the heart is Vibez: Sweetheart & Coloringz: Vivacious Violet -
 SO very pretty!!!!


Lots of pretty coordinating embellishments, and those sweet inky hearts? 
Yes, you guessed it -  they're simply cut from my excess paint areas from my cut file. 
I can't bare to waste such gorgeous paints!
Here's another view.....

Such incredible vibrancy to these paints! LOVE!!!
And the softness of the pink contrasts beautifully with the bright blue & purples!


Just divine!!!


Want to see more?

You can watch 'how' this layout came together, including my tips for using these fabulous paints, 
in my process video HERE

You can also subscribe to my channel here too

I hope you really enjoy watching my video!


REMEMBER: Type AMANDA in the comments section of your Shimmerz Paints Store order & you'll receive a FREE paint* - yayyy!!! 

*no minimum purchase, can be used on as many orders as you like, not valid with any other discounts*


Thanks so much for visiting today!

Happy Arty Days, 
Amanda xo 

Cocoa Vanilla Studio: Boys Rule Altered Clipboard


Hi Creative Friends!

Welcome back to my Happy Arty Days blog!

Today I am sharing a super cool, off the page number -
an altered clipboard with the awesome Cocoa Vanilla Studio: BOYS RULE collection!
This project came about because my sweet boy wanted me to make him something for his bedroom that also featured his birthday photo. And when your children ask to have anything you make on their walls, well, how could I refuse?!!
I really hope he likes it!

"Awesome" Altered Clipboard


Isn't this fun?!! 
Such an awesome decor item for any cool kid's bedroom!
To start with, I just played around with a design for a 6" x 8" layout, and then once I was happy I rearranged it to fit onto the slightly smaller size clipboard. It was really fun working on a much smaller scale, and it challenged me to be really particular about my embellishment choices.
Let's take a closer look......

The BEST. Awesome, indeed!!!!
With that birthday photo being part of my son's design brief, I began by layering it with papers and embellishments to create a small photo cluster.
I apply a DIE CUT EPHEMERA frame over my photo, & then position this onto the denim look cut apart from pattern paper, CV-BR006 BOY STUFF.  
I insert a few ACCESSORY STICKERS & apply a larger frame (from the MISCELLANY pk) beneath it all.

Next, I embellish the photo frame with that Cool Kid FLAIR BUTTON, and the 100% Boy ACCESSORY STICKER (which I foam mount for added dimension). I add to this embellishing with a few stars from the CLEAR STICKERS, CHIPBOARD PIECES, DIE CUT EPHEMERA & ACCESSORY STICKERS.  The last adornment to that sweet birthday photo is the over sized, fussy cut camera from pattern paper, CV-BR006 BOY STUFF. Perfect!


I attach the photo cluster to the clipboard, angling it slightly off the edge of the board to maximise the clipboard space. I also want to highlight that it is a clipboard, so I 'clip' the top left corner of my cluster too!
With my photo taken care of, I now begin to decorate the board.....


I dress the base of the clipboard with pattern paper strips from, CV-BR006 BOY STUFF, & CV-BR002 STRAIGHT & NARROW. To this trim, I apply the Awesome DIE CUT EPHEMERA title with foam dots, and add another star ACCESSORY STICKER - because when it comes to birthdays, we can never have too many stars, right?! So cool!
I love the gold hardware featured on this board, but because it's SO shiny, it's a little distracting. I decide to tone it down a bit, by embellishing over it.....


I adorn the clip with fabulous King of the World ACCESSORY STICKER, skull & cross bones FLAIR BUTTON, and another star sticker - also from the ACCESSORY STICKERS. This looks a little more edgy, less polished & much more 'boy' - love it!
Travelling down the left hand side of the clipboard, I add a larger CHIPBOARD PIECES star, and then that double layered skull & crossbones. The double layer is so effective! 
Here's a closer look for you.....


Awesome!
You'll see that I start with the CHIPBOARD PIECES skull first, and then foam mount the DIE CUT EPHEMERA onto it.Very cool!
Further left, & on the back of the clipboard, I glue the grey scallop DIE CUT EPHEMERA shape. This trim adds an extra layer and point of interest to the overall design.

Beneath the skull & cross bones, I add yet another CHIPBOARD PIECES embellishment. 
This cool sentiment banner directs your eye back into the 'awesome' title & brings everything together. For final touches, I add one or two more stars, and a small journal with the typewriter font words from the ACCESSORY STICKERS.

And there you have it!
Simple, quick, boy decor that looks really AWESOME thanks to the amazing
I hope you enjoyed seeing my project today & are inspired to get creating too!

Thanks so much for visiting,

Happy Arty Days,
Amanda xo