Citrus Twist Kits: Let's Get Digital for Fall!


Hi Friends! 

Welcome back for more Citrus Twist Kits inspiration!
Today I'm sharing a super fun Fall layout that spotlights the awesome Digital Cut Files at CTK! 
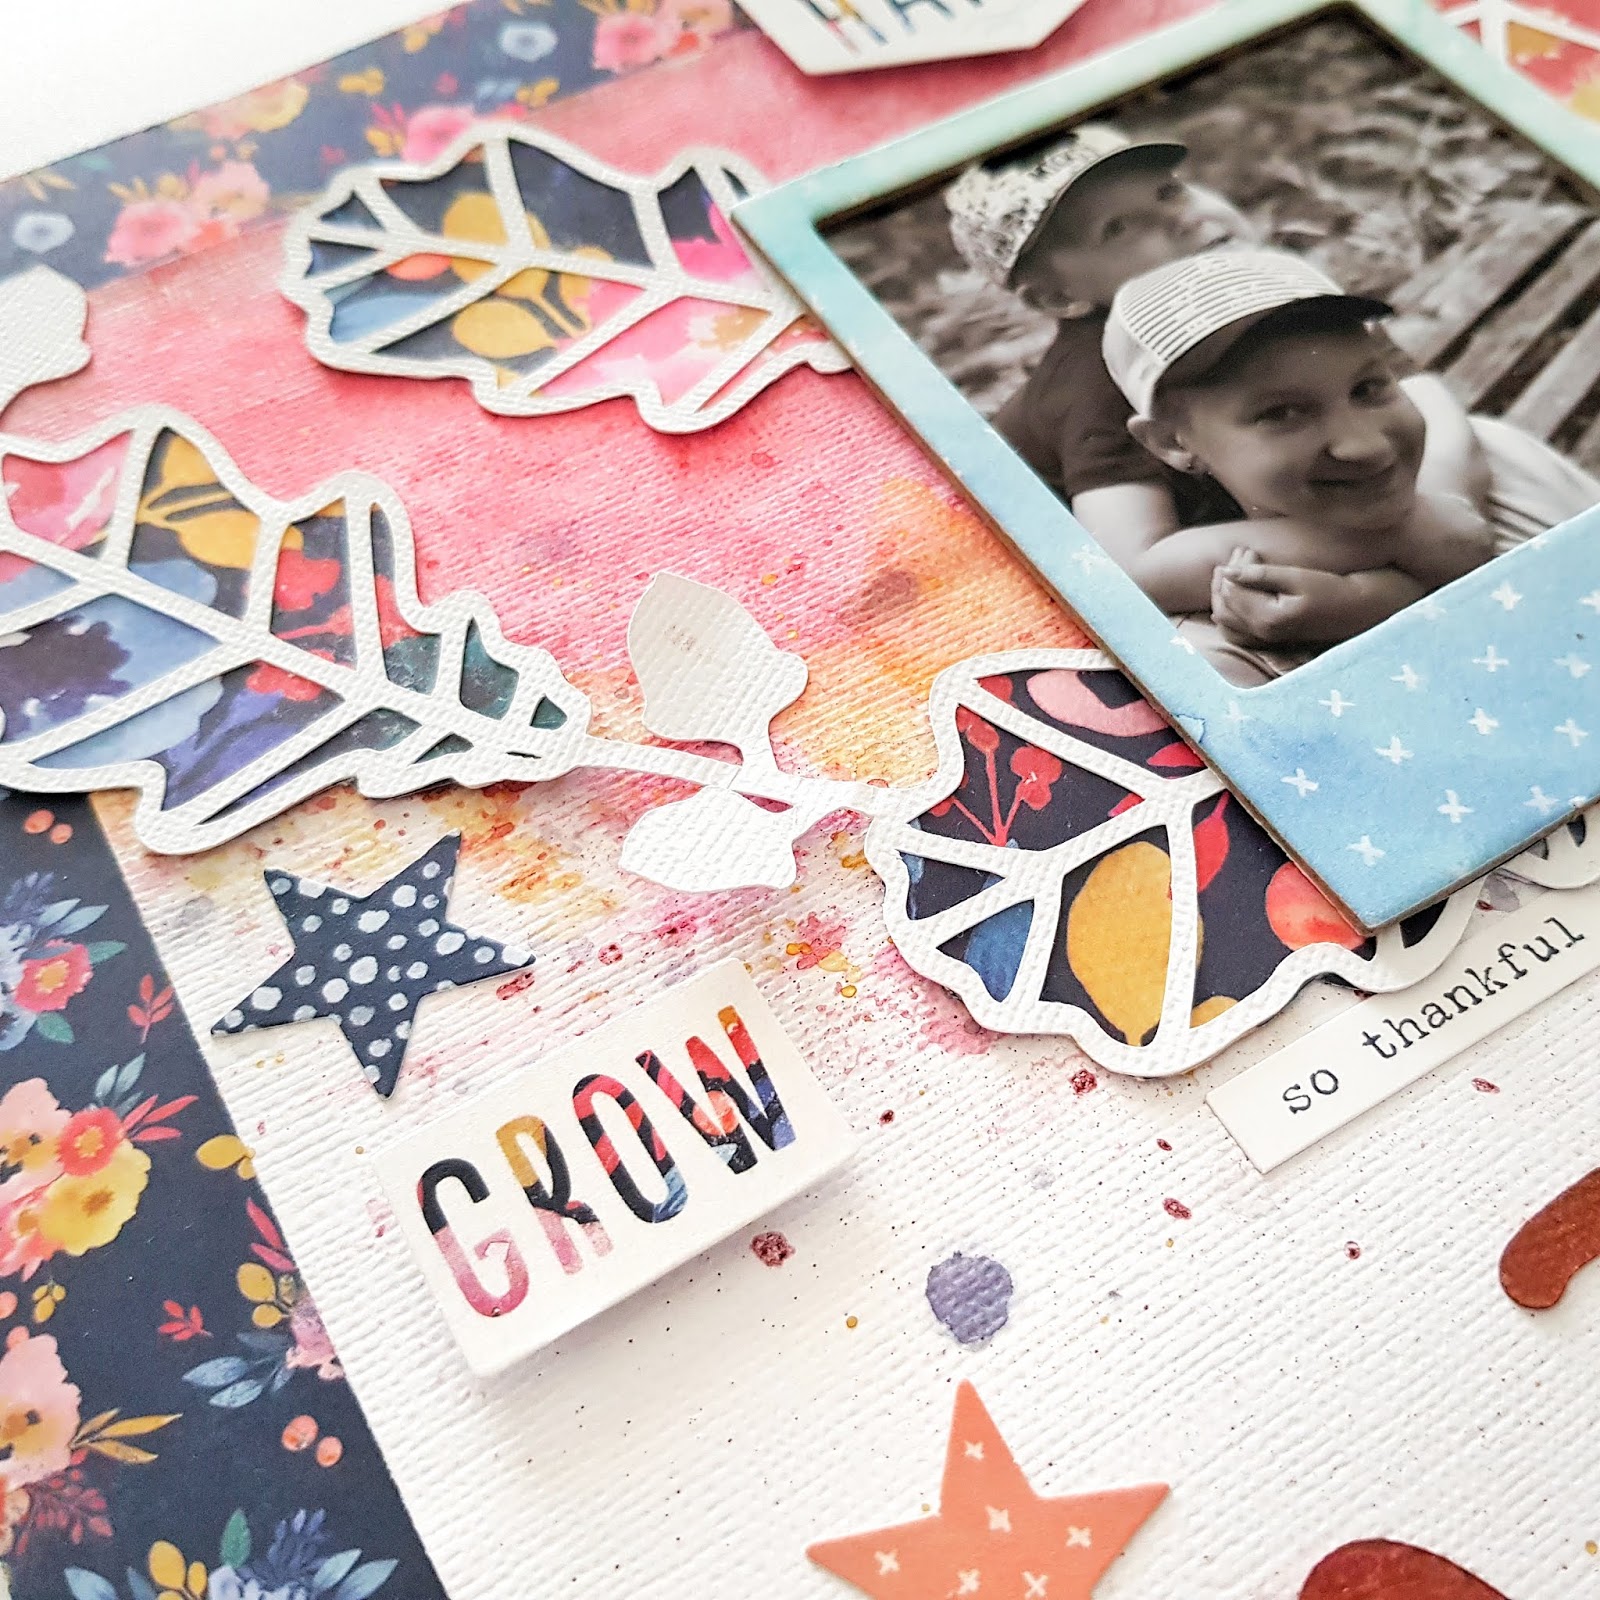
I have used the FREE Leaf Frame file with my Silhouette Sketch Pens for a really fabulous mixed media layout! 
Here's what I created....

"Small Things, Great Love" 


Isn't this gor-jus?!! All the Fall fabulousness here! 
I have featured the Little Things Pocket Life Kit, and combined it with wood veneer from the Little Things Scrapbook Kit, as well as fussy cut butterflies from the Vicki Boutin paper in the Pattern Paper Play Kit. 
But it's the Leaf Frame File that really makes this layout! 
The Leaf Frame file has been designed by our very talented Nathalie DeSousa, 
& looks like this....
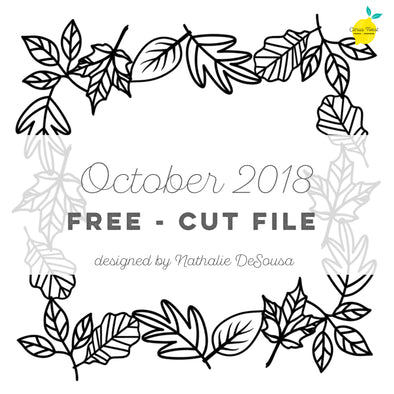

Cut file - FREE - Leaf Frame - October 2018
So awesome!!!
You can download the Leaf Frame Digital Cut File from the CTK Store HERE

I enlarged this file so it would frame around edge of my 12 x 12" cardstock base, & then used Silhouette Sketch Pens (Orange & Red ) to draw the enlarged digital file.
I loosely paint the leaves with the fabulous Pinkfresh Studio Liquid Watercolors in Candy AppleClementine, Sunshine & even a tiny amount of Lavender! I love the flow and vibrancy of these liquid watercolors! 
Here's a closer look for you.....


Sketch Pens are water soluble, so I use this 'ink bleeding' to my advantage,  & blend to create a little tone within my messy water coloring. I also add a few inky splatters for good measure. So cool! 
Here's another view for you....


Sketch Pens are really good fun, and combined with the Pinkfresh Studio Liquid Watercolors, they're super effective too! 
Those fussy cut butterflies are such a pretty adornment too! 
The laugh veneer from the Scrapbook Kit coordinates perfectly with both the Fall, outdoorsy theme of my layout.


It's also a pretty accurate descriptor of the story in my photo too! Aren't they just the cutest?!

I layer my favorite Fall photo onto that exclusive PL journal card, and then layer die cuts and 6 x 8 pattern paper beneath it all. 
Super simple creating that's tons of fun, and looks super effective! 

And there you have it! 
My fun take on this month's Let's Get Digital highlight! 
I hope you'll download this FREE file (and more) from the CTK shop HERE
and get a little creative too! 

Thanks so much for visiting, 
til next time, 
Happy Arty Days,
 Amanda xo 


Pebbles: Cards of Hope with the Along The Way collection!


Hi Friends!

Welcome back for more Pebbles inspiration!
Today I am sharing something that's a little close to my heart; 
raising cancer awareness & spreading hope. 
These days cancer is all too well known, with most of us being affected either with the disease, or having a friend or family member suffering. It is a thing of great despair & darkness.

So let's bring some light to those who need it most, by creating cards of Hope!
Infact, why not host a little 'Coffee, Cake & Create' card making session to raise money for cancer awareness?
Together we can all make a difference!

Here are my cards of hope with the beautiful Along The Way collection.....


Aren't they beautiful?!
Here's how to recreate them......


Start by trimming pattern paper Blooms into two sections,  10" x 7" and 10" x  5". Score down the center, and fold to create 2 card bases, as shown above. One card is a larger 5" x 7" size, and the other is cute 5" square card. 

Next, trim the reverse side of pattern paper Window Box to 4 1/2" x 6 1/2" and 4 1/2" x 4 1/2" and adhere to the card fronts. Cut a 4 1/2" x 3" strip of pattern paper Bird Seed and attach to the Window Box base of the larger card. Glue doilies to the card centers.


Select a tag or two from the Along The Way Tags pk, and embellish with a Phrase Sticker or Ephemera sentiment.


To add dimension and interest, build up your card layers with foam mounted ephemera.


Add a few stickers, & a lil more ephemera!


Looking good!


Use the pretty laurel leaves from the Kacie Thickers to add another texture, & element of interest.

Apply a sentiment at the card base with the gorgeous gold foil Anne Thickers. 

For finishing touches add a coordinating bow, and some sequins. Simple, but oh so elegant!


Cards of Hope only take a few minutes to create, but their thoughtfulness will last for months. 
Let's spread the hope, and support our community! 
I hope my cards have inspired you to get creating and maybe even raise a little money towards cancer awareness too!


The Along The Way collection is really beautiful, and just perfect for all those special projects!

Thanks so much for visiting,
Happy Arty Days, 
Amanda xo


ALONG THE WAY SUPPLIES:
OTHER SUPPLIES:
Doilies, ribbon & sequins.

The Cut Shoppe: A Walk In The Clouds!


Hi Everyone!

Welcome back for more cut file inspiration with The Cut Shoppe!
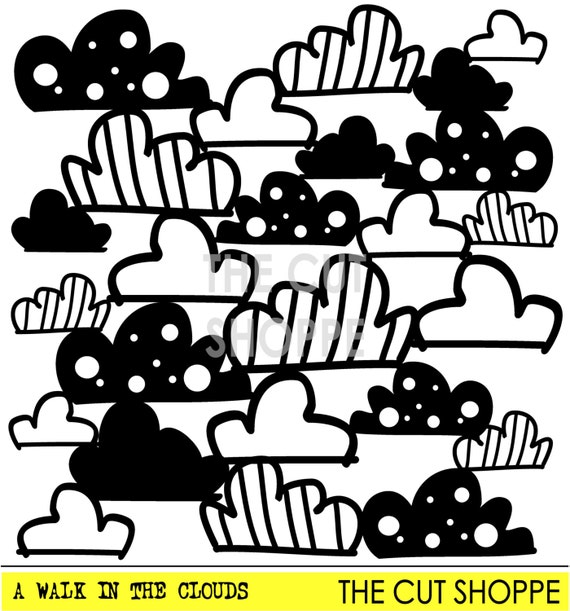
Today I am featuring the gorgeous Walk in the Clouds digital cut file 
Here's what I created with it....


"Bloom & Grow"


So beautiful! That Walk In The Clouds digital file takes this layout from pretty to pretty special!!!
Love it!
I have cut the clouds with pattern paper Sunset Strip from the new Cocoa Vanilla Studio: Midnight collection.  I love the inky appearance of this ombre paper - it's so beautiful! A gorgeous watercolor look without the mess! Actually, my entire layout is created from this scrapbook collection.

But it's those clouds that have my heart!!! 
Here's a better look at the Walk In The Clouds digital file.....

image 0

Such a playful & whimsical design! Perfect for a dreamy layout background!

To make the clouds even more impressive, I have mounted them on thick foam tape. Creating both dimension and interest!


You'll also spot that I back some of the clouds with pattern paper Moonlight - another dreamy element & detail!


I've adorned some of the clouds with pretty embellishments (hearts, flair, sequins & even a title!) for added interest! 
My darling photo is also mounted onto the clouds base.....


So very beautiful! Love this, indeed! 
Here's another view for you....


The Walk In The Clouds cut file is really magical! 


I do hope you're feeling inspired to use this amazing digital file in your next project! 
Don't have this digital file in your collection, yet? 
You can purchase it from The Cut Shoppe Etsy Store HERE 

Thanks so much for stopping by today, 
til next time, 


Shimmerz Paints: October Color Challenge & Process Video!


Hi Friends!

Welcome back for more Shimmerz Paints Education Team inspiration!
 Today I am sharing my take on the 
Autumn Vibes October Color Challenge!
My focus color for this month is Vibez Quit Yer Wine-n and oh my heart, this color is divine!!! Absolutely perfect for all your Fall creations!
Rather than rave about how beautiful this color is though,
here's a look at what I created with it.....

"October"


So Beautiful! 
I just adore that photograph of my two darlings, and the Vibez Quit Yer Wine-n color was the perfect choice for both celebrating Fall and childhood playfulness! 
I apply Quit Yer Wine-n to the top semi circle of the layout with the packaging technique. This creates a more textural look, and really highlights the berry tones within the Quit Yer Wine-n color. I also splatter this pretty color along the semi circle rim, and then decide to create a much smaller semi circle of splatters at the base of my layout too! 
To compliment Quit Yer Wine-n, I add Vibez Glorious Day and Coloringz Ahoy Matey to the mix. 
Here's a closer look for you.....


Gosh, it's pretty!!!


The golden hues in Glorious Day really add that 'extra' to the wine base. So beautiful! 

While that mulberry wine base is gorgeous, I really must stress how different the Quit Yer Wine-n color appears when applied this way. Using the packaging technique really impedes the shimmering sediment in the paint. You'll still see 'shimmer' but  not at the intensity that we're used to. 
You'll spot the difference immediately when you see my title sprayed with Quit Yer Wine-n below....


Oh.WOW!!! 
How incredible is that golden shimmer through that burgundy wine color?!! 
Absolutely sensational!!!


Quit Yer Wine-n is such a beautiful, rich color and certainly looks its absolute best when sprayed onto projects. 


For a few painty tips, and lots more details - including how this beautiful layout came together, 
please check out my process video on the Shimmerz Channel HERE 
I hope you enjoy watching, and feel inspired to try our beautiful Vibez: Quit Yer Wine-n for all your Fall creations! Get yours from the store HERE 

Thanks so much for visiting, 


**Type AMANDA in the comments section of your order to receive a FREE gift!**


Pinkfresh Studio: One Paper - Two Ways!


Hi Friends! 

I am just loving all the gorgeous creative possibilities with the new Pinkfresh Studio Indigo Hills 2 collection! So.Much.Pretty!!!
For today's post I am putting the pattern paper MEADOW under the product spotlight! 
If you haven't seen this beautiful paper yet, it looks like this.....

That wreath is just divine! 
& I am totally crushing on those watercolor leaves!
But enough chatter, here's what I've created with this beautiful paper....
First up, is a traditional wreath layout,

"Beautiful Ordinary Life"


Isn't this oh-so-lovely?!! 
A pretty page for my pretty girl! 
I feature the reverse side of pattern paper GLEN as my 12 inch base, and layer it with an 11 inch square of white cardstock. I fussy cut around the outer rim of the MEADOW wreath and adhere it to the center of the white cardstock with thick foam tape. 
It's not hugely noticeable, but this gentle dimension really helps to make that wreath pop! 


I build my photo cluster on the left hand side of the wreath, being sure to layer lots of floral die cuts beneath my sweet photo! I adorn the photo with one of our fabulous CHIPBOARD STICKERS frames, and embellish with that DIE CUT EPHEMERA title, as well as those amazing WOOD VENEER & PUFFY STICKERS. 


I use the MINI ALPHAS PUFFY STICKERS to form my subtitle around the curve of the wreath. Cherished, indeed! Such a precious memory! 


I add a PHRASE STICKER sentiment to the right hand corner of my design, and embellish around this portion of the page with more PUFFY STICKERS. 
For finishing touches, I add a few ENAMEL DOTS around the wreath and photograph. A really beautiful layout that is simple for you to replicate at home. 
I hope you'll give it a try!

For my second layout, I am opting for a little more fussy cutting....

"Better Together"


Sigh! So very beautiful! 
This time I am using the reverse side of pattern paper RIDGE as my 12 inch base. I layer this paper with an 11 inch square of smooth white cardstock, and then fussy cut the wreath from the MEADOW paper. Once completed, I snip the wreath into two portions - ensuring one section is much larger than the other. The larger section forms the larger semi circle at the top of my page, while the smaller one is positioned at the base of my layout. 
As I want the leaves to be dimensional and fold upwards on my layout, I only glue the wreath 'line'. I use foam dots beneath the leaves to keep them propped up. 


Next, I take pattern paper GLEN and fussy cut the two main flowers, separating them to create 6 individual blooms. I attach the blooms to the wreath, and save the only pink one for beneath my darling photo. 
To make some of the flowers stand out on the semi wreaths, I attach them with thick foam tape. 
So effective!


For my photo cluster I wanted the look of layered frames, but I only had the one CHIPBOARD STICKERS frame left. The solution? More fussy cutting! I trimmed up one of the JOURNALING SPOTS with gold foil, and glued it behind the photo to create the appearance of another frame. In between the two frames, I also tucked in the pretty pink bloom & leaves saved from pattern paper GLEN. Below the framed photograph, I add a PHRASE STICKER sentiment -  Obsessed with you - perfect for my two darlings! I use the MINI ALPHAS PUFFY STICKERS to create my title, and then decide to add a few XOs with the larger GOLD ACCENT PUFFY ALPHA STICKERS. I love how the golden alphas subtly encourage your eye to travel around my page. 


I add a couple more PHRASE STICKERS, and a CHIPBOARD STICKERS heart but for the ultimate finishing touch, it has to be my favorite ENAMEL DOTS! Love 'em!

And there you have it - one wreath paper design, two very different looks! 
I hope my spotlight on the MEADOW pattern paper has inspired you to get creative! 
The Indigo Hills 2 collection is a whole lot of lovely,
 and perfect for documenting all your treasured memories! 
Thanks so much for visiting today!
til next time, 

Happy Arty Days, 
Amanda xo 

Citrus Twist Kits: 3 To Inspire Challenge!


Hi Creative Friends! 

Welcome back for today's installment of the awesome 
Citrus Twist Kits: 3 - To - Inspire challenge! 

I love a good challenge, and I had such fun creating for this one that I made not one, not two, but 3 layouts to inspire you with! Lol, what can I say? I love memory keeping & crafts! 

I hope you'll find some time this week to play along too! 
All you need to do is feature the following three prompts in your creating....

1. Use alphas in your project. 
(There are a few varieties in this month's kits - plus we won't mind if you use some from last month too! ;) There are always plenty of alphas left over, right?)

2. Include some die cut shapes or ephemera
(Again, there are plenty in this month's kits and oh my heart, the exclusive ones in the PL Kit are divine!!!) 

3. Add a wood element to your page
(This could be a wooden embellishment, or even some wood grain pattern paper) 


Before you get started, here are the three layouts that I created for today's challenge.....

"Be-You-tiful"


Isn't this pretty?! 
I have used the gorgeous Little Things Scrapbook Kit, as well as fussy cut butterflies from the Pattern Paper Play Kit, the October Embellishment Kit and the Pinkfresh Studio Liquid Watercolors. I just adore the blue hues and embellishments featured in the Little Things Scrapbook Kit, and they coordinated beautifully with my sweet photograph! You'll spy lots of Crate Paper, Pinkfresh Studio  & Vicki Boutin on this layout! 
Here's a closer look for you......


Aren't those fussy cut butterflies super pretty?!!
And those Liquid Watercolors are just stunning!!! I have used SapphireLavender, & Sky Blue and they're all available in the CTK store HERE. 


Lots of luscious layers of papers & die cut ephemera beneath my photo! I love having ephemera tucked in and around my layout focal points. The wood element in this layout comes from our October Embellishment Kit - the gorgeous gold foiled wood veneer from Pinkfresh Studio! 
The pretty mint alphas for my 'Be-You-tiful' title are from the Scrapbook Kit, and are also from Pinkfresh Studio - LOVE!!!


So.much.pretty in the Little Things Scrapbook Kit!!!
My next layout has a very fresh feel to it.....

"Beautiful Ordinary Life" 


Sigh! Beautiful, indeed! 
It's no secret that I heart me some Pinkfresh Studio, & this is exactly why! 
So clean, fresh & contemporary! A really elegant and beautiful page of my darling daughter! 
All the Pinkfresh Studio goodies here, plus a couple of those super cute inflatable hearts from Amy Tangerine. 
Created with the Little Things Scrapbook Kit and teamed with the fabulous phrase stickers & wood veneers from the Embellishment Kit & paper from the Pattern Paper Play Kit.  Perfection! 


Those floral die cuts have my heart!!! SO pretty! 
The mint alphas add that tiny pop of color to break up all that peach, and add balance to my design. Love it! 

And last, but by no means least, my third layout for this super fun challenge....

"Boy: Slow Down"


Such a fresh & fun page for my darling boy! 
I have opted for a 8.5" x 11" design, and used the beautiful Little Things Pocket Life Kit! I am LOVING the exclusive pattern papers & just had to make a feature of them!
I layer quite a few of them beneath my photo to really draw your eye in. You'll also spot the vintage book paper, and lots of the exclusive die cuts too! 
I use the wood grain pattern paper for the wood element in this layout, as well as the pretty blue alphas to complete the 3-to-Inspire requirements. Such a cool adventure boy page! 


Those alphas are such a gorgeous shade of blue! All the heart eyes for these!


The PL Kits are always jam packed full of exclusive must haves! So good!

And there you have it! Lots of inspirational ideas to get your creativity flowing! 
I can't wait to see what you create for this 3-to-Inspire challenge! 

***Be sure to upload your challenge entries in the Facebook Citrus Twist Kits Fan Page***

Need supplies before you begin? 

Thanks so much for stopping by today! 
Til next time, 

Happy Arty Days, 
Amanda xo