Hi Creative Friends!
Today I wanted to share with you a rather simple, but somewhat effective,
idea on how to take cues from your patterned paper.
Sounds a bit odd to take tips or clues from your papers, but please keep with me....
The result is always a fun and contemporary page that only takes minutes to create.
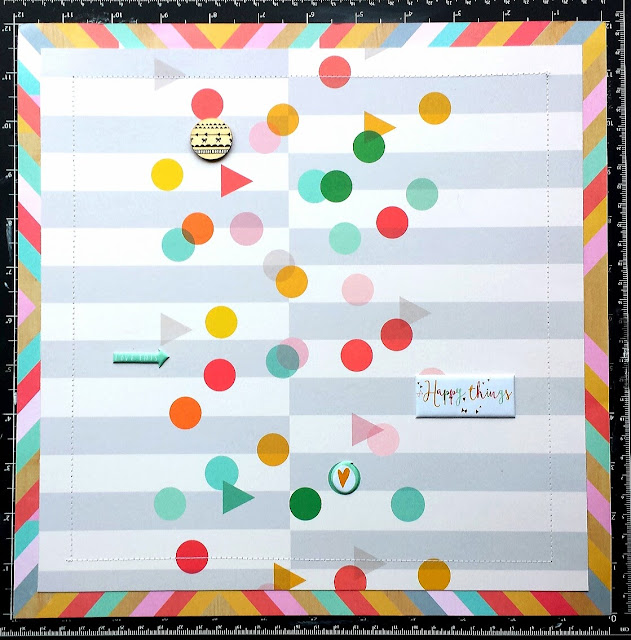
Here's the layout I am referring to....,.
"Sweet Happy Things"
I know - such a bright, happy and striking page!
& it really did take only minutes to assemble.
So let's talk paper!
This gorgeous new paper collection is, "Happy Things" from Pinkfresh Studio.
I immediately fell in love with the bright pop colours & the geometric shapes - cue!
Yep. Look carefully - I have literally cued the colours and repeat patterns to 'build' my page.
Circles, triangles, hearts.... Well, it's all part of the Imaginarium Designs chipboard family, isn't it?!
Let me step you through how I created this page......
Firstly, once I had played 'matchy match' with my paper & chippies, I did a quick flat lay shot to make sure my design worked. This gave me a chance to play with photo placement, consider colour arrangements & add on a few sticker embellies too!
Secondly, I machine stitched my two patterned papers together - just to add interest and a little texture to a fairly 'clean' look.
Tip: You'll note I left my stickers attached to my page - I often do this to aid as position markers, ensuring everything gets attached as per the plan.
Next, I prepared my chipboard.
Remember we're taking cues from that patterned paper, so colour matching is a must!
I applied Island ink as per the above image.
I then applied a complimentary green Faber-Castell Gelato and smudged it on the chipboard, as per above.
Finally, I applied Bo Bunny Glitter Paste in gold, to my focal circle.
I added the gold feature circle to really draw attention to my photograph. - breaking up all those bright and busy elements!
Next, I inked up the remaining chipboard in matching colours.
To provide balance to the feature golden circle, I also used the gold paste on a few of my chipboard hearts.
Attach photo, and then glue circles flourish into position.
You'll notice that I also embellished the chipboard with the Pinkfresh Studio wood veneers & puffy stickers - just adding more repetition & depth to the page.
Glue remaining chipboards into place & voila!
A super simple, striking page that was 'built' entirely from playing matchy-matchy and taking cues from paper!
Hope this lil tutorial has given you a new idea to try with your chippies and patterned papers!
Imaginarium Designs Products Featured:
*New* Circles Flourish & Natalie's Hand drawn Hearts coming soon!

Triangles in a board

Trouble Beautiful Sweet
Imaginarium Designs Products Featured:
*New* Circles Flourish & Natalie's Hand drawn Hearts coming soon!

Triangles in a board

Trouble Beautiful Sweet
Here's another layout I've created using the same 'taking cues' concept,
I know, it looks nothing like the patterned paper -
I actually took my paper cue from that sweet little tag tucked beneath my photo.
Minty greens, aqua, blue and yellow - such a fresh and pretty combination!
Yep, taking cues from your papers is quite a fun game to create with, I hope you'll give it a try!
------------------------
Such a pretty page, isn't it?!
I've literally been scrapping my stash here - using up my Crate Paper Style Board papers and ephemera- to create a fun, whimsy layout of my two darlings!
You'll spy a mix of my fave butterfly chippies with some gorgeous new designs too; that frame is divine!
And let's not forget Loolabelle's funky hearts!!! Too cute!
To accent my chippies on this layout I coated them in rich, colour intense ink, & then sprayed them with the corresponding colour Kaisermists.
Kaisermist adds a very slight and subtle sparkle to the chipboard.
Here's a closer look....
Love this cluster! How cool are the lime butterflies?!!
But it's that stunning new frame chipboard that really gets me....
Isn't it just darling?!!
Another super simple, but really lovely page created from taking cues from papers!

Thankyou for stopping by, I really hope I've inspired you today!
til next time,
Happy Arty Days,
Amanda xo


Post a Comment