Showing posts with label Tis The Season. Show all posts

Elle's Studio: December Kit Reveal & Inspiration!


Hi Friends! 

Welcome back for more Elle's Studio awesomeness with the December reveal! 
There are so many gorgeous new products this month, starting with the 


How fabulous is this month's exclusive kit?!! 
La la LOVE!!! So many great note cards to document the season with! 

The Add-On items are pretty amazing too.... 


As always, the stamps have my heart - so good!
And let's not forget our amazing digital cut files and printable elements too...
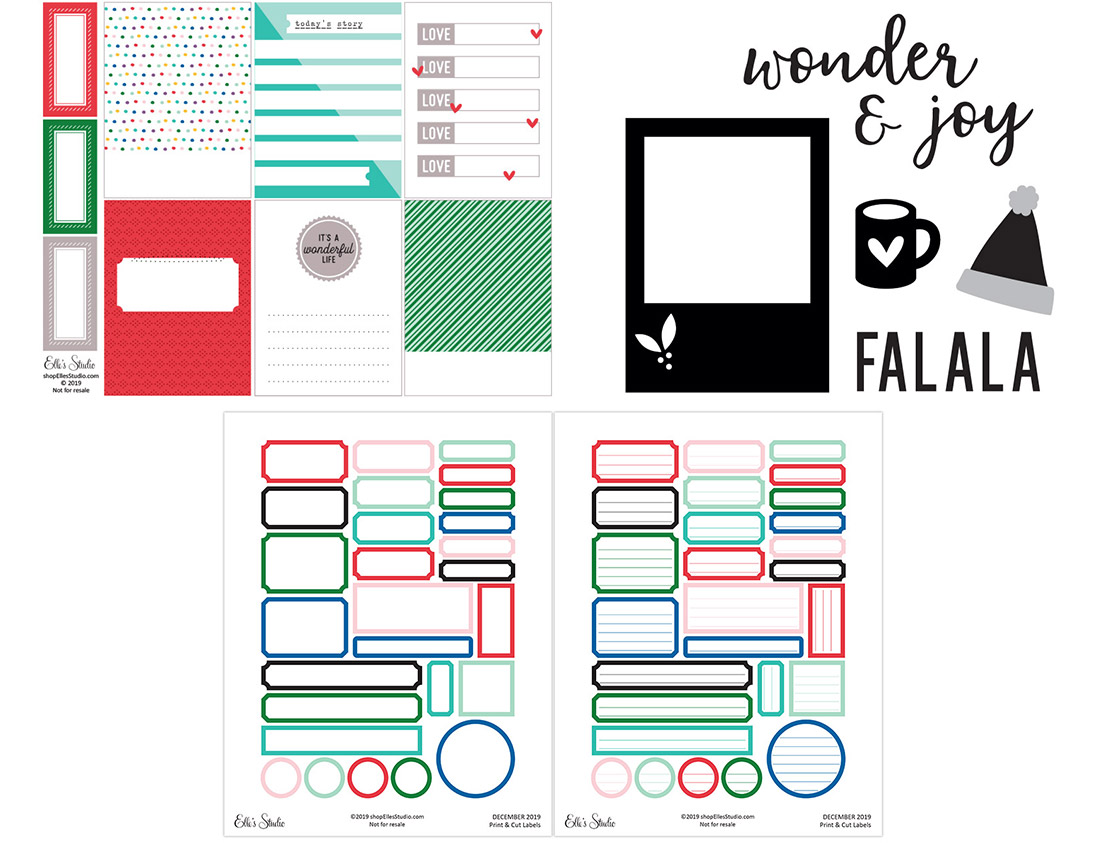

So cool! 


Now, time for some inspiration with these fabulous new products! 
First up, I just had to use those Winter Wood Veneers and those fabulous stamps....

"Hot Cocoa"


How fun is this?! La la LOVE!!!

Other supplies: Bazzill Cardstock - Avalanche, machine stitching, natural twine, Staz-On Ink - black, Scrapbook.Com Premium Hybrid Ink - Cardinal Red

Let's take a better look at this 8.5" x 11" layout.....


Aren't those veneers and stamps errrything?!!
SO good! 

You'll spy that I used the Tis The Season papers down the left hand side of my layout, and then stamped a coordinating pattern down the right side. While I had the Wonderful Life Stamp handy I also stamped the Celebrating the little things phrase onto that 3" x 4" note card with my photo, as well a few phrases around the photo cluster. The layers beneath my photo are created from a mix of the December Kit note cards, die cuts and more of the Tis The Season pattern papers.


I fussy cut and hole punched a tag from the Tis The Season papers to complete the cluster layers, and embellished it with some natural twine. Around the cluster I added a couple of the stickers from the Goals Phrase Stickers, as well as stamped a few icons from the Black Friday Sales Exclusive "Currently During The Holidays" Stamp in red ink. Here's another view for you....


Such pretty layers! 
 I decided to add machine stitching to compliment the twine, and add a little softness to this fairly crisp page. For some added interest, warmth & balance I also embellished with the Winter Wood Veneers. 


Absolutely stunning! Those veneers are a must-have item this month!

For my second project, I have created a 12 x 12 scrapbook layout documenting our beautiful Christmas tree this year...

"Oh, Christmas Tree"


Oh how pretty!!!

Other supplies: Bazill Cardstock - Avalanche, Nuvo Drops - Bubblegum Pink. 


Like my previous layout, I just had to use the fabulous 6 x 6 Tis The Season Paper Stack papers to trim the edges of my page. These papers are definitely a favorite of mine, and will likely feature in this year's December Daily album too! 
I used a few of the December note cards to back my photo with, and then halved a couple of the December Labels to create the appearance of more cards. I foam mounted this photo cluster, and tucked a mix of stickers, die cuts and The Best This Year Wood Veneers beneath it all.  


Next I grabbed my scissors and fussy cut out the tree from one of the December Kit note cards, and then cut a variety of hearts from one of the pick colored cards.  I used these fussy cuts to embellish my photo with! 


To complete this page, I used the super versatile Jane Alphabet Stickers in red - perfect! 
Simple. Easy. Beautiful! 

And there you have it! 
My first two projects with the gorgeous December Kit & new releases! 


Thanks so much for visiting today!
til next time,


Elle's Studio: Tis The Season!


Hi Friends! 

It's time to bust out the Michael Buble music as "It's beginning to look a lot like Christmas!"
 I am so excited to be preparing for the Season of Giving! 
I just love the Holidays, and the new Elle's Studio 6 x 6 Paper Stack - 'Tis The Season is perfect for documenting all our stories with! 


Whether you trim this paper into pocket size note cards, create greeting cards, include it in your Document December albums, or even craft some Holiday decor, this paper pack is simply the best! 
I used the 'Tis The Season papers for documenting my son's visit to see the Jolly Ole Elf himself! 

Here's my layout, 

"Merry & Bright" 

Ho! Ho! Ho! What could be merrier?! Such a cute photo! 

Other Supplies: Red Stamping Ink, SpiegelMom Scraps Red Rapture Sequins, White Tissue Paper. 

Let's take a closer look at my sweet Santa scrapbook page!


So adorable! And just look at all those pretty papers! 
So many gorgeous designs! 
It's well known that I like to maximize the 6 x 6 Paper Stack papers for 12 x 12 scrapbook pages, & for today's post, I really wanted to share my top 5 ideas on how to do this! 


1. Use the bold pattern paper designs to matte your photographs onto! 
I always print my photos with a white border and tend to forget how important that pop of color is. A striking base for your photo/s will really direct your eye and draw attention to your most important part of the layout! That red beneath my photo is just stunning!!!


2. Create paper layers to mount your photograph onto!
Layered papers create texture, give shape &  add visual interest. They also give us the opportunity to mix and match colors and designs, adding greater elements to the overall design. You'll notice that I even add some white tissue wrap in between my paper layers to add further emphasis & interest to my pattern paper cluster!


3. Pull out your punches, or favorite fussy cutting scissors, for some fun pattern paper shapes!
Think rows of pattern paper circles stitched together, concentric paper hearts or in today's example, layered dovetail banners! A really simple, but oh so effective, way to incorporate 6 x 6 papers into our projects!


4. Be an illusionist!
Create the impression of larger papers with careful cuts and clever paper placement! I did this two ways with the dovetail banners in my layout. 
Firstly, for the striped and wider looking banner, I diagonally cut the 6 x 6 paper from the top right corner to the bottom left corner. I then re-arranged the two cut triangles so that the longest lengths were vertical, and on opposite sides from one another. Next I overlapped one of the triangles over the other and taped it into place. You can't see the taped join because it's all hidden behind my photo cluster!  So cool! 
Secondly, I cut my thinner banners through the centers so that they became two pieces which I then shortened or lengthened beneath my photograph. 
The trick is just to make sure they align correctly ;)


5. Build 'em up! 
Connect your 6 x 6 papers together to build a longer or wider piece of paper! You'll see that I joined two sheets of the typed 'tis the season pattern paper to create a 6 x 12 sheet of paper. I also butted strips of papers together which I then tucked under the folded edge of the 6 x 12 paper. So clever! 

That's just a few of my fave ways to incorporate the smaller pattern papers into my creating. 
I hope it gives you some inspiration and ideas for the latest 6 inch 'Tis The Season Paper Stack.
How do you like to use your Elle's Studio 6 x 6 Paper Stack papers? 
Be sure to share your tips and creations with me in the Elle's Studio Facebook Group HERE. 

Thanks so much for stopping by today!
til next time, 


Cocoa Vanilla Studio: Tis The Season Inspiration!


Hi Everyone!
Welcome back for a lil Christmas festivity, fun & inspiration!
Christmas is all about the spirit of giving, and so today I am giving you a peak into my 'real' life - a layout that is so deeply personal that I would've normally just kept it in an album for my darlings!
So, if you ever wanted to get to know 'me' - lil old AJ - better, then this is the post for you!
(& if not, skip the words and just enjoy the paper pretties ;)  )
So without further ado, here's my layout......
"Memories Together"
IMG_20151207_115748
Yes, that's me and my two beautiful children - not posing, not staged & very much in front of our Christmas tree for 2015!
I don't get behind the camera too often - so this layout is a rarity in itself! But such a happy moment in our little family! We had just finished putting up the tree and singing along to some carols when my husband snapped this pic! I love it so much! It's actually not my best angle...ya-da, ya-da, ya-da.....
BUT it's the joy on my children's faces and that gorgeous embrace of my Mr A for Awesome, that melts me everytime! Told you this was a personal insight post, lol! Being 3, he is super-dee-super excited about Santa coming this year and our poor Advent calendar is feeling his joy! Teehee! Such a wonderful time of year!
It is sadly also Miss M's first year of 'knowing' about the magic of Christmas.....
Thank goodness that she is able to share in her brother's excitement & has been a super special Santa's little helper! This photograph reminds me that despite the disappointment of 'knowing', she is still so full of happiness and joy that the Spirit of Christmas remains with her. Bless!
Cocoa Vanilla Studio's, Tis The Season collection is perfect for all your Christmas creating! Fun, fresh & contemporary - this collection is all about documenting this December!
I am totally loving the ponsettia patterned paper, "All Is Bright"
TIS THE SEASON | ALL IS BRIGHT PAPER | CV-TS003
Just gorgeous and the perfect balance of Christmas colours without being overkill! The blue tones worked especially well with my photo - as you'll spy, our tree has quite a few blue decorations this year.
Here's a closer peak at the lovely embellishments I've used.....

IMG_20151210_143119
Oh those Lucky Charms, they get me every time! Brass heart keys are just too sweet and sentimental to not feature! And how cute are the mint sequins & die cut ephemera?!
I am also really loving how clever the printed wood veneers are.....
IMG_20151210_142856
TIS THE SEASON | WOOD VENEER SHAPES | CV-TS012
I mean, seriously, could they get anymore perfect?! They are just cute-to-boot!  Love them!
And because it is Christmas, and I really am trying to spread the good cheer,
here's a little bonus Christmas creation for you,
Christmas Tree Table Decoration
IMG_20151206_152258
Isn't this cute?! I actually have Miss M (9yrs old) making these as teacher gifts!
Super easy to make and mostly, a ton of fun!
(lots of paper tearing, collage and threading pearlised pins!)
It's made from the patterned papers Very Merry & Good Cheer, sequins, wood veneers and yes, those divine enamel Little Stars...
IMG_20151206_152619
Such a gorgeous little gift or adornment to your Christmas table this year!
I hope that you've enjoyed seeing my creations today, & are feeling a tad more festive!
Tis The Season is just divine for memory keeping your Holly Jolly Christmas!
& if you need a lil extra encouragement to indulge yourself - you can get the entire collection at a discounted price HERE
and on that happy note.....
From my Family to Yours,
Merry Christmas & A Happy New Year!
Stay safe and enjoy the holidays,
xx AJ ( aka @happy_arty_days )

Imaginarium Designs: December Planning!


Hi Imaginarium Designs Friends!

Welcome to December!
 'Tis The Season to enjoy some creative time with our fabulous chipboard!

And with the New Year not far upon us, I wanted to share a quick and simple tutorial on using your favourite chipboard in your Planners :)
Yes...  I said, Planners , as in more than one, lol!
 I may have several...shh! It's okay we're all happy planning friends here ;)
But enough of the chatter, here's what this week looks like in my planner....

Hello, December!!!


I did say I love my planners, didn't I? & how cool is this?!!!
I've used my MAMBI: The Happy Planner, & Cocoa Vanilla Studio's: Tis The Season Collection, a few gems from The Planner Society and combined them with some too cute chippies for a fabulous result!
My favourites are those divine Christmas Tree clips - so sweet!

Here's how I created my planner page for this week....

I always choose a colour palette or theme for my weekly planner - naturally the first week of December needed to reflect the Jolly Silly Season! 
& then, I select small to medium chipboard pieces that will tie in well with my theme. 
Here's some of my selections for this week...


Can't go past those new hashtag words!!! SO cool!

I begin by inking my trees in Ingvild Bolme Chalkers: Mint & Kaisercraft Ink Pads: Red. 


Note: These inks are water soluble, so allow to thoroughly dry before applying a generous coat of Couture Creations: Glitzin Glamour: Red and Crystallina.


I also coated a mini star in the same reds, and once dry, attached to my mint tree.

When the glitter glue is completely dry, turn the chippies over, and using a strong bonding adhesive, attach the extra long paper clips. (or fold clips, or wooden pegs for page markers too!)


 Voila! 
Very cool clips that can be tailored to suit any theme or colours in your Planners. 


 I also used chippies to embellish my page too! 
I used glitter gold embossing powder on some of them and attached to my page with double sided tape. 


The stars work really well with the Christmas theme of my Planner spread, & those new hashtag words are just awesome!!! 
They're quite delicate, contemporary and fun - perfect for us Planner Junkies ;)


 Oh, & I did one more chippie treatment! I used the negative cutout from my tree chipboard as a stencil with my WeRMemoryKeepers Heatwave Tool to create those foiled red trees! Another fun way to use our chippies in our Planners!


To see more of my Planner love be sure to follow me on IG: @happy_arty_days


I also made a commitment to my family this month that I would stop hoarding   ahem! 'collecting' pretty papers and actually use them! Bahahaha! I've tried.....

Here's 2 layouts from scrapping my stash!

#Wonderful


I love the delicacy of this page! Soft, and feminine - perfect for my lil girl!
It's created from the new Crate Paper Shine collection that I had to buy - but has been sitting on my desk for weeks now because it's too pretty to use! lol!
Like my Planner page, I have used those fantastic hashtag words, and coated '#wonderful' in glitter gold embossing powder - giving the chipboard a golden, lustrous shine!
Here's a closer peak....


Below the #wonderful, and tucked in my photo cluster, is a tiny chipboard flourish. Very delicate & painted in white acrylic paint to keep it 'pure'. 
The other chippies featured are Natalie's awesome hand drawn hearts - love these! 
So versatile and easy to use! 
To keep with the softness of this layout I have inked them in a very light petal pink ink. Gorgeous!


And my final layout for today is created from my long loved Amy Tangerine stash, "Rise & Shine"

"Best Friends"


Isn't this the sweetest photo ever? Cousins that are truly the very best of friends - so lovely!
And yes, a very simple design - but not every page is a masterpiece! Sometimes I just love to keep it simple and embrace the patterned paper and my special photographs!
And those chippies really do embellish the page perfectly!
Here's a closer look....


I've coated both dragonflies in Bo Bunny Glitter Paste in gold. Divine!


The clouds are simply inked in matte white ink. 


And that amazing title chipboard has been treated with Kaisercraft Inks; Saffron & Tangello, and then coated in Mod Podge Dimensional Magic. Stunning result!


And there you have it!
My December creations for Imaginarium Designs - hope you liked my planner page ;)

til next time, 
Happy Arty Days, xo