Showing posts with label Planner. Show all posts

Pebbles: Land That I Love Planner Pages


Hi Pebbles Friends & Fans!

Today I am sharing one of the most loved Holidays in the planner girls' calendar - the 4th of July!
"Oh say, can you see...." 
I'm singing as I type this post, and feeling all the Land of the Free feels right now!
This is such a wonderful holiday to celebrate, and I just love the Red, White & Blue adorning the pages of my weekly view planner! 
Forget functionality, this week is all about showing your stripes -  and plenty of them!
Here's how I've prepared my pages for this special occasion....


God Bless America!
As I'm quite the planner addict, you'll spot that this is yet another new planner in my stash! (Sssh! Don't tell Mr Baldwin - he doesn't need to know ;)  ) You'll note that this a much larger size and more 'boxed' style of planner (it's a MAMBI Happy Planner) compared to my previous planner & traveler's notebooks shares. The great thing is that regardless of planner size or type, you can take the ideas from this post and edit them to best suit your  daily organizer needs. Yay!
Here's how I created this patriotic spread....
First you'll need to gather up your Pebbles: Land That I Love supplies. As well as embellishments, you'll also need pattern papers Stars & Stripes Forever, Happy 4th! and Land That I Love.


I just LOVE those Puffy Stickers! Oh My Stars, indeed!


I start with creating the full size decorator boxes. For this specific project, that means trimming pattern paper Stars & Stripes Forever to size 1 1/2" wide x 2 1/2" long. One 2 1/2" x 12"strip will create exactly 8 boxes, with the choice of two patterns - stars and stripes OR blue with white stripes. Adhere to your pages as shown above.


Next, take pattern paper Happy 4th! and trim all the 'strips' to create faux washi tape.


Trim to size, and adhere with glue. This is already starting to look good!


Trim a 3" x 4" card from pattern paper Land That I Love, and create a 'flap' or two for hidden planning! I use a Printed Cardstock Shape flag as my second flap. I tape them into place with some red tape from my stash.


Decorate with a few Puffy Stickers! You'll see that I have cleverly positioned my puffy star stickers to double up as 'dot points' in my planner! Much more fun than asterisks or bullet points!


I add more Puffy Stickers, and embellish with the 6 x 12 Accent stickers too! You can never have too many stickers!


Next I create a few planner clips for the top of my page. To make, simply hot glue some of the Printed Cardstock Shapes to metal paperclips. For finishing touches, I tie a patriotic ribbon to the base of my planner to act as my page  marker. Love it!

Here's a closer look.....


I love the 'flaps' - such a fun way to decorate without losing all your pen space!


The Red, White & Blue speaks for itself!


I hope you're as excited as I am for the Fourth of July celebrations! I can't wait to see what your planners, organizers and notebooks will look like this week!
Thanks so much for stopping by today,
til next time,

Happy Arty Days, 
Amanda xo 


Pebbles Land That I Love Supplies:

Pebbles: Patio Party & Planner Inspiration!


Hi Creative Friends!

It's planning theme week over on the Pebbles Inc blog! 
And for this theme post, I wanted to share a makeover of my less glamorous, everyday planner! 
Not the over sized, over decorated planner that sits on my desk for flat lay photo shoots -  but the honest, everyday, no frills, pocket size one that I carry around in my purse! 
My 'real life mom' planner! 
You know the one, it has scribblings of new phone numbers, a reminder to pick up the dry cleaning, a few coupons and a list of bills to pay!


Yes... the boring, unexciting planner. 
BUT, that's all about to change with a quick planner make over!
I am using the gorgeous, bright & happy Patio Party collection for this cute planner inspiration today...


This line is so pretty, and the colors in Patio Party will brighten any dull organizer! And while I want to create a much happier, prettier planner I also want to keep it practical and easy to use -
Here's how....
My planner make over starts with creating my own custom dividers.


To make these 'fit' perfectly, use the original dividers that your organizer came with as a template. Trace the template onto your favourite Patio Party pattern paper and cut out. I also trace the holes so I know exactly where to hole punch my new dividers. As the first divider is the one I'll always see when I open my planner, I use the striking gold foil specialty paper from the 6 x 6 Paper Pad.

*Note: The 6 x 6 papers are single sided, so you'll need to repeat this process - reverse side up for the template, and adhere both sides together to create the one divider*

The striped, shiny gold pattern is just gorgeous but as this is the front cover divider, it still needs more....


I embellish with a few stickers from the 6 x 12 Accent Stickers sheet. Cute! 
That sentiment sticker has just the right amount of inspiration too! Now that I'm happy with my first divider, I proceed to make one for every tabbed section in my organizer. 
This time, I use the double sided 12" x 12" pattern papers so I only need to trace each template once. 
Here's a look at them all, right side up.....


Aren't they the sweetest?! I'm already feeling uplifted! 
Here's the reverse side....

Pretty florals, and oh my heart, flamingos!!! 
What a difference a set of dividers can make to your organizer!
And when it comes to being organized, having a bookmark to instantly locate your fave section of your planner is essential!


How sweet is this book mark?! 
Like the dividers, I use the original as a template to trace around, cut out and hole punch. 
So simple, and yet such a practical and pretty adornment to  your organizer.
Speaking of practical, how about something cute 'n' fun to store all those ugly coupons in?


Oh hello flamingos & hello happy! This planner pocket makes me smile!
There are a number of ways to create pockets, but the simplest one is to trace your divider template, but double the width. In my example my planner is 3 1/2" x 5", so I cut out a 3 1/2 " x 10" piece of paper. Score down the center, fold and tape the base and sides together.  Be sure to leave the top unsealed so you can insert your bits 'n' pieces into the pocket. 
Looking for something more sturdy? 
Instead of tape, machine stitch the sides and base.
The next step in 'dressing up' my everyday planner was to convert the plain plastic pocket inserts into something a bit more special....


Eeep! Sequin shaker pockets are my favourite!!! So cool! 
This pocket now doubles as a super pretty divider!
To create this fun (& practical) pocket, you'll need to insert a piece of pattern paper into the pocket. It needs to be a snug fit to help hold the sequins in place. Add sequins, and then fuse or glue the top of the pocket to the pattern paper. Embellish with another of those gorgeous 6 x 12 Accessory Stickers. You'll see in the image below that the back of the pocket still opens, and remains suitable for storing small items, receipts, tickets etc. ...


Love this! So perfect & so much fun!!!
Time to dress up that dashboard and boring cover!
I start by selecting a few of my favourite Die Cuts, and hot glue a large paperclip to the back of each of them. 
Here's a closer look for you....


Oh what a stunning page marker! Planner clips never looked so sweet!
Insert them into your cover, add a few more stickers and voila!


Now that's more like it! 
Still lightweight, & practical for my purse, but oh so pretty too!!!
Here's a look at that shaker pocket in action....

Gorgeous!!!
When it comes to jazzing up your organizer, or updating it with a fresh Spring look, Patio Party is the perfect choice!

I hope you feel inspired to get creative in your planners and organizers with our beautiful products!

Thanks so much for visiting today,
til next time, 

Happy Arty Days, 
Amanda xo

PATIO PARTY SUPPLIES:


Paper Issues: February Swag Bag


Hi Happy Arty Days Fans!

It's time for one of my favourite shares on the Paper Issues calendar, 


It's no secret how much I LOVE the Paper Issues Swag Bags!
I often refer to them as lil gems or bags of gold, cause they're that awesome!
A sampler bag if you will, of what's hip, cool, sassy and fun in the Paper Issues store!
I have fallen head over heels for the January bag...
I actually ordered two of them - one for scrapboooking and one for planning!

Here's a peak at my planner with the January Swag Bag....


So much prettiness!!! 
You can see a video and more pics of my planner spread over on my 

And here's my layout! It's created entirely from the January Swag Bag 
(except for  the 12 x 12 cardstock & watercolor paints - they're from my stash) .....

"ADORED"


More prettiness! Told you the Swag Bags are lil gems!
How totally divine is this?!! I love you indeed my darling daughter!
A whole ton of my kinda embellishments here - glitter stickers, clear stickers, wooden buttons & sequins! Love them all! 
In keeping with the hearts theme, I cut out those polka dot hearts from the 3 x 4 cards that you get in the Swag Bags. The black and white really breaks up all that pink and makes everything pop!


All those hearts!
And speaking of hearts, how about that stunning fringed heart below....


Gorgeous! The heart actually had a Happy V Day sentiment on it, so I simply used a sticker to cover it. Works perfectly now! All the heart eyes! 


Love the  3 x 4 & 6 x 4 cards in the swag bags - they're always so complimentary and coordinating to all the embellishments.
And seriously, ALL those embellishments!!! SO much in such a cute lil bag!


Love me a Swag Bag or two!!!
 I hope my layout has convinced you to get yours on subscription so you don't miss out next month! 
(At only $9.99 USD, they sell out super fast!)
Find out more about the Swag Bags here
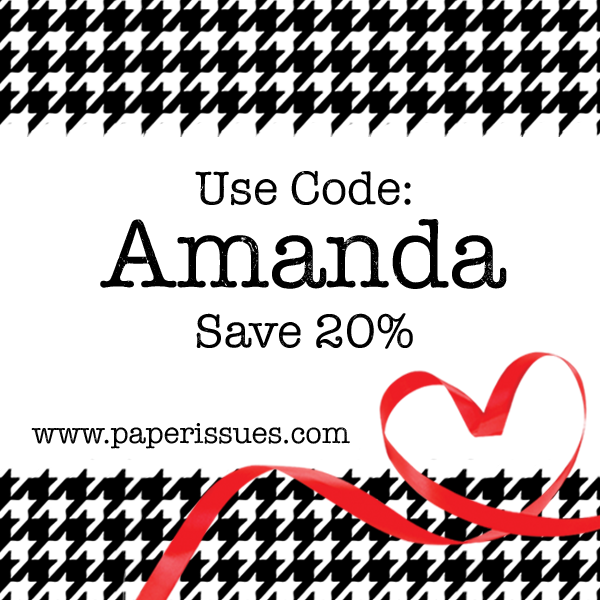
& REMEMBER : Use my code AMANDA to save 20% off your total!


See what the rest of our amazing team have created on the Paper Issues blog here.

Thanks for stopping by today, 
til next time, 

Happy Arty Days, 
Amanda xo 

Paper Issues: Plan On It challenge


Hi Creatives!
Hope you're enjoying the New Year!

I am really having fun with my planners this year, and so are the team at Paper Issues!
.

They have a fantabulously fun

challenge this month: 
16 goals for 2016! (& include 2 labels too!)

How could I resist joining in?!
Here's my planner spread & goals in my medium Kikki K Ocean....


Oh, how pretty is this?!! So many planner pretties here too! 
Embellishments are from Crate Paper Inc, The Planner Society, GP Sticker Studio, Studio Fourteen40, Berry Sweet Plans, Shop Evaliscious & Kikki K & I am totally loving the colours!!!

Here's a closer look....


2016 - Be You! 
So many wonderful goals and reminders here to keep me focused throughout the year!
Here's the other page....


Yep, Lots of plans. Lots of goals. Dreaming Big!!!
But I so got this! #girlsgottaplan

Hope you liked this lil peak into my planner!
For more inspiration, or to join in on the Paper Issues fun click here.

Thanks for visiting,
til next time,

Happy Arty Days, 
Amanda xo