Showing posts with label February. Show all posts

Elle's Studio: More February Kit Inspiration!


Hi Crafters!

Welcome back for more Elle's Studio awesomeness! 

Today I am sharing more February 2021 Kit inspiration! Such a beautiful kit with so many crafty possibilities! Here's what I created with it...

"We So Happy"


Oh how soft and dreamy! What a delightful page for my two darlings! 

Other: Bazzill Basics - Avalanche, sewing machine, colored stamping ink cubes, ribbon, & pom pom trim. 

Let's take a more detailed look at my project...


The pretty pastel colors included in this month's kit were too good to ignore, so I stacked and layered 5 of the 3 x 4inch note cards together to form a beautiful pastel base for my sweet photo. To create  more interest, I foam mounted this note card stack onto the February 2021 Cut File: Rainbow Tag to really draw attention to my photograph. Simple, and yet so effective!


To enhance the soft pastel look, I also trimmed one of the XOXO pattern papers to give me 4 pastel color  6 x 1inch paper strips, which I machine stitched onto my white cardstock base.  The variance in machine stitches featured, and the addition of ribbon and pom pom trim, really added texture and interest to my otherwise soft and delicate design. 


I embellished around my photo cluster with some of the chipboard clouds from the Happy Little Moments Chipboard Stickers - aren't they the cutest?! And used these very same stickers to form my layout title, 'We So Happy'. (The 'We So' was taken from the 'awesome' sticker) 


To break up the very white background, I also stamped around my photo cluster with the tiny heart and star icons from the Good Times Tab Stamp. The sprinkled (stamped) stars and hearts give a playful and magical vibe to the page, whilst adding color and interest as well. 


With such a crisp, clean & pretty color scheme, I felt that I need to add something more to balance my design. Cue the fabulous gray elements! That gray die cut ampersand from the February 2021 Kit is SO good! You'll also spot the gray chipboard 'together' sticker and those pretty patterned pops of gray XOXO paper peeking through my distressed cardstock edges. 


Clean, simple and oh so beautiful memory keeping with the February 2021 Kit! 
I hope my scrapbook page has inspired you to get creating with your Elle's Studio exclusive Kits! 

Thanks so much for stopping by
til next time, 


Hip Kit Club: Interactive Dolls House Layout & Process Video


Hi Friends!

Welcome back for more Hip Kit Club inspiration! 

Today's design team assignment is a product focus on the Pinkfresh Studio: Noteworthy: Right Now paper, & Puffy Frame Stickers! 
& oh my heart, you're going to love what I've created....

"Best Ever Dolls House"


I.can't.even!!!
So much fun & whimsy in this interactive dolls house!
It's inspired by the photos of my daughter visiting the 3-storey Life Size Dolls House created by visionary Japanese artist, Tatzu Nishi. (It was SO amazing & totally blew my mind!) 
You can read more about his life size dolls house HERE. 

When you open the 3x4 notecard (door) it reveals more inside....


So awesome!!! 

See more of this pretty page, including how I created it,
from start to finish in my process video below:


Alternatively, you can watch it in Full HD on my channel HERE

Thanks so much for watching, liking & subscribing!
I really appreciate your support & kindness! 

I hope you enjoyed my take on the Hip Kit Club product focus assignment! 
See more Hip Kit Club inspiration in the Facebook Group HERE

Thanks so much for visiting, 
til next time, 

Hip Kit Club: Mood Board Inspiration!


Hi Friends!

Welcome back for more Hip Kit Club inspiration! 
Today I am sharing another super pretty page created with the February Hip Kits & inspired by the March Mood Board! 
Here's what I came up with,

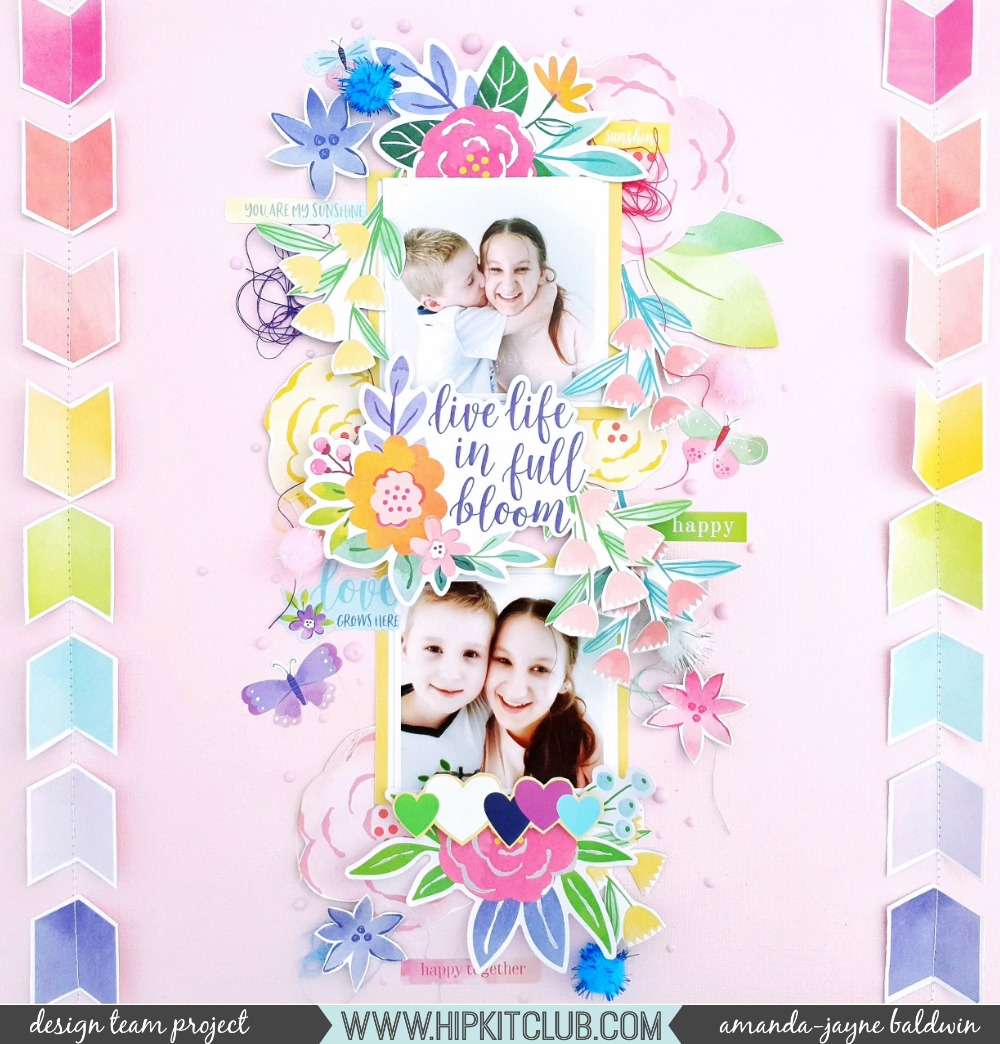
  "Live Life In Full Bloom"


Oh.my.heart! 
Could it get any sweeter?!! 
The beautiful new Bloom Street collection was the perfect choice for documenting my two darlings (and there's so much of this stunning line in all of our February Hip Kits!
All the pretty florals and bright colors are an idyllic reflection of this month's mood board too! Speaking of the mood board, it was created by none other than our super talented, Lauren Hender. Let me tell you, this girl knows how to pull colors and patterns like no other!!! 

Here's a quick reminder of what her mood board looks like....

84206057_10157625515193880_5053895584935575552_o

Whoa!!! Such a bright, bold & striking array of images! Absolutely gor-jus!!! 
You'll notice that I was not only inspired by the florals & bold use of colors but also the vertical designs and those pom poms & tassels too!

Here's a better look at my layout...

HKC-AmandaBaldwin-March13th-Blog-02

Sigh! Such a pretty page! 
I used that stunning Petalsoft Bazzill Cardstock from the February Cardstock Kit as my base, and trimmed the left & right sides with machine stitched chevron arrows. The chevrons were fussy cut from paper #24 from the Pink Paislee, Paige Evans: Bloom Street collection, which is included in the February 2020 Main Scrapbook Kit. 
With a myriad of colors in the mood board, and the presence of vertical designs, I arranged the fussy cut chevrons into rainbow order coming down the page. In keeping with the vertical design, (& very inspired by the dangling pom poms & tassels) I decided to create a cascade of florals & fussy cut blooms for my photos to rest upon. 
You'll spy lots of fussy cut flowers from the Bloom Street collection, paper #12. 

HKC-AmandaBaldwin-March13th-Blog-04

To frame my darling photographs, I trimmed up the sweet yellow 3" x 8" book mark card from the February 2020 Pocket Kit. I also fussy cut the hearts from this card, & used them to adorn one of my photos. Before I mounted my photos to the new yellow square bases, I positioned a larger bloom between each photo and the yellow cards. 
These blooms were from the Bloom Street - Journaling Spot Die Cutspack. I also tucked in a few of the fussy cut florals too!

HKC-AmandaBaldwin-March13th-Blog-06

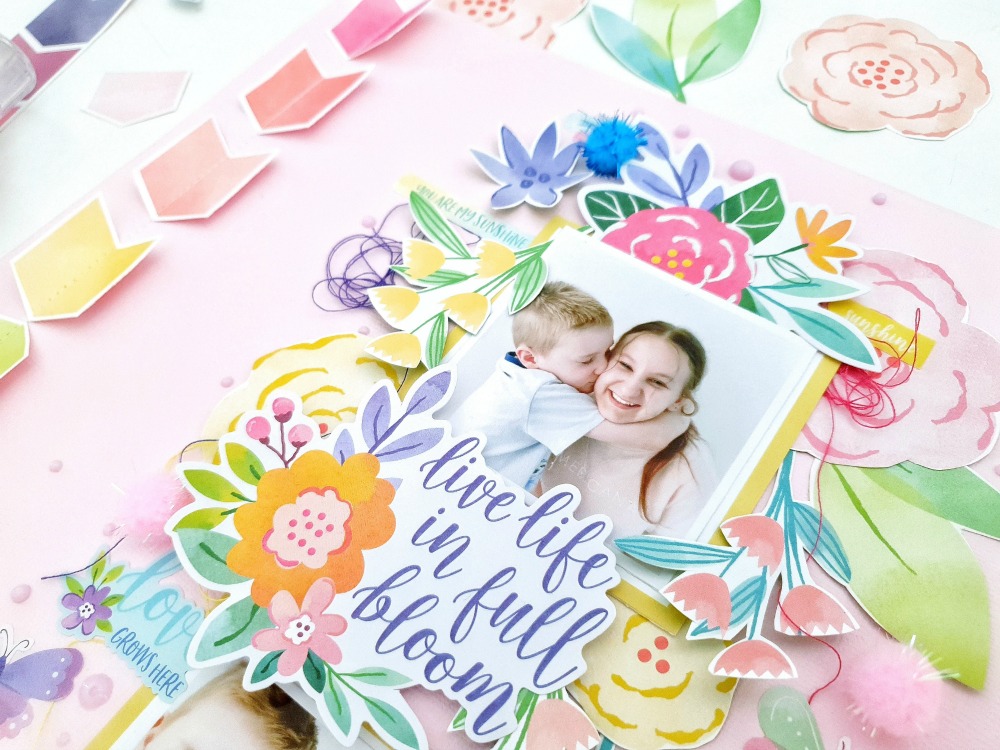
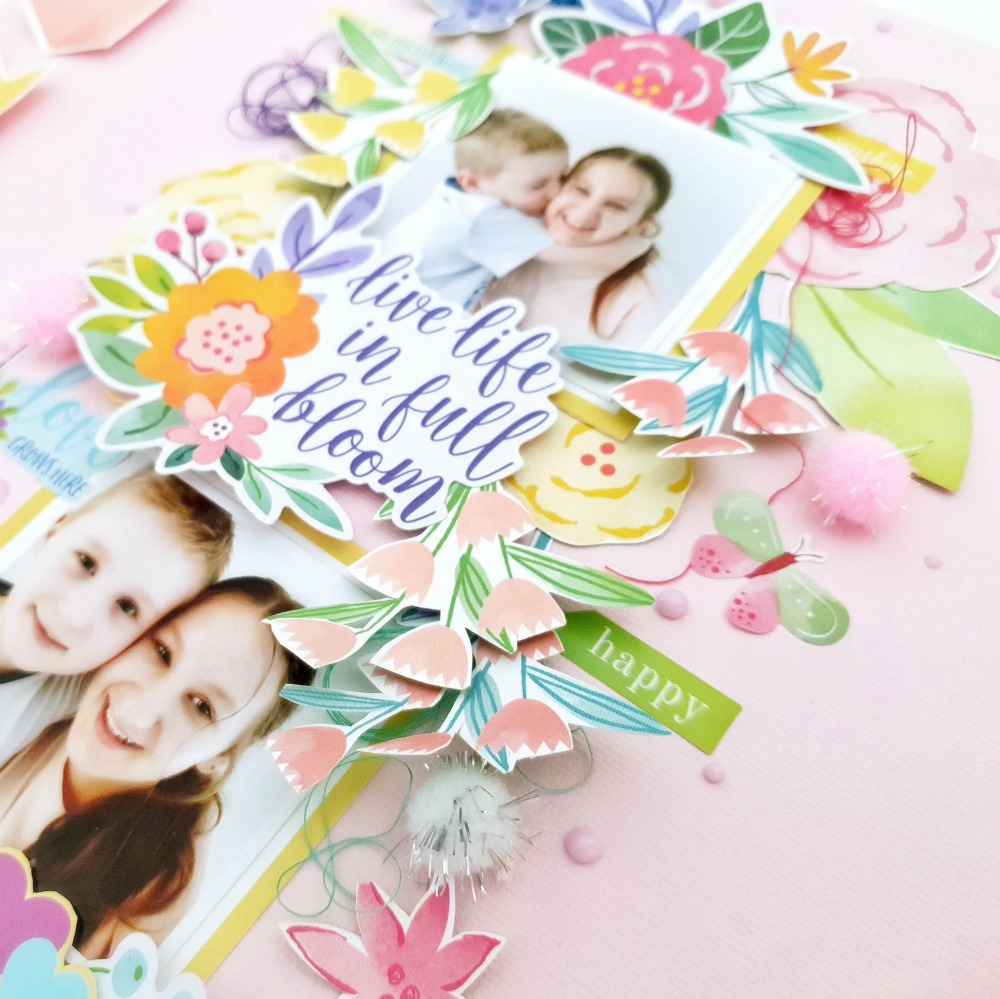
To connect my photographs, I foam mounted a Bloom Street - Journaling Spot Die Cuts sentiment, Live Life In Full Bloom to serve as my title. To symbolize the tassels, I added dangling, colored sewing threads & a few small pom poms from my sewing box stash!

HKC-AmandaBaldwin-March13th-Blog-03

I embellished around the cascading florals with assorted stickers from Pink Paislee Paige Evans: Bloom Street Sticker Book, and finished the look with lots of Nuvo Sweet Lilac Crystal Drops. Super pretty!

Here's a couple more detailed shots of all.the.pretty.things!!!

HKC-AmandaBaldwin-March13th-Blog-05

Those Nuvo Crystal Drops are fabulous, aren't they? 
I am hoping to see more of these beauties in future Hip Kits! 

HKC-AmandaBaldwin-March13th-Blog-07

Happy Together, indeed! Such a fun & whimsical take on this month's mood board! 

I hope I have inspired you to get creating with the February Hip Kits! 
Missed out on a February Hip Kit
If you're super quick, you might be able to snare a March Hip Kit or two HERE
OR, better yet - start a subscription, save money & never miss out again! Yay!!!

Thanks so much for visiting, 
til next time, 


AMANDA BALDWIN-01

Technique Tuesday: February Memory Keepers & Fresh Cut Studio Inspiration!


Hi Friends! 

Welcome back for more Technique Tuesday inspiration!
This month's Memory Keepers & Fresh Cut Studio release is a really fun one! 

How awesome are these?!! So.much.fun!!!

Here's what Technique Tuesday has to say about them....

"Emojis are a great way to communicate how you feel...without using words! With over 18 expressions, the Emojis stamp set with matching dies can add a bit of humor to your paper craft projects. With this emoji stamp and die bundle you can die cut a solid 1" circle and layer die cut emoji faces over it, or stamp an emoji face on it. You could custom stamp a background for a card or scrapbook layout with a variety of emoji faces, then add a few dimensional emoji die cuts to drive home the true feeling. Another fun use for these clear emoji stamps with dies would be to make a chore chart for your kids and let them glue pre-made emoji die cuts in the square each day...a smile for a job well done, a sad face when they forget, or a straight face for a job that needs more effort. You'll find so many ways to use these icons that are such a part of our daily lives!"

Clearly a super cute set to create cards with, but of course, I wanted to share how you could incorporate the Emojis Stamps & Crafting Dies into your memory keeping projects! 
Here's what I came up with....

"All Heart Eyes" 


Nawww!!! All the heart eyes, indeed!
Such a sweet traveler's notebook page documenting our darling doxie pup!
Here's a closer look for you....


You'll spy that I repeat stamped the 'smile' (semi circle) stamp to create my scallop trim on the top and bottom of my white cardstock. Such a super cool, alternative use of this stamp! 
I also stamped the 'This photo makes me' sentiment label in the same mint colored ink, and tucked it under my photo to create the appearance of a photo tab. 


I used the heart eyes Emojis Crafting Dies to embellish beneath my photo and add a playful element to my design!

SO cute 'n' fun!

Did you know you can become a Technique Tuesday Member
Click HERE for more information on membership benefits & discounts!


I hope you enjoyed my project!

Thanks so much for visiting, 
til next time, 


Elle's Studio: Scrap Your Stash Inspiration!


Hi Friends! 

Welcome back for more Elle's Studio February Kit love!!!
 I'm back to share more 'stretch your kit' or 'scrap your stash' inspiration while we eagerly await our new March products! 

It's no secret that the February Kit and add on items have been firm favorites of mine - I mean, all.the.rainbows!!! La la looooooove! Seriously though, the February Kit and new releases are so good that I created up a storm and I am now truly maxmizing my 'left overs' to create one more scrapbook page for today's post! 
Here's what I pulled together with my 'scraps'....

"I {heart} U"


Oh wow! What a bright & fun page! 
You'd never know that I was struggling on a shortage of supplies! Such a clever design!

Other Supplies: Bazzill Avalanche Cardstock

Let's take a closer look at  my page, 


Naww! Such a cute page for my darling boy! 
As you already know, I used all.the.things earlier in the month and didn't have much left of anything - except those Teal Acetate Alphabet letters. I had a few of those but again, I'd used all the popular letters and there were not many word options left. The solution? Use them in a random, grid order to create a fun background for this otherwise minimalist design! Not only did this add a bright pop of color to my white base, the Teal Acetate Alphabet also created the appearance of  a 'full' page design - love it! 


To add more color and interest to my design, I trimmed the left and right sides of my 8.5" x 11" layout with half inch strips of one of the Love Is 6" x 8.5" Paper Stack papers. To create the look of an 11" inch paper, I simply butted the strips together, careful to maintain the pattern design so the join wouldn't be visible. This is another great way to incorporate the appearance of more detail in your pages with only scraps of pattern paper in your stash! 


With only a few of the note cards left over from my February Kit, I decided to use one that had a bright and colorful design, which enhanced the playfulness of my page. With so many bright details on my layout, I opted to use a black and white version of my photograph so that it would remain the focal point. For further emphasis, I foam mounted the note card so it really stood out over the rest of the page. 


I raided the last of my February Kit Die Cuts and embellished my photograph and created that mini title with the purple heart and Coral Puffy Alphabet Stickers. Love it! The Coral Puffy Alphabet Stickers are complementary to the Teal Acetate Alphabet and really pop! 


To 'fill' the gaps in this simple design, I gathered all my 'left over' stickers and positioned them on and around that fun Teal Acetate Alphabet base. I used the Be Happy Stickers as both journaling spots and to cut through some of the pop color. This helped to create balance, and encouraged flow and movement into the design. The inclusion of the Puffy Rainbow Stickers really strengthened the whimsical and playful theme of my page too!


It's the Little Things, quite literally, that can make a page! 
I hope my scrap your stash post today has inspired you to get creative with your left over supplies, & that your March Kit isn't too far away ;) 
I can't wait to share more with you! 

Thanks so much for stopping by today,
til next time, 


Elle's Studio: February Kit Love & Process Videos!


Hi Friends! 

Welcome back for more Elle's Studio awesomeness with 
This month is totally going to have you seeing rainbows!!!
 But rather than rave, here's what I'm talkin' 'bout.....


 I know, right? Those colors, those patterns - SO good!

Wait til you see the February Add On items.....


Wa wa WOW!!!
A full sheet of brightly colored Puffy Rainbow Stickers!!!! Cork Stars, Acrylic Clouds & Raindrops, awesome veneers, acetate alphas, clear stamps and so much more!!!!
I.can't.handle! Beyond words gorgeous!

& the February Digital Cut Files & Printables are all kinds of awesome too....


Aaah-MAY-zing!!!! 
So much awesomeness in this month's reveal!
All.the.rainbow goodness!

(& be quick because these lovelies will sell out fast!)

And now for some rainbow, I mean, Elle's Studio inspiration!
I have process videos for both of my projects today too - so be sure to watch them at the end!

Here's my first layout with these pretty scrapbook supplies, 

"Always Be A Rainbow"


Wow! For the love of rainbows!!! 

Other Supplies: Bazzill Marshmallow Cardstock, Watercolors.


Isn't this a stunner?! 
A really wonderful page for my darling girl! 
You'll spy that I used the February Printables to create that super large, feature rainbow - so good! 
Another feature of this page that I am really loving is the some of the best moments note card from the February Kit, which I have cut to create a pocket frame for my sweet girl's photo! And let's not forget that amazing mixed font title!!! Those Teal Acetate Alphabet letters are just amazing!!!


Gosh, I just loooooove everything about this layout! So bright & fun & whimsical!
The Acrylic Clouds and Acrylic Raindrop Confetti teamed with the Cork Stars and fussy cut clouds (Love Is 6 x 8.5" Paper Stack)  really add to the magic of this design! 
But it's those rainbows that I can't stop thinking about! Here's another look at them....


Ga ga gor-jus!!! All.the.rainbow LOVE! 
Wanna see more? Please watch the process video HERE


Thanks so much for watching! I hope you enjoyed my video!

And what's better than one rainbow?
A double rainbow of course! 

Here's an 8.5" x 11" boy layout featuring more rainbow magic....

"Boy You Shine"


Total awesomeness! Such a fun, fresh & playful page!

Other Supplies: Bazzill Marshmallow Cardstock, Pinkfresh Studio Ink Pads - Seaside & Slumber.


Oh this is all kinds of magic, indeed!
A really fun and fresh twist on the first page, but with a more masculine feel to it. So cool! 


For this layout, I just couldn't resist using the negative of the Rainbow Digital Cut File and backing it with a mix of Polka Dot Journaling Tags and Love Is.. 6 x 8.5" Paper Stack papers. And speaking of mixing, how about that mixed font title?! Love it!


I also used those Coral Puffy Alphabet Stickers to number my veneer sentiments, and create order and movement across my page.


But in the end, it was rainbows for undeniable the win! lol!
You can see this sweet boy page from start to finish in my process video HERE:


Thanks so much for watching, liking & subscribing to my channel, it really means so much!
I hope I have inspired you to get creating today!

***Shop ALL the Elle's Studio February Kit & new releases HERE***

Thanks so much for visiting,
til next time,

Happy Arty Days, 
Amanda xo 

The Cut Shoppe: Tic Tac XO - I Like You Lots!


Hi Happy Arty Days Friends!

Welcome back for more digital cut file inspiration with my latest creation for The Cut Shoppe! 
Today I am sharing more of the love theme for February!
What can I say, I love all the heart day things!
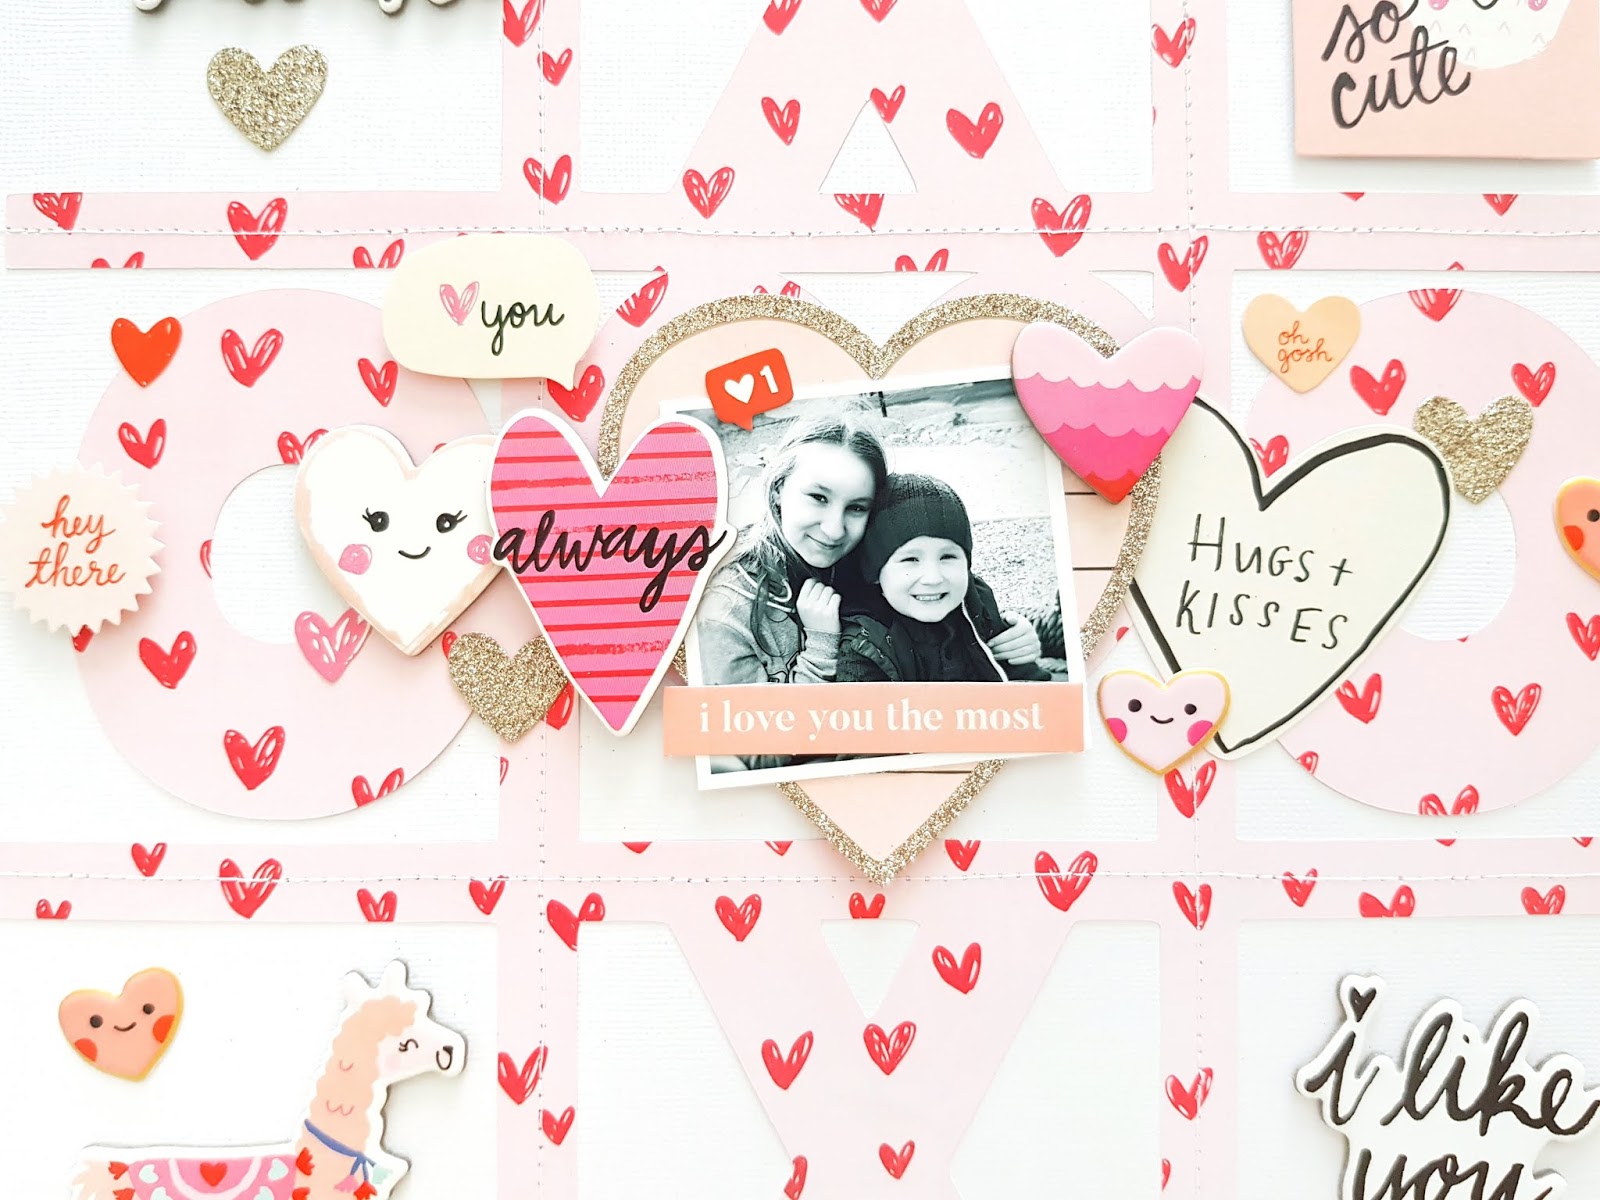
Here's my layout of my two darlings being very sweet together,
"I Like You Lots"


Nawww! SO adorable!
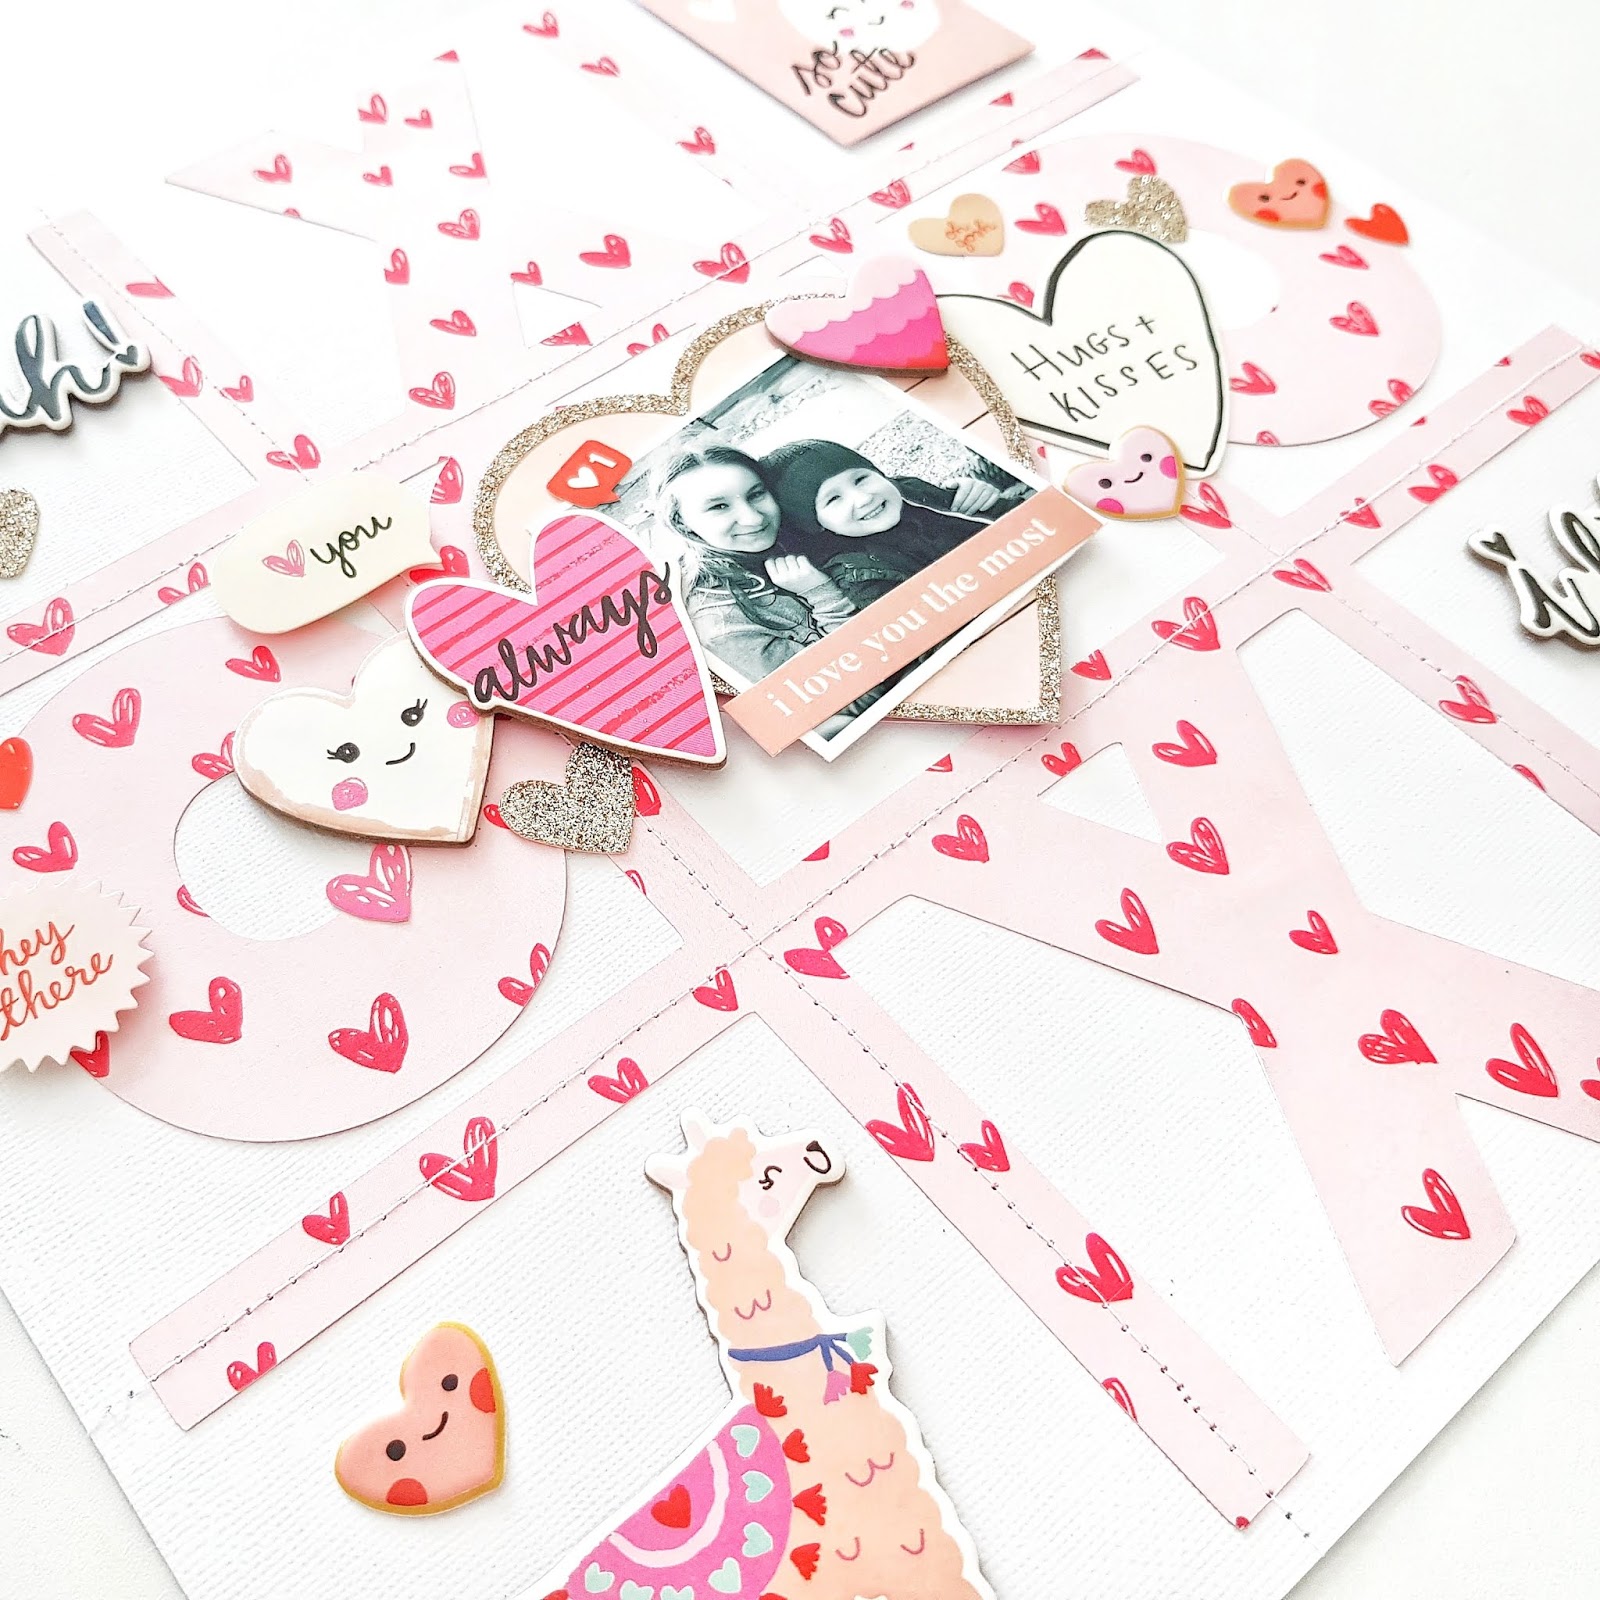
I have featured the awesome Tic Tac XO cut file & combined it with the Crate Paper: Main Squeeze and La la Love lines. Super sweet!
That Tic Tac XO digital cut file is all kinds of awesomeness!
Here's a closer look at it...


Such a fun design - LOVE!!!
Grab the Tic Tac XO cut file from The Cut Shoppe HERE.
I've cut it with Main Squeeze pattern paper, Spark, and machine stitched the grid lines onto the white cardstock base.


I just adore the tiny hearts pattern paper! Perfect for this larger designed background cut file!
I 'fill' the empty squares of the design with chipboard & ephemera pieces,


and layer my photo onto the heart center.


Lots of pretty heart embellishments adorn my central photo! You'll spy chipboard, glitter, stickers, die cut ephemera and even puffy sticker hearts embellishing this cluster. Love it! 


SO super adorable! 
Those smiley heart faces are perfect for my happy two, & are just the cutest! 


I like you lots, indeed! 
Such a darling layout for my two cherubs! 

I hope you liked my layout, & feel inspired to use the Tic Tac XO cut file in your love theme projects! 
Get this fabulous file from The Cut Shoppe HERE.

Thanks so much for visiting, 
til next time,