Showing posts with label Hello LOVE. Show all posts

Paper Issues: Cut It Up Saturday


Hi Everyone!!
It's Saturday!!! YAY!

Now let's get a cutting for Paper Issues,


Cut It Up Saturday!
My favourite day of the week!

And boy oh boy, does Stacie have some incredible FREE cutfiles in the Paper Issues store for you!
The cut file for this month's challenge is a fun one....
"Heart Tracks" 

Such an awesome background cut file!!! 
I had intended to use it as a background too, with lots of pretty paper piecing.... 
but then I had another idea! 
I decided to use those cut up  hearts to form a heart.
Here's what I created with all those hearts! (& a Paper Issues flamingo card too!)

"Be a Flamingo..."


Oh wow! How pretty and fun is this?!!
I've used Crate Paper Heart Day, & Hello Love, as well as Cocoa Vanilla Studio's Endless Summer embellishments for this super pretty, super fun page! 
I cut a large heart to use as a silhouette for my watercolour base, then filled the remaining white (heart) space with those cut file hearts - love how it turned out!
But it's all those flamingos that I'm really loving!!! 


From that puffy sticker flamingo to that fantastic Paper Issues card - the flamingos have it all!
Perfect for my pretty girl too! Such a great reminder for her to shine bright! 
Love this pic of her - beach hair and she don't care! Love it!!!


How awesome is that Paper Issues card?
I keep and use all my Paper Issues cards, they're too cool not to! And this one is one of my favourites! 


Those cool heart clips are from the Heart day ephemera pack - super cute huh?!
Speaking of ephemera, how fabulous are the Cocoa Vanilla Studio flamingos?! I mounted the one below on pop dots to really make him stand out....


Love it!

To add interest to my hearts, you'll notice I created a dimensional effect with them too.....


Gently fold them, then use a tiny spot of glue in the base only. Perfect!


Oh that wooden button! Cocoa Vanilla Studio know me too well! 
And there you have it! 
My fun layout with the gorgeous FREE Heart Tracks cut file.

Need more ideas and inspiration?! Check out the rest of the team's take on this challenge here

Remember: Use my code AMANDA to save 20% off in the Paper Issues Store!


Thanks for visiting, 
til next time, 

Happy Arty Days, 
Amanda xo 


Imaginarium Designs: April Creations & a Tutorial


Hi Everyone! 

Welcome back for more inspiring projects with our favourite
Imaginarium Designs chipboard. 
Today I have a couple of layouts, as well as a tutorial to share with you -
so let's get straight into it! 

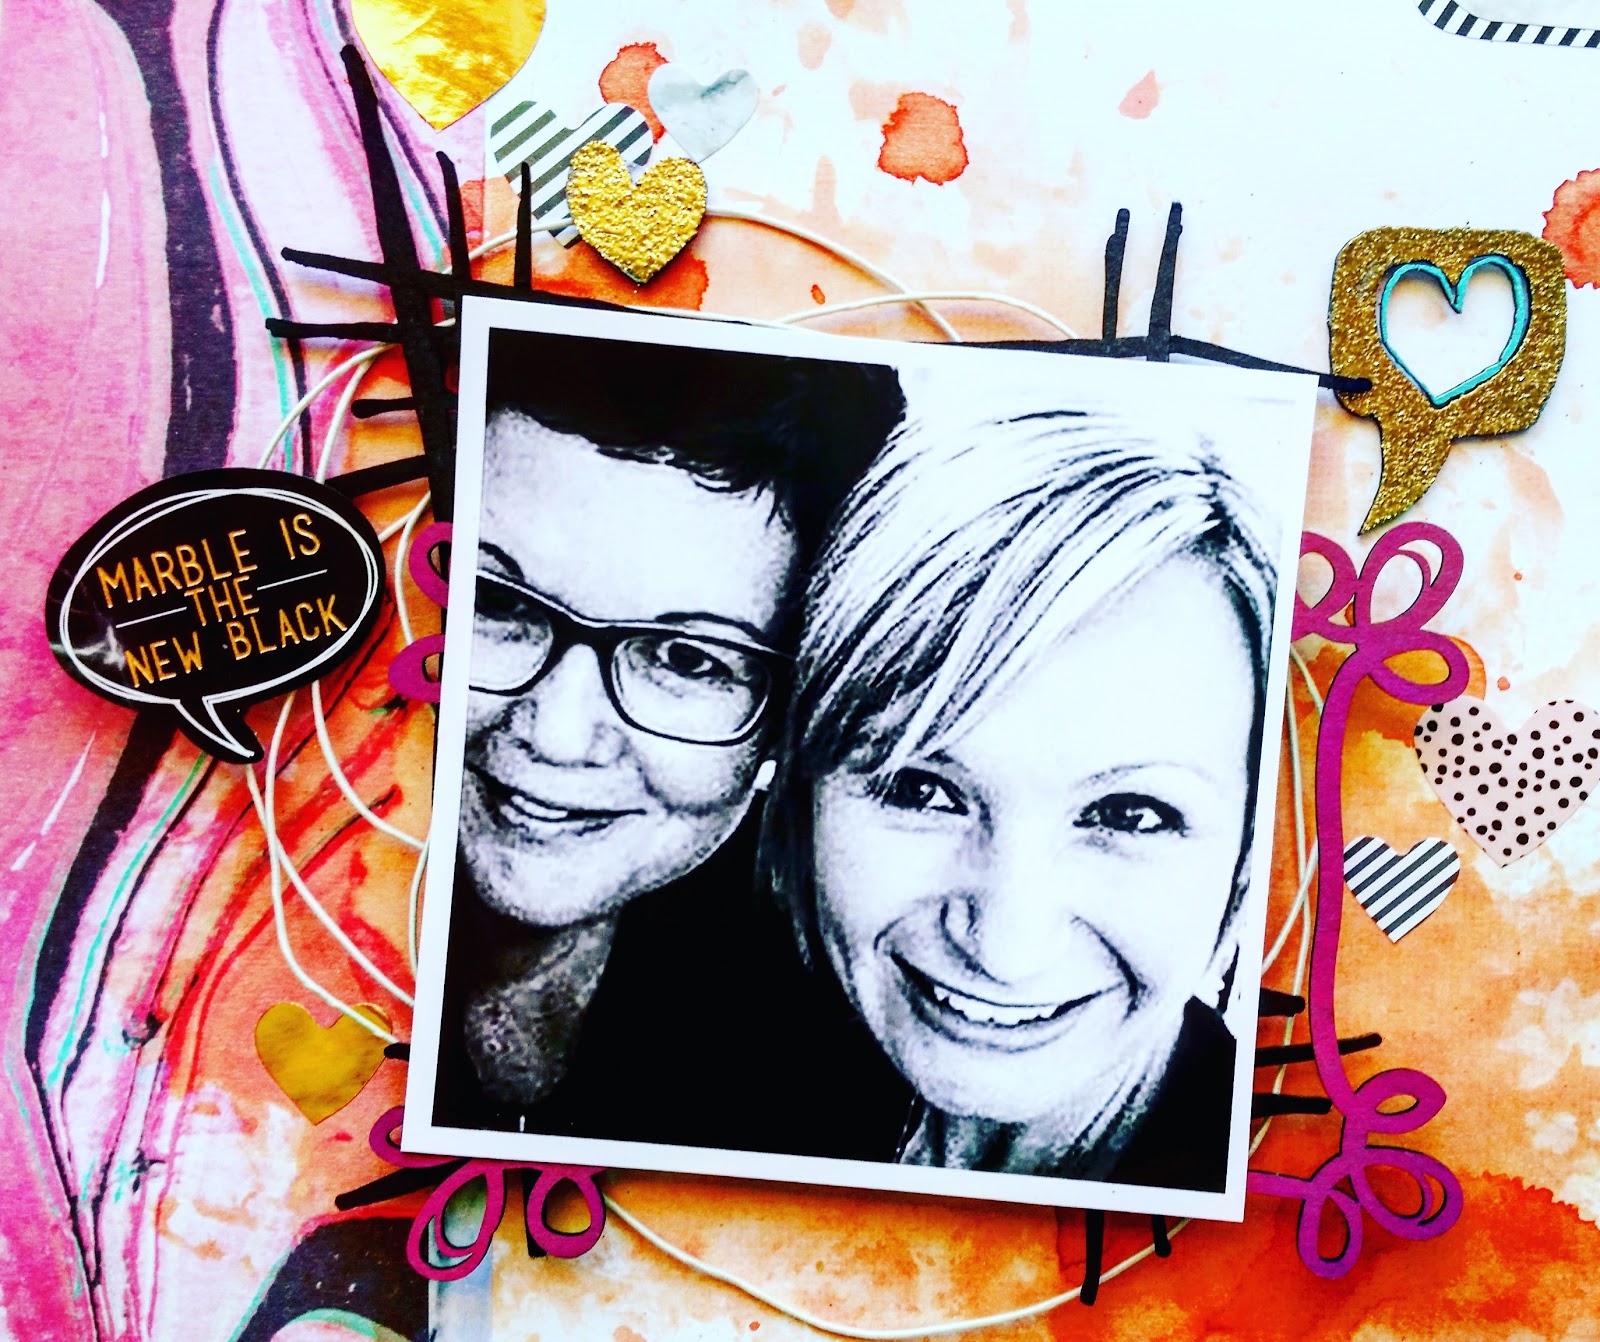
First up, I am sharing this stunning layout featuring me and the gorgeous Louise Nelson....

"Awesome"


How cool is this? An arty explosion of pop colour, style and fun! I love it! 
I've really tried to reflect a balance between both our different styles and personalities with this layout.
Bold and black, wire, arty and stylised - that's all Lou!
 Bright pops of colour, fun, hearts and sticker love - that's definitely me!
And as for Marble is the new black, well I think you'll find that Louise and I both have a thing for gorgeous materials and marble is one of them!!!
Two arty friends having fun and sharing our passion for creating.
And the chipboard? 
Well, naturally it's designed by the talented Loolabelle herself!
Let's take a closer look..... 


How striking are those frames?!! 
Black ink for Lou, and pink for me, lol!
 Layering chipboard in bold colours creates a stunning result everytime! Love it!
Here's another view...


The black and hot pink really compliment that marble pattern paper too. The paper is from Crate Paper's Hello, LOVE collection. And those really funky and foil stickers are from Typo.
The gold stickers were the inspiration for the gold embossing on the Callout chipboard.....


Love that sparkly gold finish! I removed the inner heart and inked that in Island green to also coordinate with the pattern paper. Really cool.
I had such fun creating this layout - it really came from the heart. Thankyou, Louise! 

Imaginarium Products Featured:


Next up, I have this super sweet Summery layout of my darling boy at the Seaside....

"DOWN by the SEA"


Isn't this fun?! 
It features the stunning Cocoa Vanilla Studio: Hello Sunshine collection, and is just super cute for Summer!
I've combined some of my fave chipboards here to really 'build' a story in my layout. 
Let's look a little closer.....


Soft, matte, pastel baby blue ink for those sweet clouds, bold royal blue ink for the title, and a shimmery hot orange ink and mist combination for Nat's pinwheels. So awesome!


To make those pinwheels appear to be Summer suns, I used Kaisercraft: Tangelo ink pad, and then gave a double coating of Kaisermist in Yellow. You don't see the yellow, but it toned down the orange and added so much shimmer to the 'rays'.
And how cute is that cloud with the complimenting flair? Buttons are a really fun and playful embellishment to add to your chipboard.
Super fun, bright and happy!

Imaginarium Products Featured:


And last, but not least, here's the tutorial I promised.
I'm not much of a 'special' cardmaker, but occasionally I have something so wonderful happen that I do indulge. This super pretty card is for my darling daughter on Opening Night of the Ballet. 
(She is cast to star in The Australian Youth Ballet's production of Mary Poppins - so excited for her & want her to feel our love and support as she takes to the stage!) 
She's only just turned 10, so I've used a pretty but also very contemporary colour palette and paper collection to best suit her. 
The card is designed to not only offer words of encouragement and recogntion, but also doubles up as on Off The Page keepsake. I hope she likes it!

"Shine, gorgeous!" card and keepsake


I know, it's so pretty huh?!
And it can be recreated in various colour tones & papers to suit your recipients.
Here's how to re-create it....


1. Ink the Emma Frame - avoiding the flourishes. I've used Versa ink in Royal Blue.


2. Coat the flourishes in embossing ink.
 I find using the refill nozzle much more controlled for small, intricate details, and you can tidy up the 'blobs' with the end of a pin.


3. Add embossing powder. Dust off excess with a stiff paint brush. 
Apply heat & set the powder. I used sparkling Gold Zing by American Crafts. 


4. Attach patterned papers to frame. I've featured the Cocoa Vanilla Studio: Free Spirit collection. You'll spy that it has flecks of gold glitter in the paper - coordinating perfectly with the frame!


5. Adhere photograph. I've used Miss M's last ballet exam practice photo, so it really connects with the card's purpose and meaning. 


6. Attach to front of card with double sided tape.


7. Embellish frame with blooms, ephemera, title/message etc. I've used the Free Spirit embellishments as they really do partner perfectly with the patterned papers.


8. Last, but not least, add a few rhinestone gems and pearls for finishing touches. All little girls love a bit of bling!


Voila! 
A gorgeous card that doubles as a beautiful keepsake Off The Page creation. Just stunning!

You can purchase that divine Emma Frame here.

I hope you enjoyed my post today, and feel inspired to get creating!

*Please be sure to leave a comment to go in the draw to win a pack of chipboard*

Thanks so much for visiting, 
til next time,

Happy Arty Days, 
Amanda xo 

http://happyartydays.blogspot.com.au/


Studio 1440: Be Mine


IMG_20160314_174022

Hi Creatives!
Boy oh boy, do I have a super fun layout to share with you today!
I have been just itching to get some 'free' creative time to play with the stunning NEW
It's so pretty and it partners perfectly with Crate Paper's Hello, LOVE collection too!
Here's what I came up with....

"LOVE"

IMG_20160314_174022

Okay, so it isn't a romantic 'Be Mine' layout - but let me tell you, this lil guy lights up my life and I love him to no end!
(& it's such a great pic of us hanging out together that I just had to scrap it, lol!)

I've featured lots of really cool Studio Fourteen40 products here too - let's take a closer look...

IMG_20160314_174505

I know, where do I start?!!
 How about with those super cool Use Your Words - Be Mine words? These guys are literally 'the bomb'! I love being able to transform my pages with cool text and sayings. These ones are just perfect for our 'loved-up' moments. I have layered mine on stickers, and on those wood veneer multi chevrons. I doubled the chevrons up to create a base for the Be Mine Words to rest on. Kind of a cool look, I think!

Here's another view......

IMG_20160314_174822

Yep. Love it! The chevrons are so on trend and work so well with the geo-pattern paper.
Speaking of cool wood veneers, check out those hearts! Yes, they are a firm fave of mine - but when they're this awesome they're too easy to use.

And as for favourites, well there has to be a fabulous flair, of course! Check this one out....

IMG_20160314_221357

I've used the first button in the Be Mine Set 3 


The triangle pattern and colours coordinate beautifully with the pattern paper, and the flair holds those sweet Be Mine Labels , and wood veneer chevron in place. Everything in its place - just how I like it! Clean, fun, fresh and contemporary scrapping! Be Mine is definitely after my heart ;)

I hope my layout has inspired you to get creating with Studio Fourteen40!
Thanks for stopping by,
til next time,
Happy Arty Days, 
Amanda xo

Imaginarium Designs: Hello, LOVE!


Happy February Creative Friends!

Didn't January disappear fast?!!
I hope you liked meeting the new Imaginarium Designs DT & seeing their fabulously creative talents on show -
I know that they definitely inspired me!
Speaking of inspiration.....

Feburary is all about the LOVE for me!
 So for today's post, I have put together a few gorgeous Valentine's Day inspired creations for you - combining my favourite chippies with Crate Paper's, Hello LOVE collection.
Enjoy!

First up, I have this way too adorable layout of sibling love at it's best......

"Totally ADORBS"


I know, how darling is that photo?!! 
Nothing more wonderful than seeing your children snuggling in together for a hug! 
These two are just the most connected siblings - they really do adore one another - and yes, they are totally ADORBS!

Because their love is so innocent and sweet, I've kept to a clean, white background and design. I've used my chipboard discreetly to gently embellish and draw you into that sweet photograph.

Let's take a closer look at those chippies.....


Natalie's hand drawn hearts are a firm favourite of mine. They're such a fun and delicate addition to any page! I've inked mine in berry pink to coordinate with the pink blooms in that pretty patterned paper. I've used the same treatment on the chipboard word, 'totally' too.


And how about these wispy black flourishes?!  


Just gorgeous, huh? 
To compliment the black watercolour leaves in the paper, I've lightly sprayed the flourishes in Kaisermist: Charcoal, to create a similar look.
A really cool result!

Imaginarium Designs Chipboard Featured:


Next up, I have another super sweet sibling love page......

"This."


Oh where to begin?!
 I just love memory keeping!
This is an old photo I came across on my Google Photos daily reminders - hard to believe that this is almost 3 years ago now!
Anyways, so pleased I was reminded of it! I just had to re-scrap it immediately!
That lil birdies frame is just DIVINE  and perfect for my two baby birds!
Let's take a closer look......


Oh Yeah! That frame. Just Aaahmazing!!!!
I've used that very same berry pink ink again for some of the hearts, and for part of the frame.
The top section of the frame has been embossed in Zing! Glitter Embossing Powder in Gold - isn't the two tone effect just stunning?!! 
A really cool effect to try on your chipboards!
I've used the gold glitter stickers and gold foil ephemera from Hello LOVE to partner perfectly with my golden frame; making it a real feature of my layout.


For my title, I've used some of those cute alphas and inked them in matte black for a striking, bold finish. The Loolabelle Arrows are inked in Kaisercraft: Island, to pick up on the teal highlights in the patterned paper geometric hearts. 

Imaginarium Designs Chipboard Featured:


But what about my Valentine? 
Well, I haven't forgotten him - here's a lovely card just to say how much I care....

"Happy Valentines Day" Card


Soooooooo pretty! 
I've used a super sweet bird heart frame that is a new release chipboard coming soon.....
I know, gotta love new chippie designs!!!
I really loved the gold on my previous layout, but this time I used Bo Bunny: Glitter Paste. I love this stuff! If you haven't tried it on your chipboards yet, you MUST! It is simply amazing, and so easy to apply. 
But enough chattering! 
Thanks for stopping by to see my February creations with our favourite chipboard!
I hope you enjoyed my post and feel inspired too!

til next time, 

Happy Valentines Day!
Amanda xo