Showing posts with label August. Show all posts

Elle's Studio: August Kit & Stamping Inspiration!


Hi Friends! 

Welcome back for more Elle's Studio August Kit awesomeness!
With so many gorgeous items available this month, I just had to keep creating with them - or maybe it was more like, I just couldn't stop - ha! Seriously, that good! 
But enough of the chatter, here's my latest scrapbook page, 

"Big Smiles"


Oh.my.heart!!! La la love this color scheme - so pretty for my sweet & happy girl! 

Other Supplies: White Bazzill Cardstock, Black Sequins, Red/Purple&Black Stamping Ink.

Such a fun and happy page! 
Let's take a closer look....


Those layers are errrything!!!
I mixed note cards from both the August Kit & the Priorities Printables to create that eye catching stack beneath my cute photo. I tucked in an August Label or two, as well as a die cut and some of A New Day Stickers. Sweet! 


Beneath my photo stack, is a one inch trim of one of the Summer Fun pattern papers. I enhanced this trim with a mix of August Labels, Composition Stickers, A New Day Stickers, Puffy Hearts & a veneer or two! I loved how this looked, and decided to 'build' on it with a ton of repeat stamped hearts from the Shine Brighter Stamp, more puffy hearts, and even some of the fabulous Acrylic Hearts! 


The Chipboard Tags sticker was perfect for my 'photograph notes', and while I had them handy, I just had to adorn my layout with 3 of those fabulous Chipboard Tags! 
For finishing touches, I cut through all that sweet color with a few black ink stamped sentiments from the Shine Brighter Stamp & a sprinkle of black sequins. 


Simple, but oh so beautiful! 
You can see why I can't stop creating with this month's kit -

I hope my layout has inspired you today! 
Thanks so much for visiting, 
til next time, 


Elle's Studio: August Kit & New Releases Inspiration!


Hi Friends! 

Welcome back for more Elle's Studio inspiration
with the fabulous August Kit and new release items!
I know, every month I say it, but truly this month's kit and add-ons are aaaah-may-zing!!!
Check them out....

August Kit


The colors & patterns are just stunning!

And let's not forget the fabulous August New Releases....

WOW! 

And last, but by no means least, the amazing
August Printables & Digital Files


Wow! So.much.awesome!!!

***Shop ALL the Elle's Studio new releases HERE***

Here's what I have created with these products so far....

First up is a sweet 8.5" x 11" page documenting my darling girl's academic achievements,

"School Life"


This is so awesome! Such a special occasion to document for her school life!


Other: White Bazzill Cardstock, Staz-on Black, Ribbon, & SpiegelMom Scraps Sequins.

Let's take a closer look at this lovely...


So many pretty details!
The Shine Bright Stamp is pretty amazing, but it it's the So Cool Puffy Stickers title that wins my heart! I mixed the Hello Life & So Cool Phrases to create my 'school life' title. So versatile!
The Composition Stickers and ABC Veneer are fun embellishments for this education theme too! 


Awesome, indeed!
Loving the color scheme of gray, coral red and black n white - so classy!


Those puffy stickers are errrything!!!


Always Be Curious, indeed!
Love it!

My second layout has a real Summer vibe to it,

"Celebrating Fun Times"


How bright 'n' fun is this?!
Summer memories documented to perfection!

Other: White Bazill Cardstock, stapler & pale blue tissue paper. 


So simple, and yet so strikingly beautiful - LOVE this!
I combined the August Kit, new releases and both the Bright Polka Dot & Summer Fun 6 x 8.5" papers to create this layout.


The new release embellishments are really stunning! 
They look so good clustered together!


Yep, August at Elle's Studio is superb!


Thanks so much for visiting, 
til next time, 


Hip Kit Club: You Are Loved Layout


Hi Friends! 

I am so super excited to be sharing my very first "blog" project for the Hip Kit Club Design Team! 
Today's inspiration is with the gorgeous August 2019 Main Scrapbook & Cardstock Kits, and features those fabulous Pretty Little Studio: Indian Summer Frames! I have also been challenged to incorporate some stitching into my project for some added interest and fun! 
Here is the layout I created, 

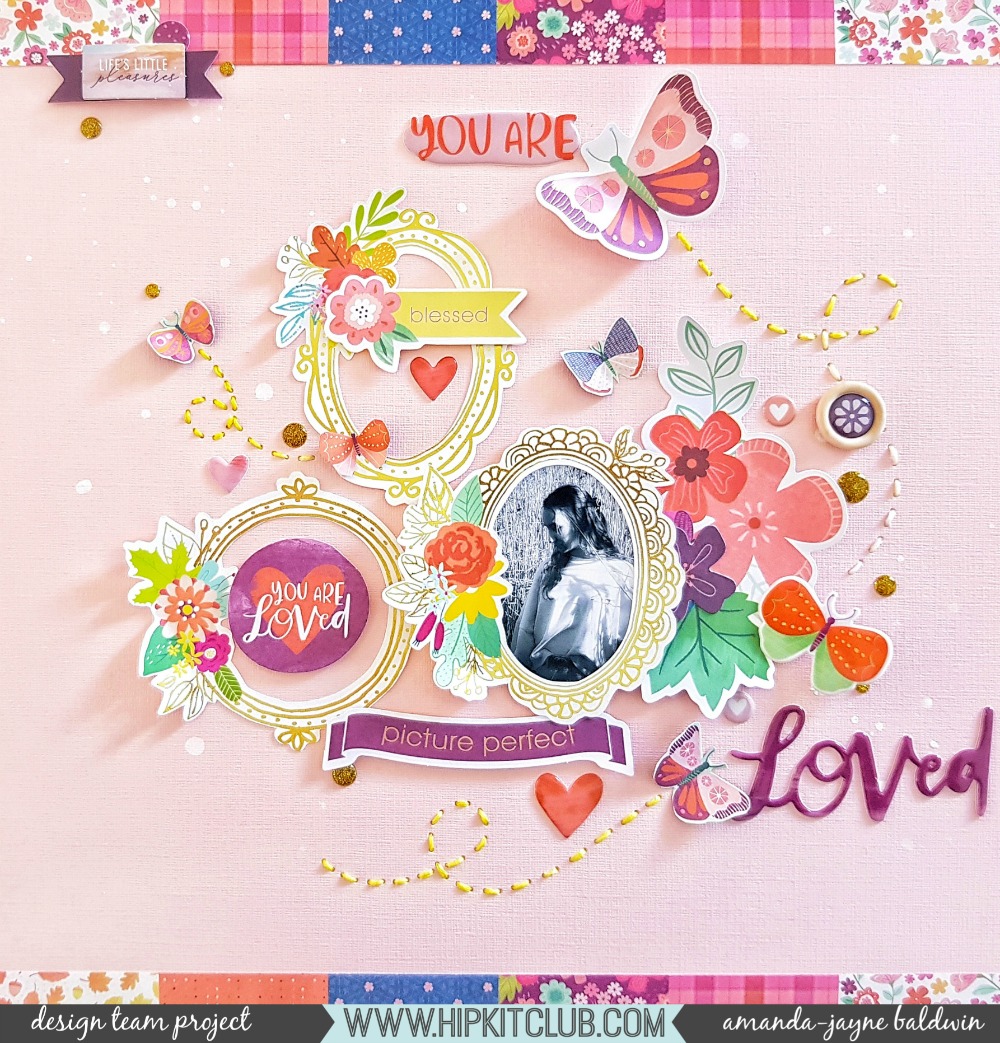
"You Are Loved"

HKC_AmandaBaldwin_Sept12thBLOG_01

Isn't this the sweetest?!! Loved, indeed! 
A really beautiful layout for my darling girl!

I started my layout with the beautiful Bazzill Quartz Cardstock as I knew I would be inclined to use the floral adorned frames, and thus create a very feminine page! I had the perfect picture of my sweet girl to scrapbook, and a very strong idea of the message and sentiment that I wanted to document. 
As she's feeling those 'difficult' teen years, I wanted her to know how beautiful, blessed & loved she is. The Pink Paislee (Paige Evans) Truly Grateful Mixed Ephemera & coordinating Phrase Thickers were perfect for this!

HKC_AmandaBaldwin_Sept12thBLOG_05

I selected the oval and circular frames for my feature, as not only are they adorned with florals, but are also gold foiled! Gor-jus!!! Also, the softer appearance of the round frames is just perfect for girly and delicate layouts! To bring further attention to those stunning frames, I embellished them all with my important sentiments. 
As my darling girl is my greatest treasure of all, I foam mounted her framed photo and layered it onto a larger arrangement of ephemera blooms. This emphasized her photo, and importance, to the overall design. I also used the picture perfect sentiment to acknowledge her genuine beauty.

HKC_AmandaBaldwin_Sept12thBLOG_07

Infact, when it came to the title & sentiments, I designed the layout so it would read, You are...blessed, you are loved, picture perfect, Loved. I hope when she looks back in her albums, she sees how truly beautiful she always was despite the awkward years!

HKC_AmandaBaldwin_Sept12thBLOG_04

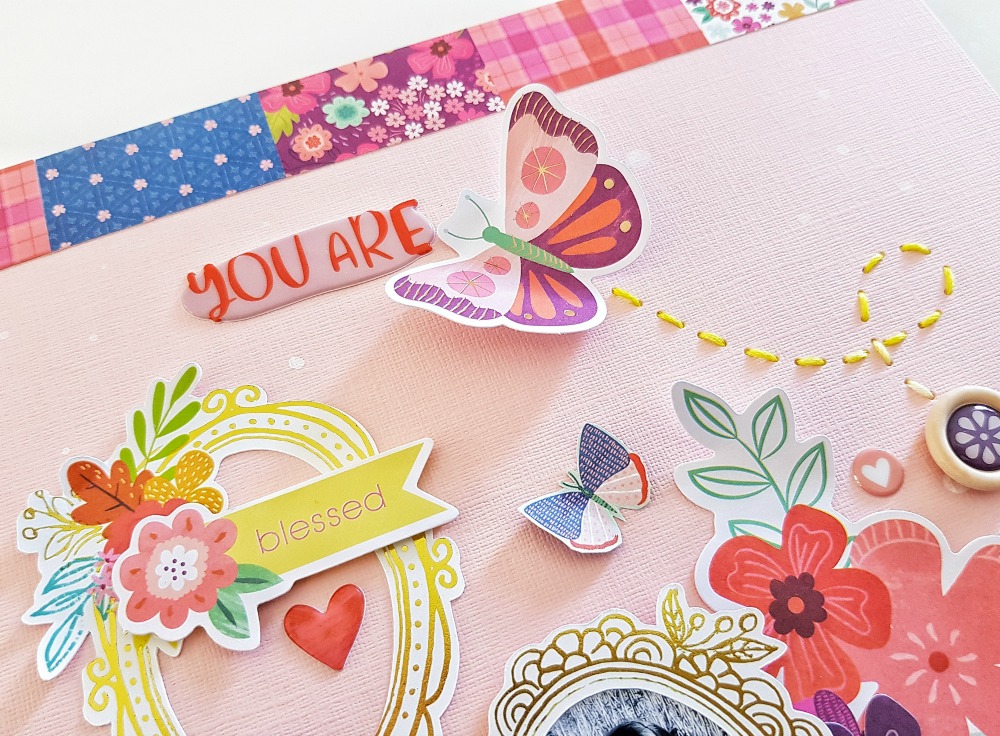
For the stitching element,  I just couldn't resist adding a little whimsy and playfulness to the design with butterflies & their flight paths. I used butterflies from the Truly Grateful Mixed Ephemera, Truly Grateful Phrase Thickers, & even some fussy cut ones from the Truly Grateful pattern paper #5. For the 'flight paths', I simply perforated the holes with a paper piercing tool & then stitched it all with some yellow embroidery thread. 
I love how this turned out! So pretty!

HKC_AmandaBaldwin_Sept12thBLOG_03
F
or a polished look, and to tie in all those bright & beautiful colors, I trimmed the Truly Grateful pattern paper #14  into a 1" x 12" strip to line the top of my layout, and a half inch x 12" strip for the bottom. I adorned the top left corner with  Pinkfresh Studio: Just A Lil Lovely Mixed Embellishments, and then scattered a few more embellishments around the page. 
The gold glitter enamel dots are really somethin'!

HKC_AmandaBaldwin_Sept12thBLOG_06

And there you have it! 
Frames, Florals & Stitching with the August 2019 Scrapbook & Cardstock Kits! 
I hope you feel inspired to get creating with these beautiful kits today!
Thanks so much for stopping by! 
til next time, 

AMANDA BALDWIN-01

Elle's Studio: More August Kit Inspiration!


Hi Friends!

Welcome back for more Elle's Studio awesomeness!
Today I'm sharing more everyday documenting with the fabulous August Kit, Add On items & the incredible Title Builder Vol.3 Stamp! 
It's no secret that I adore Elle's Studio stamps, but honestly, the Title Builder Stamps are a true favorite o'mine! SO good!
Here's yet another reason why...


Other Supplies: White Carrdstock, Machine Stitching, Altenew Ink Cubes - Pink Diamond, Rubellite, & Razzleberry, SpiegelMom Scraps Firecrackers Sequins. 

Isn't this the sweetest Summer page?! 
And see what I mean about the everyday documenting? This was no milestone moment, just a simple capture of my two darlings exploring the rock pools - but one that I still wanted to record & 'keep' forever! A Summer moment that truly was the Best Fun Ever!

Here's a closer look at my layout...


Every element of this page was inspired by that sweet photo! I often create pages where the photo is the focus, and chief story teller of the design. From the colors in my children's clothing, to the warm Summer's day at the rock beach, to the loving moment that they shared - it all inspired this fun Summer page! 

To be completely honest, my 12 x 12 scrapbook layout also really began as a pocket page.....
I started with the 3 x 4 notecard that features the 'more of this' sentiment on it. Apart from it's coordinating color, I also loved the pennant icon that the sentiment was printed on. So, I used a scalpel knife & fussy cut it to create a photo clip to insert my photo into. A really simple touch that brings attraction to my photo! I then embellished this photo card with the 'Best Friends' Back To School puffy sticker & the 'Summer' veneer from the Title Builder Vol.3 Wood Veneers. 
So cool! Pocket page scrappin' is so much fun! 
But... we all know that I'm a 12 x 12 girl at heart, so I just couldn't stop there! 


Next, I created a banner from white cardstock, and repeat stamped the word LOVE from the Title Builder Vol.3 Stamp. I stamped this subtitle in an ombre style & added faux stitching around the edges with black pen. The banner shape compliments the pennant photo clip, & added an extra point of interest to draw attention to my photograph. To connect the two main pieces of my layout together, I embellished both with a pair of red sunglasses - one is an Acrylic, and the other was fussy cut from a notecard in the August kit. Cute!

It's at this point where I actually decided to create a 12 x 12 page. I trimmed one inch off my white cardstock base to allow for the paper trim on the left hand side. I butted two half inch strips of pattern paper from the 6 x 6 Sunshine Paper Stack to form the 12 inch appearance. I did this twice, and then machine stitched all trims onto the underside of the white cardstock. I also layered the polka dot print stripes paper through the left hands side of my page (at the 4inch mark) to anchor both my photo and banner.  
Now for the super fun part! All the embellishments!!!


I added a a good scattering of hearts (including the stamped hearts & LOVE word from the Highlights From Today stamp), watercolor splatters, the fantastic Makes Me Smile Cork Circles and few sequins from my stash. I also stamped up a spot of journaling with the Title Builder Vol.3 Stamp, 'this is the best fun ever'. I told you that the Title Builder Vol.3 stamp is my favorite!!! LOVE it!


I added a few more of the Makes Me Smile Cork Circles around the page, and a couple more pairs of both fussy cut & Acrylic Sunglasses. So fun!


And there you have it!
 Documenting the everyday never looked so good! 
I hope my layout has inspired you to get creating with the fabulous  Elle's Studio August kit and those stamps! 


Thanks so much for visting, 
til next time, 


Technique Tuesday: August Memory Keepers & Fresh Cut Studio


Hi Friends! 

Welcome back for more stamp-endous fun with the
August Memory Keepers & Fresh Cut Studio new release from 


This month's featured stamp - The Story


How awesome is this?! 
Such a terrific stamp for all types of memory keeping - think pocket pages, TN pages, memory planners & more!

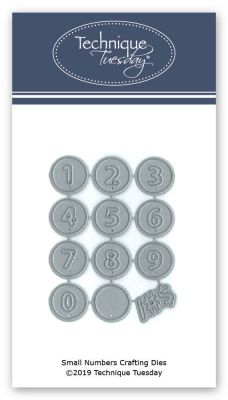
And let's not forget this month's featured die - Small Numbers Crafting Dies

Small Numbers Crafting Dies

How cute 'n' fun!

Here's what Technique Tuesday have to say about this fabulous crafting bundle...

 "The Story stamp set and Small Numbers crafting die bundle will help you get that documentation on your page layouts. List details of pictures using the prompts who, what, when, where and why from the journaling stamp set with numbers from the set of dies. You can add dates beside your photos using the small circle dies with numbers inside them. With two different sets of journaling line stamps you can keep your story brief or tell the entire tale.
If you like making bullet journals, this set of stamps and dies for making lists will give you tiny number dies and line stamps to create those lists. And this versatile stamp and die combo for journaling would also be terrific for documenting adventures in a travel notebook. Remember...it's important to tell your stories!"

Now I know you're probably thinking I'd use these items to make a few pages for my CTK Life Crafted Album or Traveler's Notebooks, but I wanted to demonstrate the versatility of these products, and make them work for my style -
 so I opted for a 12 x 12 scrapbook layout!

Here's what I created...

"Here Is The Story"


Oh.Em.Gee! How amazing is this?!!
Such a different look for these stamps & dies, and yet oh-so effective!
Here's a better look.....


Yep. Pure Awesome!!!
I've combined these stamps and dies with the Pinkfresh Studio Just A Lil Lovely collection & Liquid Watercolors in Sapphire, Aquamarine & Sky Blue. Such a terrific combination!


I stamped The Story ruled lines stamp beneath the pattern paper banner strips in a mid-blue ink, to add emphasis and interest to my photo cluster. I love the alternative use of this stamp - so cool! 


In the top section of my layout, I repeat stamped the stars, and numerals from The Story stamp in varying shades of blue ink. I love how it looks over the Pinkfresh Studio Liquid Watercolor base! SO good!


I used black ink for the title and journaling on the page, as well as the arrow icons. I found the black ink to be more striking and ensured my sentiments didn't get lost amongst the rest of the mixed media base. 


For the Small Numbers Crafting Dies, I used a mix of both smooth white cardstock & cork. I cut the plain 'spot' die in white card, and foam mounted these spots throughout the page for added interest and dimension. I featured the cork numbers around my photos to bring order and sequence to my photo cluster & journal spots. 

Bold, striking and oh-so Cool!!!

Simple creating made awesome with the August Memory Keepers & Fresh Cut Studio products from Technique Tuesday.


Thanks so much for visiting, 
til next time, 

Elle's Studio: August Kit is #1 BEST!


Hi Friends! 

Welcome back for more Elle's Studio inspiration! 
Today I am sharing another layout created with the fabulous August Kit & new release items! 
There are SO many awesome new elements & add ons to this month's kit, that I challenged myself to incorporate most of them into my layout! 

Here's what I created with them, 

"#BEST" 


Other: Blue & teal stamping ink, white tissue wrap.

Whoa! What a fun school themed page! 
It may not be 'back to school' in Australia where I live, but this theme in the August Kit works perfectly for any school occasion. Really versatile, and ideal for my sweet boy's photos. 
I started my layout with the Noteworthy repeat print 12" paper, and 1 1/2" strips of the Sunshine 6 x 6  Paper Stack. I butted these two strips together on the left hand side to create a feature point and anchor for my design. 


Next, I stamped up a mix of blue & teal stars with the Back To School Stamp. I used both types of stars, and positioned them to the right of the Sunshine paper strips. As I had planned to only use the left hand side of my page, I was to careful to avoid stamping further than the center of the page. 
I love the pop of color the stars add to the background! 

Design Tip: The use of tiny stamped icons, and or shapes, is a great alternative to enamel dots or sequins, especially for masculine pages.


The next step in creating my layout was to form the photo clusters & layers. For this, I used a mix of 3" x 4" journal cards & die cuts from the August Kit, 3" x 4" cuts from the Sunshine 6 x 6 Paper Stack papers, and the Back to School Puffy Stickers. The pencils and book stack embellishments were fussy cut from the note cards included in the Kit. At the base of the photo layers, I added a torn sheet of tissue wrap, followed by some foam tape. This added both texture & dimension to the clusters.  


To unify the two photo clusters, I used one of the Makes Me Smile Cork Circles as focal embellishment between them. This draws attention to both photos, and in turn, connects the images. 


You'll also spy the Notebook Puffy Alphabet Stickers travelling down left side of both clusters too. The use of A,B,C 1,2,3 is not only a fun way to incorporate more of the school theme, but it also an orderly pattern that subtly encourages further connection between both photos. 


For a finished look, I stamped the #1 from the Back to School Stamp and followed it with the # BEST acrylic from the Title Builder Vol.3 Acrylic set. 

And there you have it! 
A really effective looking layout from such a relatively simple design! 
I hope I have inspired you to get creating with the fabulous Elle's Studio August Kit and new releases today!

Thanks so much for visiting!
til next time, 


Shimmerz Paints: August Color Kitz Inspiration & Process Video!


Hi Shimmerz Friends & Fans!

Amanda here, & today I am sharing a lil inspiration 
(complete with process video) 
with our gorgeous August Color Kitz!


This month's Color Kitz is absolutely stunning! 
Such pretty colors! &  just check out that exclusive ice cream cut file!!!
Colorz featured are:

 Vibez Hermit the Frog
Coloringz Heidi Ho Blue
Inklingz Sunkissed
Shimmerz Pink

Plus Sprinkle Time! sequins from our friends at SpiegelMomScraps.

If you're super quick, you *might* be able to snare one still before they completely sell out!


I couldn't wait to get creating with this beautiful kit! 
Here's what I came up with.....

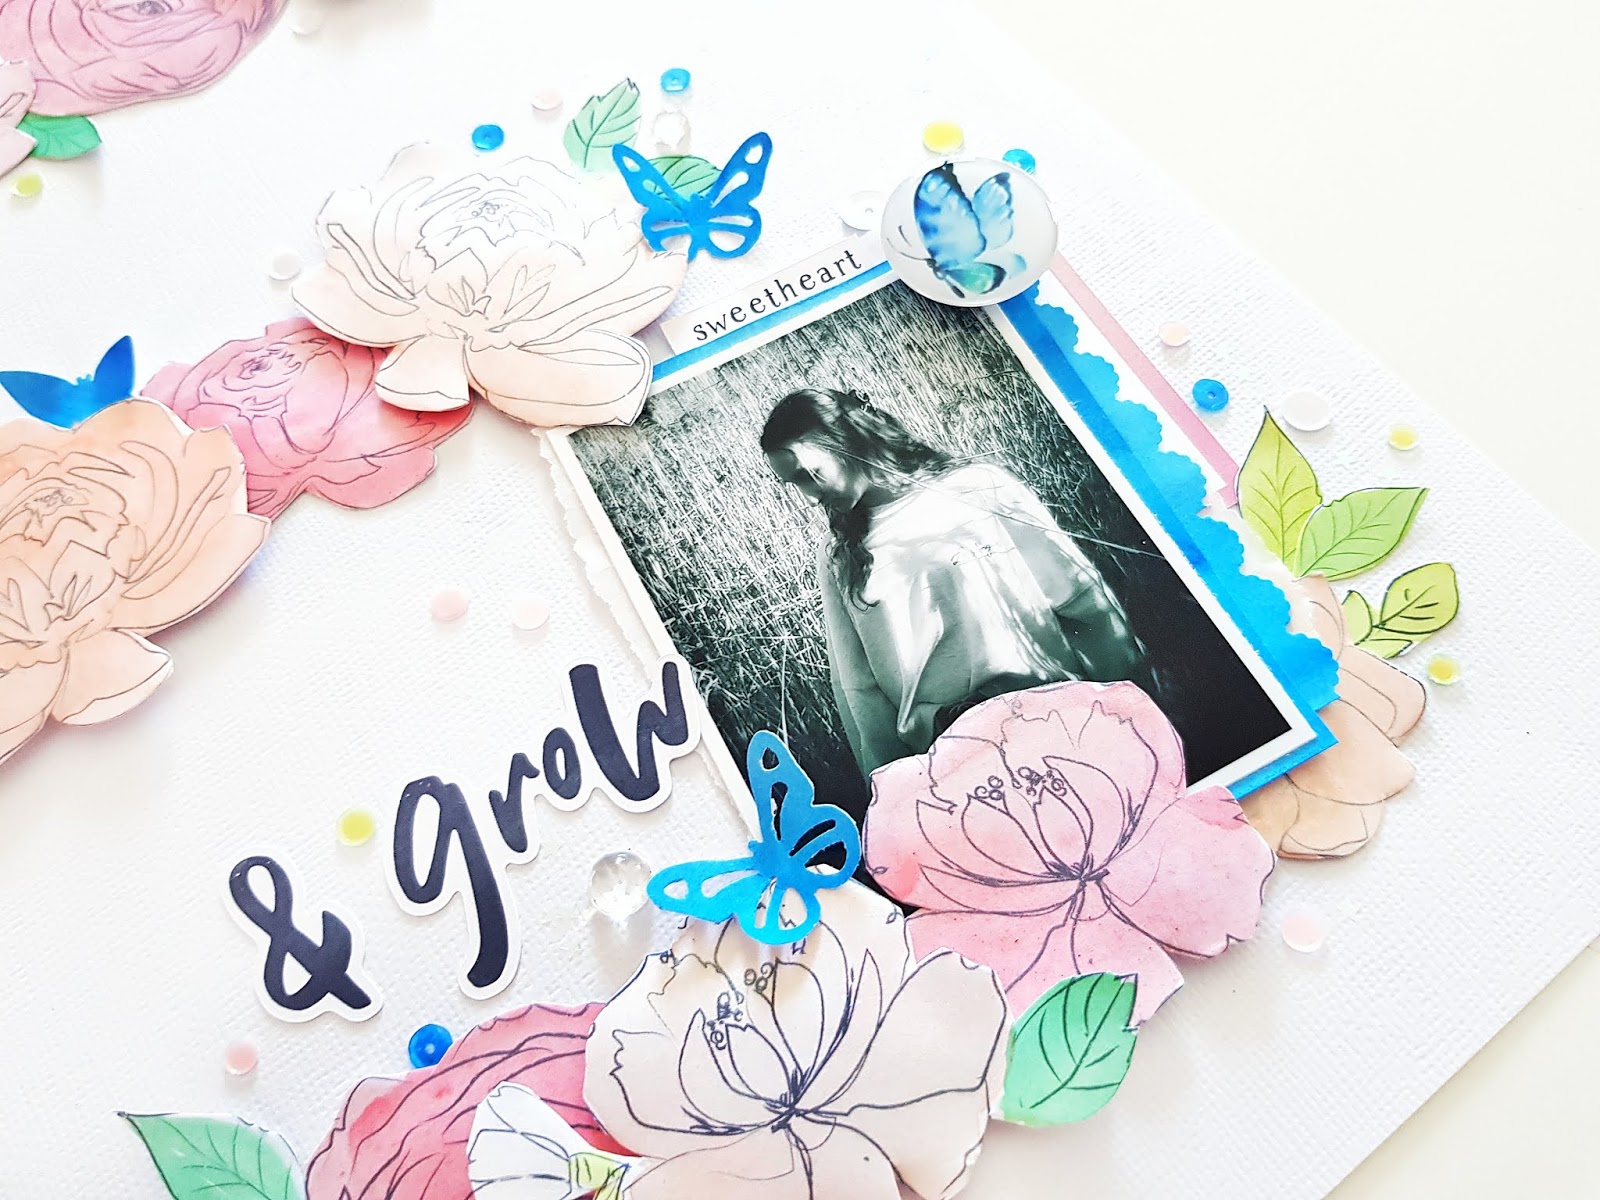
"Bloom & Grow"


Oh my heart! Isn't this so pretty!
And before you ask about the ice cream cut file, let me tell you that my moody cutting machine ate every single one of those ice cream cones! I know, right?! So frustrating!
On the upside, digital files keep forever, & I'll try cutting it again after I've updated my software, lol!
I've also opted for a 'clean look' mixed media page - lots of controlled painting for this sweet page!
Here's a closer look at my layout.... 

Whoa! So.much.pretty!!!
Turns out you don't have to use the cut file to maximize the awesomeness of this kit! 

I began my layout by painting a bunch of blooms and leaves from the Cocoa Vanilla Studio "Sophisticated" pattern paper (Midnight collection) using ALL the colors! 
Where's the Heidi Ho Blue, I hear you ask? 
Well, to create those darker green leaves I mixed Coloringz Heidi Ho Blue with Vibez Hermit the Frog - so you kinda get a bonus 'extra' color in your kit ;)
Once dry, I fussy cut all the florals and arranged onto the 12 x 12 white cardstock base.


Next, I sprayed some scrap paper with pure Coloringz Heidi Ho Blue. 
With this newly created blue paper, I punched a few butterflies, and even backed it to my photograph for added interest. 
In keeping with the butterfly adornments, I just couldn't resist using the beautiful


Aren't they the perfect embellishment?! 
You can shop them HERE

Here's a closer look at them on my layout....


Beauties, indeed! 
The pretty yellow & lime butterfly coordinates perfectly with the Vibez Hermit the Frog painted leaves. Love it!


For finishing touches, I add my title Bloom & Grow also from the Cocoa Vanilla Studio Midnight collection, & end with scattering lots of Spinkle Time! sequins onto my page....


So many lovelies to look at!


Absolutely gorgeous!!! 
And such a 'clean' approach to using paints on your projects! 
Wanna see how it all came together?

Please watch my process video HERE


I hope you enjoyed watching my process video
& feel inspired to get creating with your August Color Kitz! 


Thanks so  much for visiting!

til next time,