Showing posts with label HKC exclusives. Show all posts

Hip Kit Club: June 2021 Main Kit Only


 Hi Crafters!

Welcome back for more Hip Kit Club inspiration & awesomeness!

Today I'm sharing how I've incorporated punches and metal dies from my stash into a 

June 2021 Main Kit Only layout. 

Yay, such a fun challenge!  

Oh, and if you're a mom of boys (or simply just wondering how such a pretty kit can work for boy pages), read on!

Here's my darling son's newest page with the June 2021 Main Kit Only...

"Happy Memories"


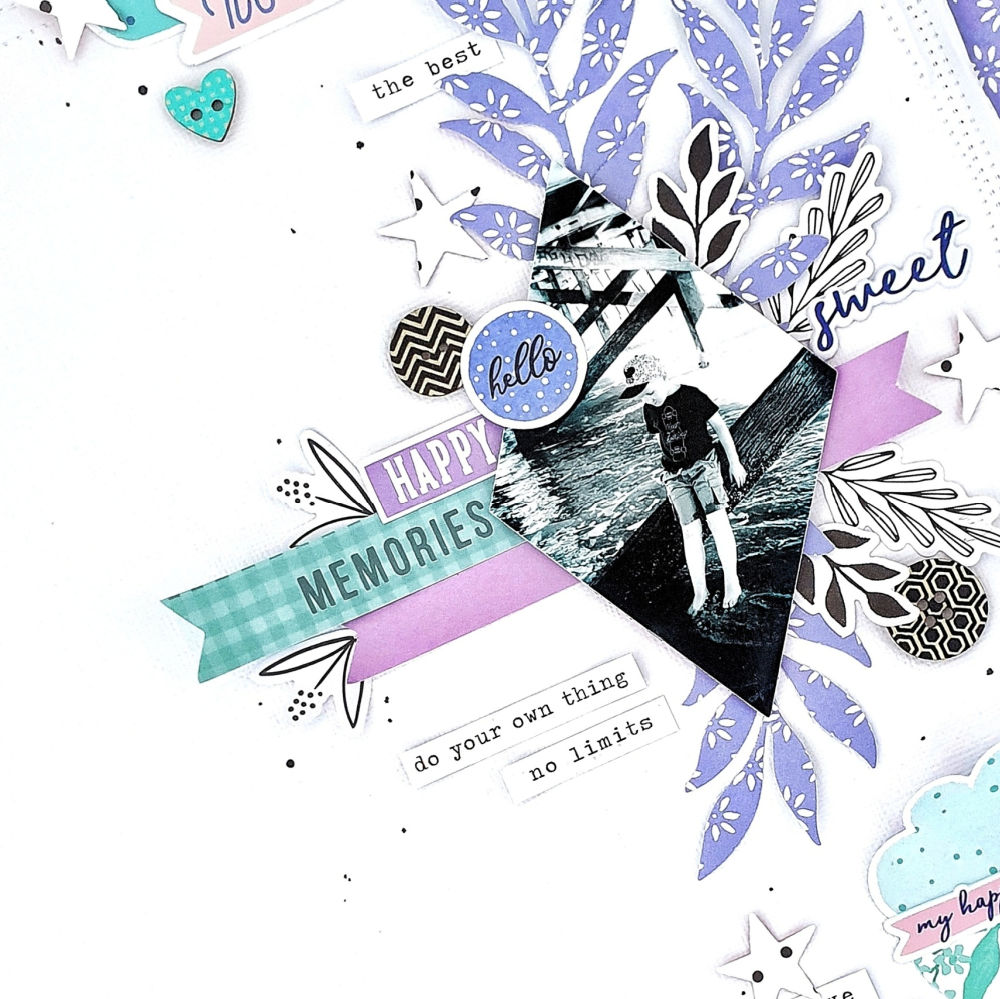
Whoa! How awesome is this?! Super cool &  perfect for documenting my sweet boy!

You'll spy punched stars and semi circles, as well as die cut foliage pieces too! 

And my favorite die cut? Well, that would definitely be the diamond die that I used to shape my photograph with! 

Here's a closer look at it...


So super awesome! That diamond photo is really somethin'! To be honest, it dictated the vertical page arrangement and overall design of the layout. I even aligned my border papers (B sides of Hip Kit Club's Delightful: Lemon Parfait and Pinkfresh Studio's Happy Blooms: Garden) with the diamond photo before I zig zagged them into place.


The blue, teal and purple tones of this layout are so cool and refreshing that they simply add to the chilled out, Summer vibes theme. This contemporary color scheme is then balanced out with pops of striking black & white embellishments. The black and white details really cut through the 'softness' of the colors,  giving a stronger & more masculine feel. You'll notice that I've featured lots of textural elements such as messy machine stitching, distressed cardstock, those amazing Hip Kit Exclusive Wood Veneer Buttons, lots of foam tape and even curled, folded and raised embellishments for the same effect.


The Hip Kit Club Delightful Ephemera  leaves inspired me to create more foliage die cuts to anchor my photo with. I cut these leaves from the B side of Pinkfresh Studio's Happy Blooms: Garden paper, and arranged them with the Delightful leaves, as well as the banners from the Pinkfresh Studio Happy Blooms: Journaling Bits.  The Delightful Wood Veneer Buttons were perfect for added dimension and interest, but I felt like my page needed more black and white details. The solution? I used an old star punch with the B side of Hip Kit's Delightful: Strawberry Crush Paper (white paper with black dot pattern) and sprinkled them throughout the vertical design (because he's my lil super star, of course!).


My semi circle punch was used to support the two die cut clouds. A simple mirroring technique, but so effective!


All the Hip Kit Club Main Kit awesomeness!!! Love it!

I hope my layout has inspired you to get creating with the June 2021 Hip Kits today!

til next time,
Happy Arty Days, 

Amanda xo

Hip Kit Club: April Mood Board Inspiration


 Hi Friends! 

Welcome back for more Hip Kit Club awesomeness!

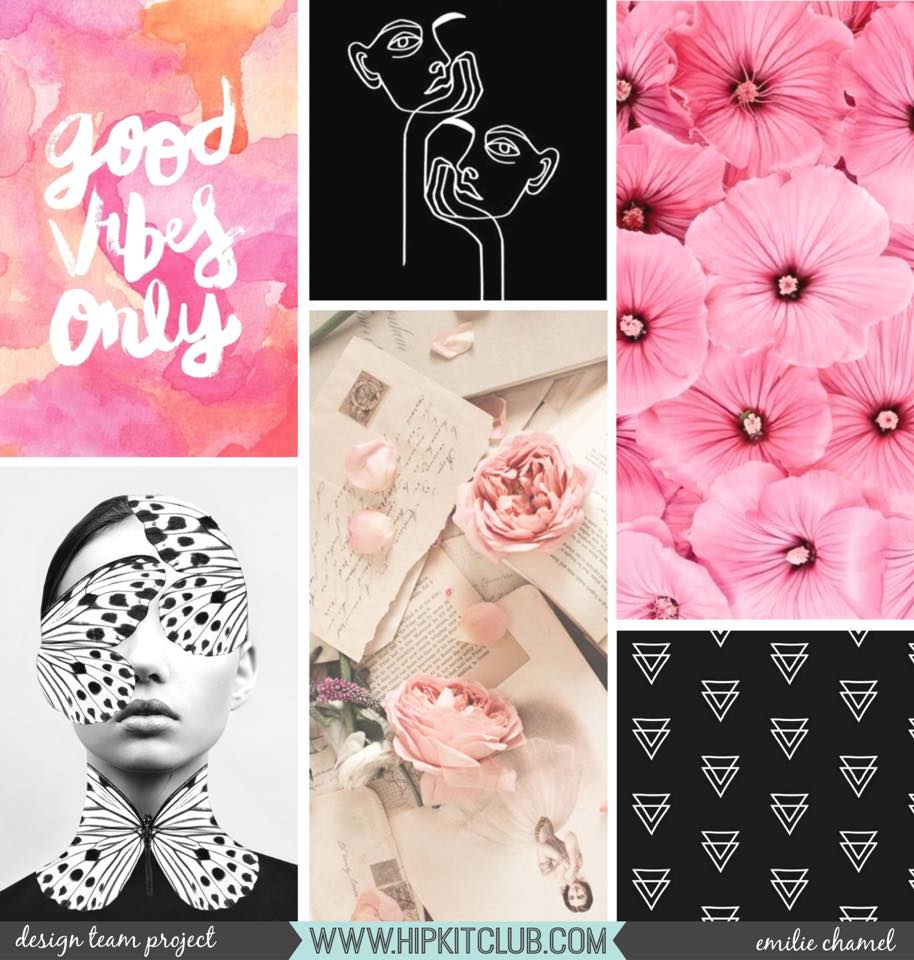
 Today I'm sharing my take on this month's gorgeous mood board created by the lovely Emilie Chamel! The April mood board is super striking and has so many beautiful images to inspire you with! If you haven't seen it yet, here's what the April mood board looks like...


Told you it was gorgeous!!! A really stunning mood board! 

I was particularly impressed by the pop colors and contrasting black and white elements. Here's what it inspired me to create with our fabulous February 2021 Hip Kits...

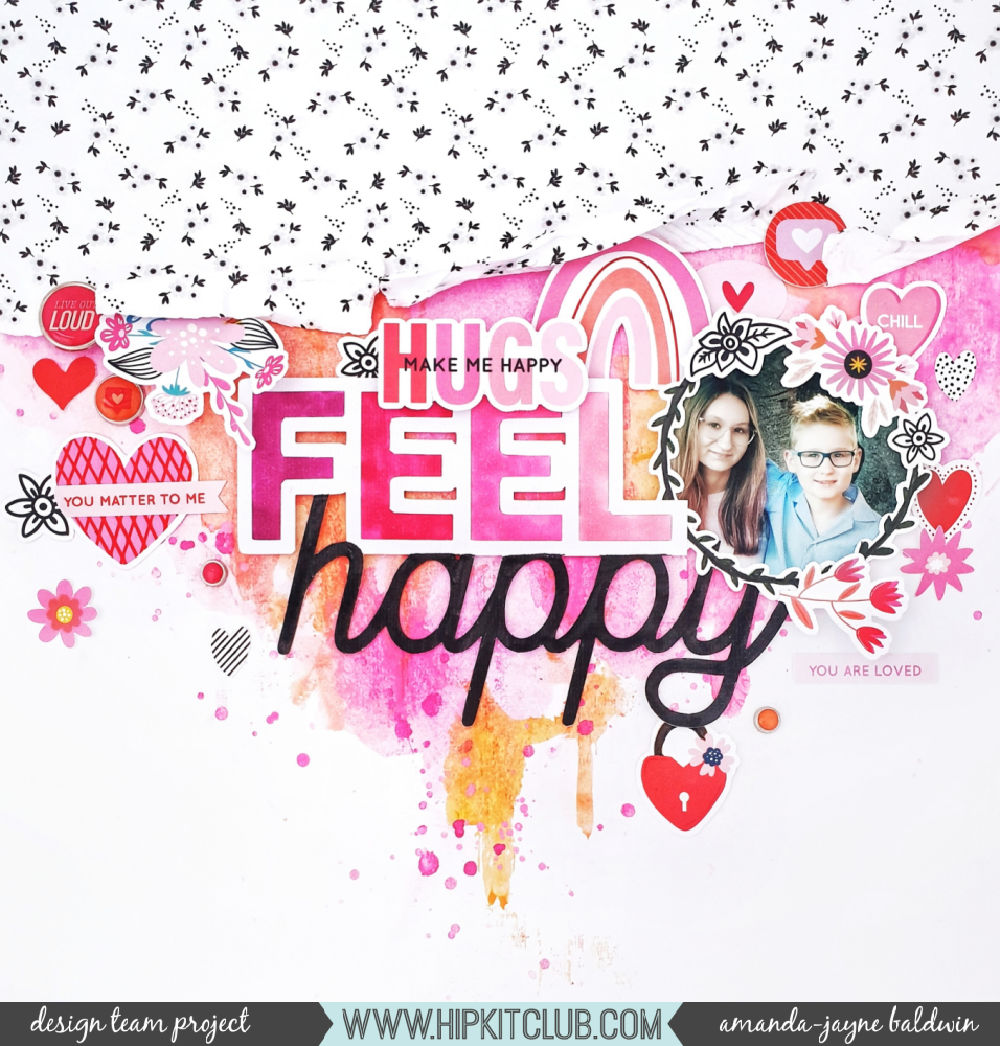
"Feel Happy" 12 x 12 scrapbook layout


Wow! It's clear to see that I was inspired by the first image, 'Good Vibes Only'! I couldn't resist that bright watercolor background! I used watercolors from my stash, applied them to an acrylic stamp block, and literally smooshed and scraped the colors onto my Bazzill White Cardstock (February 2021 Cardstock Kit) base. I added a few flicks and splatters of color for interest too! I love how the watercolor in the mood board image really made the phrase pop, and I decided to do the same for my large script cut file title. Let's take a better look...


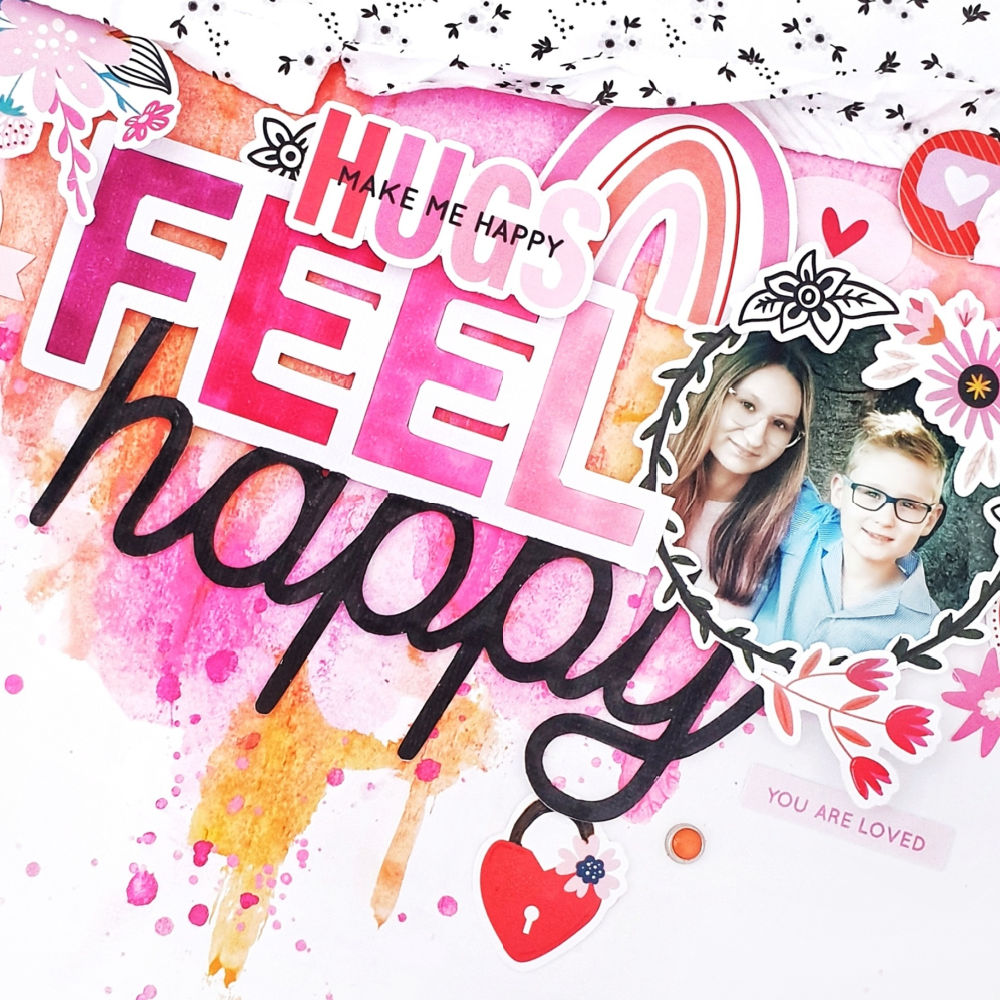
Oh my heart! This totally makes me feel happy! The cut file is from the March 2021 Hip Kit Club Subscriber Exclusive Cut Files, and is actually called 'Feelin' Happy'. To better suit my story, I snipped off the 'in' to form the new title, Feel Happy. Love it!


Inspired by the colors of the mood board, and even more so by the ombre tones on that cute "HUGS make me happy" Hip Kit Club exclusive Heartfelt collection die cut, I hand colored my cut file with some artist markers to match.  Such a simple approach to customizing cut file titles, but I really do love how effective it looks! I foam mounted my title onto that striking watercolor base, and then double foam mounted the "HUGS make me happy" die cut over it.


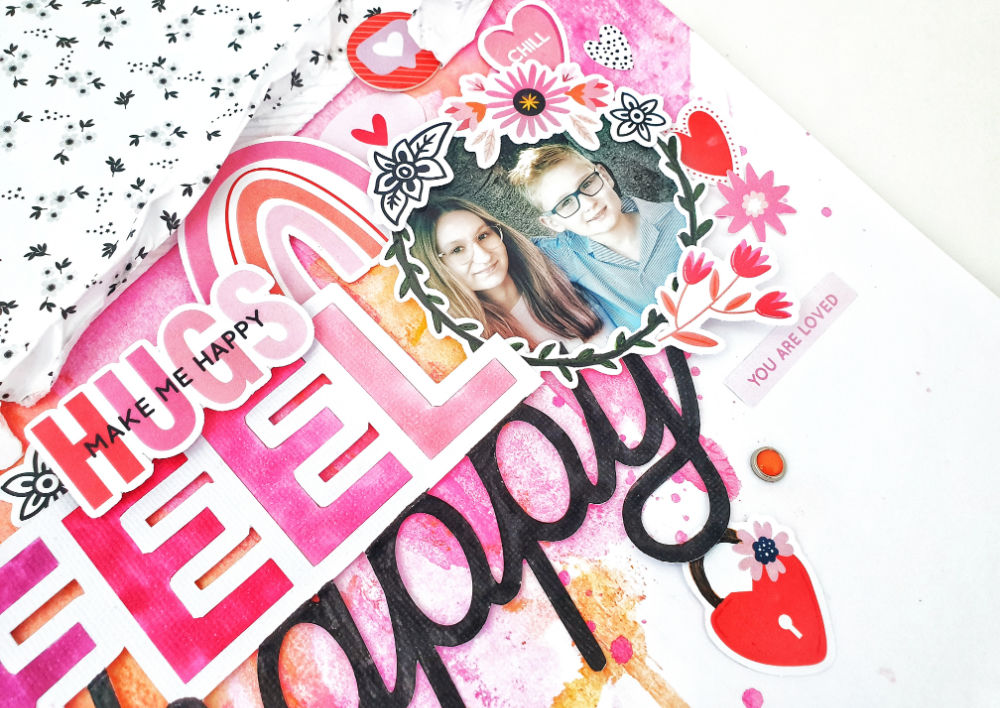
I embellished around my cut file title, with lots of the lovely Hip Kit Club Heartfelt Ephemera from the February 2021 Embellishment Kit. On close inspection, you'll spy that I have also customized a few of these items with a permanent black marker. I colored over the green wreath which I used as my photo frame, and part of heart padlock to better suit the contrasting use of color in the mood board. Again, really simple touches that make such a difference to the overall look and feel to the page!


That floral die cut  worked beautifully as a frame for my two darlings' photo, and to connect it with my title, I attached it with that sweet rainbow die cut. Because, well...rainbow connections and all!  With florals and black and white being such dominant features in the April mood board, it seemed an obvious choice to use the beautiful Hip Kit Club Heartfelt patterned paper, 'Say It With Flowers' to trim the top section of my page. To add more interest, and even a bit of texture to my design, I tore and distressed the edge of this paper, and then tucked a few extra die cuts beneath it. So cool!


For added interest, I also adorned the page with a mix of florals & hearts from the Heartfelt Ephemera & Die Cuts, Simple Stories: Hello Today - Decorative Brads, and even a Chipboard Flair or two from the Pinkfresh Studio: Some Days collection.


Hugs make me feel happy, & I hope my layout has made you smile too!

I hope you feel inspired to play along with the HKC April Mood Board Challenge! 

Please be sure to upload your creations to the Hip Kit Club Facebook Group HERE - we really LOVE seeing what you've made with the amazing Hip Kits too!

Thanks so much for visiting,

til next time,

Happy Arty Days, 

Amanda xo

Hip Kit Club - January Mood Board Inspiration!


 Hi Friends! 

Welcome back for more Hip Kit Club awesomeness!

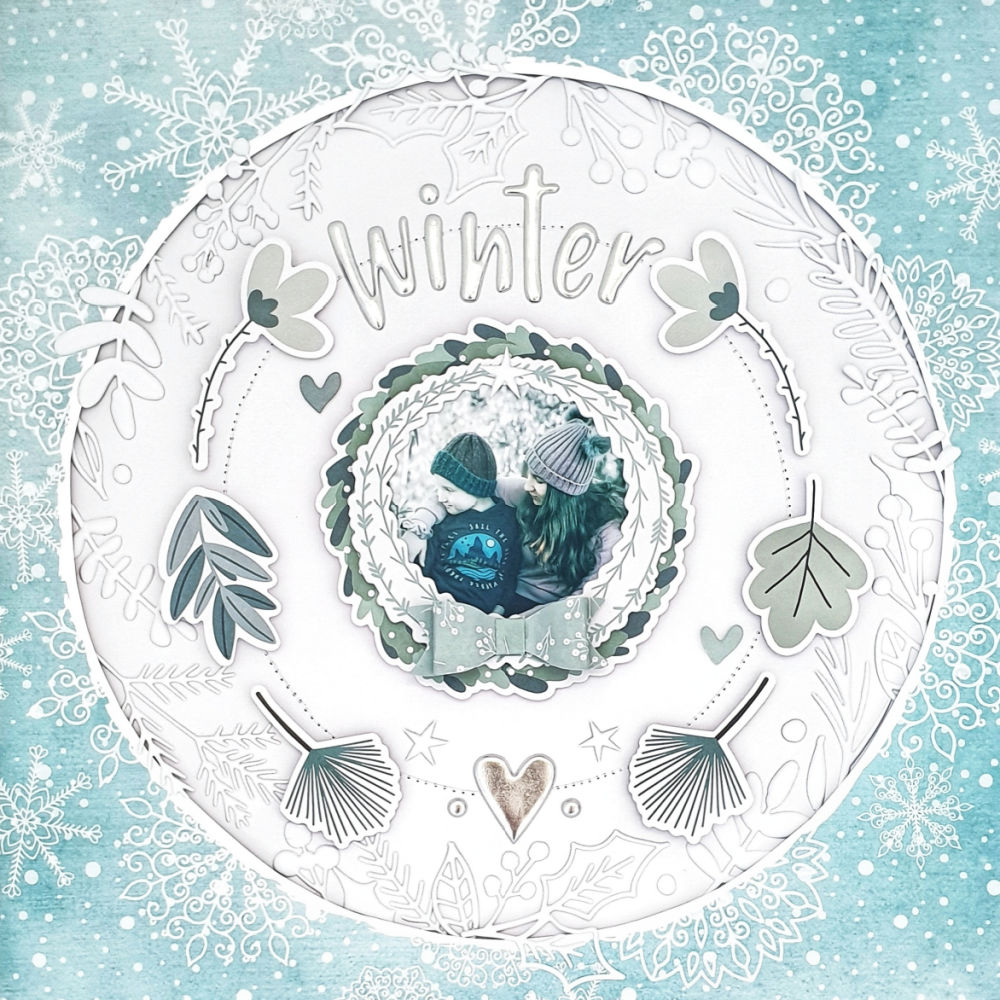
Today I am sharing some Winter themed inspiration with the gorgeous HKC: January Mood Board! 

My December 2020 Hip Kits may have only just arrived, but that didn't stop me from crafting up a crisp Winter Wonderland layout for today's post!  

But before I get too excited, here's a reminder of what the January Mood Board looks like...


So gorgeous! The board was created by our amazing Anke Kramer, & it's such an icy delight to behold! Love it!  And here's what it inspired me to craft...

"Winter"


Oh my heart! Ice, Ice Baby! Winter love, indeed! As soon as I laid eyes on the beautiful, exclusive Hip Kit Club, Keeping Cozy 'Frozen Sky' paper, I knew I would cut it up and create a concentric design with it! I mean seriously, that paper is errrrrrything!!! Hip Kit Club exclusives are always my faves! Let's take a closer look....


It really is somethin', aint it?! As you can see, I was totally inspired by the center, 'Hello, Winter" image, and used it to create my  overall layout design. A circular snowflake arrangement on a square background, with the focal point in the center. I also loved the notion of going concentric - starting large and getting smaller, and making your eye travel to the center of the page. With these design ideas in mind, I chose the pretty  Keeping Cozy: Northern Lights pattern paper for my layout base. It's washy gray blue color, and tiny snowflake pattern made for a beautiful border and starting point for my page! My next layer, or smaller square if you like, was a sheet of White Bazzill Cardstock (courtesy of the December 2020 Cardstock Kit) which I trimmed to 11.5" x 11.5" and machine stitched onto the Northern Lights base.


I trimmed down the Frozen Sky paper to 11" x 11" & cut out the circular center of this print too! I backed it with foam tape, and adhered it to the White Bazzill Cardstock layer. My concentric square layers were now complete! I chose to enhance the newly transformed circular design by adhering all the Keeping Cozy: White Puffy Leaf Stickers under, over and around the fussy cut circle rim. Yes - it took the entire packet - but doesn't it look awesome?!! Some embellishments are truly beyond words (& that's exactly why you always need to order the Embellishment Kit too!) Amazing!


I machine stitched my next circle into place, and then used this detail as a guide for my foam mounted, Keeping Cozy: Floral Ephemera leaves and Metallic Puffy Stickers title. So much soft texture and dimension to this page!


I framed my photograph with that stunning Keeping Cozy Chipboard Sticker wreath, and then positioned my photo onto that sweet Floral Ephemera wreath.  For maximum impact, I foam mounted these final circular layers to the center of my page. To add that 'extra' something, I added a Keeping Cozy Cardstock Bow in a similar color to the wreath.


That bow!!! So adorable & the perfect finishing touch to my darling's photograph! I also embellished with a couple more of those shiny Metallic Puffy Stickers, and a chipboard heart or two! Beautiful! Here's a couple more close ups for you...


I just love that shiny silver title - so cool, crisp & icy!


SO many beautiful details and layers created with the divine December 2020 Hip Kits! 

I hope my layout has inspired you to create something today! 

Please be sure to share your Hip Kit projects with us in the Hip Kit Club Facebook Group HERE - we love seeing what everyone makes!

Thanks so much for visiting! 

til next time, 
Happy Arty Days, 

Amanda xo

Hip Kit Club: Rainbows, Rollerskates & a Process Video!


Hi Friends!

Welcome back for more Hip Kit Club inspiration! 
 I am SO super excited to be sharing my latest scrapbook layout (& process video) with the gorgeous 
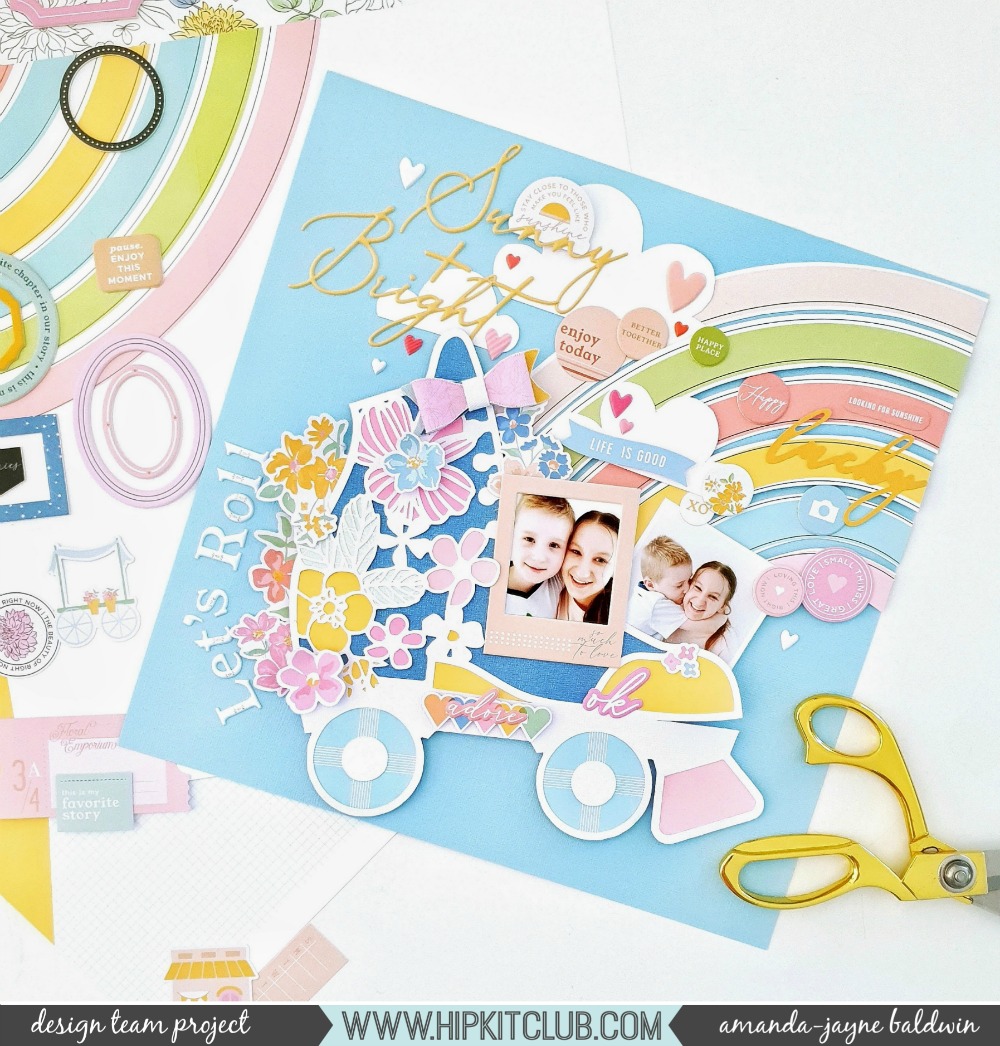
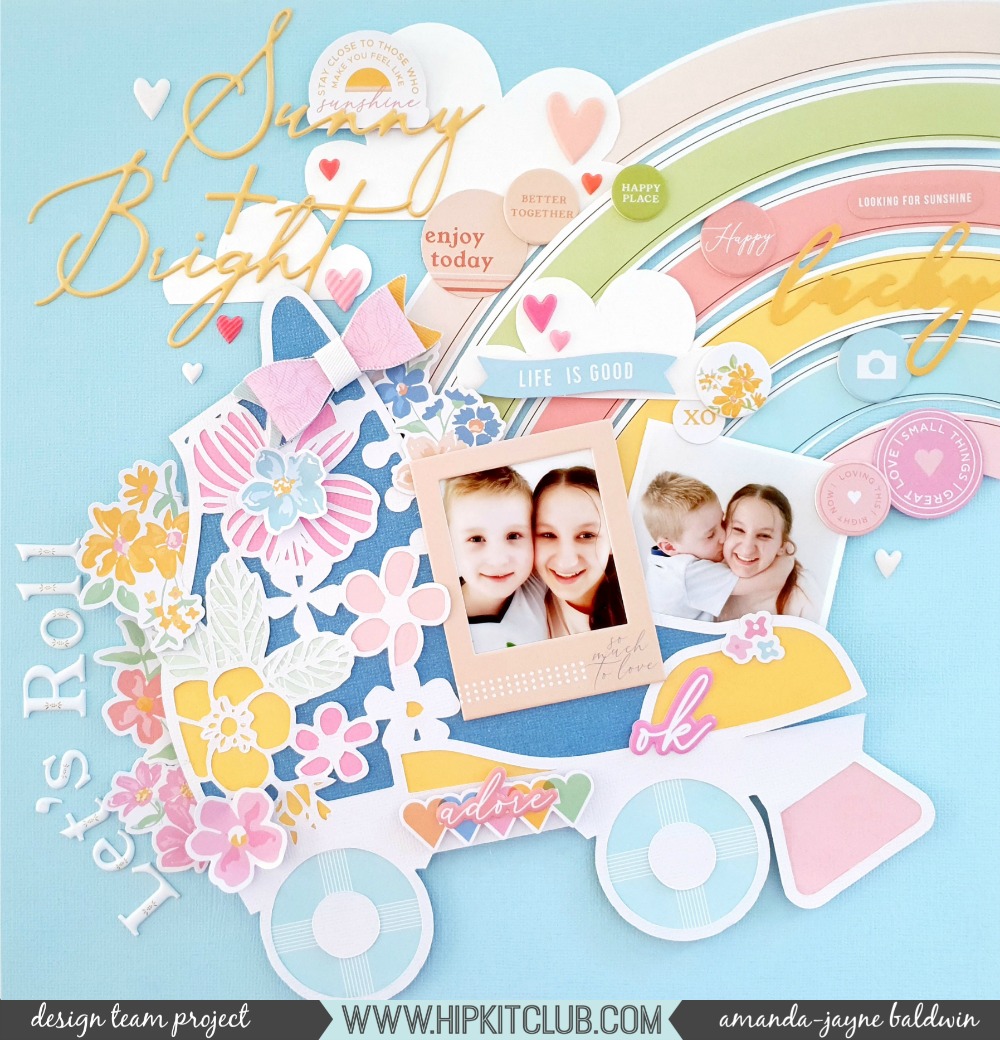
Today I am being inspired by the February Mood Board, and in particular, the rainbows, florals, hearts & those rollerskates! You'll also spy the fabulous February HKC Subscriber Exclusive rollerskate cut file - but rather than rave, here's a quick look at my happy-go-lucky vibes page!

"Let's Roll"

HKC-AmandaBaldwin-Feb21st-Blog-02

Oh how fun, and whimsical! Such a bright and playful page for my two darlings! I just couldn't resist fussy cutting that rainbow paper from Pinkfresh Studio: My Favorite Story collection (courtesy of the HKC January 2020 Main Kit) and combining it with our amazing rollerskate HKC Exclusive Subscriber Cut File! I mean, rainbows and rollerskates go hand in hand, right?!
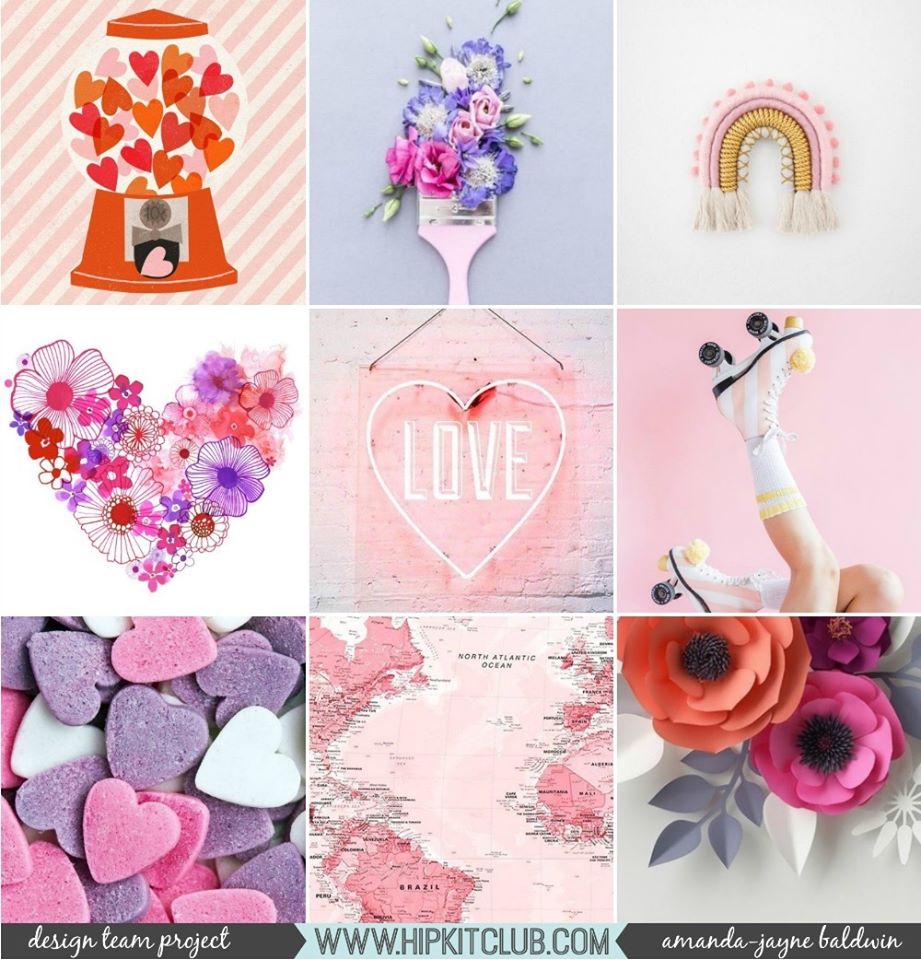
If you missed seeing the February mood board, it looks like this....

83086838_3691446797532946_74651127219486720_o

Wow! All kinds of pretty, huh?! You can interpret this board so many ways, and best part, it coordinates with both our January and February Hip Kits - Yay!!! I hope you'll see something that sparks some creativity and inspires you! But back to today's project, here's a better look at my layout.....

HKC-AmandaBaldwin-Feb21st-Blog-01

Sunny + Bright, indeed! So.much.fun!!!
I started my scrapbook page with the beautiful  Bazzill Starmist Cardstockfrom the January Cardstock Kit - such a pretty color for my background and base. Next I backed the fabulous rollerskate HKC Subscriber Cut File with two of the Pinkfresh Studio: My Favorite Story papers from the January 2020 Main Kit, as well as that stunning, sparkly Bazzill Prince Charming Bling Cardstockfor added wow factor! I can't even begin to tell you how ahh-MAY-zing that cardstock is!!!
I fussy cut that divine rainbow, Joyful Heart paper, also from theMain Kit, and layered it onto that fabulous Starmist base. For added interest, I foam mounted every second stripe in the rainbow and then adorned every stripe with tone on tone embellishments from both the January Main & Embellishment Kits. Such a pretty effect!


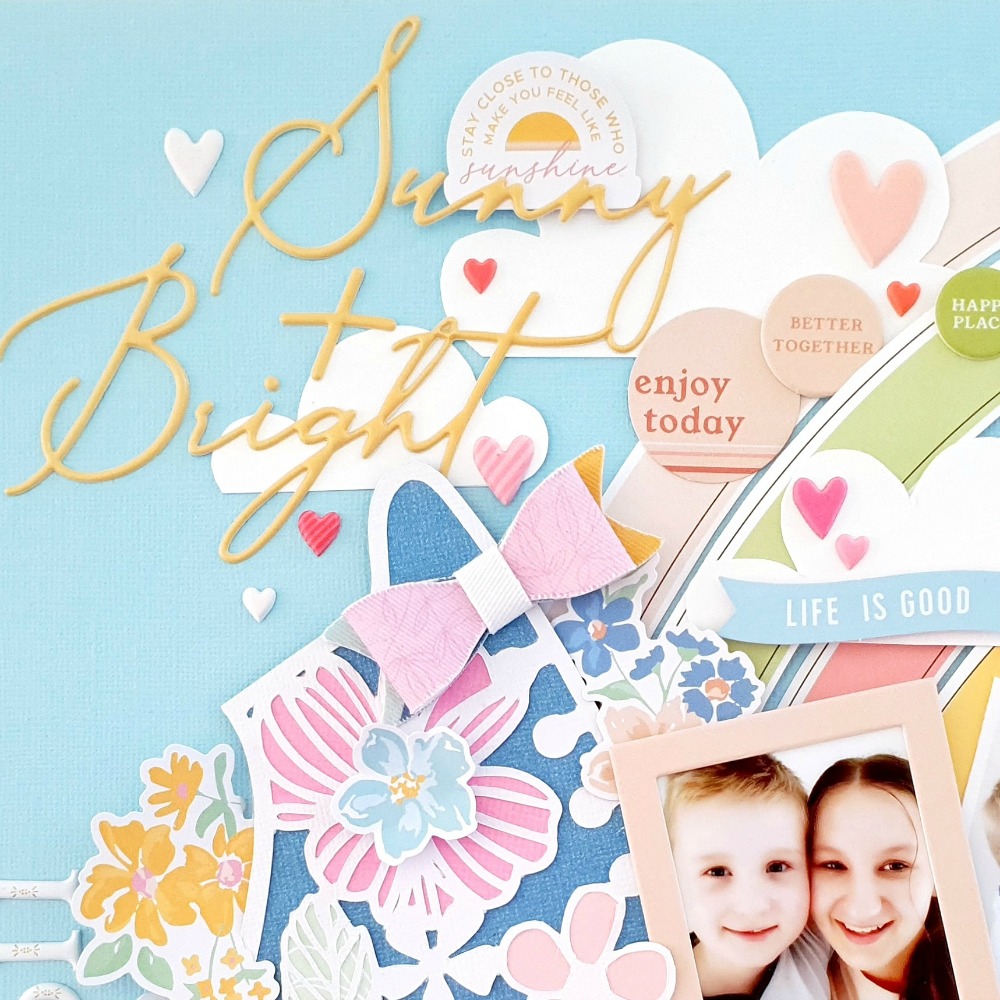
I framed my main photograph with one of the Pinkfresh Studio Chipboard Frames from the Embellishment Kit, and then positioned it onto that cute skate! To complete the rollerskate, I added lots of the Floral Die Cuts and a Fabric Bow (also from our Embellishment Kit) as well as a couple of the Puffy Phrase Stickers. I layered it all onto the end of the fussy cut rainbow and tucked in my second photo into this cluster. Love it!


I used the White Puffy Alphas (with gold accents, no less!) from the Embellishment Kit to form my title, and then added a subtitle - Sunny + Bright - with thePuffy Phrase Stickers courtesy of the Main Kit. I cut out and adhered a few fluffy white clouds from the Bazzill White Cardstock, and then finished off with a good sprinkling of the Pink Paislee Lucky Us Puffy Shape Stickers. 


Such a magical design! 
Please watch my process video for a much more detailed look at how my page came together:


Alternatively, you can watch it in Full HD on my channel by clicking the link HERE. 
Thanks so much for watching! 

I hope I have inspired you to get creating with the beautiful January & February 2020 Hip Kits- they really are divine!!!

til next time,

Hip Kit Club: Cut File & Color Kit Inspiration Plus Process Video!


Hi Friends!

Welcome back for more Hip Kit Club awesomeness!
 I can't begin to tell you how awesome the January 2020 Hip Kit Club Cut Files are!
 I mean, seriously, SO good! 
If you know me, I can't go past florals, so I'm featuring the floral wreath cut file in my scrapbook layout today.  As I type this though, my January 2020 Hip Kits are still in transit, so..... 
for today's post I'm sharing how I have 'stretched' my December 2019 Hip Kits to make one more detailed, and very pretty page! 
I've even included a process video at the end of this post, so you can see exactly what I'm meaning ;) But first, here's my lovely take on the floral wreath cut file.....

"Cherished Pretty Girl"

HKC-AmandaBaldwin-Jan29th-Blog-01

Wa wa wow!!! 
As well as being all about the florals, I'm also huge on creating very pretty things - especially when it comes to my darling girl! Isn't she the sweetest?!
For this page, you'll spy lots of floral clusters and foliage but I had used a ton of my supplies in my recent HKC mini album (watch here if you missed it), so I had to get a little creative with my 'left over' items to form all those pretty details! 
See if you can spy the snowflakes and stars forming my florals....

HKC-AmandaBaldwin-Jan29th-Blog-02

Gah! It's just so gor-jus!!!!
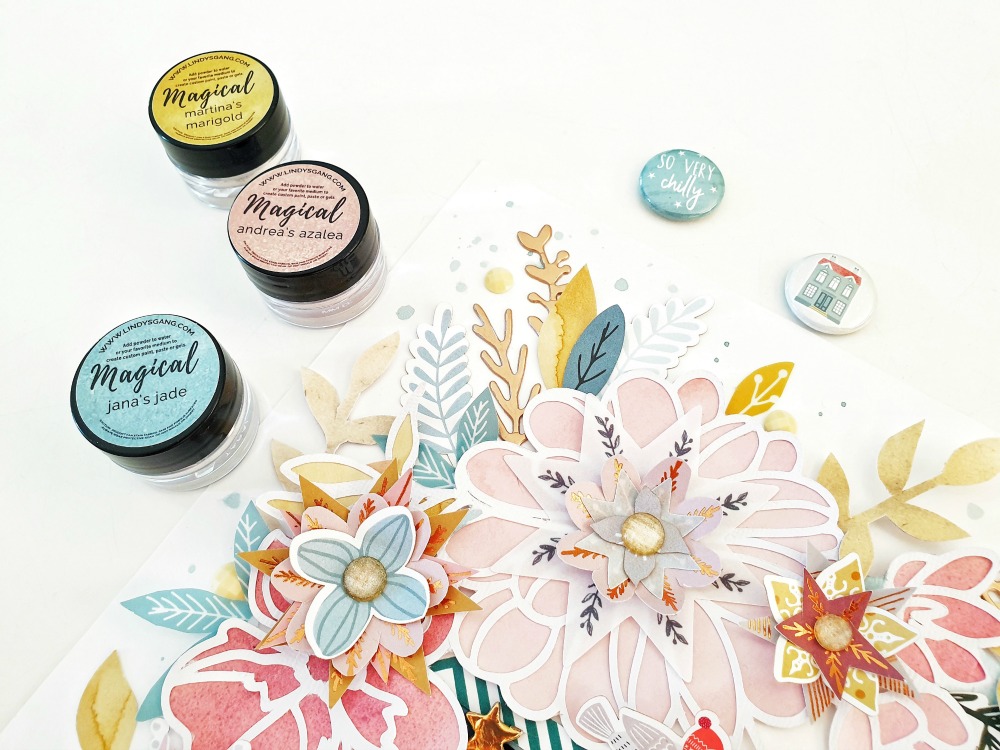
To create this page, I started by painting up a few scrap pieces of white cardstock with the Lindy's Gang Magicals: Martina's Marigold & Andrea's Azalea (from December 2019 Color Kit).  I then used these pieces of paper to back the cut file leaves and blooms, as well as cut a few more of my own flower shapes and leaves with. 
Next, I painted the wreath 'rings' with the Lindy's Gang: Magicals in Jana's Jade - so pretty!

HKC-AmandaBaldwin-Jan29th-Blog-03

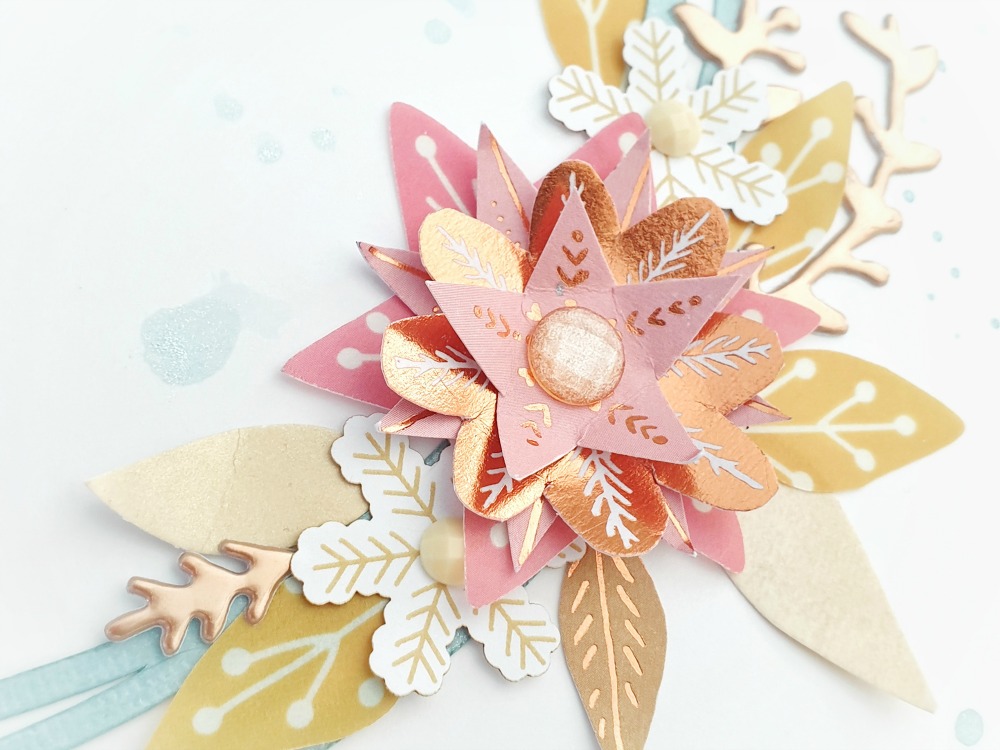
I embellished the wreath with a mix of floral clusters which are created from fussy cut stars and snowflakes from the Crate Paper Snowflake Joyous Specialty Foil Accented Paper (exclusive to the December 2019 Paper Kit), So Frosty Decorative Vellum Star Die Cuts, So Frosty Mixed Ephemera, So Frosty Winter Florals and Die Cut Tags,and fussy cut shapes created from the Color Kit Magicals! To complete the look, I added the Prima Adhesive Gems to the centers of these stacked flowers - perfect! 
Don't they look fantastic?! 
A really simple but effective way to use up your 'scraps' to create more embellishments.

HKC-AmandaBaldwin-Jan29th-Blog-05

I separated a few of the wreath, tree and branch pieces from the Crate Paper Copper Foil Phrase & Icon Thickersto create the appearance of more foliage around the wreath. I also added in a few fussy cut leaves which I snipped out from the So Frosty Decorative Vellum Star Die Cuts, as well as the previously painted Lindy's Gang Magicals papers. I combined these with my leafy So Frosty Winter Floral die cuts to build up the wreath and create lots of shape, interest and form.

I tucked my So Frosty framed photograph into the florals on the left hand side, and continued to embellish away! The tiny, floral, So Frosty Flair Button from the December 2019 Embellishment Kitwas the perfect adornment to my baby girl's framed photo - I just love this small, but oh so pretty detail!
HKC-AmandaBaldwin-Jan29th-Blog-06

With a shortage of letters in my Thickers supplies, I opted a mixed font title with alphas from both the December Main & Embellishment Kits. Again, a great way to combine and mix your kits to stretch them that lil bit further! For a polished and finished look, I added some soft splatters and droplets of Jana's Jade Magicals around the wreath, and a few more of the Prima Gems. Beautiful!

Wanna see more? Please watch my process video HERE


Thanks so much for watching! 
I hope you enjoyed seeing how my layout with the January 2020 Hip Kit Club Cut Files & December 2019 Color Kit came together, and that I have inspired you to get creating today! 

Til next time,


AMANDA BALDWIN-01