Pages

Thursday, 28 March 2019

Cocoa Vanilla Studio: Throwback Thursday with More Than Words!

Hi Creative Friends!

Welcome back for another installment of the Cocoa Vanilla Studio: Throw Back Thursday feature!
Today I am taking you back to 2018 with 
the gorgeous More Than Words collection and a very sweet 'mom & son' page,

"Wonderful Moments"


Talk about sweet, this melts my heart! Such a happy moment documented! And maybe another twist on my love for the monochromatic designs ;)
Lots of lovely layers here, starting with the reverse side of CV-MT003 GOSSAMER as my layout base. I layer over this pretty black floral paper with a sheet of pale blue cardstock. I distress, peel back, and staple this cardstock into place to reveal the CV-MT003 GOSSAMER base. This is such an effective technique, as it creates both texture & interest, as well as a masculine touch to these pretty papers!
To these two background bases, I layer a cut file (Geometric Art courtesy of The Cut Shoppe) which I semi back with the 6 x 6 PAPER PAD version of the GOSSAMER paper. To the cut file, I add embellishments galore, and of course, my photo cluster! So many pretty layers! Let's take a closer look......


Absolutely LOVE this photo of me & my boy! 
I embellish the cut file with a mix of DIE CUT EPHEMERA, CHIPBOARD ACCENT STICKERS, ENAMEL SHAPES, & even ACCESSORY STICKERS. I start my design from the top of the cut file, & travel down the page focusing on my photo cluster in the center. The 'wonderful' CHIPBOARD ACCENT STICKER was the perfect title choice for my darling photo! But my title doesn't end there! As your eye moves down my layout, you'll find the remainder of my title beneath my photograph....


Unforgettable, & Wonderful are fussy cut labels from pattern paper CV-MT006 TREASURE, and Moments is from the CHIPBOARD ACCENT STICKERS. Such a fun mixed title & I just adore all the tucked in pieces surrounding my photo! Layered perfection!
Here's a better look at my title and central photo....


That layering beneath my photo is just stunning! 
You'll spy more cuts from pattern paper, CV-MT006 TREASURE, as well as ACCESSORY STICKERS, more CHIPBOARD ACCENT STICKERS, DIE CUT EPHEMERA & that divine VELLUM ACCENTS feather!  I love that bold pop of blue, it really brings attention to my photo!

Here's another view for you....

Just gorgeous!
I tuck a few white cotton floss threads into the photo cluster too!  For more interest & a finishing touch, I also add a few watercolor splatters as well! LOVE it!


More Than Words might be a girly, feminine collection but it is still perfect for scrapping the boys too! 
I hope you enjoyed my edition of Throw Back Thursday, 
& feel inspired to get creating with your older Cocoa Vanilla Studio stash too!

Thanks so much for visiting today!
til next time, 

Wednesday, 27 March 2019

Elle's Studio: Easter Traveler's Notebook / Mini Album


Hi Everyone!

Welcome back for more Elle's Studio March Kit inspiration!
This month's kit and exclusive add on items are perfect for all your memory keeping needs, and today I am sharing how I used these supplies to create a completed, Easter theme, Traveler's Notebook insert! Yay!
Think December Daily goes small scale & Easter style!

Here's a look at my TN front cover....


Isn't this fun?! 
Such a simple, but very sweet Traveler's Notebook insert to document all your Easter memories with!
To create this TN, I trimmed a sheet of the 12" Noteworthy pattern paper to 8 3/4" x 8 1/4". Next I  trimmed 10 sheets of plain white paper ( I like to use 180gsm watercolor paper ) to 8 1/4" x 8 1/4". I placed the pattern paper cover onto the slightly smaller sheets of white paper, and scored down the center to create a 'spine'. To hold it all into place, I machine stitched along the scored line, and voila! A TN insert ready to record those memories with! 
I decorated the cover with the Happy Easter wood veneer and one of the Acrylic Chocolate Bunnies! I also embellished the cover with some of the Teal Puffy Alpha Stickers - gorgeous!

Let's look inside....


Other Supplies: Enamel dots, magenta gel pen. 

What a sweet opening page! 
I decorated the reverse side of the cover with a simple butterfly puffy sticker from the Noteworthy collection. On the opposite page, I trimmed a 1/2" strip of the Springtime 6 x 6" Paper Stack, and attached it to the top and bottom of my page. I also applied lots of lovely embellishments including that very cute wood veneer Easter egg. To make it pop just a lil more, I partly colored it with a magenta gel ink pen. Speaking of veneers, you'll also spy that fabulous Speech Bubble at the top of my page! Love it! The pale purple Little Acrylic Bunny is a very sweet addition to the embellishment cluster too! 

Further inside my TN, you'll notice that I divide my Easter story into 'chapters'. This helps me to organize how I will document, photograph and record our memories made this Easter. 
Chapter 1 is 'Family Time'....


I opted for a simple design here, and trimmed one of the March Kit 3 x 4 journal cards into 1/2" strips. I attached these strips to the center tops and center bases of both pages. On the left hand side, I added the chapter number and title with the Large Wood Veneer Numbers & White Puffy Alphabet Stickers. I also tucked a small die cut from the March Kit beneath the number one. At the base of this page, I also added a Tiny Everyday Label Sticker, as well as a Spring Puffy Sticker. Cute! 
On the right hand side, I glued a 3 x 4" journal card from the March Kit to the center of my page. This is where I'll add my first family photograph from our upcoming Easter. For finishing touches, I adorned the page with more coordinating die cuts from the March Kit, and a March Label too! 

Here's another 'ready to go' page for this chapter.....


How sweet is that Springtime pattern paper?! 
Again, I've kept to a simple layout design, and am just waiting for my 6 x 4" family portrait photograph to be glued onto the right hand side, to balance that pattern paper. Cute! 

Let's jump ahead to Chapter 2, 'Hello Spring'.....


I just adore interactive elements in any notebook or mini album, so stitching a journal pocket with the Springtime papers was a given! To highlight the Spring feel, I chose that floral paper & coordinating journal card. They really enhance the Spring vibes!

Here are a few more simple pages awaiting photos and memorabilia from this Season....


Isn't this happy?! 
I created a monochromatic page with the all the yellow items in the March Kit. Nothing says sunshine and happiness more than yellow! I have ensured that my pages leave ample room for journaling & a photo, or two!

Here's another fun Spring page.....


Oh, how cool is this? I created this fun spread by cutting up the Springtime 6 x 6 Paper Stack packaging label, and added a die cut from the March Kit. So simple, and so effective!

Let's move on to Chapter 3, "Easter"......


Other: Enamel dots.

Oh how adorable! All the lil bunnies!!!
Here's another page in this chapter.....


Eeep!!! That Chocolate Acrylic Bunny is errrrything! 
Possibly my fave item from the add-ons this month!

And that's just a brief look at my Easter TN using the fabulous March Kit and new releases!
Now all I need to do is get out my big girl camera for Easter, and take those photos!
Ready, set, Easter is GO!!!

I hope my post inspired you to go ahead & create a Traveler's Notebook to record your Easter memories with!

Thanks so much for stopping by today!
til next time, 


Monday, 25 March 2019

Citrus Twist Kits: March Life Chapters Kit & Mini Album!


Hi Happy Arty Days Friends! 

Welcome back for more Citrus Twist Kits inspiration!
I am just loving the new March Life Chapters Life Crafted Kit!
So much gorgeousness!
Today I am shining the spotlight on two of my favorite items from this kit; the cork numerals & the die cut ephemera!
To demonstrate the versatility of our Life Crafted Kits, I've avoided creating pages for my Life Crafted Album or even making scrapbook layouts. Instead, I have featured both items in a super cute, miniature flip album!

"Our Lil' Story"


Squeeee! How cute is this mini album?!! SO adorable! 
Here's a closer view of the cover....


The sweetest!
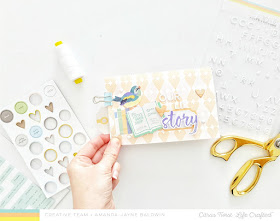
The front cover features lots of the die cut ephemera, and in particular the book pieces to enhance the story themed album title! I also decorate with chipboard hearts, and the white puffy alphabet stickers from the Life Chapters Kit. 

To create this mini flip album, I select 3 of the Life Chapters 6 x 8" pattern papers and machine stitch them together through the center (at 4"). Fold into half, and voila, a lil flip book ready to decorate!
Here's a look inside....


Life is a fairytale seems to sum it up perfectly! With so many book references in this month's kit, story telling is definitely on the agenda!
How awesome is that cork numeral? Such a statement piece!
All good stories start with number one - so gather around, I have a story to tell.


I layered the cork numeral onto one of the 6 x 4" journal cards from the Life Chapters Kit, and then embellished it with ephemera. Simple, but so effective! I use thick double sided tape to adhere the 6 x 4" journal card to the album pages. 

Our story begins with the arrival of our newest family member....


Nawww! Such a cutie! 
I use the mint Tiny Word stickers, as well as the puffy white alpha stickers, to document part 1 of this happy story! More ephemera adorns the page, and that 'found' chipboard sticker graces my sweet photo!

Moving on to chapter 2.....


Isn't this adorable! 
Again, I mount the cork numeral onto a journal card - but this time, I use a 3 x 4" one. The cork number 2 also forms the 'handle' to lift the flap....


I love interactive elements, and hidden stories & photos is such a fun element to any mini album!


I attach the 3 x 4" card with washi tape from my stash, and embellish with more of the ephemera, and chipboard stickers. Simple, beautiful creating made so easy with the Life Crafted Kit!

Chapter 3 signals the close of this flip album.....


Like previous pages, the cork numeral is adorned with the exclusive ephemera and chipboard from the Life Chapters Kit.


The ephemera label, Endings can be beautiful was the perfect sentiment to end this mini with.
And there you have it!

Cork numerals and ephemera stealing the spotlight in this super sweet (& easy to recreate!) mini album!
I hope I have inspired you to get creating with your Citrus Twist Kits: Life Crafted Kits today!
Needing more supplies? 

Thanks so much for stopping by today, 
til next time, 


Pinkfresh Studio: Joyful Day Scrapbook Layout & Process Video!


Hi Friends!

Welcome back for more Pinkfresh Studio inspiration! 

Today I am creating with the gorgeous new Joyful Day collection! 
Such a dreamy collection to work with! 

Here's what I came up with.....

"Birthday Girl"


Told you it was dreamy!!! 
So much pretty going on here! 

Here's a closer look.....


Sigh! 
This is totally swoon worthy! 
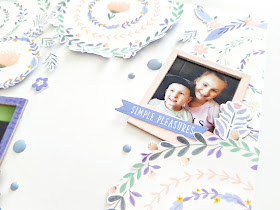
For this 8.5" x 11" layout, I decided to  make a real feature of the floral wreath pattern paper, Big Ideas. I fussy cut almost the entire sheet, and made a decorative border around my white cardstock base. I just love how effective this looks! 


I layer a few of the wreaths with foam tape for added interest & dimension. 
I tuck my sweet chipboard framed photos into the border too! 


I add my title with the tiny puffy alphabet stickers in coordinating colors, and embellish with die cut ephemera, and enamel dots from the mixed embellishments pack. 
Such a simple design, but oh so lovely! 


The sweetest! 


Big fussy cut Ideas never looked so good! 
If you're interested, I have a process video for you to watch...


I hope you enjoyed watching! 

Thanks so much for all your support, 
Have an amazing week!

til next time, 

Sunday, 24 March 2019

Shimmerz Paints: Color Kitz Inspiration & Process Video!


Hi Happy Arty Days Friends!

Welcome back for more Shimmerz Paints inspiration! 
Boy oh boy am I excited to share my first layout with the gorgeous new 

The February released Color Kitz was simply stunning, and I couldn't wait to get creating with it!


Soooooooo pretty!
Here's a better look at this awesome Color Kit....


Gorgeous, huh?! 
No wonder it sold out in minutes! 
Yes - sold out! 
The Color Kitz are limited edition so you need to shop fast! 
That said, you can still purchase the individual paints by clicking on them below:


& remember: Type AMANDA  in the comments section of your Shimmerz Paints Store order to earn yourself a *FREE paint. 
*Not valid with any other offers. 

For today's project I have created a Spring inspired layout combining this kit with the fabulous Paige Evans' designed cut file from the limited edition

This kit is still available in the store and looks like this....

So awesome!!!
Get yours HERE before it sells out too! 

Here's a look at my Spring themed layout......

"Happy Memories"


Sigh! Isn't this just divine! 
So.much.pretty!!!!
Florals are always for the win!

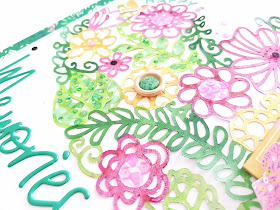
The colors in this kit were a perfect match to hand paint that intricate cut file!
 & what a fun way to use your Shimmerz Paints!

You can watch how I create this layout in my short process video HERE 


Thanks so much for watching! 
I hope I've inspired you to get creating with the Shimmerz Paints Color Kitz!

Here's some more eye candy for you.....


That Vibez  is just divine!!! 
The shimmer is amazing!


The One In A Melon sequins from Spiegelmom Scraps are such a super fun inclusion in this kit! 


Just look at all that shimmer and sparkle! 
This hand painted cut file is simply stunning!


Gor-jus!!!

And there you have it! 
Fun, simple creating that looks anything but! 
Spring sensation!

I hope I've inspired you to get painting today! 


Thanks so much for visiting, 


Friday, 22 March 2019

The Cut Shoppe: Floral Wreath, Happy Times!


Hi Lovelies! 

Today I am sharing my final project for The Cut Shoppe Design Team!
I have absolutely LOVED creating for this awesome team, 
and wish Ashley & The Cut Shoppe all the very best! 

 For my final layout, I have created a super pretty Spring inspired number with the gorgeous new Floral Wreath cut file!
Teamed with the beautiful and bright Cocoa Vanilla Studio Happiness collection, this layout is a floral dream!
Here's my layout,

"Happy Times"


Oh isn't this gor-jus?!!
The new Floral Wreath is simply stunning! 
I have cut the wreath in white cardstock, and backed it with two of the Happiness 6 x 8" Paper Pad papers. 
Here's a better look at the Floral Wreath......


LOVE!!!!! Absolute floral perfection!

Here's a closer view of my layout.....


To create soft dimension & interest to my wreath, I fold some of the flower petals upwards. I also embellish some of the flower centers with fussy cut butterflies, die cuts, sequins and even a flair button! 


So very pretty! The sequins are the 'Dragon Tales' mix from Spiegelmom Scraps, and they add just the right amount of sparkle to this girly page! 


So my photo isn't lost among all those bright & beautiful florals, I print it in black & white, and also mount it with a die cut frame. Perfect!


I layer my title, happy times, over the wreath too! 


And for finishing touches, I surround the Floral Wreath with hearts and more of those gorgeous sequins! 
And there you have it! 
Spring perfection! 

I hope you feel inspired to use this cut file in your creating! 

Thanks so much for visiting,